How to Migrate Microsoft Planner data?
Migrate Planner from one tenant to another securely with the help of Kernel Microsoft Planner Migration tool. It allows easy transfer plans and tasks with their related attributes to another planner in a few easy steps.
Explore software’s key capabilities
Results in a seamless and accurate migration when you implement Kernel Microsoft Planner Migration. Provides hassle-free transfer of plans.
Migrate all Planner data
Migrate each one of the Planner data including Group Creation, Plan Creation, Members, Buckets, Tasks, Task Title, Attachments, Comments, and Checklist User Assignments and Applied Labels. The tool streamlines the process by supporting bulk migration of tasks at one go.
Migrate attachments in tasks
Attachments in tasks never go missing when you migrate a plan using Kernel Microsoft Planner Migration Tool. Users do not need to worry about the files, videos, lists, or documents shared as attachments within tasks as the tool ensures complete data integrity.
Migrate task comments
Efficiently move tasks and their linked comments while providing continued yet improved team collaboration. With this tool, users get the ability to migrate tasks with feedback and discussions to help avoid hitches in the ongoing communication and projects.
Detailed migration summary
Kernel Microsoft Planner Migration provides a full description of the migration tasks and a completion summary at the end with the error details. Users can view migration logs and download the migration report as a CSV file for their future reference.
Tasks filtering and selective migration
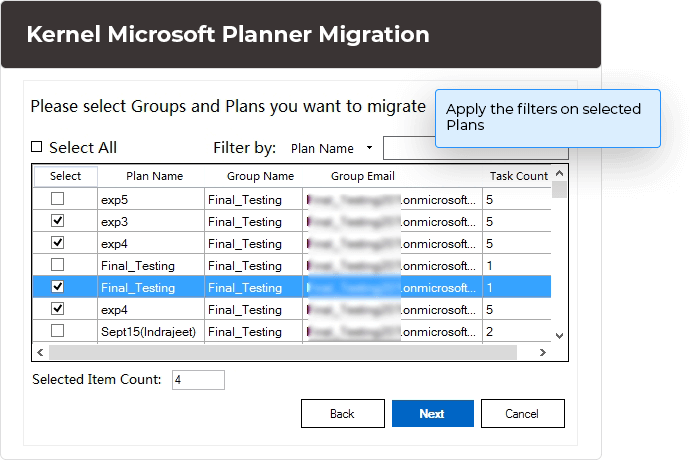
Transfer specific data from one planner to another within same or different Microsoft tenant based on the filters such as Plan Name, Group Name, or Group email. Using filters during migration helps to get rid of unwanted plans and groups data.
Provides free demo version
Download the free demo version to get insights of how the tool performs and yields streamlined transfer of plans and other data. Empower your team with better task management using this hassle-free Microsoft Planner migration solution.
Explore software’s major benefits

User mapping Map users from Source tenant to the Destination to ensure tasks are properly assigned once a plan is migrated. It ensures a seamless collaboration among teams' post-migration.

Migrate data between tenants Migrate data between Microsoft Planner tenants simply by adding source and destination accounts. It facilitates migration plans, tasks, and other data from various sources to target Microsoft Planner efficiently and accurately.

Custom migration Allows users with access to customize the migration settings and user mapping. You can rename your plans to avoid duplicity while comprehending the arrangement at destination.

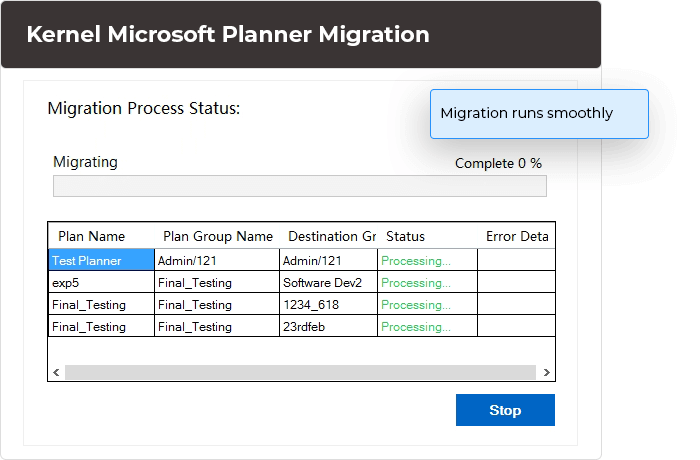
Trace progress Provides a complete summary of the migration once complete so that users can get an idea how the process is executed. If anything goes wrong, you’ll have the information to fix it.

Migrate plans securely Helps in migrating plans while maintaining the original hierarchy of plans and tasks within. After migrating to the destination, you can access all elements just like the source tenant.

Compatible to all Windows Compatible to all Windows versions including Windows 365 (Cloud PC)/ 11/ 10/ 8 /7 and Windows Server version 2022/ 2019/ 2016/ 2012 R2/ 2012/ 2008 R2/ 2008/ 2003.
 SharePoint Site migration
 Microsoft Teams migration
 File Server to Google Drive
 File Server to SharePoint
 Public Folder to SharePoint
 Microsoft Teams Backup
 Google Drive migration
 Google Drive to SharePoint
 File Server to OneDrive
 OneDrive migration & backup
Frequently asked questions
- Step 1: In the left pane, right-click on Microsoft Planner and choose "Microsoft Planner Migration."
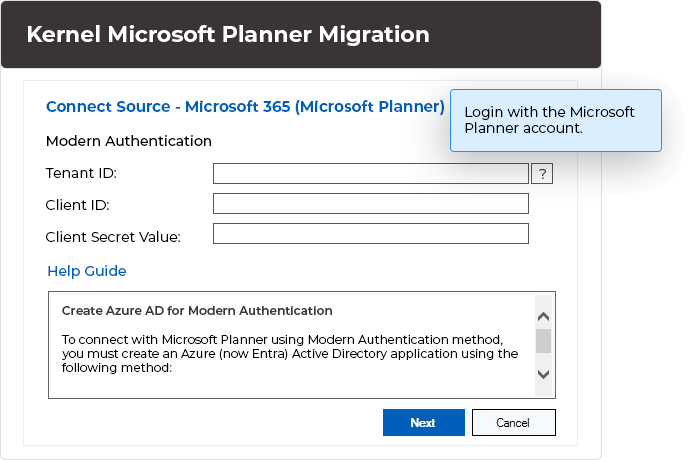
- Step 2: Enter Source tenant credentials and allow the software to connect with the Source. Click Next.
- Step 3: Just like Source, enter the credentials to connect with the Destination tenant. Click Next.
- Step 4: Select Plans and Groups to allow user mapping from source to destination.
- Step 5: Once user mapping is done, check that all users are mapped to the destination and then click Next.
- Step 6: Now select Manage Members to add members in the destination groups based on the previous user mapping. It will provide access to all the data. Select Next to migrate planner from one tenant to another.
- Step 7: This will begin the migration process.
- Step 8: After process completion, you can check the migration logs or download the migration report as a CSV file.
- Step 1: Go to the Microsoft Azure Portal
- Step 1: In the left pane, navigate to Azure Active Directory (Entra)
- Step 1: Select App Registrations
- Step 1: Find the app you want the Client and Tenant ID for
- Step 1: Get the API permission for the migration software
When you create the client secret value, it asks you to specify a time period. Once the time is over, the value won’t work, and you will need to create a new Client Secret.
Software Prerequisites & recommendations
Version: 25.1
Release Date: Jan 2025
Exchange Server: Exchange Server Online (Microsoft 365)/ 2019/ 2016/ 2013/ 2010/ 2007/ 2003/ 2000
Outlook: Outlook 2019/ 2016/ 2013/ 2010/ 2007/ 2003
SharePoint Servers: SharePoint 2013/ 2016/ 2019/ SharePoint Online (Office 365), SharePoint Server Subscription Edition, SharePoint Foundation 2013/ 2010, SharePoint Server 2010
Virtual Environments: Hyper-V Server, VMware ESX/ ESXi Server, Microsoft Virtual PC
Hard Disk: 4 GB free space for the installation and data migration
Memory: Minimum 4 GB RAM
Processor: Intel® Pentium 4 Class or higher Processor
Operating System: Windows 365 (Cloud PC)/ 11/ 10/ 8 /7 Service Pack 1, Windows Server 2022/ 2019/ 2016/ 2012 R2/ 2012/ 2008 R2/ 2008/ 2003