Kernel Exchange Backup & Restore
Exchange Server Backup Tool for Secure and Fast Exchange Mailbox Backup
1M+
Downloads
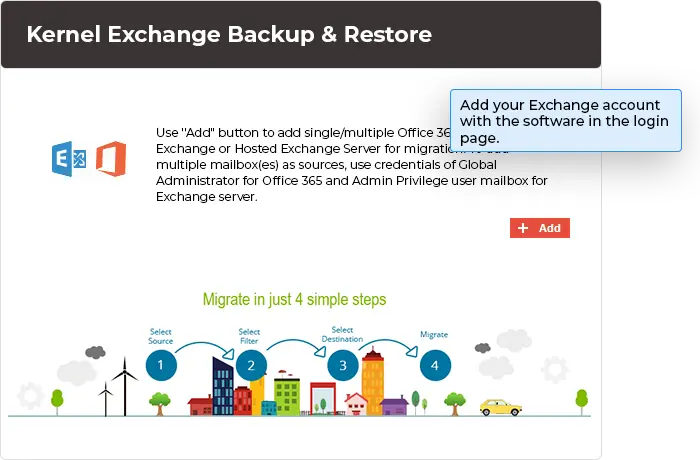
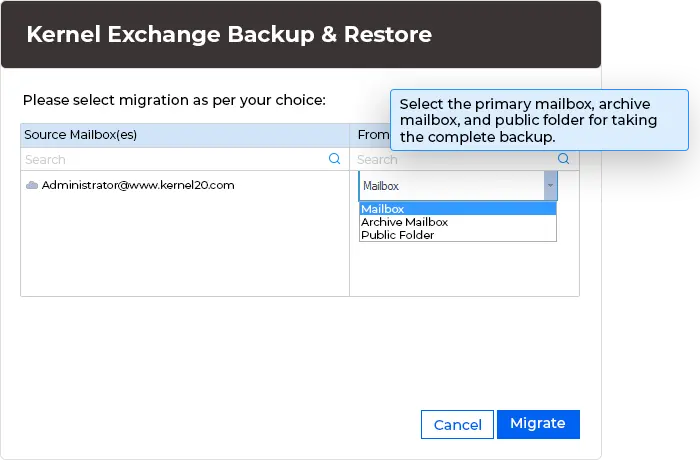
Kernel Exchange Server Backup and Restore Tool helps administrators back up Exchange Server and hosted Exchange mailboxes to PST and various other file formats. The software supports backup of primary, archive, shared mailboxes, and Public Folders. It also allows for incremental Exchange mailbox backup to save only new or modified data.
Download the trial version and back up 10 items per folder free.- Back up Exchange (On-Premises, Hosted, & Online) mailboxes to PST.
- Backup all mailbox types, including primary, archive, shared mailboxes, and Public Folders.
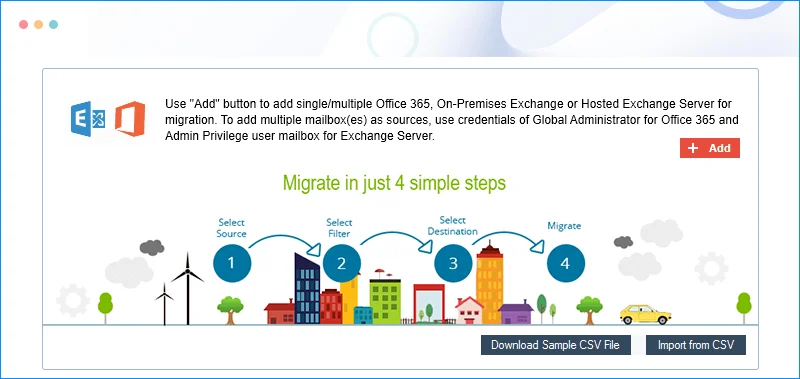
- Support large-scale environments with bulk backup capabilities using CSV-based processing.
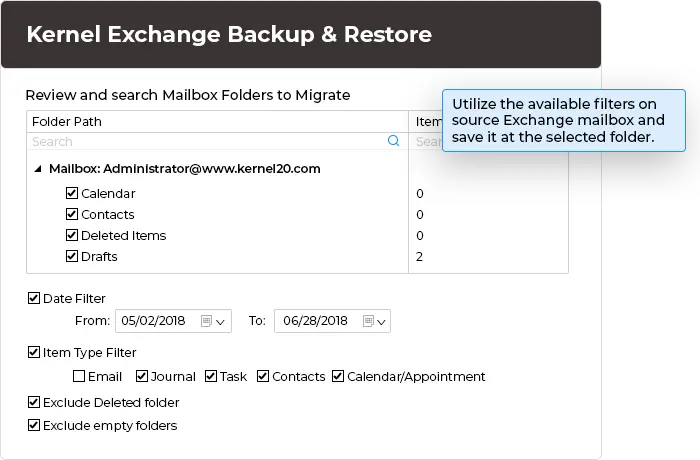
- Preserve folder hierarchy, metadata, and email properties throughout the backup.
- Granular-level Exchange mailbox backup with folder, item-type, and date-range filters.
- Built-in option to restore PST and OST files to the Exchange Server.
What's new in Kernel Exchange Server Backup & Restore
190+ COUNTRIES WORLDWIDE
20 YEARS' EXPERIENCE
24x7 CUSTOMER SUPPORT