This blog provides information and detailed instructions to set up or configure an Exchange account in the Microsoft Outlook application.
Microsoft Outlook application allows configuration of multiple email accounts like Gmail, Office 365, IMAP, Exchange Server, and more and provides the synchronization facility. Here, we are giving the process to add Microsoft Exchange in Outlook 2013 manually.
Note: There is no provision for setting up an Exchange Account manually in Microsoft Outlook 2016 and 2019 versions.
Manually configure Microsoft Exchange account in Outlook 2013
Before going to the steps to configure Microsoft Exchange account in Outlook 2013, please confirm the following pre-requisites.
- Exchange Server is ON and is available
- Exchange Services are running
- Microsoft Outlook 2013 is installed on the Exchange client machine
After ensuring all the above requirements, perform these steps to add Microsoft Exchange account in Outlook 2013 manually.
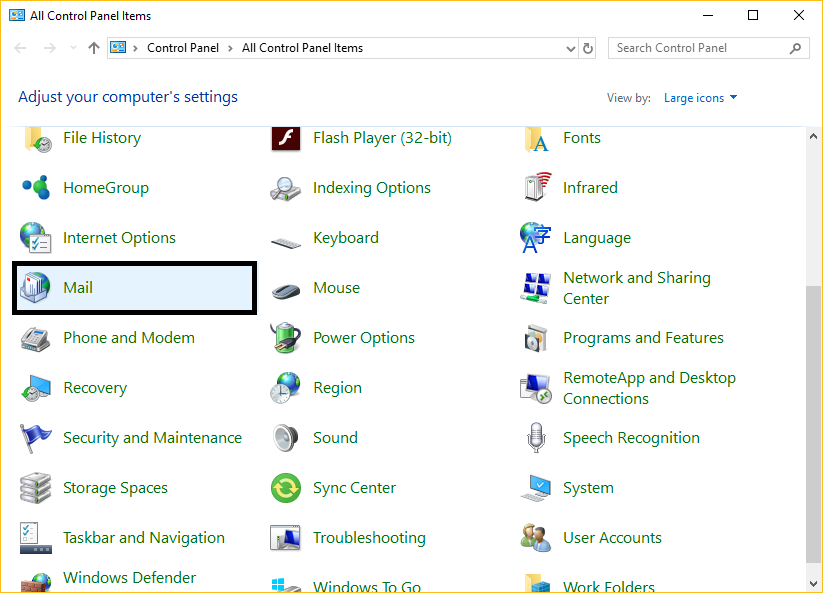
- Open Control Panel on your Exchange client machine. Click on the Mail option.
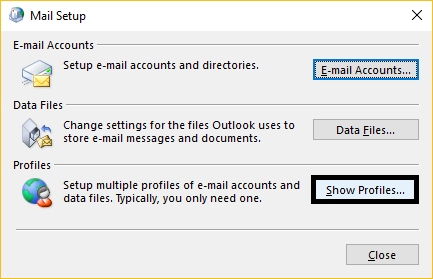
- On the Mail Setup page, click on Show Profiles option.
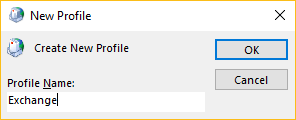
- Click Add to create a new profile. Then type any profile name and click OK.
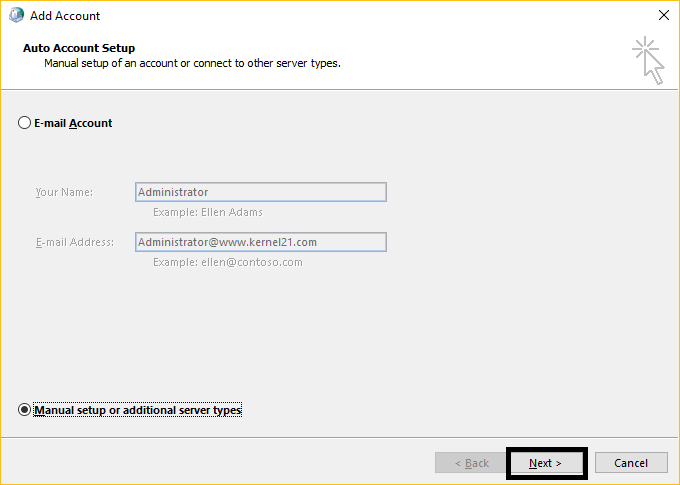
- Next, the Add Account page will get opened. Select Manual setup or additional server types and click Next.
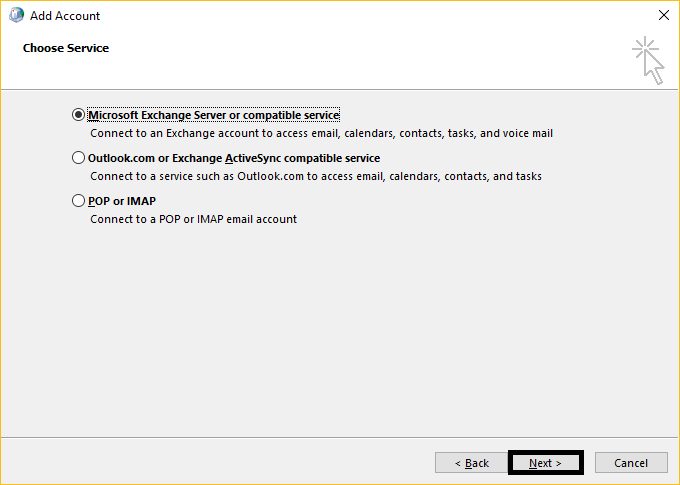
- Choose Service as Microsoft Exchange Server or compatible service and click on Next.
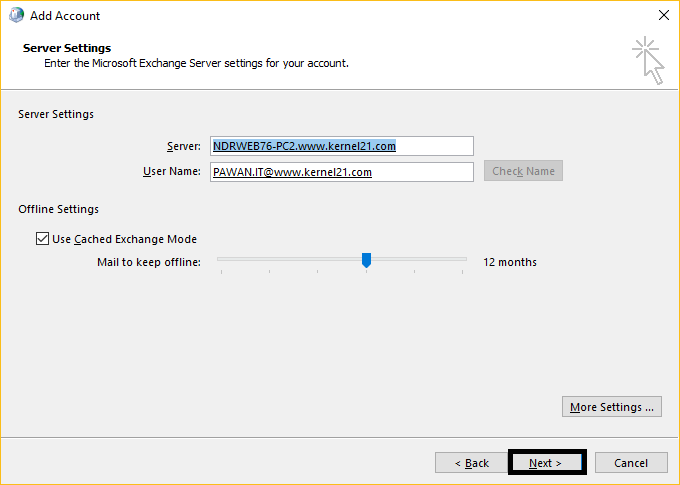
- Under the Server Settings section, add your Exchange Server name, Username, and then click on Check Name option. Using the Autodiscover feature in Exchange Server, the Exchange Server and Username address are successfully verified and added. Click Next. It may ask you to add the credentials for this Username along with the password; please provide it to continue.
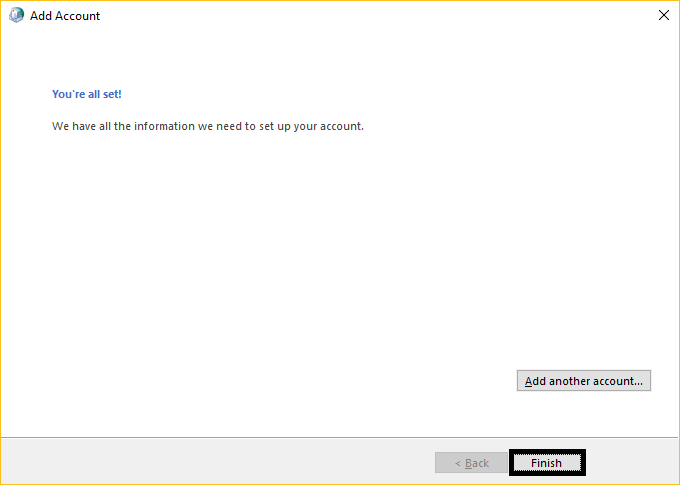
- The added account will start configuring, and then it will display the confirmation message. Click Finish to confirm again.
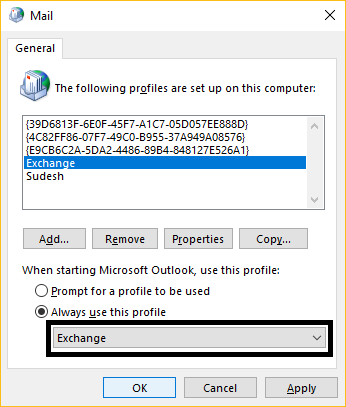
- Next, in the opened Show profiles page on Mail, select your created profile from the list under Always use this profile section and click OK.
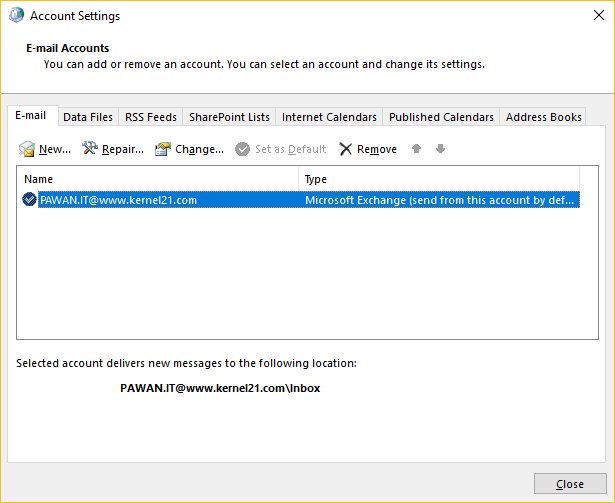
- Go to your Account Settings and check if the currently added account is Set as Default. If not, please set it to default by selecting it and clicking on Set as Default option.
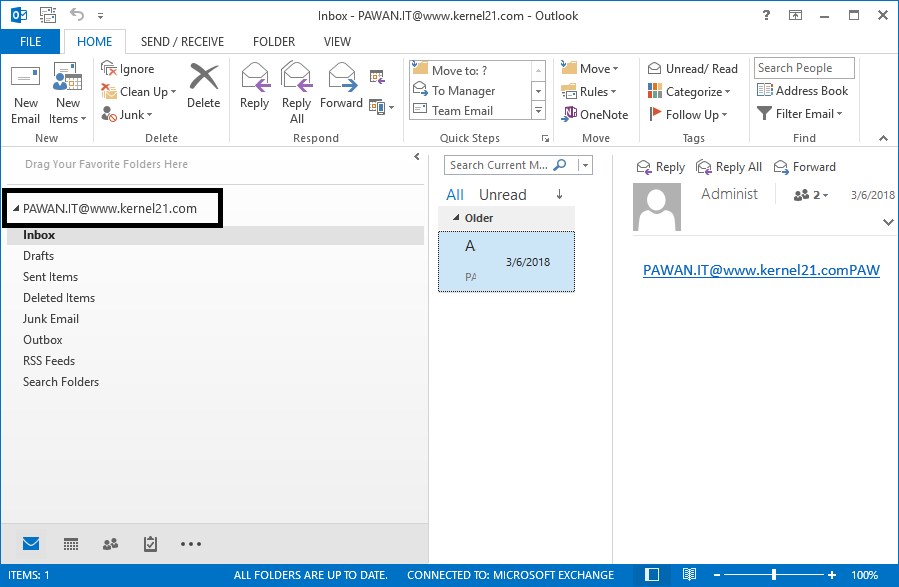
- Now, open your Microsoft Outlook application. You can now view and access the just configured Exchange Server user account.
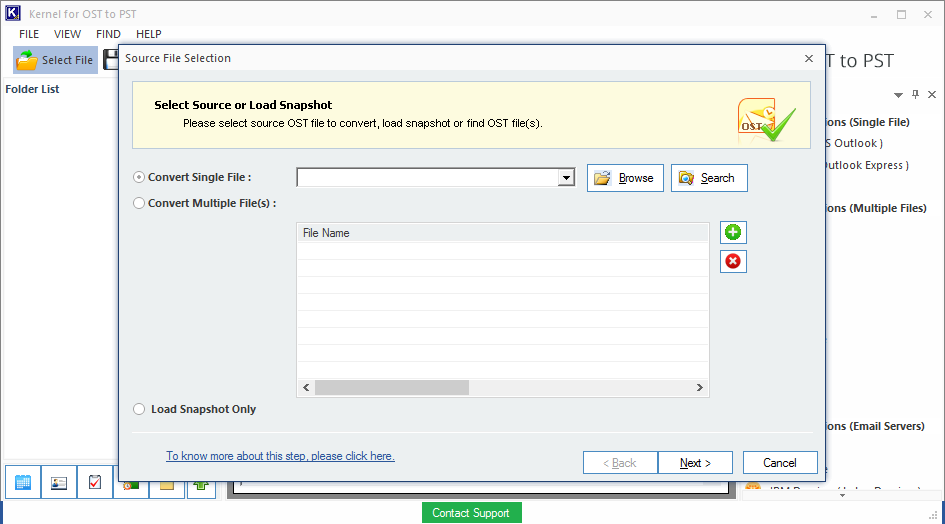
Now, you have the desired Exchange account configured in your Outlook email client and all the data saved as an OST file in offline mode (if the Cached Exchange Mode is enabled). In addition to facilitating offline working, the OST file works as a backup file for you to access the lost or deleted Exchange data again after converting it to PST file format.
Though are some free methods to convert OST to PST file, but these methods are not at all reliable or secure. For your help, we suggest an advanced converter tool that offers to convert OST to PST files efficiently without any need for the Exchange Server availability. Kernel for OST to PST tool is an OST converter tool which offers conversion of even corrupted or orphaned OST files in no time. It lets users preview OST data for selective data recovery. Other than conversion to PST file format, the tool provides OST data migration to Office 365, Exchange Server, Gmail, and more.
Conclusion
The blog has described the complete method to manually add Microsoft Exchange in Outlook 2013. It also offers an advanced OST converter tool to convert your OST files into PST format for accessing in difficult situations or use it as a backup for Exchange data.
- How to Clear Partial or Full Memory in Microsoft Outlook?
- How to Create and Save an MSG File in MS Outlook?
- Ways to Open a Shared Folder in Outlook
- AutoArchive Not Working in MS Outlook – How to Fix?
- Search PST Files with the Indexing Options in Outlook
- How to Locate scanost and Execute OST file recovery?
- How can you change the location of OST file in Outlook?