Read time 6 minutes
OLM is an abbreviation used for the data file for Outlook for Mac. You can consider it as a counterpart of the OST/PST file of Outlook on Windows. It saves all the data present in Outlook for Mac like messages, attachments, contacts, calendar entries, notes, etc. When you need to change the Mac device or when you need to upgrade the Outlook for Mac to the latest version, you will have to export the OLM data to another file. To carry out this task, users need to know about OLM file location in Mac Outlook.
This article seeks to find where exactly you will find the OLM file location in MAC Outlook. In MS Outlook 2016 for Mac, the usual or default location of Outlook of the email profile folder, and in MS Outlook 2011 for Mac, the default location of OLM files is in the identity folder. Here is the exact location for both versions –
Try the Kernel OLM Viewer tool to view and read OLM files without Outlook for Mac. Download Free
You have seen in Outlook for Mac, that by default the Outlook 15 Profiles folder is hidden. Here you can unhide them by following steps:
Step 1- Firstly launch Finder and Go to Home.
Step 2- Select View> select Show View Options from the menu.
Step 3- Select the Show Library folder and close View Options.
Now, you can access Outlook 15 Profiles folder.
When you visit the above-mentioned location, you will not find the OLM file there physically. You have to create an OLM file by exporting the data to a saving location. Here’s how the export process will work:
After exporting the data, you need to import the OLM file to a new Outlook for Mac to complete the transfer. Follow the steps:
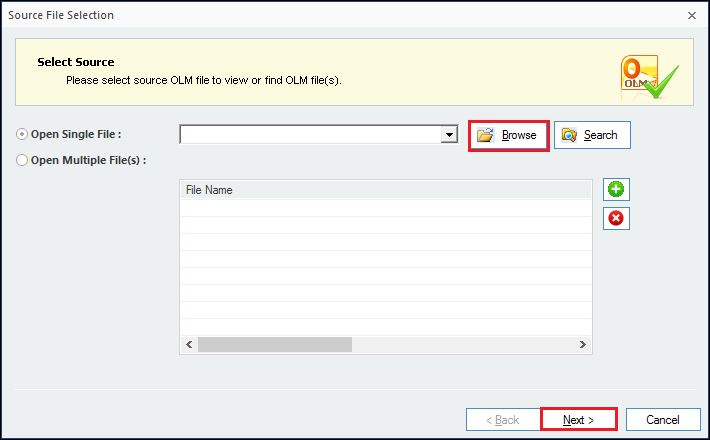
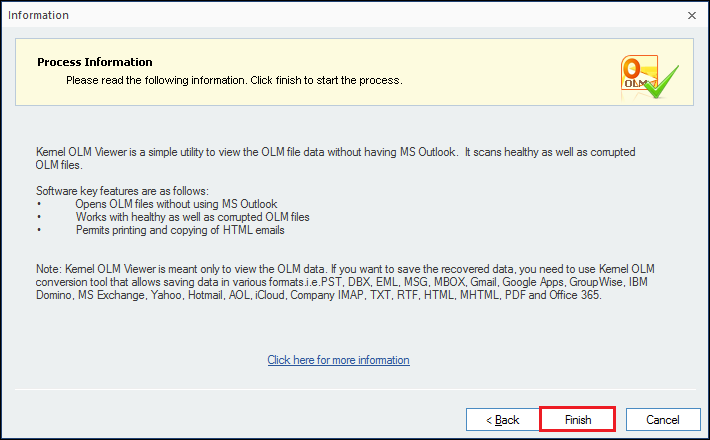
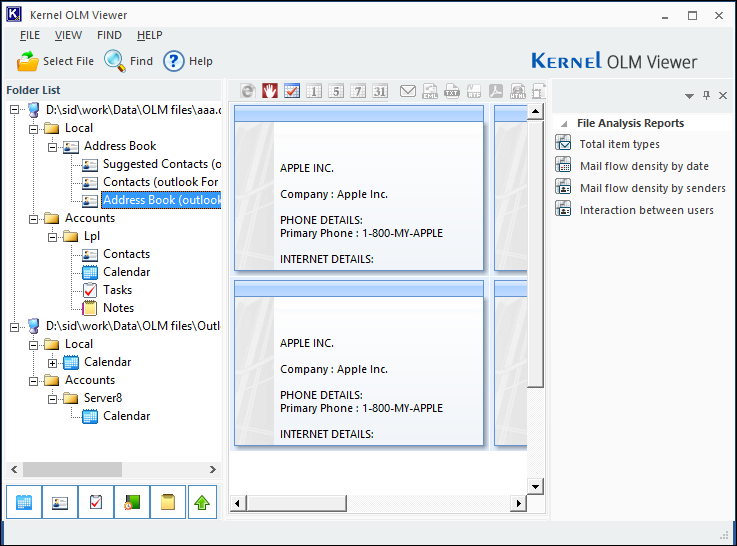
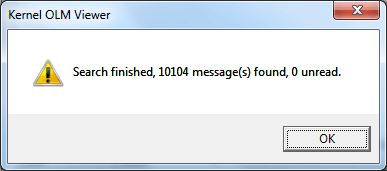
When you have saved the Outlook files in the OLM file, you want to access its data on a Windows platform. In such a case, you have two options, first is to either free OLM to PST converter or use an OLM viewer tool. If you think of using an OLM Viewer tool, then Kernel OLM Viewer tool is there for your assistance. It reads the OLM file and brings you complete information in a proper mailbox structure.
Let’s see its functional procedure:
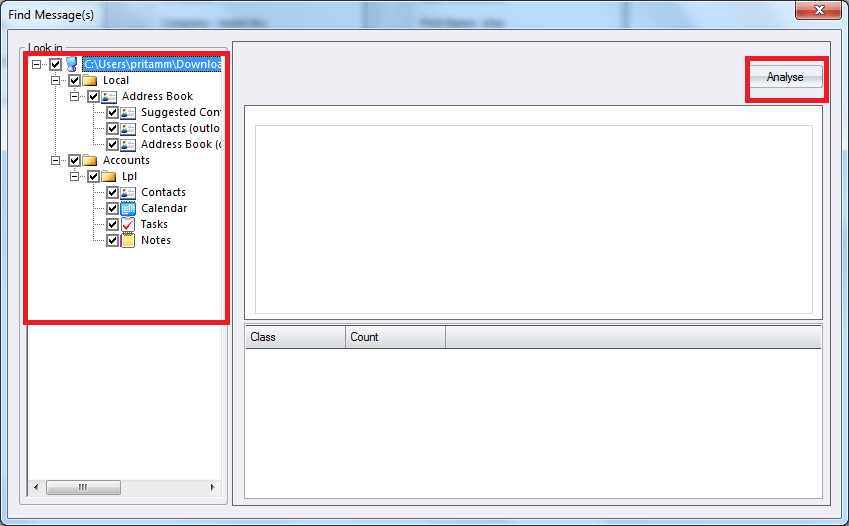
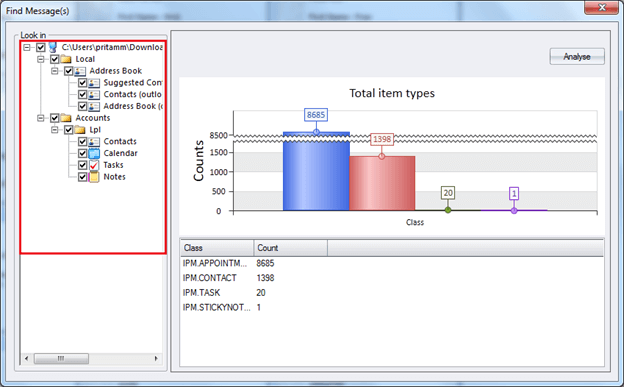
You can use the Kernel OLM Viewer to generate four different types of File Analysis Reports-
If you want to know how you may generate the report, follow these simple steps:
With the help of this article, you can easily find the OLM file from its default location and get its preview of the Kernel OLM Viewer tool. It is entirely free software that will access the OLM file from the location and show the items’ preview. If you want to access your OLM file in Windows, you can use the software and access all the mailboxes and their data, including emails, attachments, contacts, etc.


Thanks for providing the helpful information about OLM file location in MAC Outlook.
If some your data information is deleted from the OLM file, then creating it again will not recover it back. You require the software’s services for it.
Thanks for mentioned the data file location of various Outlook files. I was looking it for saving it in a different location. But the software made the task much easier.
Very well written blog. Very helpful for me. Also thanks to recommend such an excellent tool.
I have tried Kernel OLM Viewer tool and was able to view my OLM files! Superb Tool
I’m happy with the products as well as the service provided by the KernelApps Team.