Email is the standard mode for professional communication. People in the corporate world use emails to communicate both internally and externally. For most users, going through all received emails is a daily chore, but things get worse when junk or spam email count starts increasing.
The unsolicited email messages not only bother the person but also consume storage space, and it’s also possible that they may contain malicious links or viruses, ready to spread or steal data when opened.
In this write-up, we’ll show you how to stop junk emails in Outlook, using some built-in features of Microsoft Outlook 2019 and 2016. Also, if you use Outlook as a primary email client, then we recommend you become familiar with top 10 Outlook errors and ways to fix them.
Methods to stop junk emails in Outlook
Now, let's discuss ways to save you from the tons of unwanted and misleading emails that interfere with your productivity. We will mention 2 manual methods to stop junk emails in Outlook.
You can block emails from individual senders using a built-in Outlook feature and add as many email sender names as you like to the blocklist. Though adding sender name to the block list is manual in this approach, it’ll save you time in the long run to stop junk emails in Outlook.
Follow the below-given steps, to block a sender in Microsoft Outlook 2019, 2016:
- Open Outlook 2016.
- Select the junk or spam email sent by the sender by clicking on it.
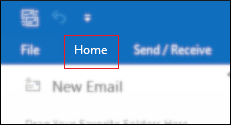
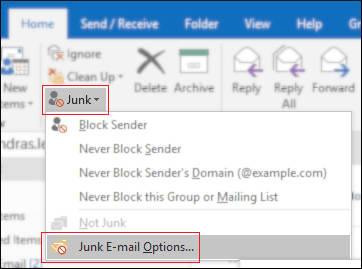
- Switch to Home tab.
- Click on the Junk option and select Block Sender.
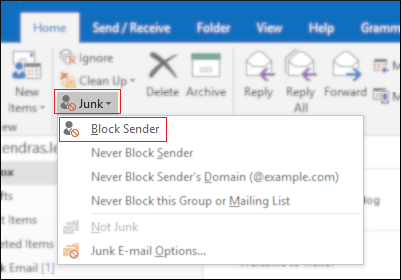
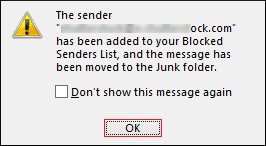
- Click Ok
To add more junk/spam email senders to the block list, repeat the same process, and add as many spam senders as you like.
Another method to stop junk emails in Outlook is by applying filters that will automatically filter out the spam or junk emails and won’t show in the inbox. In comparison with manually adding a junk or spam email sender’s name to the list, this method is more approachable and faster.
To stop junk emails in Outlook 2019, 2016 automatically, go through the below steps:
- Open Outlook 2016
- Switch to Home tab and click on Junk option and select Junk E-mail Options.
Note: If you can’t find Junk option, try clicking the 3-dot icon on the far right. Otherwise simply select and right-click any email and select the Junk option.
- Once the Junk E-mail Options wizard appears, as below. You can set the level of Automatic Filter by selecting from the options given below,
For this guide, we have selected Low: Move the most obvious junk email to the Junk Email folder option. Make sure, you select the two below options: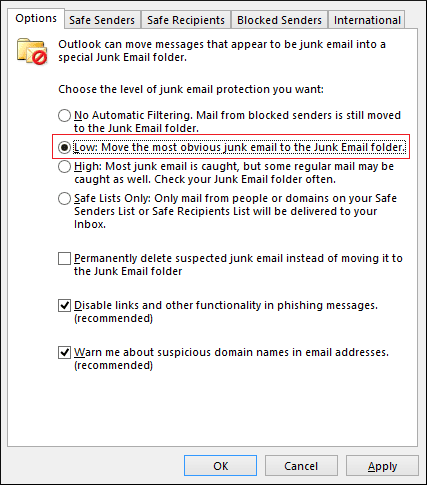
- This option moves not only the Junk emails but those emails as well that appears to be Junk or spam, and this might stop an important email from appearing in the inbox. Thus, to ensure that you miss no important emails, follow the rest of the process.
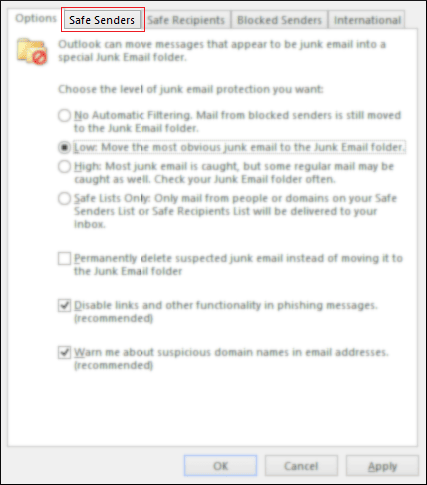
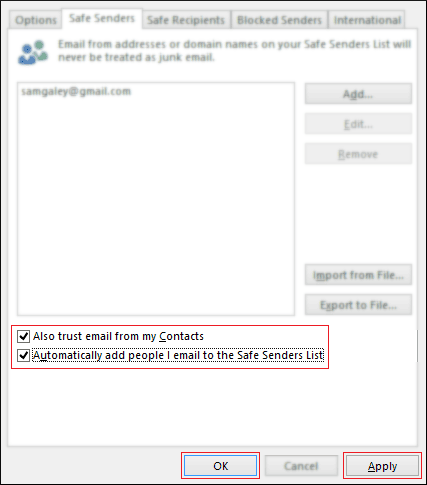
- Now, switch to Safe Senders tab in Junk E-mail Options wizard.
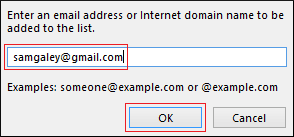
- Click Add.
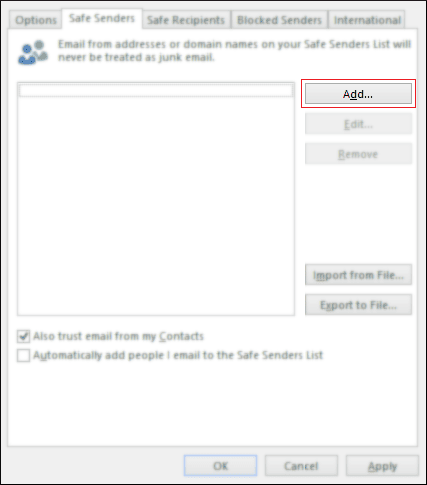
- Add email addresses of the sender you consider safe and click Ok.
- Lastly, ensure that you tick the checkboxes before the following options:
- Also trust email from my Contacts
- Automatically add people email to the Safe Senders List
- Now, click Apply > Ok.
With the method given above, you can automate filtering the junk or spam email from different senders without discarding legit emails from people you trust or from your organization.
You can also set junk or spam emails for permanent deletion instead of transferring them to Junk Email folder. To do so, follow the steps:
- Open Outlook and click Home.
- Right-click any email and select Junk > Junk E-mail Options.
- Check the option Permanently delete suspected junk email instead of moving it to the Junk Email folder.
Note: Enabling this option will stop junk emails in Outlook but will also take away your ability to analyze and verify if the email was from a legitimate source or not.
Receiving tons of junk email will ultimately result in oversized PST file which will cause issues such as slow Outlook response, slow backup & synchronization, Outlook data file corruption etc. To avoid these troubles, we recommend splitting your large PST file using a professional tool. Kernel PST Split securely divides the PST file into various small versions of specified size while retaining the original folder and file hierarchy.
Corruption in a PST file can be a result of oversized PST file as mentioned in the previous section. Any damage to the Outlook data file could cost the user crucial data, messages, and attachments. Therefore, a quick and reliable method should be implemented right away to save your data and time.
Kernel for Outlook PST Repair software is developed with robust data recovery mechanism to recover and deliver damaged PST file items safely to the user. The PST repair tool in addition to data recovery also enables users to restore accidentally deleted mailbox items.
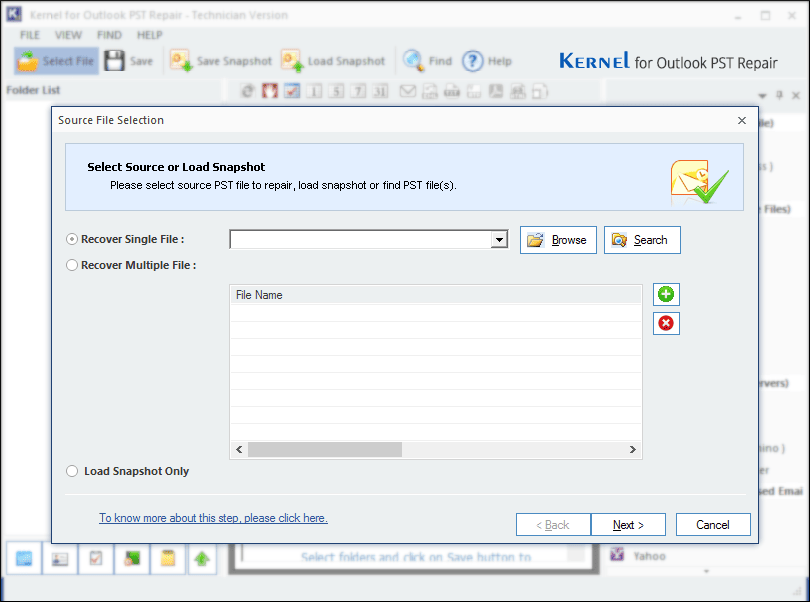
With the software, you can fix various issues such as why I cannot open PST file, how to recover removed attachments, incompatible Outlook data file, etc.
Conclusion
Spam mail is a threat to user’s privacy and security. Methods discussed above will guide the user to stop junk emails in Outlook and prevent constant interruptions. Blocking such emails is also necessary to avoid an oversized PST file, which will ultimately lead to data corruption. To split and save the PST file, we recommend employing Kernel PST Split tool, and for those who are already facing corruption in Outlook data files must utilize the Kernel for Outlook PST Repair without any delay. The tools offer an abundance of features and provide an intuitive user-friendly interface