Adding images or infographics in email messages help you to share your main objective, ideas, quotes and thoughts in a more descriptive manner. This makes your marketing emails, newsletters, update messages, socials/promotion emails visually appealing. The image in Outlook provides your target audience with actionable content. You can add an image file to your message as an attachment or paste/insert it in the mail body itself.
Several email service providers like Gmail and Outlook set a limit on the size of the attachments. Resizing or reducing image size helps you efficiently attach and share even a large image with minimum hassle.
Why reduce image size in Outlook?
Here are a few reasons to reduce the size of image attached in Outlook:
- Lower data consumption: Resizing image helps the receiver download them even with a limited data plan.
- No email bounce: Avoid bouncing off of emails for the email providers who set a limit on the attachment size.
- Quick email delivery: When you resize images or other attachments, you’re reducing the email size, which supports quick email delivery.
- Avoid formatting issues: large and bulky images can often distort the email structure, making it difficult to read the email body.
How to resize image in outlook email?
Well, there are multiple ways to resize images in Outlook email. We will discuss each of the methods in a more detailed manner.
Note: Some like Gmail, Yahoo, and Exchange restrict mailing large files. Typically, while sending a large image file as an attachment, users often encounter alert saying, “Your file is too large to send.” This situation can be handled by resizing the image file in Outlook mail.
Method 1: Insert and resize images in the body of an email message:
To insert and reduce image size in Outlook inside the body of an email message, follow the steps given below:
- Insert image: Inside the body of your email message, click on the desired location where you want to insert an image. Click on the Insert option from the menu bar and then choose Pictures from the Illustrations group. After that, Browse for the folder containing the image file and then click on the Insert button.
- Resize an image: If you want to resize an image, click on the image to display circular sizing handles located at each corner of the image.
- Resize an image to exact dimensions: Occasionally, you have to send an image to exact dimensions. In that case, Select the image > Click on the Format tab from the Menu bar and go to the Size group. Enter the required dimensions for your image.
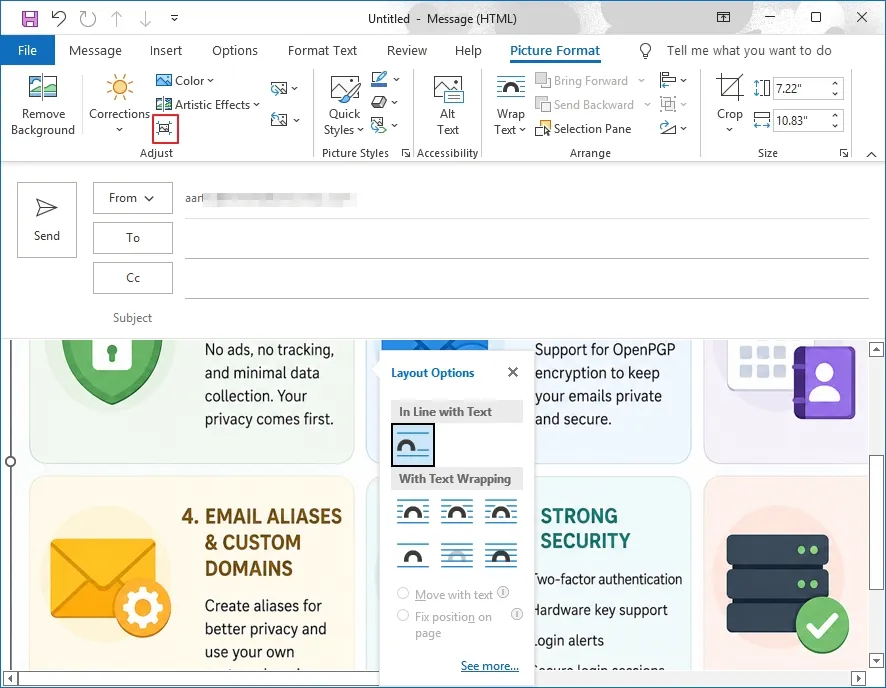
- Compress images to reduce the file size: Compressing an image reduces the file size. Though it maintains the height and width of the image but degrades its resolution. Images with lower resolution have a smaller file size. Select the image > Click on the Format tab > Click on the Compress Pictures icon from the Adjust group.
- Select the options for compression and resolution changes, then click on the OK.

Note: Resizing also changes the apparent size of the image file. Click one of the sizing handles and drag it towards the center to reduce the image size or away from the center to enhance the size of the image.
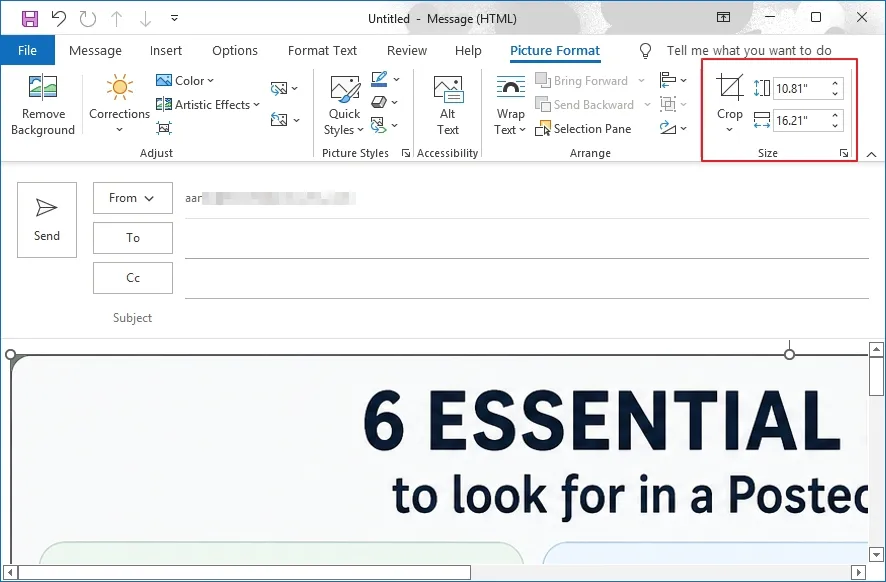
Note: To to alter the height and width separately, uncheck the ‘Lock aspect ratio’ checkbox and enter the required height and width independently.
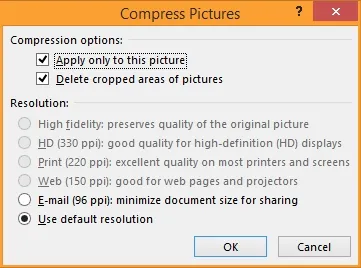
Note: Web (150 PPI) is the most common resolution for images that are not meant to be printed.
Method 2: Attach an image to your email and resize it
Whenever you need to attach an image to an Outlook message, you can resize the large images to a maximum resolution. If you have embedded the picture in the body of the message, you cannot resize the image in Outlook. You have to resize image in Outlook email before embedding. To do so, follow the below steps:
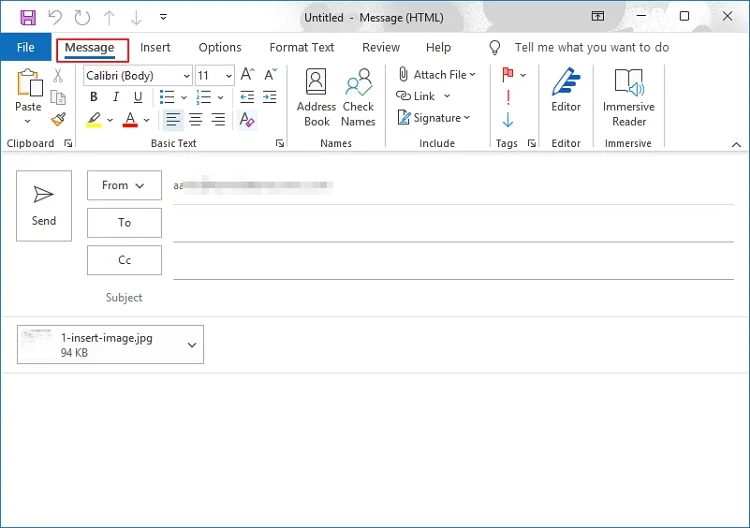
- Start with a new email message.
- Click Attach File in the Insert tab, or even you can drag and drop an image from File Explorer to the Subject field.
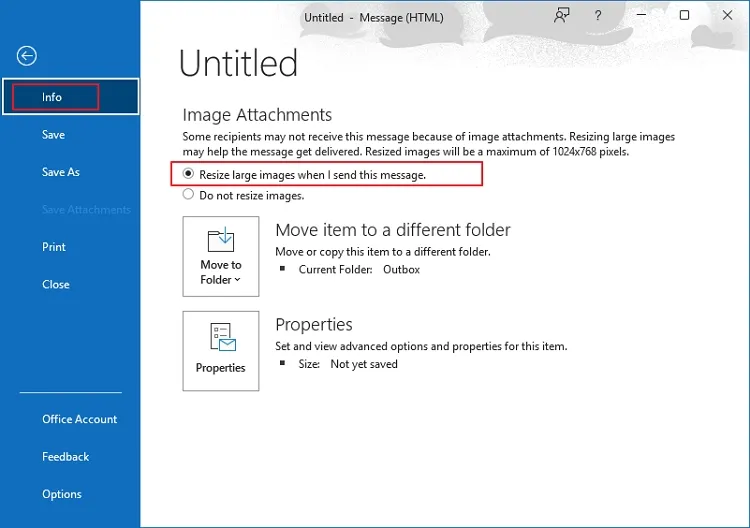
- Select the File tab in the message window.
- In the Image Attachments section, select Resize large images when I send this message from the Info tab.
- Click the Message tab to get back to your email.
- Now, after completing your message, click Send.

Method 3: Resize image using Kernel Bulk Image Resizer tool
Though many tools are available to resize images before using them as attachments but choosing the best one out of all the apparatus requires a real hustle. Therefore, be smart and go for Kernel Bulk Image Resizer. This tool provides several advanced features which are mentioned below.
With this software, you can:
- Resize your images without causing any distortions.
- Resize multiple images at the same time.
- Specify JPEG quality for the images.
- Flip, rotate, and resize your images.
- Support image formats like JPEG, JPG, PNG, BMP, TIF, TIFF, and GIF.
Concluding Lines
Outlook has its own file size criteria to send images and other attachments. Therefore to send a file without issues, you need to reduce image size in Outlook. However, these manual methods can be lengthy and time-consuming. To save time and effort, use the recommended solution, that is, Kernel Bulk Image Resizer tool. The tool supports a wide variety of image formats for resizing images to serve the requirements of all users. Moreover, the tool works uninterruptedly, irrespective of the size and number of images.