User Query - “Lately, I am observing a sudden rise in spam emails in my team’s INBOX. I want a way to display a warning message to all the emails whose sender is outside my organization’s domain, so my team can be cautious not to open a suspicious link. Is there a way to implement this functionality for my organization in Office 365?”
Yes, you can implement this feature in your organization using the Exchange transport rules. It’s a built-in functionality that Microsoft provides for Office 365 users and helps to manage Outlook external email warning in Office 365. The transport rule you create will be applicable to all Outlook versions, like web, desktop, mobile (Android or iOS).
Quick solution to create Outlook external email warning
- Open the Exchange Management Shell (EMS) and connect to Exchange Online.
- Paste and run the following command:
New-TransportRule -Name "External Disclaimer" ` -FromScope NotInOrganization ` -ApplyHtmlDisclaimerLocation Prepend ` -ApplyHtmlDisclaimerText "PASTE THE TEXT YOU WANT TO DISPLAY BEFORE ANY EXTERNAL EMAIL IN OUTLOOK." ` -ApplyHtmlDisclaimerFallbackAction Wrap
The above command will prefix every email that you receive from a sender that is not in your organization with your custom disclaimer / message. Here, I have used plain text for messages. You can style the warning with HTML and CSS as per your needs to make it more attentive.
Note: You must be an admin or at least have the Organization Management permission assigned to run the New-TransportRule cmdlet.
What’s the purpose of enabling Outlook external email warning in Office 365?
The basic motive for creating a rule for external mail warning is to:
- Prevent users from falling victim to phishing attacks by displaying a warning text that states the email’s origin (external).
- Remind employees to be cautious while replying to the email or opening any embedded link.
- Helps to easily distinguish between emails from within the organization and those from third-party (untrusted sources).
- Implement a security practice that helps to protect the overall integrity of the organization.
How & who can manage Outlook external email warning in Office 365?
It’s a warning that you see in Outlook. But you cannot enable or disable it from Outlook. To implement this feature, you make use of the Exchange Transport Rule service and add a rule for the mail flow in Exchange Online (Office 365). You can only create a new rule, either using the Exchange Admin Center (EAC) or the Exchange Management Shell (EMS). I already told you the process to enable external email warning in Outlook using EMS above. Next, we will see how to enable it via EAC.
But not everyone can add this rule. This is something that affects your whole organization's mail flow system. Only your Exchange Server admin has the authority to do it. In case you wish to do it, ask the admin to assign you the Organization Management role/permission. It will make you eligible to manage the mail flow rule.
How to Enable Outlook external email warning in Office 365 using EAC?
If you want more control over the email warning, you can do it with EAC. To create a new mail flow rule, follow these steps:
- Navigate to the Exchange Admin Center home page and login using your Office 365 credentials.
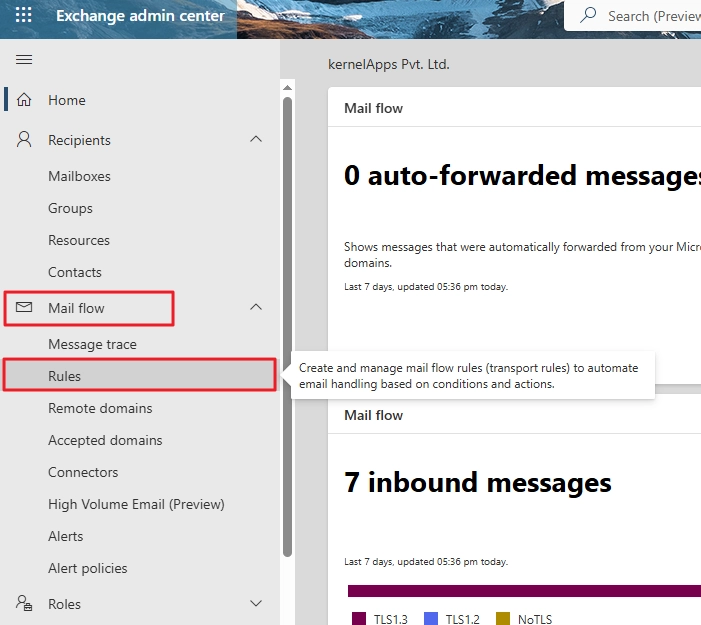
- On the left side panel, click Mail flow option and select the Rules The Rules section allows you to manage Outlook external email warnings in Office 365.
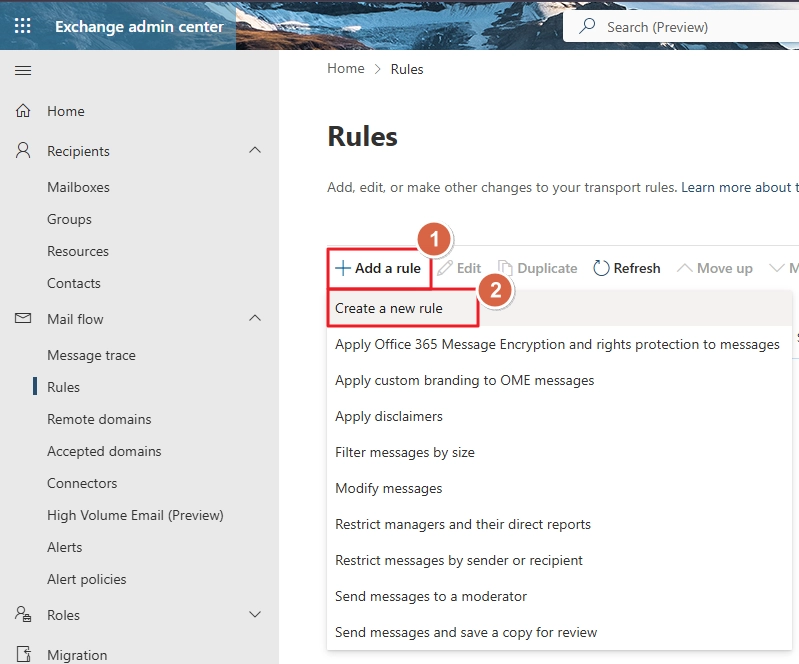
- In the right-side window, click Add Rule and choose Create a new rule option.
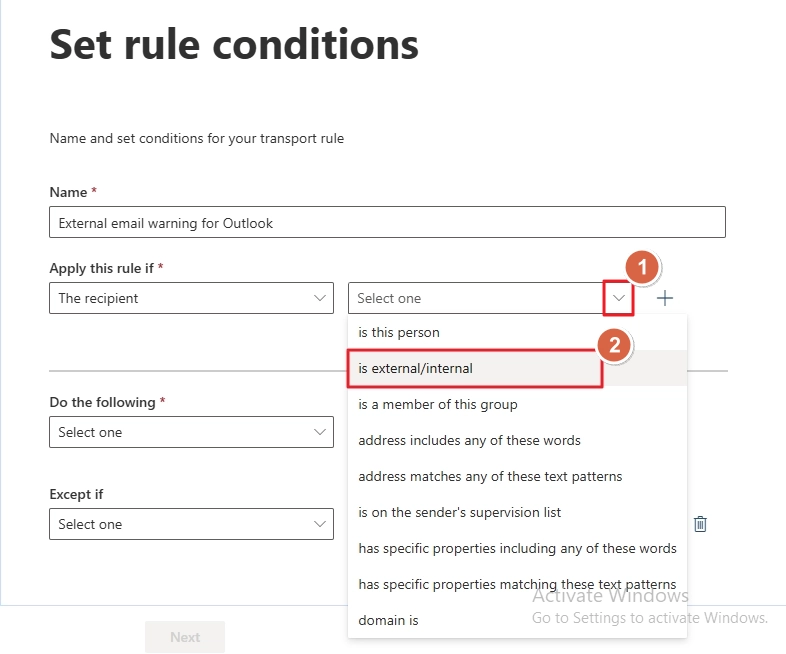
- Provide a name for the new rule. For Apply this rule if value select The recipient.
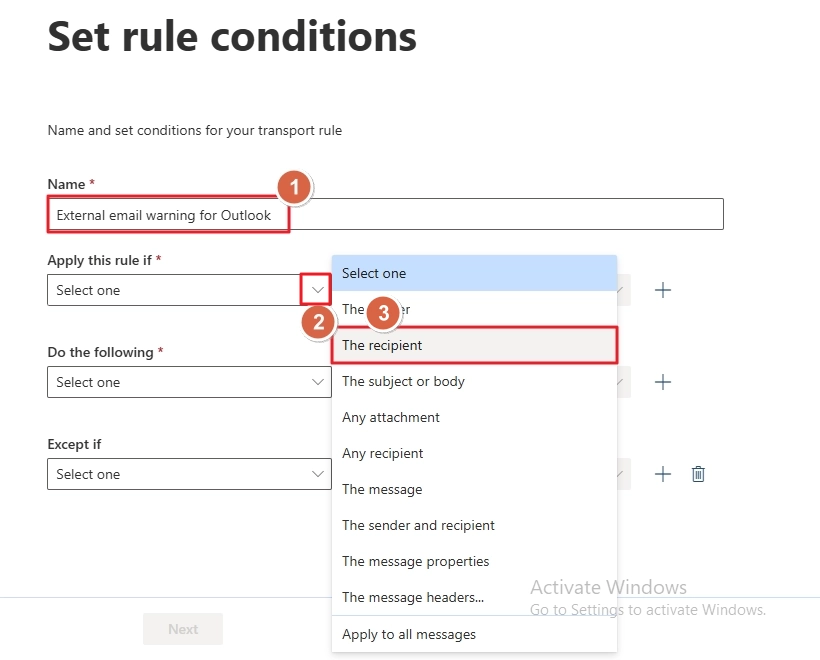
- For the next option, choose is external/internal.
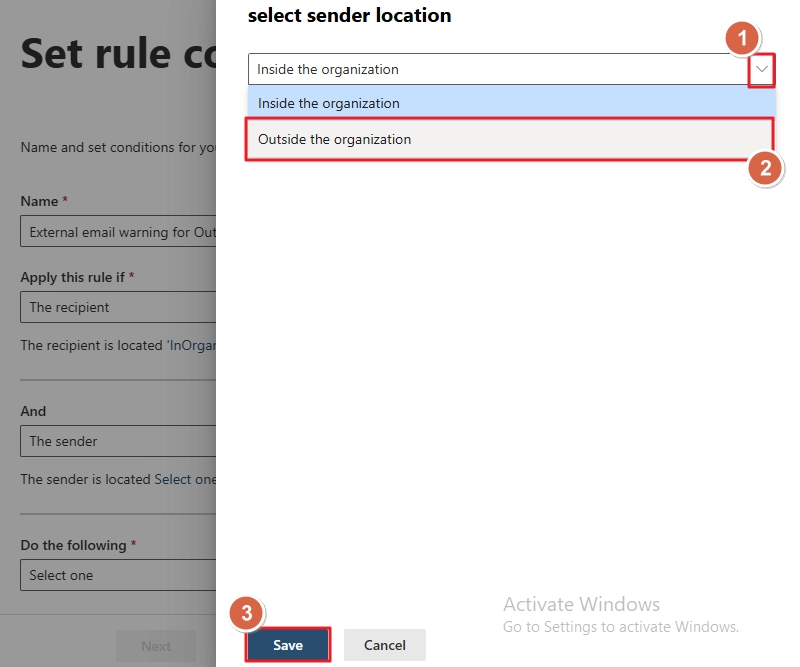
- For the Select recipient location, choose Inside the organization option, and click Save.

- Click the + (add icon) and choose the value The sender.
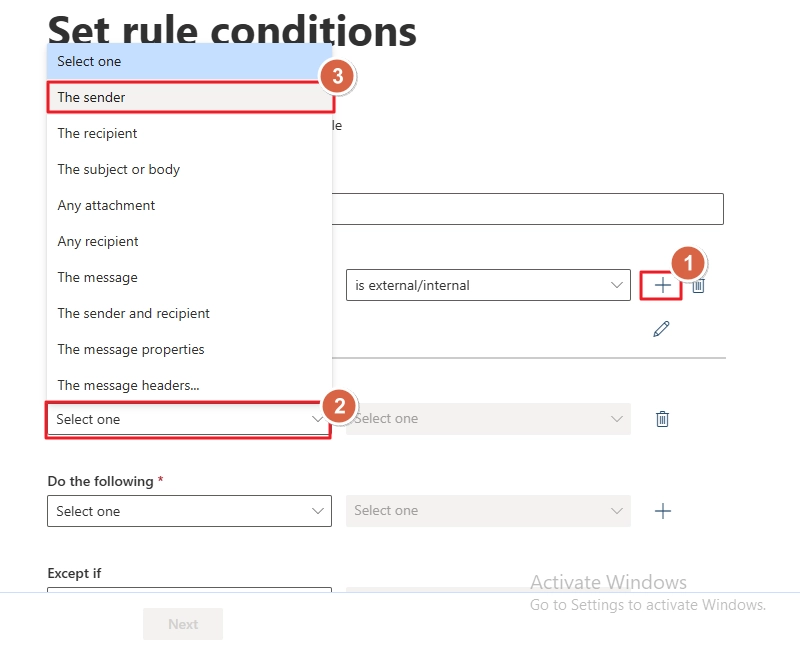
- Same as step 5, choose is internal/external for the next dropdown. And in the window pop up, choose Outside the organization and click Save.
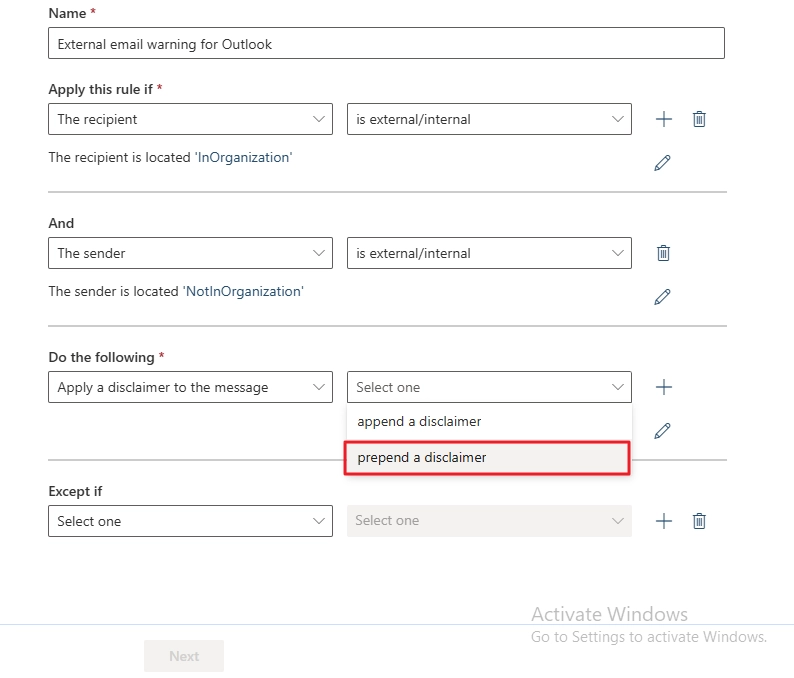
- For Do the following choose Apply a disclaimer to the message. Then choose the prepend a disclaimer option for the next field.
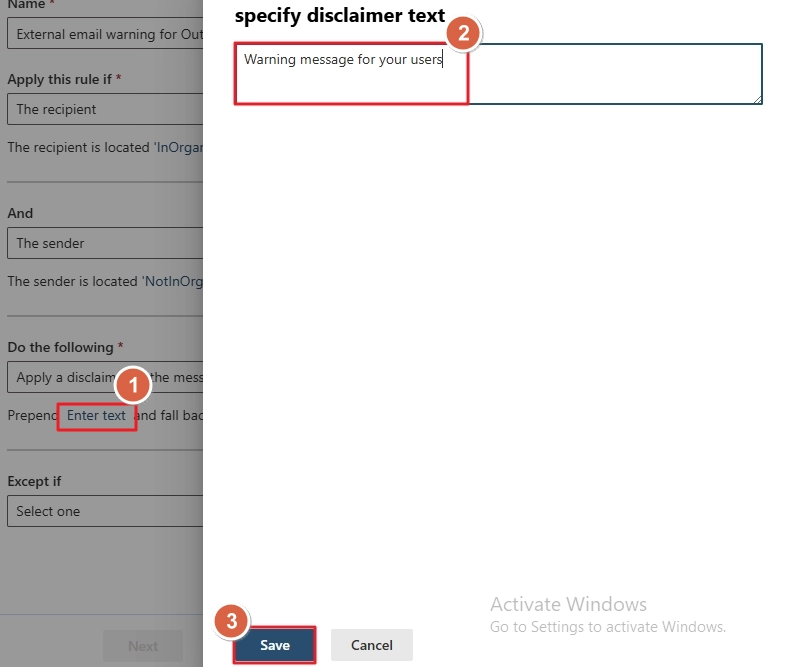
- Click Enter Text and provide the message you want to display. Then, click Save.
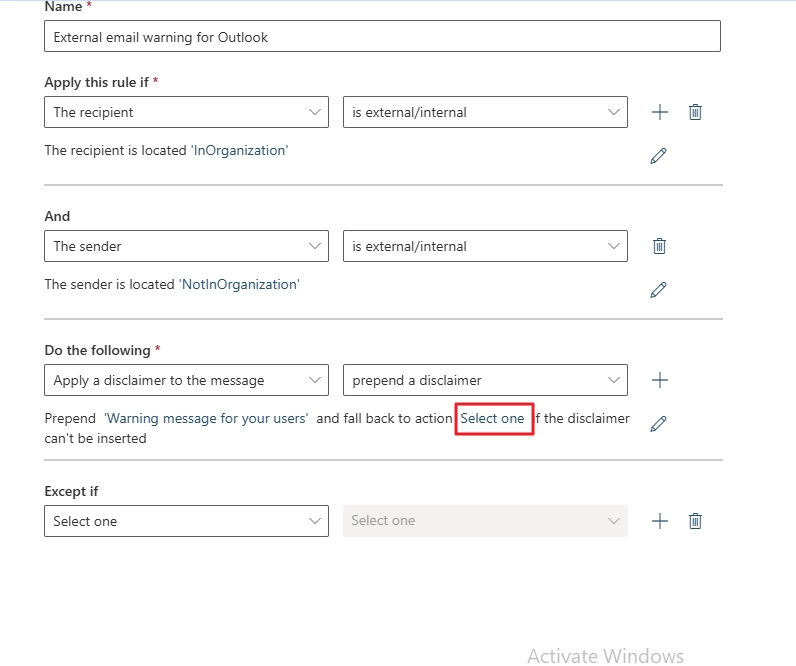
- Then, click Select one link.
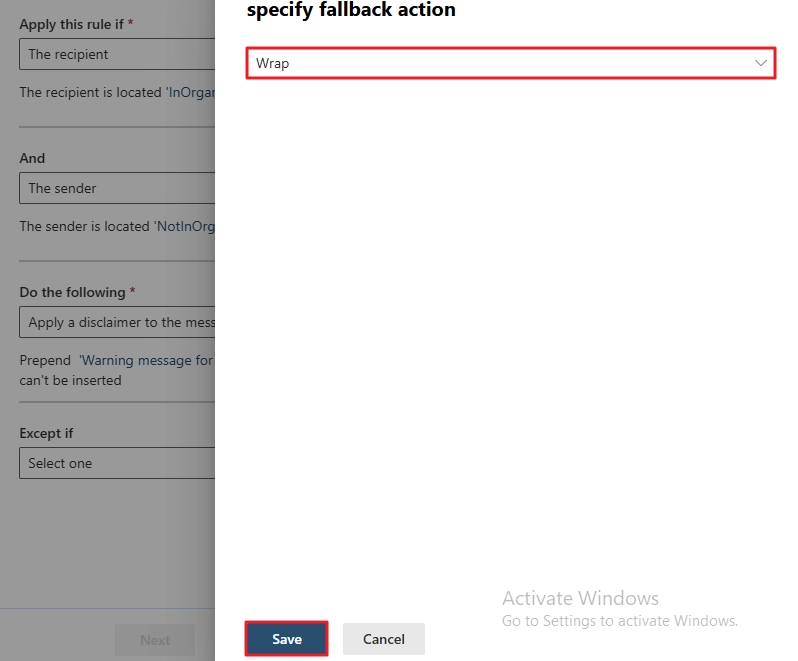
- In the new window, make sure Wrap is selected and click Save.
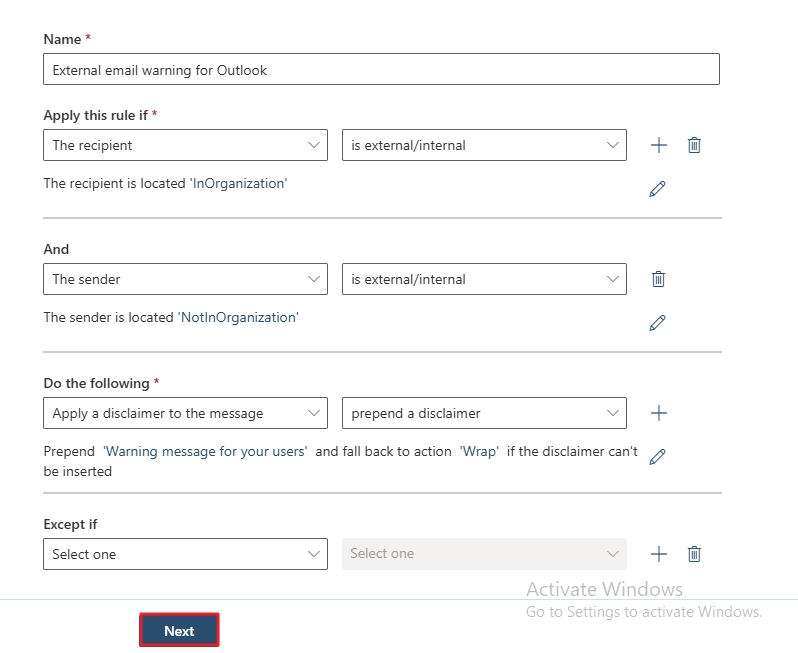
- Click Next to proceed.
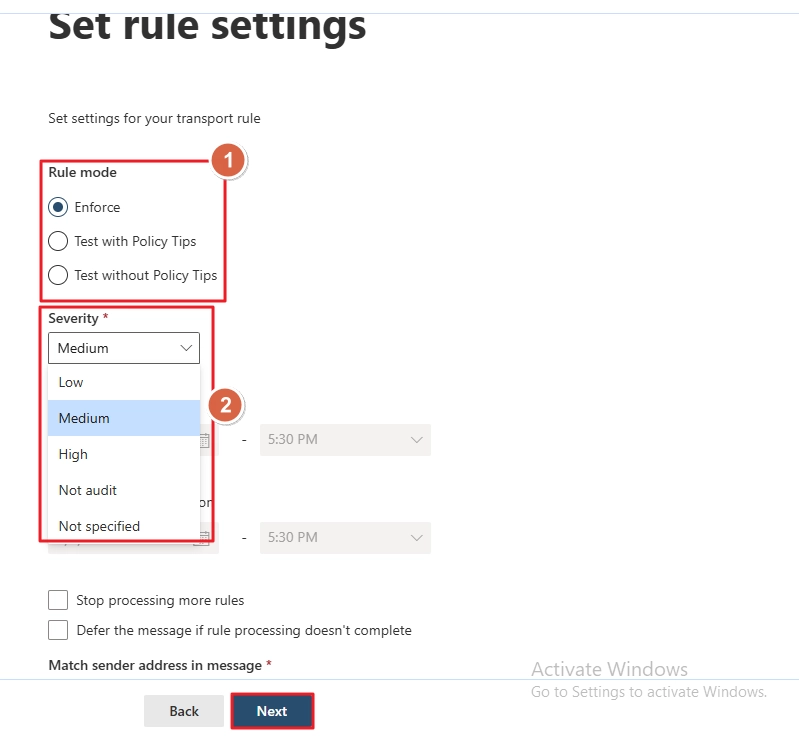
- Pick a Rule mode, choose a Severity level and specify other settings as per your need. Then, click Next.
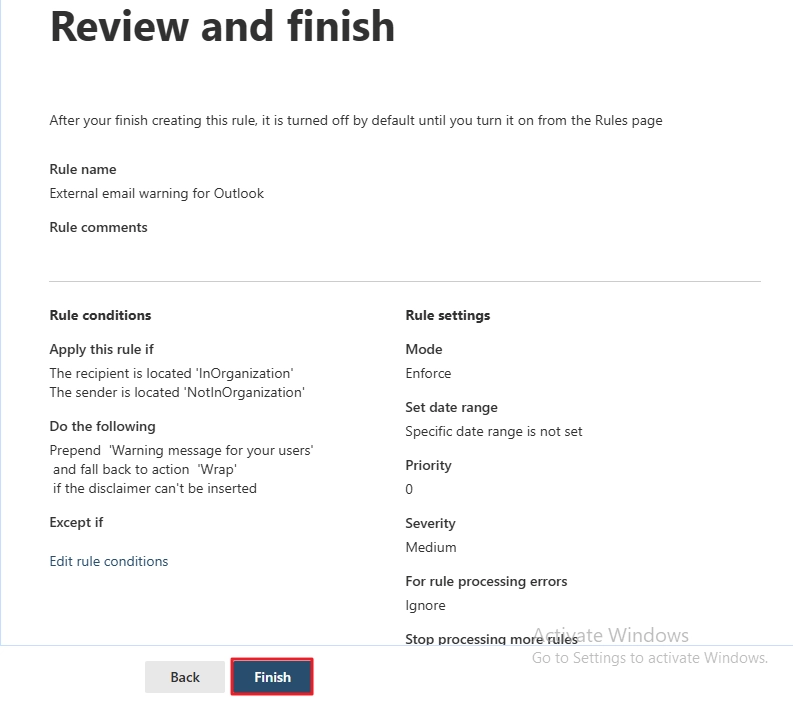
- Review the conditions and click Finish to create the rule.
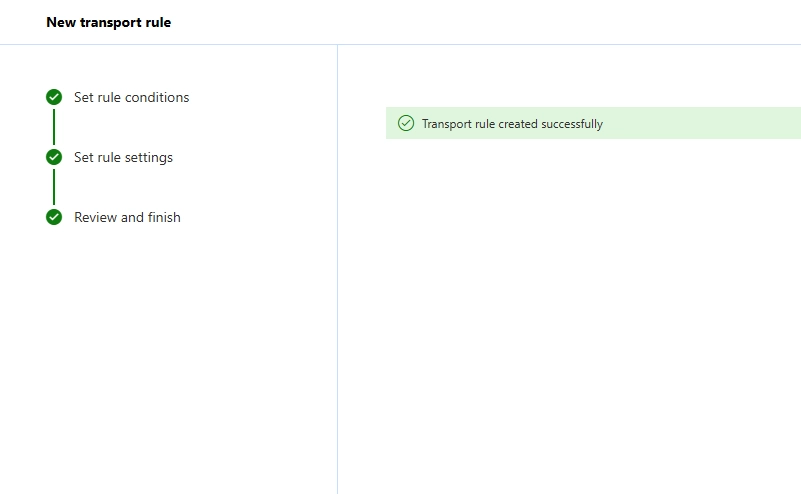
- Office 365 will begin to create the rule. When it's done, you will see a confirmation message.
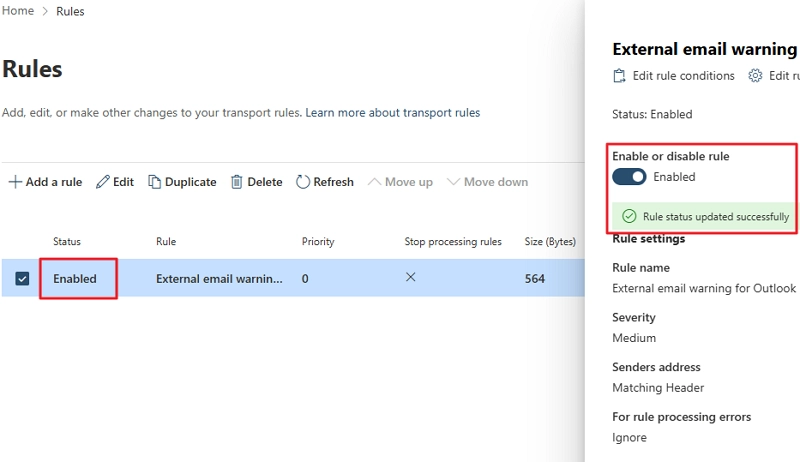
- By default, the rule will be disabled, to enable it, go back to the Rule page. Select the rule you just created for external email warning.
- In the new window pop up, notice the toggle button for the Enable or disable rule option, it will be Disabled. Click on the toggle button to enable it.
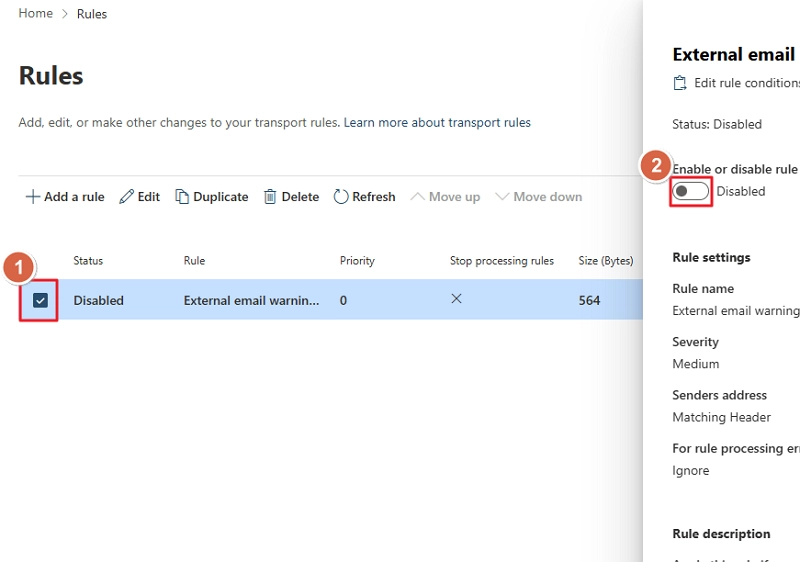
- Wait for a few seconds (minutes if server load is high), the rule Status and toggle button, both will turn to Enabled.
PRO TIP for creating rule for Outlook external email warnings
- When you give the warning text above in the 10th step above, instead of using plain text, a better alternative is to use HTML and CSS to make it more readable. Believe me, I have tried it myself, and it looks much better than a weird plain text warning message. I have provided the code that I usually use below. You can copy this code, modify it, and paste it for the specify disclaimer text value.
<table border=0 cellspacing=0 cellpadding=0 align=left width=`"100%`">
<tr>
<td style='background:#bba555;padding:5.25pt 5.5pt 5.25pt 1.5pt'></td>
<td width=`"100%`" style='width:100.0%;background:#ffe599;padding:5.25pt
3.75pt 5.25pt 11.25pt; word-wrap:break-word' cellpadding=`"7px 5px 7px
15px`" color=`"#212121`">
<div><p><span style='font-size:11pt;font-family:Arial,sans-serif;color:
#212121'>
<b>WARNING:</b> This email is from outside our organization. Only open the links or attachments if you trust the sender.
</span></p></div>
</td></tr></table> - In addition to adding a warning text, you can also add a prefix to Subject of the external email. This will help to quickly identify external emails, even before you open them. To do this, you can either create Outlook external email warning new rule or edit the one you created above like this:
- Under the Do the following section, click the + icon. Select Prepend the subject of the message with option.
- Then, choose specified prefix option for the next dropdown.
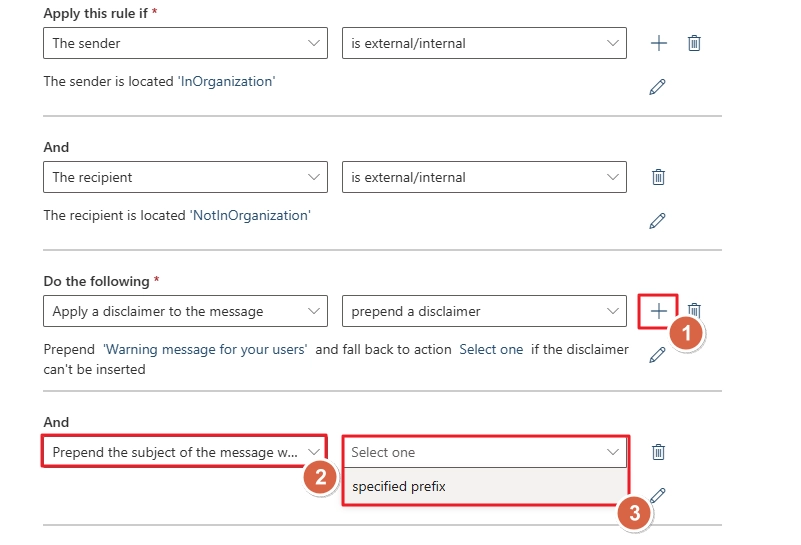
- In the new window pop up, type “External” in the input section and click Save.
- Then, save the rule and exit.
How to disable Outlook external email warning in Office 365?
In case your organizations move the server to a secure location with no scope of receiving emails from outside. There is no point in having a rule that is only applicable to emails outside your domain. You should disable it with these steps:
- Navigate to EAC > Mail flow > Rules, as you did above.
- Select the rule you created for handling external warnings.
- In the window that pops up to the right, click the toggle button that says Enabled.
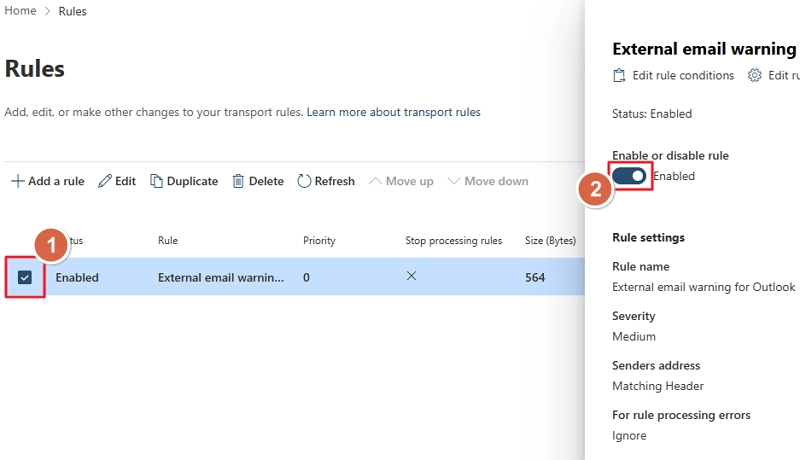
Note: If it shows Disabled, don’t click on it.
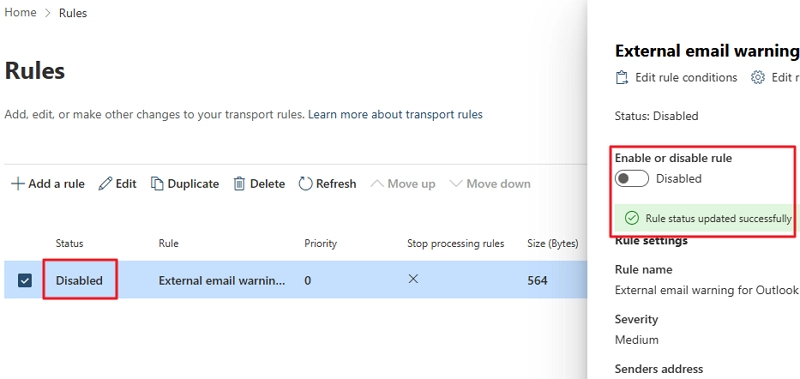
- Wait for the status to change to Disabled.
Disable external email warning in Outlook using EMS
You can also use the Exchange Management Shell to disable any transport rule. Steps to do so are:
- Open the EMS
- Connect to Exchange Online
- Run this command
Note: Disable-TransportRule -Identity "YOUR-RULE-NAME"
Is it already too late? Moving from Prevention to EDB Recovery
If an employee has already opened an infected attachment file and corrupted the EDB file, then you don’t need ways to manage Outlook external email warning in Office 365. You need to repair EDB file. The fastest way to restore the server is to recover the database using a backup. However, if you don’t have a backup or the backup itself is affected by viruses, you can use the Microsoft built-in tool, eseutil. It works by deleting the pages infected by the malicious code. Follow these steps to remove the corrupt data:
- Dismount the database (if not already dismounted due to corruption) by running this command in PowerShell.
Dismount-Database -Identity "YourDatabaseName"
- Then, run eseutil command with /p switch in the PowerShell
Note: All the damaged pages will be deleted permanently after running this command
eseutil /p "YOUR_EDB_FILE_COMPLETE_PATH"
- Defragment the database with this command:
eseutil /d "YOUR_EDB_FILE_COMPLETE_PATH"
- Finally, do an integrity check using New-MailboxRepairRequest or isinteg (for Exchange Server 2010 and earlier versions)
After repairing the EDB file, check its status using the eseutil /mh command. If the .edb is in a clean state, mount the EDB file to the server. But if the command shows EDB file state as dirty, the eseutil fails due to severe corruption.
In such instances, you must use a professional Exchange database recovery tool. Choose a tool that can repair any level of damage from EDB file, without losing any mailbox items. And most importantly, restore all the files/folders with original folder structure and metadata.
Our Kernel Exchange Suite software is a one-stop solution to every Exchange Server related issue. EDB repair, restore deleted mailbox, migrate mailbox across tenants, database backup, etc., the suite can help you with all.
Implement secure emailing with Office 365 transport rule
If I were you, I would just send an email to my admin and let him/her take care of all the complicated technical rule stuff. But if you are an admin yourself or a curious user, then use the solutions above to manage Outlook external email warning in Office 365. I think the fastest way to create a disclaimer or warning is to use the EMS. With a single command, you can create it, disable it, or delete it. And for users who prefer a GUI approach and want more control, use EAC. But make sure you have the required role assigned to manage the email flow rule.
Frequently Asked Questions
Q. I am not receiving new emails due to low mailbox storage. How to fix it?
Ans. Receiving a ton of spam emails can fill up your mailbox storage quota fast. Either delete obsolete emails manually or increase the mailbox storage limit.
Q. After creating rules using EAC, we have to enable it. Do I need to do this with EMS too?
Ans. No, when you add a new transport rule using EMS, it is by default enabled. In case your created rule is not working, check if it was configured correctly or verify if your admin has disabled it.
Q. How many mail flow rules can I create for my organization in Office 365?
Ans. Currently, Microsoft only allows a maximum of 300 rules per organization with a size limit of 8KB per rule. Exceeding the size limit will result in errors in rule execution.