After Microsoft rolled out Outlook 2016 and 2019, it was made clear that Outlook 2007 won’t be supported by Office 365. Even, they recommended that it is not wise to use Outlook 2007 with Office 365. The reason behind such declaration is that the support for Outlook 2007 is already in ‘extended phase’, which clearly means that Microsoft will continue to provide support for security patches but will not include any bug fixes.
To use Outlook 2007 with Office 365, Outlook 2007 makes use of Autodiscover to automatically execute settings in Exchange Server. However, if in any case Autodiscover does not work, there is a manual method to configure Outlook 2007 with Office 365.
In this article, we will discuss how you can still configure Outlook for Office 365 easily without much efforts and hassle.
To employ manual method to configure Outlook 2007 with Office 365, user has to follow the steps mentioned below:
Manually Configure Outlook 2007 with Office 365
To configure Outlook for Office 365 manually, one needs to have knowledge of Office 365 functionality, and then the following steps can be used accordingly.
Step 1: Determine the mailbox server name and proxy server URL by these steps:
- Sign-in to Office 365.
- Open Outlook Web App by clicking Outlook.
- Click Help, followed by About.
- On About page, locate and note down mailbox server name and host name.
Step 2: Post determination of mailbox server name and host name, follow these steps:
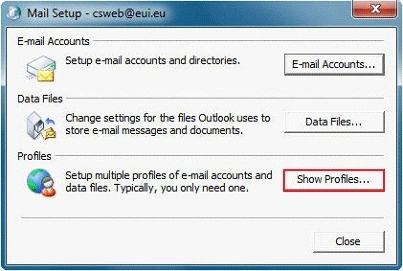
- Click Start > Control Panel > Mail.
- Click Show Profile.
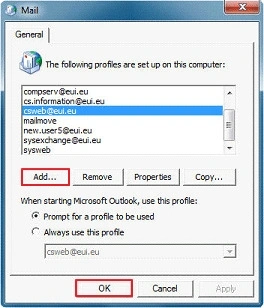
Step 3: Click Add, then declare the profile name and then click OK.
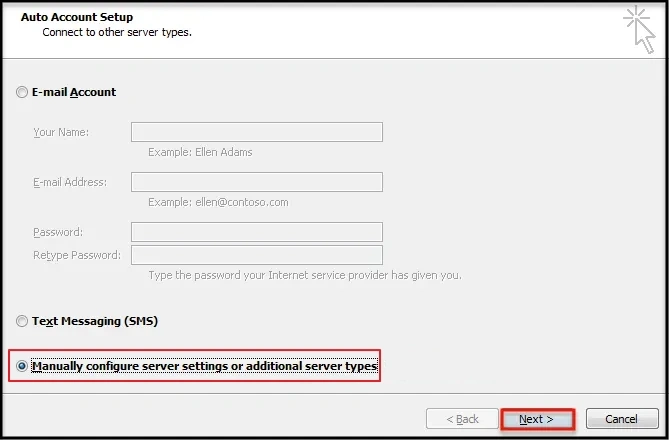
Step 4: Select Manually configure server settings or additional server types check box followed by Next.
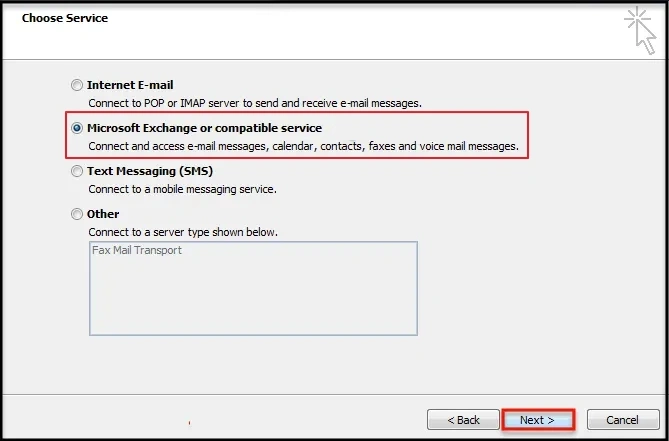
Step 5: Select Microsoft Exchange or compatible service followed by Next.
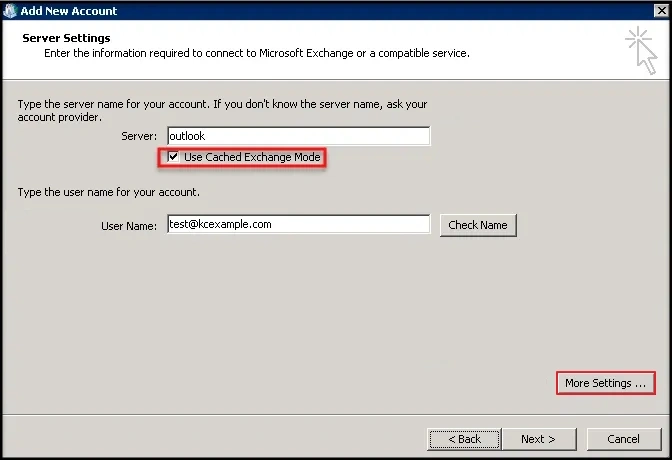
Step 6: Enter server name in server box.
Step 7: Ensure selection of Use Cached Exchange Mode option.
Step 8: Enter User Name and click More Settings.
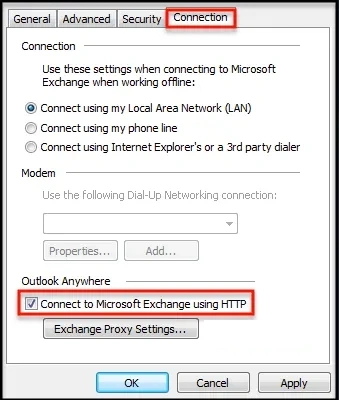
Step 9: Click Connection tab.
Step 10: Make sure that the Connect to Microsoft Exchange using HTTP check box is selected then click Exchange Proxy Settings.
Step 11: In the Use this URL to connect to my proxy server for Exchange box, enter proxy server URL, which has been obtained in previous steps.
Step 12: Make sure that Only connect to proxy servers that have this principal name in their certificate check box is selected, followed by typing msstd: outlook.com.
Step 13: Select On fast networks, connect using HTTP first, then connect using TCP/IP check box, followed by On slow networks, connect using HTTP first, then connect using TCP/IP check box.
Step 14: Under Proxy authentication settings select Basic Authentication.
Step 15: Click OK twice.
Step 16: Check NAMES of server and user name followed by Next.
Step 17: Click Finish.
With these steps Outlook configuration for Office 365 becomes easy for users without assistance from any third-party tool.
Directly move Outlook 2007 emails to Office 365 - Professional method
The manual method is time-consuming and needs lots of concentration, time, and effort. Moreover, Outlook 2007, being an old version, can face corruption issues, making it more difficult for users to use Outlook 2007 with Office 365. With a professional PST Repair tool, you can easily repair your corrupt PST file and directly move its data to Office 365. Kernel for Outlook PST Repair tool is the most reliable software to repair corrupted PST files and migrate their data to different destinations.
Benefits of using a professional tool:
- Remove corruption from PST file (if there is any) and make it healthy.
- Save PST data in various file formats like MBOX, MSG, EML, TXT, DOC, PDF, HTML, etc.
- Directly import PST files to Office 365, Exchange Server, Gmail, Yahoo, etc.
- Offers 100% secure and accurate conversion without any loss.
- The free version allows to repair and save 25 items per PST file.
Wrap Up
It’s pretty difficult to configure Outlook 2007 with Office 365, especially if you do not know how to use Office 365. However, it is not impossible to configure the profile with right approach and solution. In this article, we discussed how to configure Outlook for Office 365, as well as how you can easily repair a corrupt, damaged PST file and move its data to Office 365 using an advanced PST converter tool.
Frequently Asked Questions
Q. How can I configure Outlook 2016 for Office 365?
A. To configure Outlook 2016 for Office 365, simply open Outlook 2016, then go to File > Add Account and enter credentials of your Office 365 account.
Q. How to configure Outlook 2007 with Office 365 manually?
A. To configure Outlook 2007 with Office 365, open Control Panel > Mail, then create a new profile, and select Manually configure server settings.