Email servers like Gmail are a collaborative platform that allow organizations to communicate with users all around the globe. Developed by google, Gmail is widely adapted by small to large scale businesses for email communication because of its integration to many business productivity applications like Google Drive, Google Docs, and more. Still, Gmail is often prone to the risk of being affected by external threats or data breaches under different circumstances.
Backup Gmail to PST is a common task performed by organizations to secure their Gmail data from intrusions. Migration of Gmail data to PST enables user to avoid storage incapabilities causing errors, also PST allows you to sync data to IMAP accounts. It’s suitable to gain a deeper understanding of what are the differences between MS Outlook vs Gmail.
However, as most of the emails coming in and going out through Gmail are critical for the business process, many organizations want to back up this data in a local drive or to Outlook PST for data protection.
In this article, we will talk about how to transfer emails from Gmail to Outlook 2016/2013. There are two methods:
- Manual method to transfer Emails from Gmail to Outlook 2016/2013
- Backup Gmail Data to PST using a professional tool (Kernel Gmail Backup)
Instant Solution
Download automated tool Kernel Gmail Backup to transfer or backup emails from Gmail to Outlook 2016/2013.
To Backup G Suite data including Hangout Chats, Google Drive Data, Contacts, Calendar, Mail, etc. to Outlook, try Kernel Google Workspace Backup and Restore Tool.
Manual method to transfer Emails from Gmail to Outlook 2016/2013
The process of backing up Gmail data to PST provides an extra layer of security to your data and allows an enhancement in managing workflows. Here, we will discuss how we manually backup emails from Gmail to Outlook 2016/2013 using a manual method in the steps given below:
- Select File menu in the Outlook app (Outlook 2016/2013).
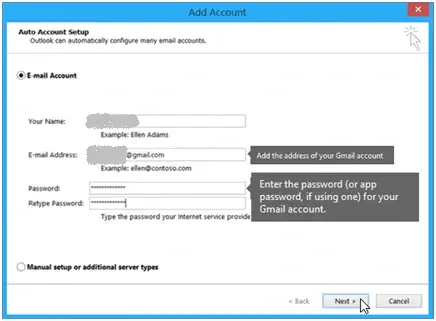
- In the File menu, select Add Account.
- A new Auto Account Setup page will open wherein you need to enter your name, Gmail address and password and then choose Next.
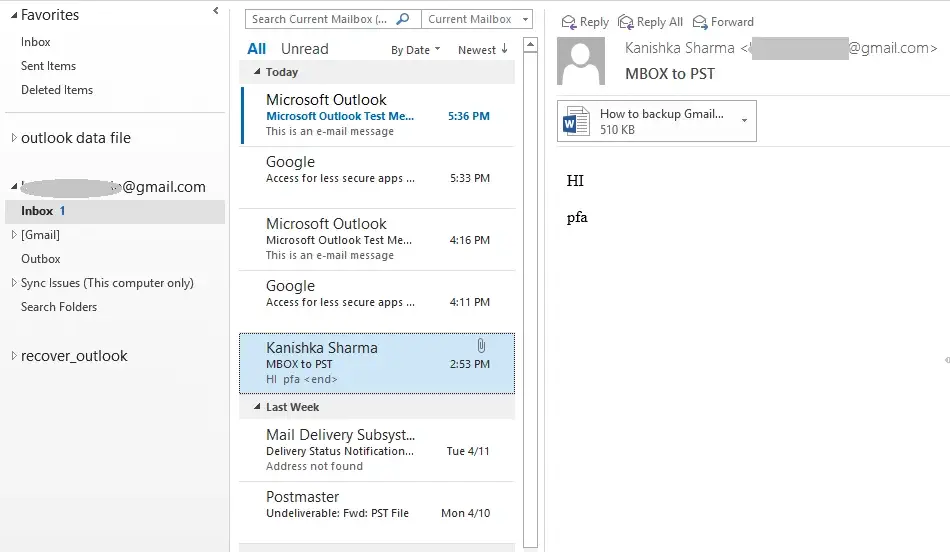
- Now, click Finish. And you would see that Outlook got sync with your Gmail account. The emails in your Gmail account will appear in Outlook.
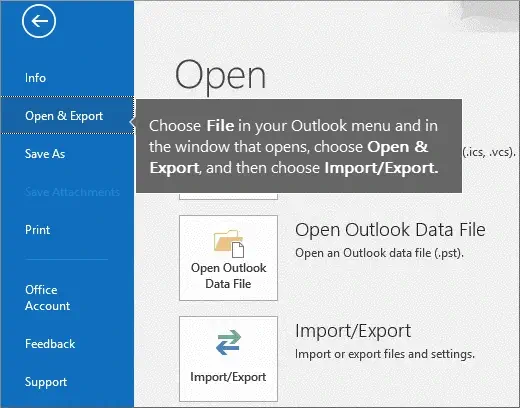
- Now, choose File menu and go to Open & Export < Import/Export.
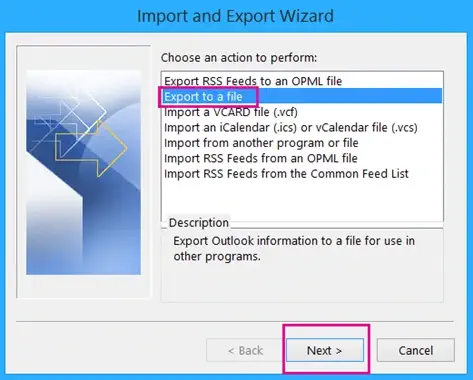
- Now choose Export to a file and click Next.
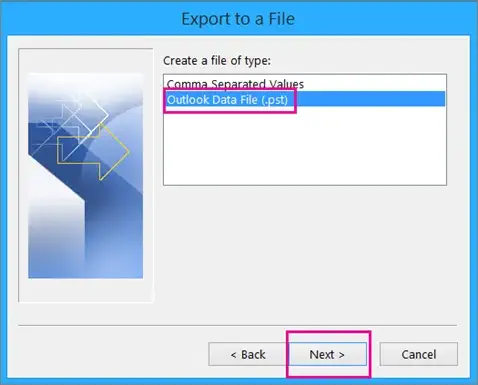
- Now select Outlook Data File (.pst), and then click Next.
- Now you have to select the account you want to export by choosing the name and Gmail address; also check Include subfolders to ensure ensures copying of complete data or mails. Click on Next.

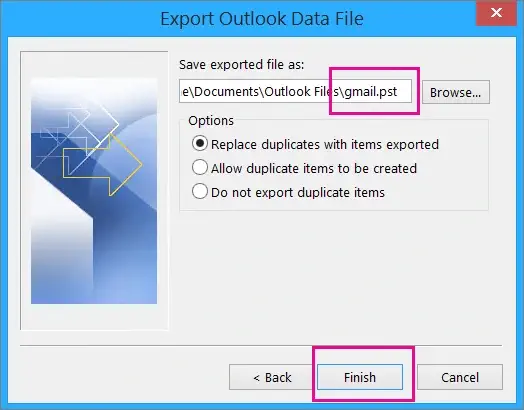
- Now Browse to select the saving location and to name the recovered PST file. And then select Finish.
These steps will allow you to backup or transfer emails from Gmail to Outlook 2016/2013. But there are some problems which may occur during this process. And these problems might delay your process. Some of the common errors you face while backing up data are as follows.
Login error: While filling your username and password, you may repeatedly be prompted for credentials. It happens when you enter the wrong password, when you use a new computer for login, or when you are using Gmail after a long time. To fix this issue, you have to select Cancel till the prompt stops appearing. Also, you can use your old computer for the Add account process.
Security settings in Gmail: Sometimes, you may not be able to access your Gmail messages in Outlook and get an error message saying “Your IMAP server wants to alert you to the following…” To fix this error, you can go to your Gmail account and ensure that Allow less security settings is set to ON and then follow the above steps to add the account.
Backup Gmail Data to PST using a professional tool
Implementing the process of backing up involves the validation of multiple factors which sometimes become tough for you. We suggest opting for an automated tool that performs your backup Gmail to PST task easily using robust features & provide results in quick time. If you are looking for an easy backup option, then you can try a third-party tool, such as Kernel Gmail Backup . It is such a renowned backup tool that eases the backup experience of IMAP users. The tool supports multiple email clients for IMAP backup like Gmail, Zimbra, Yahoo Mail, AWS, Outlook, Zoho Mail, etc.
We also suggest you use an advanced tool for backup G Suite data including emails, contacts, calendar & Google Drive files/folders with Kernel G Suite Backup Tool. Let’s understand how to use the Kernel Gmail Backup tool by mentioning the step-by-step guide below:
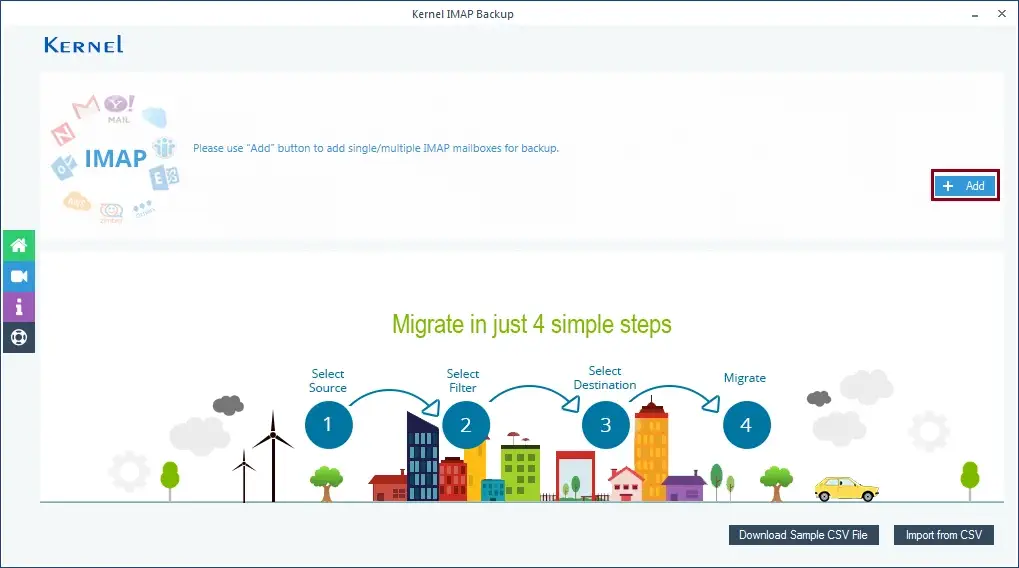
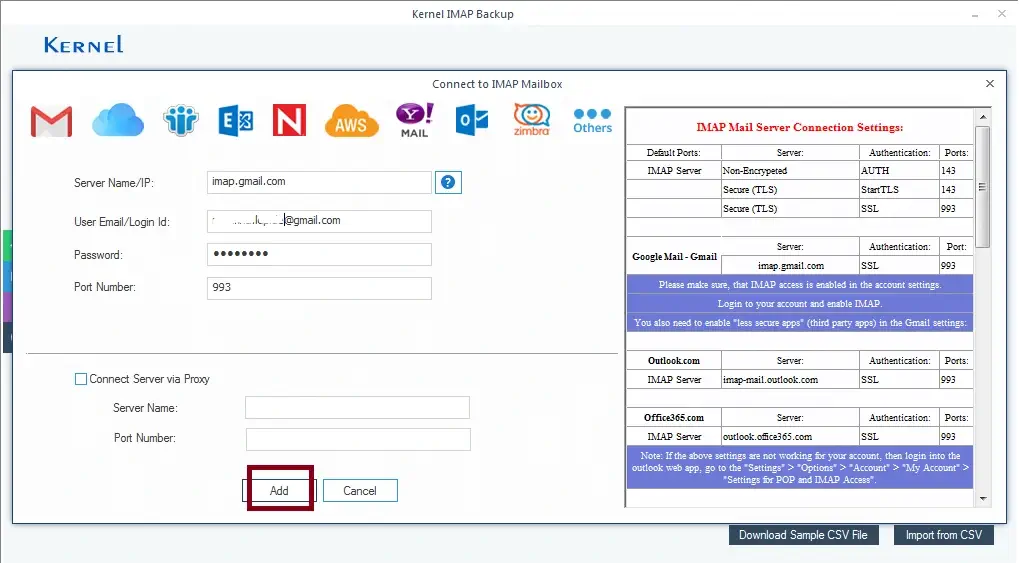
- In the home screen, click on the Add button to add the Gmail IMAP account.
- You will find the Server Name, Port number, Authentication, and other details for your email client. Now, fill in the details along with your credentials and click on Add to proceed.
- Once the account is linked successfully, click on Set Filter and Migrate option.
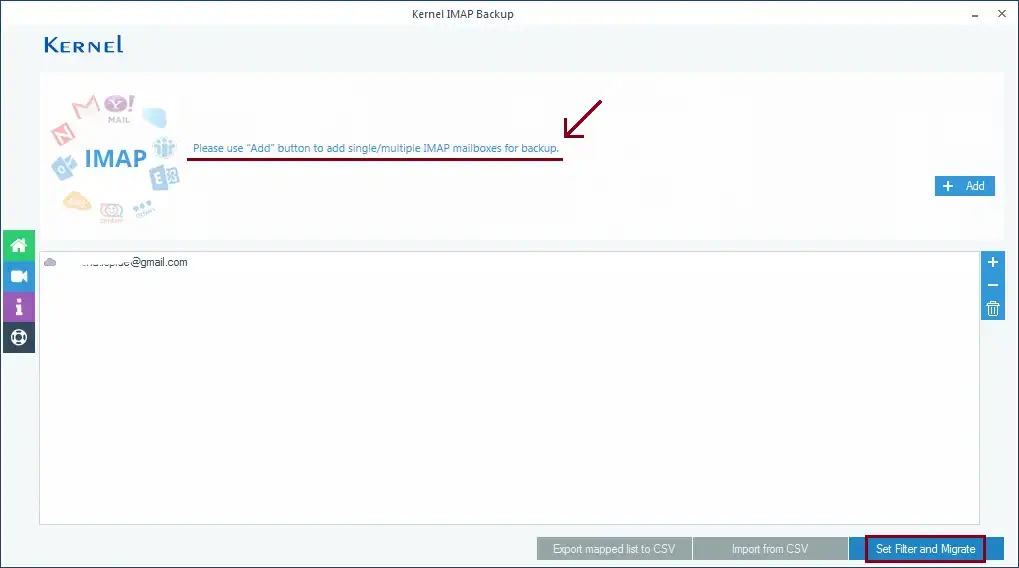 Note: If you want to add multiple IMAP accounts, you can do so by clicking on the Add button.
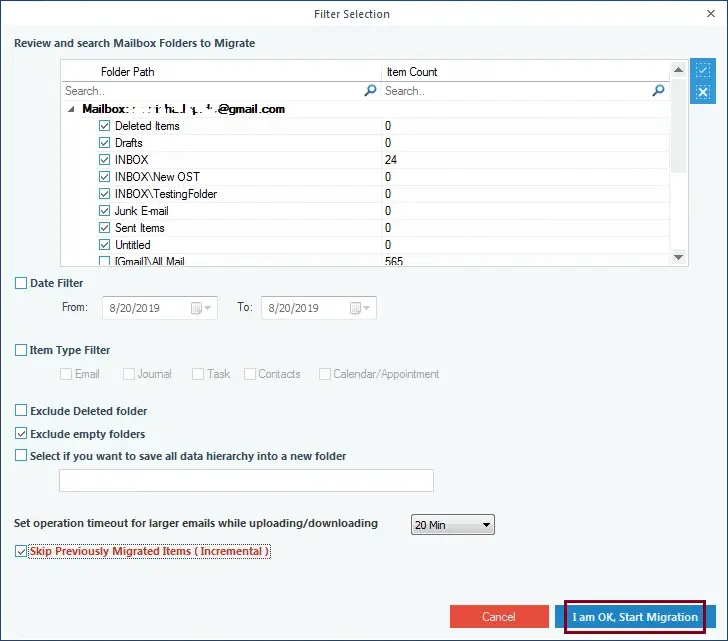
 - Apply filters for the backup process, as needed. You can choose between many options like Date, Item type, Include/Exclude folder, etc. as per your requirement. Once you have selected everything, click on I am Ok, Start Migration.
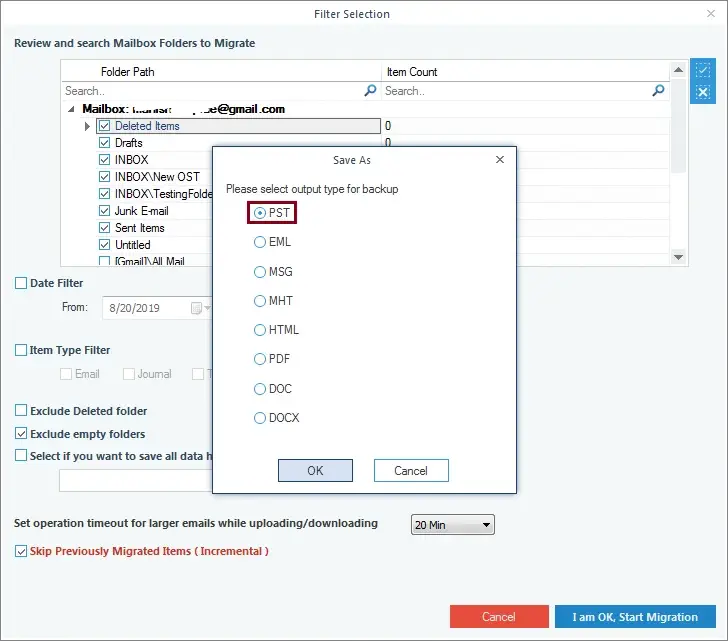
- Select the PST format from the list of formats and click on OK.
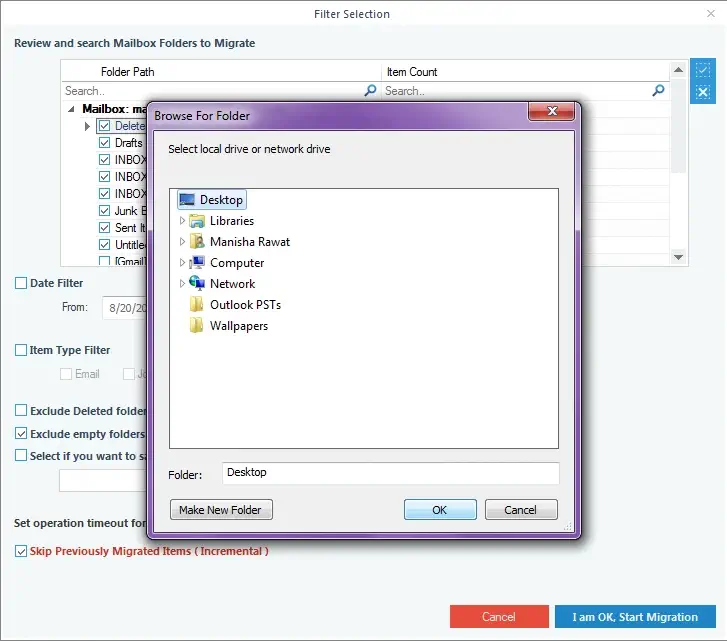
- In the next step, provide a destination to the file and click on OK.
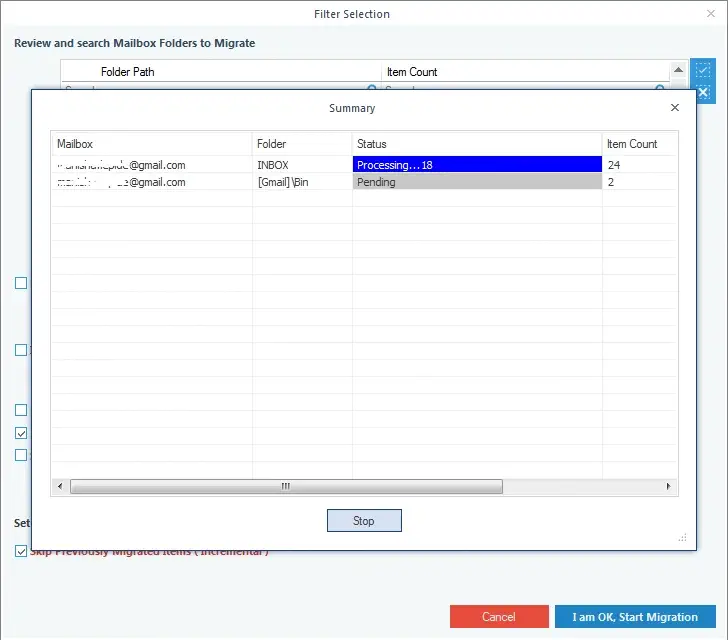
- And the process will start; the tool will show you the progress of the process. Wait for it to finish.
- Once the process is over, click on OK to finish.
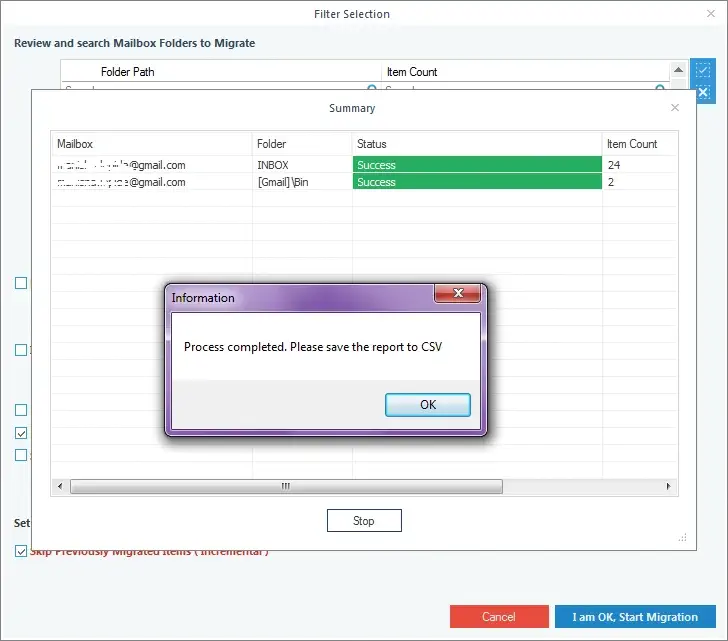
Finally, your Gmail data is saved in the PST file, and you can access it into Outlook easily.
Conclusion
Backing up your Gmail data to PST has become a crucial part of the daily business activity as it helps to manage storage and secure your crucial mail containing sensitive data. We have discussed the manual method using import/export feature in Outlook by which, you can save only a single account’s data in PST file. Still, using the advanced tool like Kernel Gmail Backup is trustworthy software which can save unlimited IMAP accounts like Gmail in PST format. After using the software, you can see that the backup process is relatively easier and does not require any extra permissions. A free trial version of software can save backup of 10 items from a folder.

KernelGmail Backup Tool
Backup multiple Gmail emails to PST,PDF,HTML,EML & MSG formats