"We’re planning to switch from our Namecheap email service provider to Office 365 and want to decommission the old server. None of the available manual methods guarantee transfer without data loss. We want a solution to efficiently help us migrate emails from Namecheap to Office 365."
Namecheap is a renowned web hosting provider, which is known for its email services too. While Namecheap offers a simple interface and affordable email services, most businesses are switching to Office 365 due to its advanced features and enhanced security. The process of changing email platforms can be overwhelming. However, you can perform the transition smoothly with the right strategy and methods.
This article covers everything that you must know for easy IMAP migration from Namecheap email service to Office 365. Let’s begin!
Why Migrate Emails from Namecheap to Office 365?
Let’s understand the importance of migrating from Namecheap to Office 365 through a comparison table:
| Comparison Factors | Namecheap | Office 365 |
| Definition | Email hosting service provider that offers domain name services, VPS, and webmail hosting. | Cloud based productivity suite that aims at improving content management and collaboration. |
| Cloud storage | Limited storage as provided by the hosting provider. | 1 TB + OneDrive storage per user and allows flexible expansion of storage. |
| Security | Provides standard security features, such as SSL and 2 factor authentication. | Enterprise level security features, such as multi-factor authentication, GDPR, encryption, etc. |
| Collaboration tools | No such tools provided | Include tools like SharePoint, Planner, Teams, etc. |
| Email features | Include basic email features with IMAP/ POP server | Advanced email features, such as shared calendars |
How to Migrate from Namecheap Private Email to Office 365?
Here are the two reliable methods that help you achieve Namecheap to Office 365 migration with ease. Follow the step-by-step guide:
Method 1: Migrate Emails from Namecheap to Office 365 using Outlook
This method of migrating emails involves the use of the Outlook application with the IMAP server settings. Let’s see the process:
Step 1: Open Outlook on your computer and go to File > Add account.
Step 2: Enter the email address of your Namecheap account and then click Connect.
Step 3: Select IMAP as the account type and adjust the incoming server settings for IMAP.
- IMAP Server: mail.privateemail.com
- Port number: 993
Click Connect.
Step 4: Now, follow the similar steps to add the Office 365 account.
Step 5: Manually drag and drop email folders from Namecheap to Office 365 mailbox.
Step 6: Follow the same steps to move other email folders.
Method 2: Use the Import/ Export feature of Outlook
With the Import/Export feature of Outlook, you can transfer emails, contacts, calendars, etc. from Namecheap to Microsoft 365. Add your Namecheap and Office 365 accounts (as in the previous method) to Outlook, and then follow the process mentioned ahead.
Step 1: Export emails from Namecheap
This step requires you to first export emails from Namecheap email using the process below:
- Open Outlook on your system and go to File.
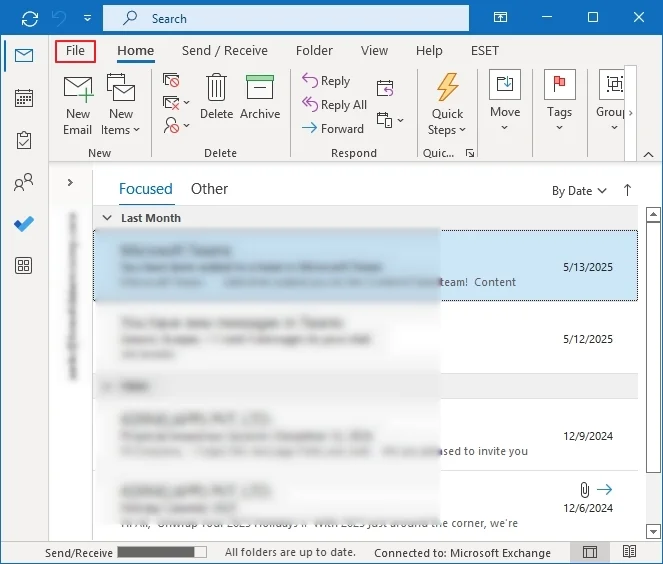
- Click Open & Export> Import/Export.

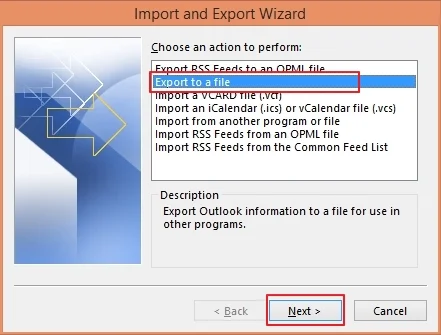
- Then select Export to a file and then click Next.
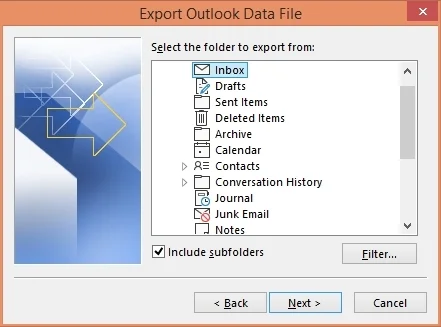
- Choose Outlook data file (.pst) as output type and select Namecheap account.
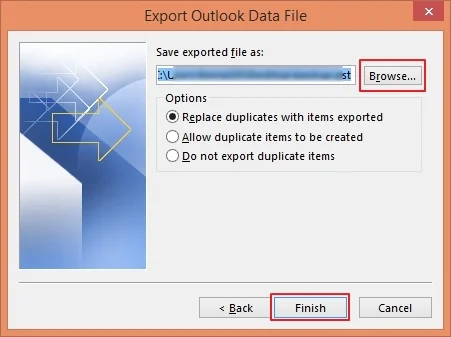
- Click Next and Browse to provide the saving destination.
- Click Finish to complete export.
Step 2: Import PST to Office 365
In the next step, we need to import the resultant PST file from the previous step to Office 365 as follows:
- Open Outlook and go to File> Open & Export > Import/Export.
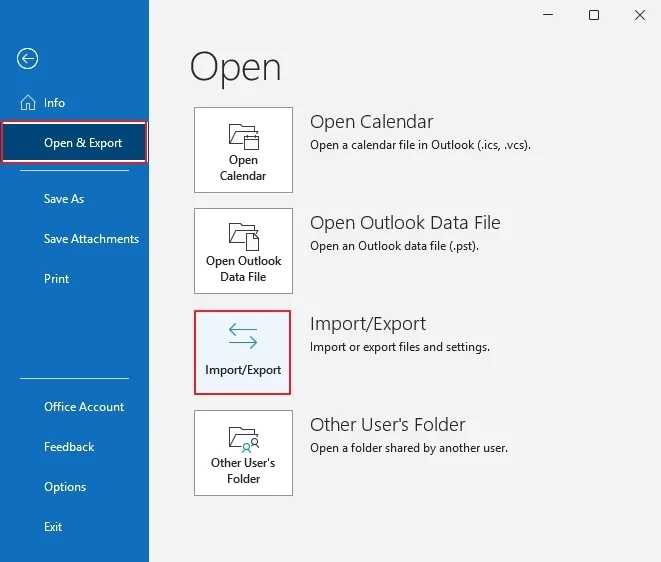
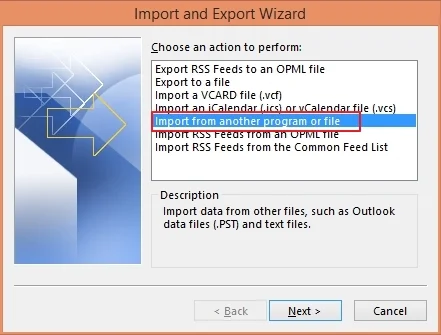
- Select Choose Import from another program or file, and then Next.
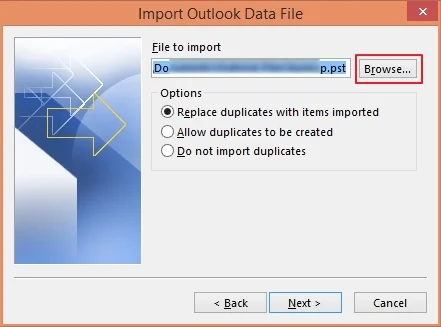
- Provide the path of the PST file from your system.
- Choose the Office 365 account and then import items into the same folder.
- Click Finish to transfer mails from Namecheap to Office 365 account.
What are the drawbacks of manual methods?
When you try to manually migrate Namecheap emails to Office 365, there are certain drawbacks that you must consider, such as:
- Not suitable for migrating large mailboxes.
- Risk of losing critical business data during the process.
- Do not support migration of filters and signatures.
- It takes a lot of time to migrate each folder individually.
Conclusion
As time passes, business size expands along with the expansion of resources, storage, and security. In such scenarios, email clients like Namecheap often fail to fulfill what businesses look for. Therefore, migrating from Namecheap to Office 365 mailbox seems to be a suitable choice in such a case to access high-end features. Use the above manual methods to migrate mailboxes, but you cannot rely on them for accurate migration. To avoid complications, use reliable IMAP to Office 365 migration tool, like Kernel IMAP to Office 365 tool that helps to migrate mailboxes with precision and 100% accuracy.