Unfortunately, the process of migrating Public Folders is complicated. Luckily, if you are migrating from Exchange 2013 or Exchange 2016, then Microsoft has made things a bit easier for you, but it is still going to be a little bit tricker and more complicated to migrate Public Folders to Office 365.
So, here in this blog, we will discuss how to migrate Public folders from Exchange 2013 or Exchange 2016 to Office 365. But before we get onto the migration, we need to ensure that we hit the following migration prerequisites:
- Exchange Version: Exchange 2013 all cumulative updates, Exchange 2016 all cumulative updates, and Exchange 2019
- Exchange Online Permissions: Mailbox has root permission to access the public folder
- Local Exchange Permissions: Users must have admin privilege.
- Public Folder Mailbox size 50 GB contains one or more folder have 50 GB
- MRS Proxy service running on one of your local Exchange Servers
Overview
The process to migrate Public Folders to Office 365 can be broken down into the following steps:
- Download the Migration Scripts
- Prepare your local server
- Prepare Exchange Online
- Create Migration files
- Create public folder mailboxes and a single public folder and assign the root permission of a mailbox
- Start the migration
- Lock access to the old public folders
- Finish the Migration (Switchover to Exchange Online)
- Test
- Complete the Migration
Download all of the following scripts - https://www.microsoft.com/en-us/download/details.aspx?id=54855
I recommend saving them all in a folder called C:\PFScripts to make following this article easier.
Only the following versions of the Exchange server are supported by these scripts
- Add your onmicrosoft domain to your local server New-AcceptedDomain -Name PublicFolderDestination_MigrationPF -DomainName "example.mail.onmicrosoft.com" -DomainType InternalRelay
- We need to rename any public folders whose name contains a backslash '\'
Get-PublicFolder -Recurse -ResultSize Unlimited | Where {$_.Name -like "*\*" -or $_.Name -like "*/*"} | Format-List Name, Identity, EntryId
- If this comes back with any results, simply rename the public folder without the backslash.
- Now we need to check for the existence of any previous successful or failed migration attempts.
Get-OrganizationConfig | Format-List PublicFoldersLockedforMigration,
PublicFolderMigrationComplete,
PublicFolderMailboxesLockedForNewConnections,
PublicFolderMailboxesMigrationComplete- If this command returns true for any of the options, then you need to run this to reset them
Set-OrganizationConfig -PublicFoldersLockedforMigration:$false -
PublicFolderMigrationComplete:$false -
PublicFolderMailboxesLockedForNewConnections:$false -
PublicFolderMailboxesMigrationComplete:$false
- Let’s take a snapshot of the existing structure so we can verify the success of the migration afterward
Get-PublicFolder -Recurse -ResultSize Unlimited | Export-CliXML OnPrem_PFStructure.xml
Get-PublicFolderStatistics -ResultSize Unlimited | Export-CliXML OnPrem_PFStatistics.xml
Get-PublicFolder -Recurse -ResultSize Unlimited | Get-PublicFolderClientPermission | Select-Object Identity,User -ExpandProperty AccessRights | Export-CliXML OnPrem_PFPerms.xml
Get-MailPublicFolder -ResultSize Unlimited | Export-CliXML OnPrem_MEPF.xml
- Put all the files generated above in the C:\PFMigration folder
Open an Exchange Online Shell, connect to Exchange Online, and then do the following:
- We need to check that there are no existing migration requests
Get-PublicFolderMigrationRequest | Get-PublicFolderMigrationRequestStatistics
Get-MigrationBatch | ?{$_.MigrationType.ToString() -eq "PublicFolder"}
- We need to check that PAW is enabled
- Get-MigrationConfig
- Look under the features heading
- If you can see PAW listed, carry on; if it is not enabled, you will likely need to speak to Office 365 support.
- In the Exchange Online EAC, check that there are no existing public folder mailboxes; if there are, delete them.
Open Exchange PowerShell on your local Exchange server, change the directory to C:\PFScripts run the following commands
.\Export-ModernPublicFolderStatistics.ps1 PublicFolderstats.csv
.\ModernPublicFolderToMailboxMapGenerator.ps1 -MailboxSize 25GB -MailboxRecoverableItemSize 1GB -ImportFile .\publicfolderstats.csv -ExportFile C:\PFMigration\map.csv
If you’ve previously done Exchange 2007 or 2010 Public folder migrations, you'll be relieved to learn you only need to generate these two files.
In Exchange Online, mailboxes act as the backbone for the Public Folder storage, and we need to create these mailboxes before we can create public folders. Connect to Exchange Online PowerShell and run this script:
$mappings = Import-Csv C:\PFMigration\map.csv
$primaryMailboxName = ($mappings | Where-Object FolderPath -eq "\" ).TargetMailbox
New-Mailbox -HoldForMigration:$true -PublicFolder -IsExcludedFromServingHierarchy:$false
$primaryMailboxName
($mappings | Where-Object TargetMailbox -ne $primaryMailboxName).TargetMailbox | Sort-
Object -unique | ForEach-Object { New-Mailbox -PublicFolder
-IsExcludedFromServingHierarchy:$false $_ }
It’s time to get the migration started! From your Local Exchange Server, open Exchange Shell, change the directory to C:\PFscripts, and run the following command
.\Sync-ModernMailPublicFolders.ps1 -Credential (Get-Credential) -CsvSummaryFile:sync_summary.csv
When prompted, enter the login details for your Exchange Online admin account.
Now switch to Exchange Online PowerShell and do the following,
$Source_Credential = Get-Credential domain\exchangeadmin
(replacing the domain \ user name with your own)$Source_RemoteServer = "server.domain.com"
(replacing the server name with the name of your MRS Proxy Server)- Run this Script
PfEndpoint = New-MigrationEndpoint -PublicFolder -Name PublicFolderEndpoint
-RemoteServer $Source_RemoteServer -Credentials $Source_Credential
[byte[]]$bytes = Get-Content -Encoding Byte C:\PFMigration\map.csv
New-MigrationBatch -Name PublicFolderMigration -CSVData $bytes -SourceEndpoint
$PfEndpoint.Identity -NotificationEmails email@domain.com - Start the Migration
Start-MigrationBatch PublicFolderMigration
Now, we need to stop people using the existing on-premises public folders from being able to access them. To do this, open Exchange Shell on any of your Exchange servers
Set-OrganizationConfig -PublicFolderMailboxesLockedForNewConnections $true
It can take up to 2 hours to replicate and take effect for all users.
Connect to Exchange Online PowerShell and run this command
Complete-MigrationBatch PublicFolderMigration
Before unlocking the new public folders for all users, I would recommend testing that the migration has been completed successfully. To do this, assign yourself or some test users access to the new public folders
Set-Mailbox -Identity <test user> -DefaultPublicFolderMailbox <public folder mailbox identity>
Once you have confirmed everything looks ok, you can unlock the public folders for all users
Set-OrganizationConfig -RemotePublicFolderMailboxes $Null -PublicFoldersEnabled Local
Finally, run the following two commands on your local Exchange server
.\SetMailPublicFolderExternalAddress.ps1 -ExecutionSummaryFile:mepf_summary.csv
Set-OrganizationConfig -PublicFolderMailboxesMigrationComplete:$true -PublicFoldersEnabled Remote
And that’s it; you are finally done! If you want an easier route to migrate Public Folders to Office 365, consider trying an automated tool which we discussed below:
Easy migration with Kernel Migration for Exchange
If you are looking for a quick and hassle-free method to migrate public folders to Office 365, then you must try Exchange Migration tool, which is a perfect choice to migrate public folders to any desired destination. The tool migrates public folders to Office 365 along with all its permissions and limits. Before starting the migration, it lets you run a pre-migration analysis and understand the time required for the migration. It also provides an option to undo the migration process if it is interrupted midway due to any situation.
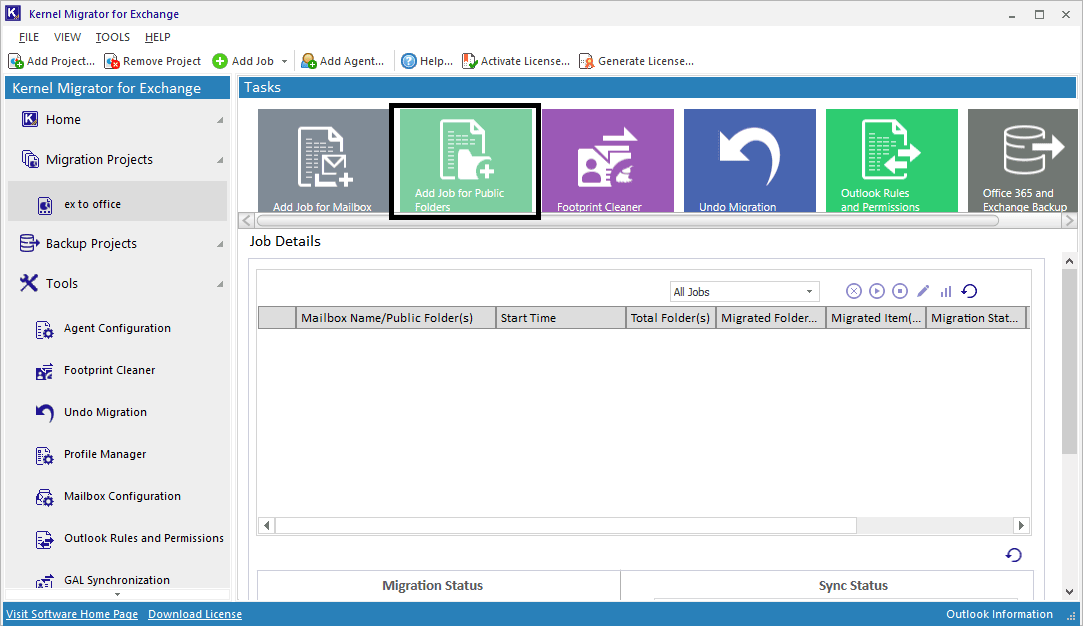
- Open Kernel Migration for Exchange software application. Click Add Project from the home screen to add a project. Now click on Add Public folders.
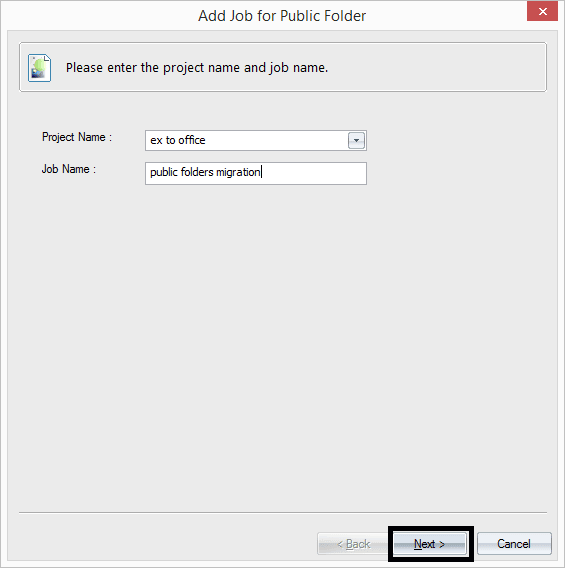
- Provide a job name and click Next.
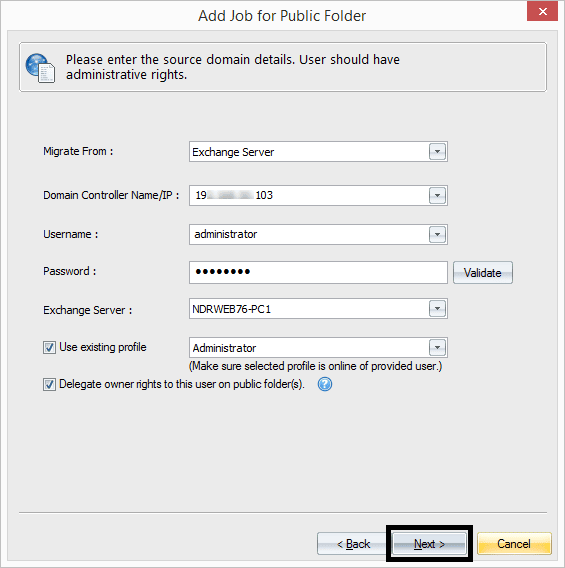
- Enter the source domain (Exchange 2013) login details. Validate those details with the Validate option. You can Use the existing profile also and delegate owner rights to this user on public folder(s). After providing complete information, click Next.
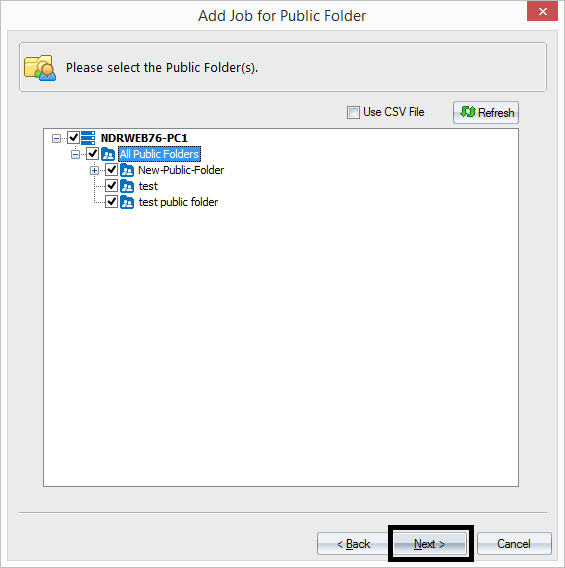
- Select the required public folders from the retrieved list and then click Next.
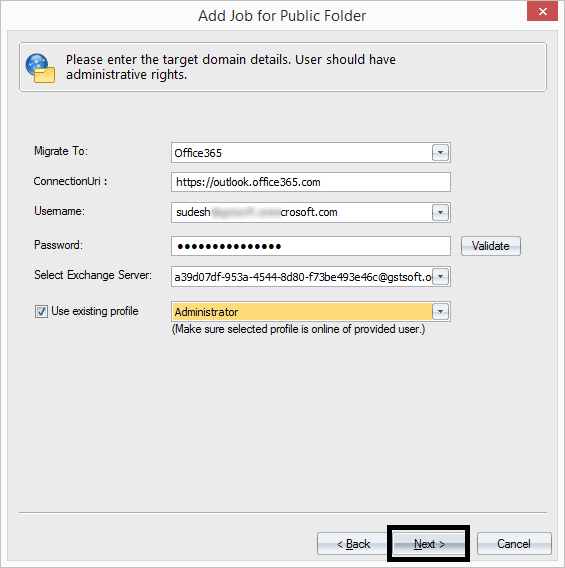
- Provide the target domain (Office 365 account) details like username and password. Validate them with the given option. Click Next.
- Apply the filters like Message classes, Date range, etc., and click Next.

- Select the options to manage bad items and synchronization. Then click Next.

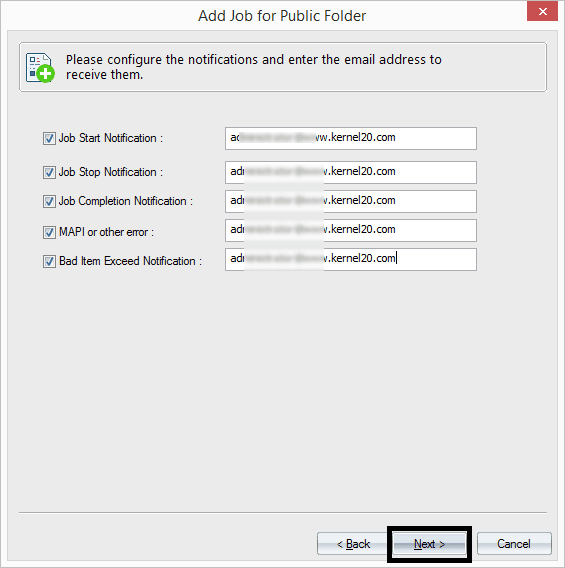
- Provide the e-mail address to set notifications as per your need and click Next.
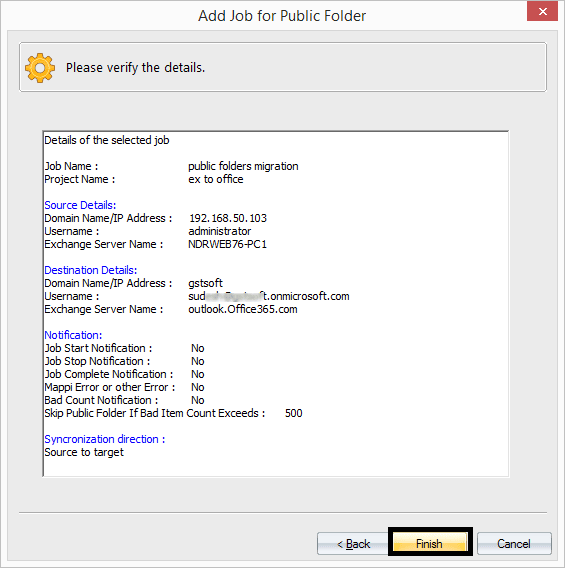
- Verify the details given in the summary and click Finish to start the migration.
Within minutes, the migration of Exchange public folders to Office 365 is finished and the migration status is shown.
Thus, you can perform migration of Exchange and Office 365 swiftly using Kernel Migration for Exchange.
Conclusion
As you can see from the above discussion, the manual process is lengthy and complicated. It will take a lot of time to complete and not be 100% error-free. So, as an alternative, you can try an advanced third-party tool named Kernel Migration for Exchange. It can securely migrate Public folders to Office 365 with complete data integrity. The tool supports all versions of Exchange Server, Exchange Online, and Hosted Exchange. You can download its free trial version to learn more about the tool.