Read time: 9 minutes
Summary: Over Exchange server, organizations now prefer Office 365 due to features like advanced productivity, improved collaboration, wider integration, etc. They also get remote accessibility, fewer infrastructure costs, improved email reliability, etc., to make their operation smoother and more effective. This article explains how to migrate Exchange to Office 365, covers migration type, methods, step-by-step execution, professional recommendations, etc. It also tells how a professional Exchange migrator tool will help you out with minimal downtime.
Emails are now the backbone of every organization for business communication. But managing on-premises Exchange servers has become more costly and difficult today due to a convergence of heightened security risks, significant licensing price hikes & end-of-life (EOL) for older versions. Hardware obsolescence & maintenance, security patching, limited scalability, disaster recovery, and many other issues push organizations to migrate Microsoft Exchange to Office 365.
On the other hand, Microsoft 365 (formerly Office 365) offers cloud-based email management with high availability, built-in security features, automatic updates, etc. As a result, Exchange to Office 365 migration is now a strategic move for businesses of all sizes.
This article explains everything you need to know, be it planning or execution, so that you can migrate Exchange server to Office 365 smoothly. After going through this, you’ll be able to decide what would be best, either native methods or a professional Exchange migration tool, for zero data loss with protected downtime migration.
Types of Exchange to Office 365 Migration
Based on your environment, you need to choose the right migration method before you migrate Exchange to Office 365.
| Scenario | Migration Type |
|---|---|
| Small Organizations | Cutover migration is often the best choice. |
| Medium-Sized Organizations | Staged migration can be ideal for more flexibility. |
| Large Organizations | Hybrid migration has more flexibility and control, but requires more effort to set up. |
| Non-Exchange Environments | IMAP migration or PST migration works well for transitioning to Office 365. |
| Complex Scenarios like selective migration, bulk data with zero data loss, unlimited migration, etc. | Professional solutions are the best option. |
1. Cutover Migration
Cutover migration migrates all Exchange mailboxes to Office 365 at once. Since it completes quickly, only small organizations prefer this method. Apart from that, it causes a short service disruption during the final migration. It is best for:
- One-time, fast migration
- Exchange 2003, 2007, 2010, 2013.
- Small business.
- Fewer than 2000 mailboxes.
2. Staged Migration
Staged Migration allows Exchange admins to migrate mailboxes in batches over time in multiple batches, and the user can continue their work without disruption. It continues to operate until the migration is fully complete. However, it is more complex than a cutover migration, as each batch needs to be managed carefully. It is best for:
- Migrate in phases.
- Exchange 2003 or 2007.
- Medium-sized organization.
- More than 2000 mailboxes.
3. Hybrid Migration
Hybrid migration allows organizations to establish a coexistence environment between their on-premises Exchange server and Office 365. It provides a smooth experience, where users on both platforms can send and receive emails as if they are on the same system. It is best for:
- Large organizations.
- More than 2,000 mailboxes.
- Organization having hybrid Exchange environment.
4. IMAP Migration
IMAP migration involves moving email data from non-Exchange email systems (Gmail, Yahoo, etc.) to Office 365. This method relies on the IMAP protocol to transfer email data, but it does not migrate calendars, contacts, or tasks. It is best for:
- A few mailboxes migration
- Migration only emails rather than contacts, calendars, etc.
- Organizations migrating from Gmail or other providers to Office 365.
5. Automated Migration
Automated migration means the migration job is done by using a professional solution, instead of manual methods. Professional Exchange Migration tools provide an advanced, automated process for migrating Exchange to Office 365. They offer additional features such as improved migration reporting and support for complex scenarios, such as hybrid setups, large mailboxes, and selective migrations. Also, they simplify the migration process and complete the job in a couple of minutes. It is best for:
- Specific data migration.
- All sizes of organization.
- Unlimited mailbox migration.
- Scheduled & controlled migration job.
- Error-free and zero data loss migration.
Prerequisites and Planning to Migrate Exchange to Office 365
To get successful and effective migration results, proper planning and meeting all prerequisites are essential.
Step 1: Plan the Migration
When planning for Exchange to Office 365 migration, understand your current Exchange setup first. For the same, check how many users you have, the Exchange version (Exchange 2010, 2013, 2016, & 2019), mailbox number, etc. Based on this, choose the migration type to avoid downtime and data loss. Also, go through the table below:
| Exchange Version | Supported Migration Types |
|---|---|
| Exchange 2003 | Cutover, Staged, Hybrid |
| Exchange 2007 | Cutover, Staged, Hybrid |
| Exchange 2010 | Cutover, Hybrid |
| Exchange 2013 | Cutover, Hybrid |
| Exchange 2016 | Hybrid |
| Exchange 2019 | Hybrid |
Step 2: Set Up Destination (Office 365)
After accessing the source environment, create an Office 365 tenant and add your company domain. Verify the domain using DNS records. After that, create users or sync them and assign Exchange Online licenses so mailboxes can be created in Office 365.
Step 3: Prepare the Exchange Server
Make sure the on-premises Exchange server is healthy and fully updated. Enable Outlook Anywhere and confirm that users can access email from outside the network. Do remember to take a full backup of Exchange before starting the migration.
Step 4: Configure the Migration
Log in to the Exchange Admin Centre in Office 365. Choose the migration option that fits your environment, provide Exchange administrator credentials, and create a migration batch. This allows Office 365 to connect to your Exchange server and copy mailbox data.
Step 5: Start the Mailbox Migration
Start the migration batch and monitor the process. Mailbox data will sync in the background with no disruption in workflow. Once syncing is complete, finalize the migration so that mailboxes move fully to Office 365.
Step 6: Update DNS Records
After migration is finished, update DNS records such as MX and Autodiscover to point email traffic to Office 365. All your new emails are delivered to Exchange Online.
Step 7: Test and Validate
It is the most important step, because it validates the migration condition. Ask your users to log in and confirm that email sending, receiving, calendars, and contacts are working correctly. Outlook usually reconnects automatically, but mobile devices may need re-login.
Step 8: Clean Up and Secure
If no longer needed, safely decommission the on-premises Exchange server. Enable security features like Multi-Factor Authentication and configure spam and phishing protection in Office 365.
Note: Effective Exchange to Office 365 migration relies on proper planning, careful execution, & accurate testing. When done correctly, you experience minimal disruption with the benefits of cloud-based email communication.
How to Migrate Exchange to Office 365: Step-by-Step Guide
For Exchange to Office 365 migration, you can use both GUI-based and command-based methods at your convenience. Go through each and pick for yourself, but before you start the migration, make sure the Exchange server is healthy and supported.
- Domain ownership must be verified.
- Exchange version must be 2010, 2013, 2016, or 2019 when migrating manually.
- The latest cumulative updates should be installed.
- Outlook Anywhere (RPC over HTTPS) is enabled.
- Valid public SSL certificate assigned to Exchange services.
- Mail flow is working internally and externally.
Method 1. Use EAC to Migrate Exchange to Office 365
If you’re comfortable with GUI-based steps, then using Exchange Admin Centre to migrate Exchange to Office 365 is a good choice. With this, you can migrate with accessibility and visual feedback. Here are the steps to follow:
- Open Exchange Admin Center and go to Migration, then tap on Migration Batches.
- Click New migration batch and select the Migration Type.
(Here we’ve chosen Cutover migration for complete data migration. You can choose any for yourself.) - Enter on-premises Exchange administrator credentials. Microsoft 365 automatically creates a migration endpoint.
- Once the above steps are performed, start the Migration Batch.
Note: At this stage, Microsoft 365 connects securely to the Exchange server and begins copying mailbox data.
- All user mailboxes are moved together.
- Email, calendars, contacts, and tasks are migrated.
- Users can continue working while data syncs in the background.
- The on-premises Exchange server remains active until migration is finalised.
- After a successful migration, check your data in Office 365.
- Once you have verified migrated data, update the DNS record route email to Microsoft 365.
Method 2. Use Exchange Management Shell to Migrate Exchange to Office 365
Users with strong expertise in common can also use the Exchange Management Shell to migrate Exchange to Office 365. As per the migration type, you need to perform specific commands. But as we’ve chosen cutover migration to migrate the entire Exchange to Office 365, we’ll follow the same. Here are the commands to execute:
- Open Exchange Management and connect to your Exchange Online environment. Execute the following command for authentication:
Connect-ExchangeOnline -UserPrincipalName admin@domain.com -ShowProgress $trueReplace admin@domain.com with your Office 365 admin account.
- Provide your on-premises Exchange admin credentials to authenticate against the on-premises Exchange server.
$onPremCred = Get-Credential - Create the migration endpoint using the correct settings for cutover migration.
New-MigrationEndpoint ` -Name "CutoverEndpoint" ` -ExchangeOutlookAnywhere ` -RpcProxyServer mail.domain.com ` -Credentials $onPremCred ` -Authentication Basic ` -EmailAddress admin@domain.com - Use the following command to create the migration batch and automatically start and complete the migration.
New-MigrationBatch ` -Name "CutoverBatch" ` -SourceEndpoint "CutoverEndpoint" ` -MigrationType Cutover ` -AutoStart ` -AutoComplete - Monitor the progress of the migration batch using the following command:
Get-MigrationBatch | Format-TableThis will show you the status of the migration batches (progress, completed, errors, etc.).
- Once the migration is complete, make sure that MX records and Autodiscover records point to Office 365. After all mailboxes have successfully migrated, disable the migration batch:
Get-MigrationBatch -Identity "CutoverBatch" | Set-MigrationBatch -Complete - Once the migration batch is completed, you can remove the endpoint with the command below:
Remove-MigrationEndpoint -Identity "CutoverEndpoint"
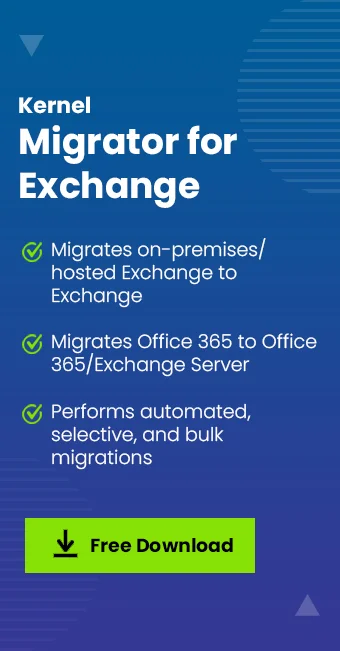
Ultimate Solution: Kernel Migrator for Exchange
Each manual method to migrate Exchange to Office 365, be it EAC (Exchange Admin Centre) or EMS (Exchange Management Shell), has its own drawbacks. You may face disrupted migration, data loss, higher setup cost, complex steps, mailbox limitations, etc., that may result in unfavorable outcomes. That’s where a professional Exchange migrator tool steps in.
Kernel Migrator for Exchange is one such top-quality solution that escapes all such inconveniences of manual approaches. It offers a fully automated process along with several features and capabilities to make the migration task smooth. A few advanced features are as follows:
- Migrate hosted Exchange to Office 365.
- Support for intra-forest, cross-forest, and hybrid migration.
- Migrate data across on-premises Exchange and Exchange Online.
- Custom filter for selective Exchange data migration.
- Scheduled migration feature to perform the job at a convenient time.
- Monitor migration progress with real-time notifications and alerts.
Last Say
This article has covered major exchange migration types, a step-by-step guide, and effective methods (EAC & EMC), respectively. However, manually migrating Exchange to Office 365 is cost-effective but may put you in trouble and give undesired results. If you’re not concerned about your data loss and time consumption, you can use it. But if you need all your data with metadata, using the recommended professional automated migration solution is wise. This feature-rich tool turns your complex migration task into an easier one. To get hands-on experience, get the trial version now!!
FAQs
Cutover (for a few mailboxes) or Hybrid Migration (for coexistence/minimal user impact) would be the migration type if you need to migrate Exchange 2016 to Office 365. However, you can use the professional automated solution for a more accurate and hassle-free migration.
To migrate Exchange 2013 to Office 365, key steps include:
Verify domain ownership.
Configure Azure AD Connect for user synchronization.
Run the Hybrid Configuration Wizard (HCW).
Create migration batches
Updating DNS records (MX/Autodiscover), once done.