Read time 6 minutes
Organizations now prefer hosted Exchange over on-premises installation for their emailing requirements. This is primarily due to convenience and cost considerations. On-premises Exchange Server deployment is complicated and expensive. While considering installation and infrastructure costs, hosted Exchange is simple as it is subscription-based. Also, it doesn’t require initial investments or experienced engineers for the maintenance of the systems.
Effectively, hosted Exchange is more suitable for small and medium-sized enterprises. So, many business organizations migrate to hosted Exchange when they realize the cost-effectiveness of hosted Exchange. If you are looking for manual methods instead of professional ways for the migration of on-premises Exchange to hosted Exchange, you will soon find that executing such methods would be a hectic task.
Features of Hosted Exchange That Attract Enterprises
A few compelling features of Hoisted Exchange are as follows:
- No initial investments in infrastructure are required.
- As the infrastructure is maintained by the service providers, organizations have no headache of maintaining on-premises servers.
- Hosted Exchange is more scalable than on-premises Exchange (as no hardware upgrade is needed).
- Ready to use after subscription (but in on-premises, the full burden of installation and configuration is on the Exchange administrators).
These advantages persuade many organizations to migrate from on-premises Exchange to Hosted Exchange.
How to Migrate from On-premises Exchange to Hosted Exchange?
When a migration is required between any two Exchange versions (example Exchange 2010 to 2016 migration, Exchange 2013 to 2016, etc.), selecting free manual ways is not a good option due to:
- Higher chances of data loss issues.
- Consecutive steps needed to be performed.
- Complex mapping procedure.
- Timeout failure with larger mailbox size.
- Advanced configurations, permissions, or specific sub-folders may hamper.
Therefore, professional Exchange migration software is the requirement of the time when you need to migrate data from on-premises Exchange to hosted Exchange. Kernel Migration for Exchange is a software developed to perform crucial Exchange and cloud migrations in a simple way.
It can migrate from/to any Exchange version to another, from Office 365 to Exchange, and Exchange to Office 365 migration. Migration between on-premises and hosted Exchange is a simple affair for this utility. It can move only the required data from the source to the destination, i.e., Hosted exchange at your preference.
Step-by-Step Process to Migrate On-Premises Exchange to Hosted Exchange
Let’s understand how to perform on-premises Exchange to hosted Exchange migration.
- First, download the software from the website, install it on your system, and then launch it.
- Click on Add Project to add a project for the migration process.
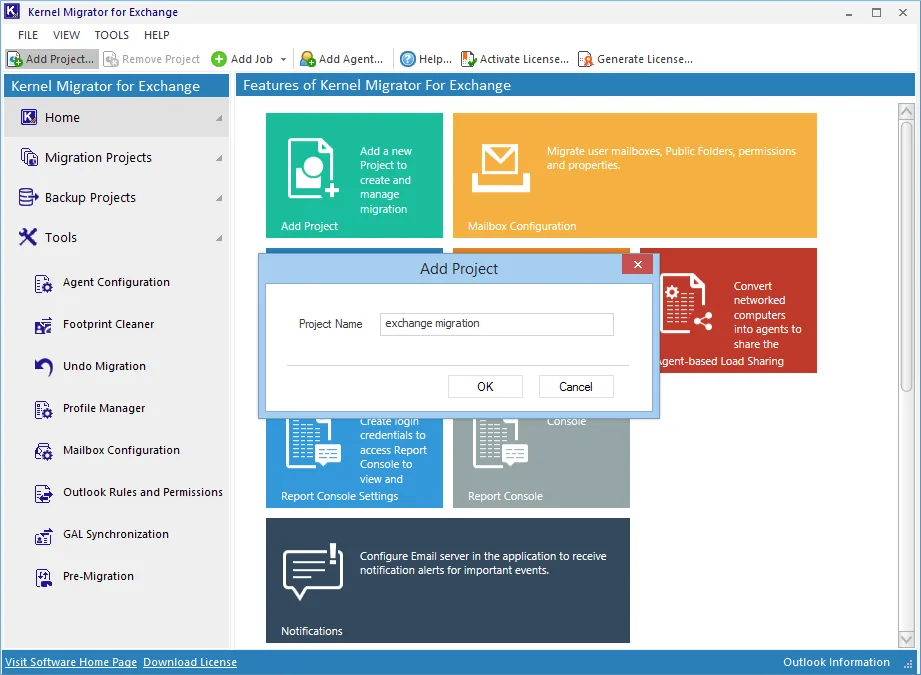
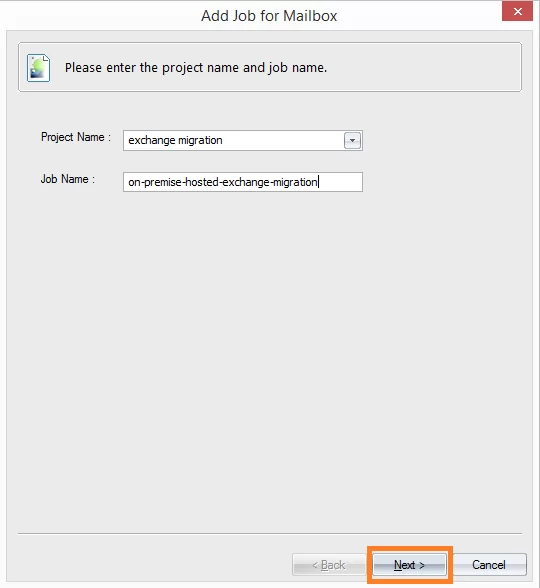
- Enter the project name and click OK. Now, create a Job. Click Next.
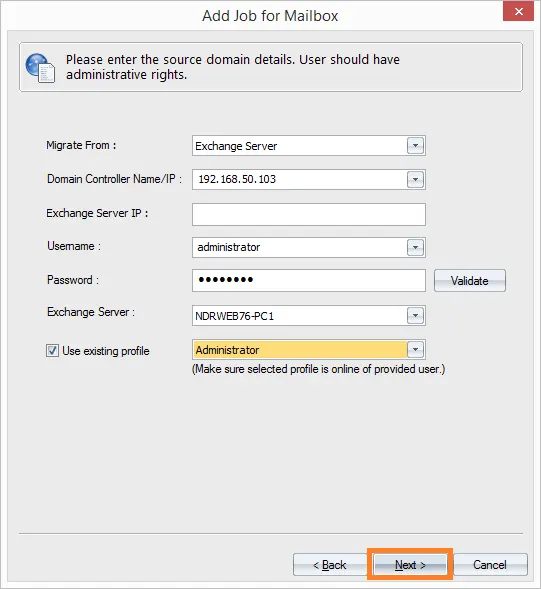
- Provide the on-premises Exchange login credentials – domain name/IP, Username, Password, etc. and click Next.
- Select the desired mailboxes from the list for the migration and click Next.
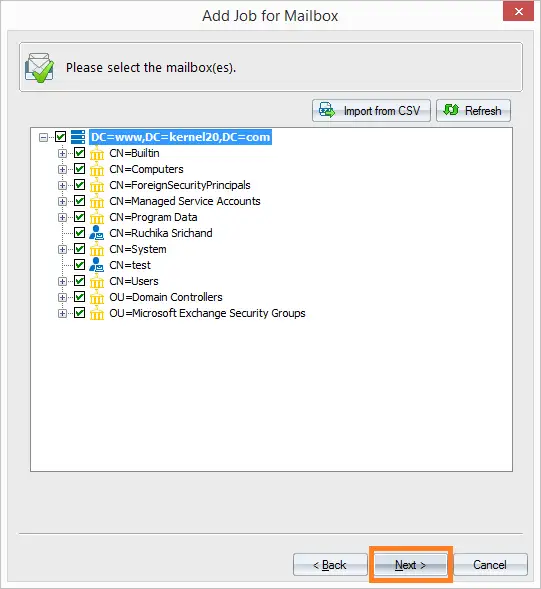
- Provide the hosted Exchange details (username, password, etc.) to add it as the target. Click Next.
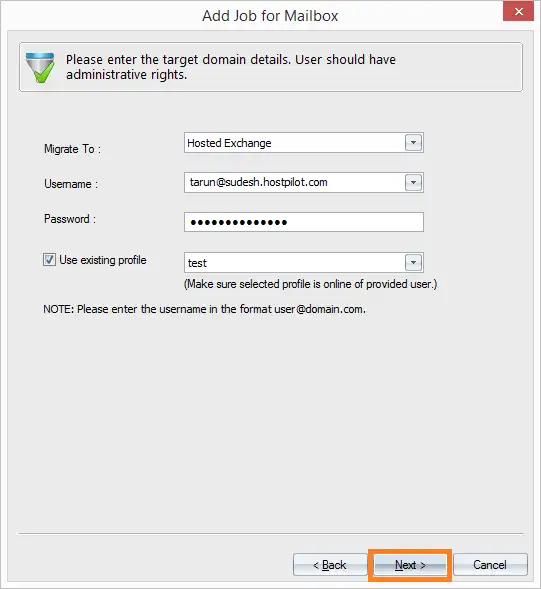
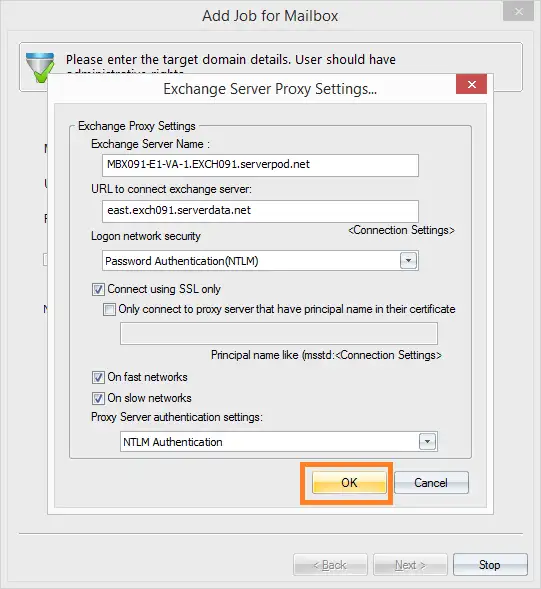
- Hosted Exchange details will be automatically retrieved by the software. Click OK to move further.
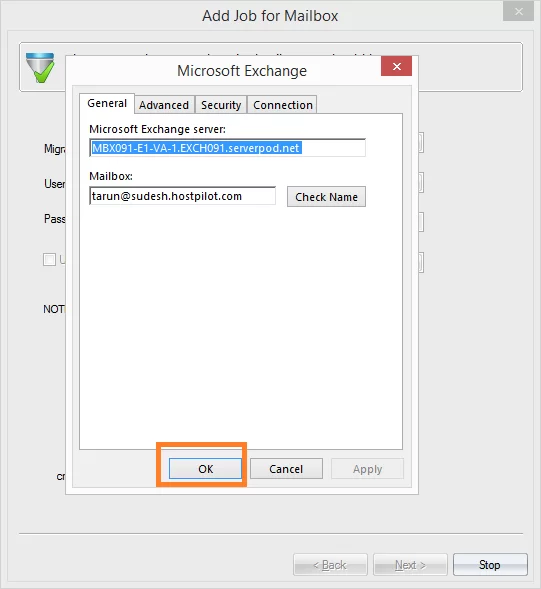
- Hosted Exchange gets added finally. click OK.
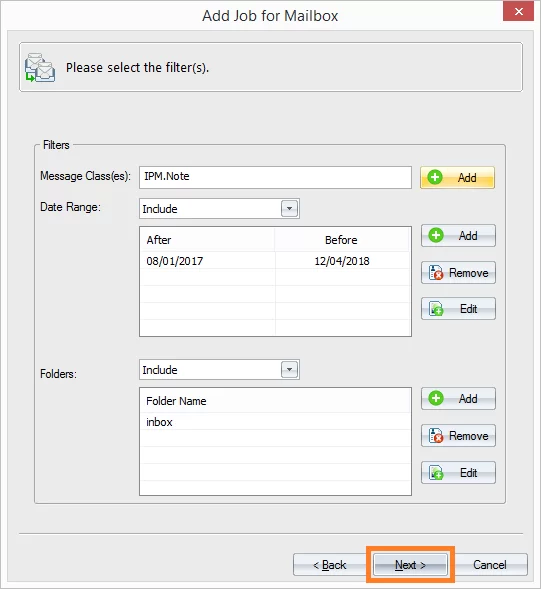
- Apply the filters as per requirement, message filters, data range filters, folder filters and click Next.
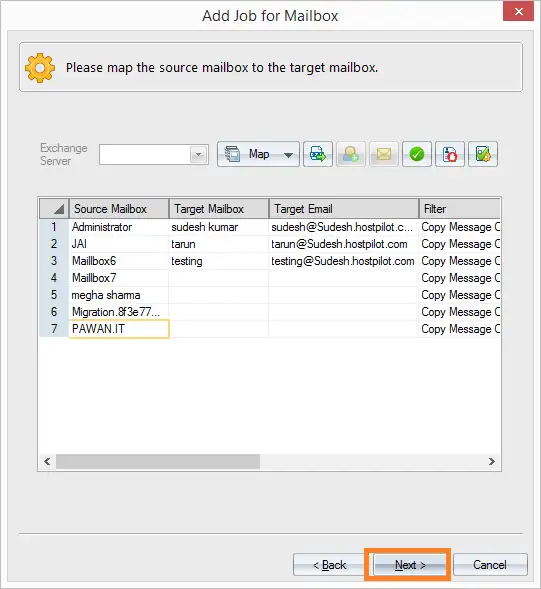
- Map source mailboxes with target mailboxes manually or using CSV, and click Next.
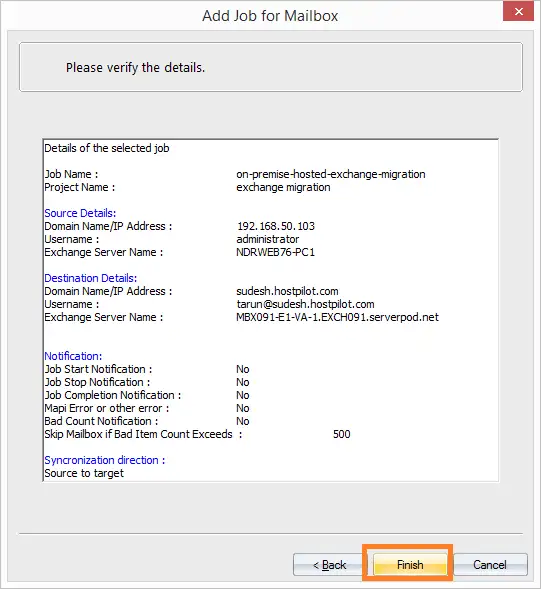
- Also, you can manage Bad Items, configure Synchronization and Notification settings, and specify migration schedule using this tool. Then a summary is generated for the process; review it and click Finish to carry on with the migration.
- After this, migration will take some time to complete; finally, the migration summary is displayed.
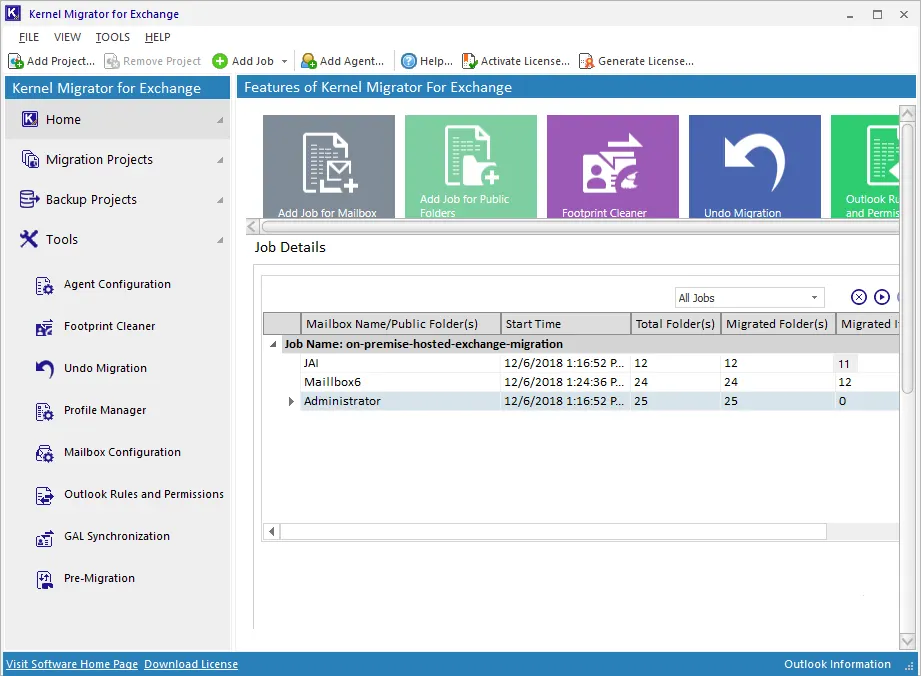
Thus, you have conveniently migrated from on-premises Exchange to hosted Exchange successfully.
Conclusion
When there is a need for migration from on-premises to hosted Exchange, it should be taken seriously, and a reliable method of migration should be chosen. Save your precious time by installing Kernel Migration for Exchange tool. It has advanced filters and other features for selective data migration. Error-free data migration is guaranteed with the software. Apart from this migration, it supports other migrations like Live Exchange Server to Office 365 and vice versa as well. Try demo version to understand the features today!!