Read time 10 minutes
When Exchange Server 2010 was launched, it brought a new set of technologies, features, and services to the Exchange environment. Its main goal was to support people and organizations to evolve their work habits from communication focus to a collaboration focus. It helped to deploy Exchange 2010 on-premises and also host some mailboxes in the cloud.
As the end of support for Exchange 2010 is coming closer, businesses are left with no option other than moving to a new platform. There are various options available to migrate from Exchange 2010, such as Exchange 2019, 2016, or Office 365.
Well, some companies want to upgrade to the latest environment, while others plan to move to Office 365. But, which platform is ideal for you – Exchange 2019 or Office 365? Let’s have a look at it.

Download Kernel Migrator for Exchange to Migrate Exchange Server 2010 data to Office/Microsoft 365 without any interruption and in quick time.
Exchange 2019 Vs. Office 365
As per Microsoft, if you are looking for features like collaboration from anywhere and zero initial investment, then moving to cloud is the best option. However, for organizations that are restricted from moving to cloud due to legal and compliance requirements, Exchange 2019 is the right option for them.
We know selecting between these two platforms is very challenging. Earlier,
Following reasons that might encourage you to stay with Exchange 2019 are:
- If you don’t believe in the security of cloud completely and want full control over your data
- If you rely on logs for analysis
- If you need instant support for any queries related mail servers
- If you don’t want to invest in the cloud or have to maintain a budget
Why Choose Office 365 over Exchange 2019?
Office 365 offers some great benefits to its users which makes it an essential requirement for every business. Apart from SharePoint, OneDrive, and Skype platform, office 365 is embedded with some other benefits also, such as:
- Flexibility and cost management:
Office 365 offers great flexibility over its subscription plans. You can choose from a category of subscription plans depending upon your needs. Also, with Office 365 subscription plans, you only have to pay for what you use. With one license of Office 365, you can access SharePoint Online, Skype for Business, OneDrive, and Sway all at one place (depending on your plan).
- No risk of data loss:
As you know, Office 365 is backed by Microsoft – one of the trusted vendors for providing cloud services. So, there is no risk of losing your data. Also, Microsoft offers high uptime for Office 365 data.
- Security and Compliance:
When it comes to storing data on the cloud, security is a major concern for every organization. That’s why moving to Office 365 is one of the best options because it offers many advanced security and compliance features.
Because of these benefits, every organization would want to move to Office 365. But, before performing the migration, there are some things that you need to know about.
Preparing for Exchange 2010 Migration to Office 365
Before migrating from Exchange 2010 to Office 365, you need proper planning. There are some things that you need to ask yourself before starting the migration.
- Do you really need to move to Office 365?:
The first question you should ask yourself is “Do you really need Office 365?” Analyze the features offered by Office 365 and your needs. Analyze the main reason for migration, its financial viability, and the potential benefits. Also, compare the charges of Office 365 with the cost maintenance of Exchange on-premises environment.
- Change your Domain Name System records:
To switch to Office 365 from Exchange, you’ll have to verify your DNS records to prove that you own the domain. Changing the DNS records allow you to direct your emails to the new mailboxes. Otherwise, the emails will be sent to the old server.
- Have a password policy in place:
To move to Office 365, it’s necessary to have a password policy in place. After moving to Office 365, users be able to access their mailboxes from anywhere over the Internet, which increases the chances of hacking. However, Office 365 provides multi-factor authentication. So, you don’t have to worry about it much.
- Functions that you have in your old emails:
When you connect with a new mailbox, functions like autocomplete file, signature, or reattaching PST files can disappear. However, if you can recreate them in the email server, then it shouldn’t be a problem for you. Also, these functions can be migrated as well, but it’ll require some extra work.
After considering all these points, train your employees and partners so that they’ll be comfortable with the new work environment. If your employees are not trained enough, they may find it difficult in the initial stages of Office 365 adoption.
Migrating to Office 365
After planning the Exchange 2010 to Office 365, you can easily start the migration process. Now, the question arises how to migrate to Office 365 from Exchange 2010. Well, Microsoft provides manual methods to migrate Exchange 2010 mailboxes to Office 365. Generally, there are three manual methods to migrate Exchange to Office 365. But, Exchange 2010 only supports two methods. Let’s have a look at these manual methods.
- Cutover or Express Migration:
Cutover migration is a manual process that allows users to migrate their mailboxes to Office 365. However, you can only perform this process if you’re migrating less than 2000 mailboxes. Also, it is recommended that you migrate 150 users or less at one time because it can take a lot of time to migrate 2000 mailboxes at once. You can implement the Cutover migration from the Exchange admin center.
Express migration is similar to Cutover migration, and also known as Minimal Hybrid. It is considered as another effective method to migrate Exchange mailboxes to Office 365. However, it is a long process as it takes a couple of weeks or less to migrate Exchange mailboxes to Office 365. There are several steps involved in express migration, such as:
- Verifying domain ownership
- Beginning the Express migration process
- Create users in Office 365 by running directory synchronization
- Provide Office 365 licenses to the users
- Migrate user mailbox data
- Updating DNS records
To know in detail, how to go to the Office 365 Admin Center.
- Hybrid Migration:
For Exchange 2010 to Office 365, Hybrid deployment should be the first preference. Hybrid deployment allows you to maintain both on-premises and online mailboxes for your organization. However, it is more complicated than cutover or expresses the migration method.
- One advantage of Hybrid migration is that it offers a hybrid environment of both on-premises Exchange and Office 365. Also, it is the only migration method that allows mailboxes to be off-boarded from Office 365 to Exchange on-premises without using third-party tools. You can perform Hybrid Migration for Exchange server if you have more than 150 and less than 2000 mailboxes.
- But there is one drawback of using Hybrid migration, it relies on directory synchronization. And if for some reasons an organization cannot implement directory synchronization, then they’ll have to use a third-party tool or other manual methods.
You can migrate data using manual methods, but the process of migrating will be very complicated and time-consuming. So, you should look for a third-party solution that allows quick and easy migration of Exchange 2010 mailboxes to Office 365 without any data loss.
Migrate Exchange 2010 to Office 365
Kernel Migrator for Exchange is a specially designed tool that offers quick and easy migration of Exchange mailboxes to Office 365. You can migrate mailboxes as well as public folders with this software. Also, the pre-migration analysis of the software allows you to eliminate any risks involved in the migration process. Now, let’s see the steps, how this tool works:
Note: To migrate Exchange 2010 mailboxes to Office 365, you’ll have to create a migration job.
- Open the tool and select the project under “All projects” tab in the left pane, and then select “Add Job.”

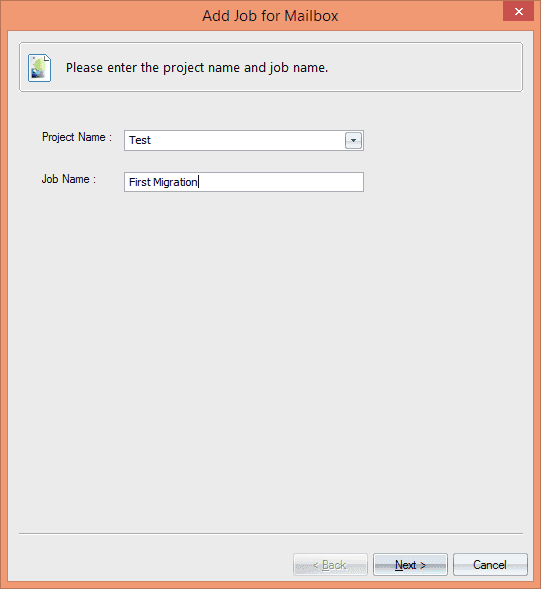
- The “Add job for mailbox” wizard will appear on the screen. Select the project name and enter a job name and click “Next.”
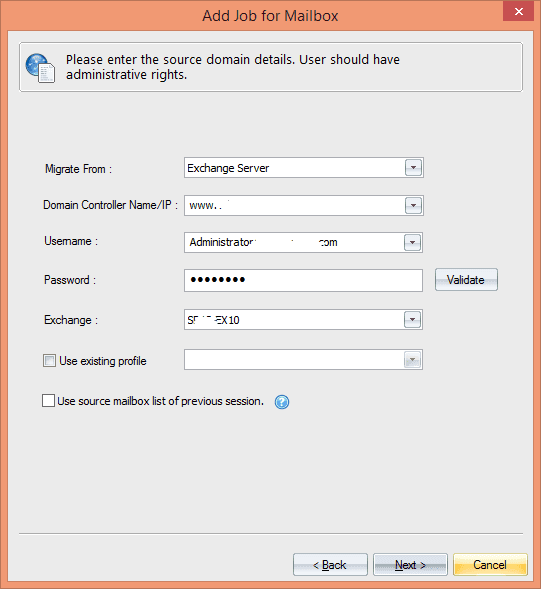
- After adding the job type, select Exchange Server as a source to add Exchange 2010 mailboxes.
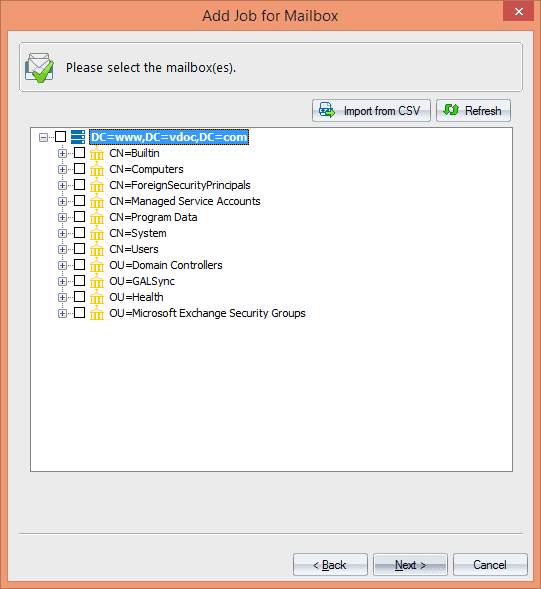
- Now, select the mailboxes that you want to migrate. You can also import mailboxes using a CSV file and click “Next.”
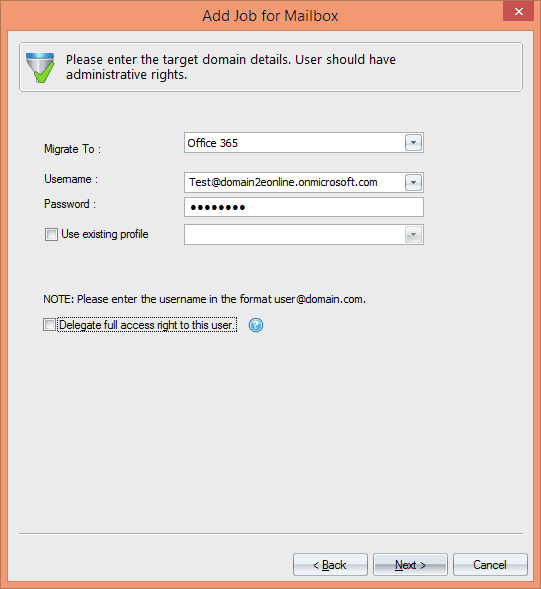
- After adding the source, you’ll have to select Office 365 in the target (Destination) field. Enter the required information and click “Next.”
- It allows users to set specific filters to the mailboxes. Select the filters that you want to apply and click “Next.”
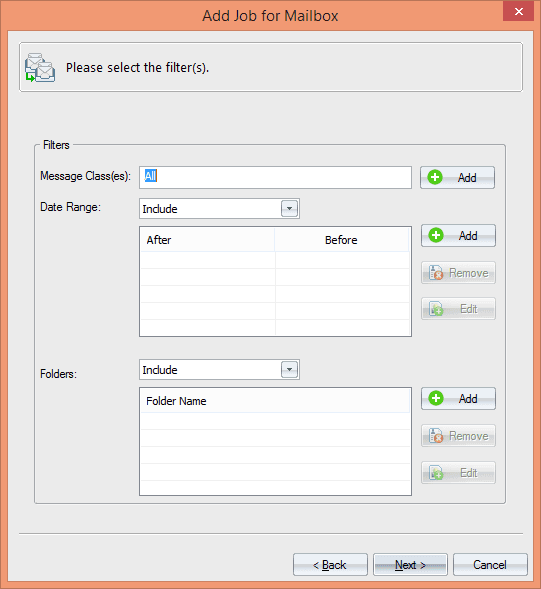
- Map the source Exchange mailboxes with the target Office 365 mailboxes. Click “Next.”
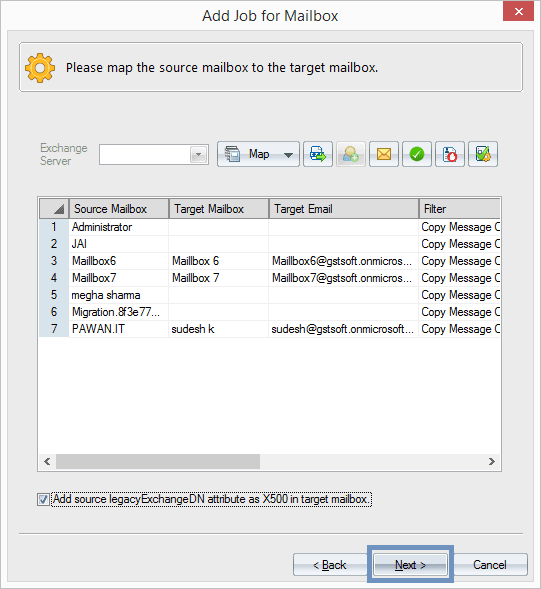
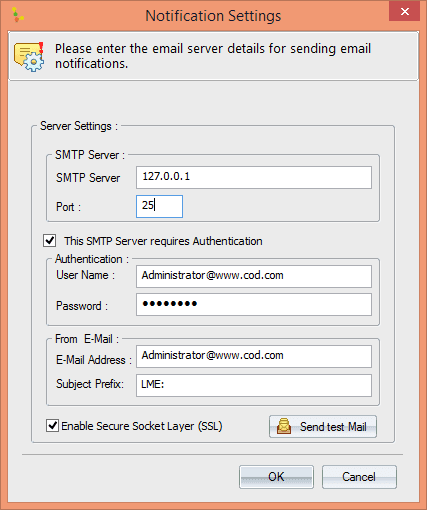
- In Notification Settings, provide the necessary details to receive email notifications and click “Next” to proceed.
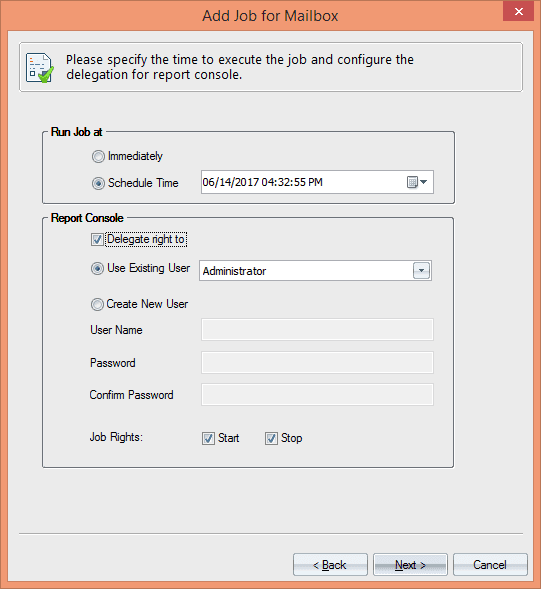
- With this tool, you can also schedule or run the migration job instantly. Click “Next” after scheduling the period for migration. Here is an example of schedule migration job.
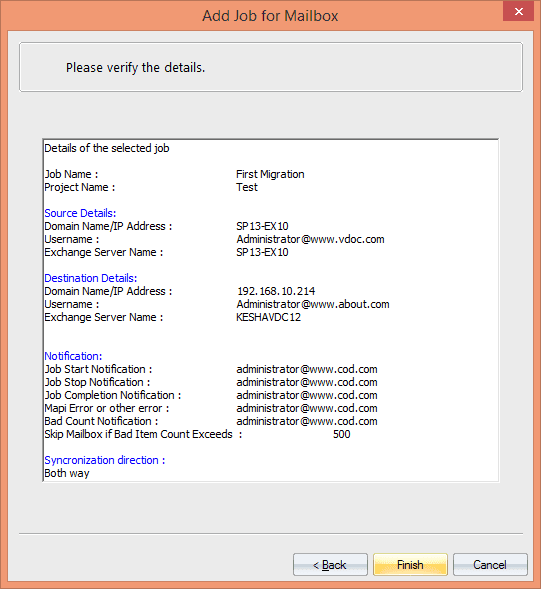
- After clicking “Next,” the tool will display the migration summary before starting the migration. If the summary is ok, then click “Finish” to start the migration process. Otherwise, press “Back” button to make any changes in the migration job.
Conclusion
Migrating data from Exchange 2010 to Office 365 has become a necessity for businesses to manage their data more effectively. However, the manual methods are not that efficient for migrating mailboxes. So, try any third-party tool. And it is known as the best Exchange Migration software for migration.




I love recommending this tool to those who are serious about switching from MS ES Exchange to Exchange Online. Its graphical interface is impressive and also very helpful in the migration process. If somebody wants to try it, then it goes with challenge.
I was using Microsoft Exchange Server 2010 but due to some security issues and flexibility requirements, I want to switch to Office 365. Then I Googled and found this amazing Kernel Exchange Migration tool. It is an excellent tool for this migration need.