Read time: 8 minutes
- Try out filters, make Lightroom adjustments & increase image sharpness.
- Add vignetting effect, white balance, noise reduction, etc.
- Use AI-powered tools such as Canva, Picsart, and Photoroom.
- Use Kernel Photo Repair if the picture or photo is corrupted severely.
High-quality photos are highly effective in creating a positive online presence. Whether you’re an avid photographer, photojournalist, digital marketer, or even an amateur artist, you need images to promote your business. Low-quality photos send the wrong message and decrease engagement with potential customers. So, if you have been struggling to get good quality shots or trying to bring life out of lifeless images, you don’t need to worry. Here are pro tips that will help to fix the quality of a photo as well as transform your formerly dull and lackluster photographs into eye-catching visuals.
Know About Bad Quality Image Before How to Fix Quality of Picture
Any image that looks blurry, faded, or lacks details or sharpness, often caused by a low number of pixels, excessive file compression, or poor lighting, is considered a bad quality image. Here are some causes and characteristics of a bad-quality image:
Stretching an image with too low pixels makes individual squares of color visible and gives a blocky or mushy appearance.
- Camera sensors taking pictures in low light environments capture grainy images.
- Improper enlargement of images often results in low quality, creating a blurry image.
- Compressed image files can remove data, which leads to visual distortions, blocky, or mushy textures around edges.
How to Fix Quality of Picture | 10 Pro Tips You Should Know
With these 10 tips to fix quality of picture, you’ll be able to transform those dull images into stunning masterpieces. Read on to learn how easily it can improve the photo quality of any type of photography, from basic pictures all the way up to higher-end DSLR photography.
1. Use AI-Powered Models
AI-assisted processing helps to fix a photo with low resolution. They enhance image quality using deep learning models such as Convolutional Neural Networks (CNNs) and Generative Adversarial Networks (GANs). The models perform super-resolution by learning the patterns from the large datasets. AI reconstructs high-frequency details, improves texture fidelity, color correctors, and many more components to fix the quality of picture. Since it includes the risk of losing information about the image, you should be aware of that.
2. Explore Lightroom Adjustments
The first step to fixing bad quality photos is exploring the adjustments available in Lightroom. Lightroom gives you a wide range of options for enhancing your photos, including HSL sliders (hue, saturation, and luminance) that allow you to adjust specific colors in an image, as well as the tone curve, which allows you to adjust contrast and brightness. Experimenting with these options will help bring your photos back from the brink of despair.
3. Try Out Filters on Image
Filters are a great way to spice up a dull image. Not only can they add vibrancy and interest, but they also give you an opportunity to experiment with different color palettes and effects without having to spend hours editing the photo manually. Take some time to explore the various filters available in Lightroom or Photoshop and see which one works best for your image.
4. Utilize Retouching Tools
If an image has blemishes or imperfections that detract from its overall appeal, then retouching tools such as Clone Stamp and Healing Brush may be able to help restore it back into shape. These tools can be used to remove dust spots, smudges, fix color casting issues or other minor flaws that negatively impact the look of your photo. Avoid over-retouching as it can make an image look artificial or overly manipulated.
5. Increase Sharpness
Increasing sharpness is one of the most common ways photographers try to fix a photo with low resolution. You can adjust sharpness using any image editing software; however, be careful not to over-sharpen your images, as this can lead to an unnatural look or even artifacts in the photo. It’s best to start with a small amount of sharpening and gradually increase until you achieve your desired results & fix your grainy photos perfectly.
6. Reduce Noise
Noise is another general issue with photographs taken in low-light situations or with high ISO settings on digital cameras. To reduce noise, use an image editor and apply a noise reduction filter to the photo. You may also want to try using a noise-reduction plug-in like Neat Image or Noise Ninja, which specializes in reducing noise from digital photography files. The key here is not to overdo it; you don’t want your image looking overly smooth or artificial.
7. Adjust White Balance
Poor white balance can cause colors in your photos to appear off-kilter; think of how different colors look under fluorescent lighting versus natural sunlight versus incandescent bulbs! Adjusting the white balance will help restore some of those colors to their proper hues and create more accurate overall color tones. Moreover, it can help in fixing any scratches or other spots in images. Again, be careful not to overdo it; it’s best not to adjust more than necessary so that you don’t end up with odd-looking colors in your photo.
8. Crop for Composition
Cropping is also one of the most important steps when it comes to improving a bad-quality picture. You should always crop your photos to create better composition. Try different angles and experiment with different crops until you find the one that works best for the photo. If you are not sure how to begin, consider the rule of thirds as a guide for cropping your photos. This will help ensure that your subject is placed at the center of attention in the frame and that the other elements within the image are balanced out properly.
9. Enhance Details with Dodge & Burn Technique
The dodge and burn technique is used by professional photographers all over the world to enhance details in their photographs. This technique allows you to lighten or darken specific areas of an image, allowing you to bring out details that were lost due to poor lighting or overexposure.
To do this, simply select the area you want to adjust and then use a brush tool set at either a lighter or darker shade than its surroundings. By doing this, you can make small adjustments which will help improve the overall effect of your photograph without drastically changing it & fix your faded photos easily.
10. Add Vignetting Effect
Vignetting helps draw focus toward specific elements within an image by surrounding them with a soft vignette border, which fades away into nothingness towards its edges. To apply this effect, simply select an area within your photograph that needs more emphasis and then use a brush tool set at either a lighter or darker shade than its surroundings in order to achieve desired results.
Diagnose First: What Kind of Bad Quality is it?
An image whose quality is quite bad can have different symptoms and causes. Once you identify, then you can know if it’s fixable or not manually. So, don’t apply random filters to fix picture quality. The table below will help you identify the type of image quality:
| Symptoms | Cause | Fixable? |
|---|---|---|
| Blurry, soft overall | Camera shake, missed focus | Partially |
| Grainy, speckled | High ISO, low light | Yes |
| Blocky, square pixels | Too small, zoomed in | Partially |
| Halo around edges | Over-sharpened or bad JPG | Sometimes |
| Dirty/mosquito noise | JPEG saved too many times | No, unless the master exists |
| Too dark | Underexposed | Yes, if RAW |
| White areas | Overexposed/clipped | No |
| Yellow/blue tint | Wrong white balance | Yes |
| Branding in sky | 8-bit, heavy edit, JPG | Partially |
| Purple/green edges | Chromatic aberration | Yes |
Prevention: Export and Compression Settings That Don’t Destroy Quality
Most bad quality happens at export. Use correct settings to avoid making your images look bad:
| Use Cases | Format | Quality | Max Dimension |
|---|---|---|---|
| Web photo | AVIF | 60-70 | 2560px |
| Web logo | WEBP Lossless | Lossless | 2x display size |
| Print 8×10 | JPG | 100/12 | 2400×3000 300DPI |
| JPG | 80 | 1080px wide | |
| Archive | TIFF/PNG | Lossless | Original |
Common Mistakes to Avoid When Fixing Photos
Here are some common mistakes that users should avoid while fixing or editing images:
- Over-processing and over-sharpening create halos or noisy images.
- Boosting saturation makes colors look artificial.
- Over-brightening shadows can create an unnatural look.
- Incorrect color temperature can make the image look yellow or blue.
- Excessive skin smoothing makes skin look plastic and unnatural.
What if the Photo is Corrupted | What to Do Then?
You must have experienced the frustration of taking a great photo, only to have it corrupted or damaged. It can be incredibly disheartening to lose precious memories due to a damaged image file. Thankfully, there are many top photo repair tools available that can help you repair bad quality pictures & fix low resolution photos, and make them usable again.
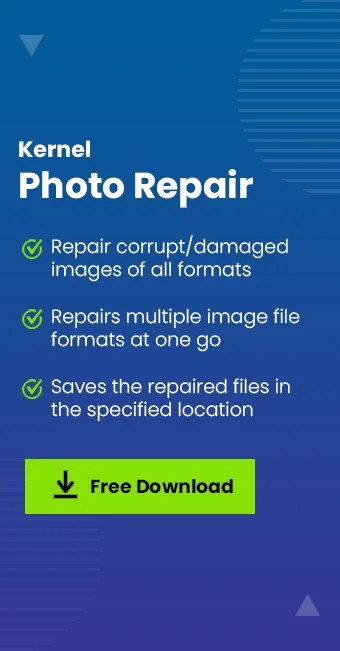
One such tool is Kernel Photo Repair, which offers a simple solution for repairing corrupted photos with just a few clicks. It is an easy-to-use software program designed to help users repair bad-quality photos quickly and easily. It can detect and repair corrupted image files in multiple formats, including JPEG, TIFF, GIF, BMP & PNG image files.
- Repair images from any kind of corruption or damage with original quality intact.
- Comes with an intuitive UI that makes it simple for even novice users.
- Simple process; just choose the file you want to repair & then click Repair Now
- Allows you to drag and drop multiple images at once
- Runs on all major Windows operating systems.
Final Note on How to Fix Quality of Picture
By now, you must have a solid understanding of the main problems that can arise with bad quality photos, as well as some tips and tricks for fixing them. Remember to focus on lighting, composition, and detail to really fix quality of picture and make your photos stand out. And if you need a little bit extra help, Kernel Photo Repair tool is always there to fix bad quality photos, so they look their best. Give it a try today!
Frequently Asked Questions
A. To fix blurry Instagram photos, make sure you post images with the correct aspect ratios.
A. To fix low-resolution photos, use Kernel Photo Repair tool. It is the advanced solution that guarantees a reliable output.