Read time: 10 minutes
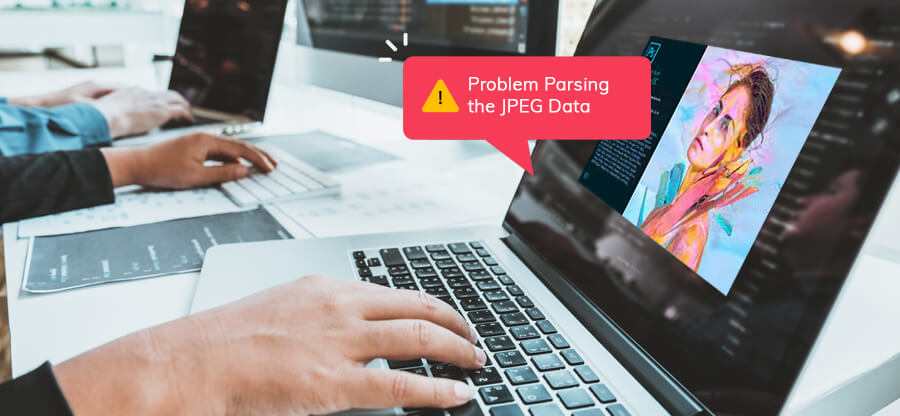
Are you also looking for ways to fix pixelated images? If you’re a digital user, a photographer, video editor, etc. chances are that you’ve experienced this all-too familiar issue when accessing or using images. Pixelation is one of the most common and annoying problems that can occur with digitally manipulated or stored photos and illustrations, detracting from their intended clarity and often making them unrecognizable. In this article, we will explore some of the best ways to fix pixelated photos quickly and easily.
Common Causes of Image Pixelation
Are you wondering why your image is pixelated and not as clear as it should be? There are several reasons why an image may become pixelated.![]()
1. Low resolution
The most common reason for a pixelated image is that it was saved at a low resolution. When images are compressed to save space on your computer or website, they often lose quality.
2. Zooming in too much
Another common cause of a pixelated image is zooming in too much on the photo. When you zoom in on an image, it loses clarity and starts to appear blurry or pixelated because you’re enlarging pixels beyond their normal size.
3. Compression quality
If you are compressing your images before sharing them with others, then it is important to ensure that they remain high quality even after right image compression. If a compressed image is low quality, then it will appear blurred or pixelated when viewed on screen.
4. Poor quality image
Finally, some images just naturally have poor quality due to their source material being low-resolution or taken with a poor-quality camera lens or device.
5. Improper file format
Saving images in wrong format such as using JPEG to save logos or graphics instead of PNG can cause pixelation in images and jagged edges.
How to Fix Pixelated Images Manually?
It’s not difficult to fix pixelated images nowadays. There are a number of powerful tools available from Adobe Photoshop, Paint.NET, Canva and specialized photo repair tools. It just depends on the quality you need and the amount of time you want to invest in editing your image. Get ready to use all these options with us, & choose the one that fits your needs perfectly & fix faded images now.
Method 1. Adobe Photoshop (Best Solution)
Adobe Photoshop is the first tool that comes to mind since it’s among some of the most powerful and robust photo correction tools out there. Here are two ways with which you can fix pixelated images in seconds.
1. Using camera Raw filter option
If you’re using Photoshop, there are a few simple steps that one can take to fix pixelation and improve the overall quality of your images. Read on for our easy-to-follow steps & repair damaged photos in Photoshop.
Step 1: Open your image in Photoshop
The first step is to open your image in Photoshop. Go to File > Open and select the image file that you want to edit. Now, you should see it displayed on the main workspace of your screen.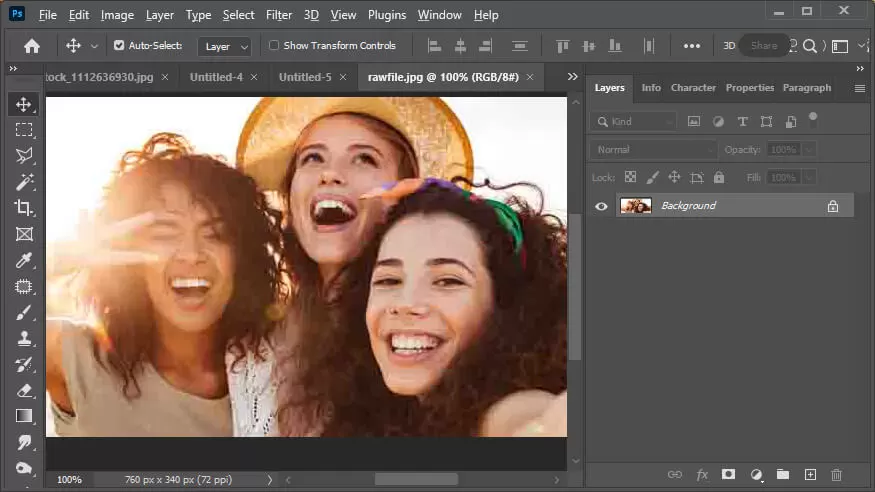
Step 2: Adjust the resolution and pixels settings
Next, we need to adjust the resolution and pixels settings of your image. For this, go to the menu bar & select Image > Image Size from the dropdown options. In the next box that appears, enter a higher resolution than what was previously set (we suggest at least 300). This will automatically increase the number of pixels per inch (PPI) for your image, thus reducing pixelation when viewed up close.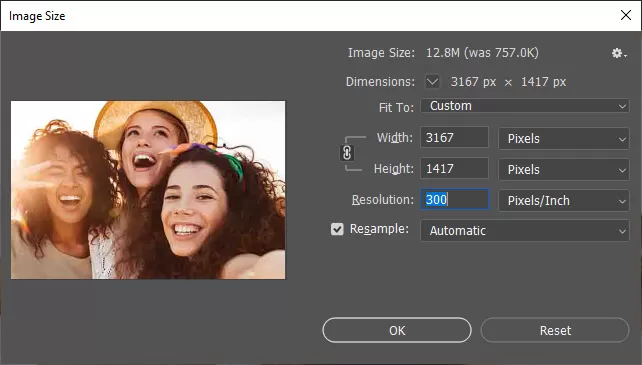
Step 3: Apply camera Raw filter
The next step is to apply a Camera Raw filter which will help improve sharpness and reduce graininess caused by pixelation. To do this, go back into the menu bar and select Filter > Camera Raw Filter. From here, open the Detail tab located within this window and adjust both the Sharpening and Noise Reduction sliders until you achieve desired results for your image.
Step 4: Adjust hue/saturation settings
Finally, we need to tweak any remaining settings so that our final result looks as good as possible. Navigate to the menu bar once again but this time select Image > Adjustment > Hue/Saturation from the dropdown options inside this window now adjust any color settings as required before saving your work with File > Save from within this same window once again.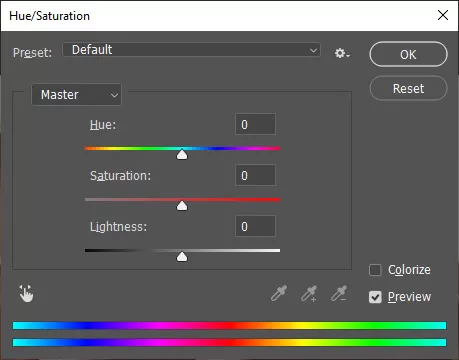
2. Using blur & sharpen options
With just a few simple steps, anyone can use Photoshop’s blur and sharpen filters to quickly resolve pixelation & fix grainy photos. Here is how:
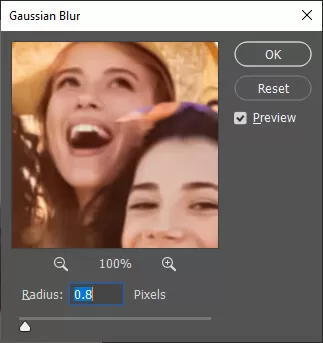
- Open the image & select “Filter,” then choose “Blur” from the list. This will open a new window with several blur options.
- From here, select Gaussian Blur. You will be able to track the slider until you find an acceptable range for blurring your image.
- Once finished, click OK to apply the filter to your photo.
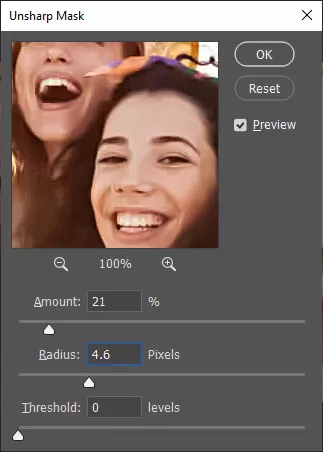
- From the menu bar, select “Filter” again. This time, choose “Sharpen” from the pop-up list.
- Tap Unsharp Mask from here and use the slider to adjust your photo until you achieve an acceptable level of sharpness (usually between 40-60%).
- When finished, click OK to apply this filter to your photo.
Now that your photo has been blurred, it is time to sharpen it back up. For this,
Method 2. Paint.NET (Quickest Fix)
Paint.NET is an excellent free tool for editing images, and it can also be used to fix pixelated photos. Here, we’ll show you how easy it is to ‘unpixelate’ an image using Paint.NET.
1. Open the photo in Paint.NET
First, open the pixelated photo in Paint.NET by selecting File > Open from the menu bar & browsing for the image on your computer.
2. Apply Gaussian Blur
Once your image is opened in Paint.NET, select “Effects” from the top menu bar, then click on “Blur” and then “Gaussian Blur” which will appear in the list of options. This will open up a new window titled “Gaussian Blur” with a slider at the bottom of it that allows you to adjust the amount of blurriness added to your image. Slide this until most of the pixelation has disappeared from your photo.
3. Sharpen your image
The last step is to sharpen your image which will help restore some of the lost details while further reducing any remaining pixelation in the photo. To do this, select Effects > Photo > Sharpen from the top menu bar and adjust the slider until you have achieved an acceptable level of clarity before clicking OK once again.
Method 3. Online Editor Tools (Universal Approach)
With technology available, it’s becoming easier to fix pixelated images quickly and easily. Online editors such as Pixlr, Pixenate, Lunapic, IMGonline, & Fotor offer a universal solution for those needing to address this issue.
From basic photo editing tools such as adjustments for brightness, contrast, sharpness; to more advanced components like cropping or red-eye removal, these online services provide a useful toolbox for all users. These tools are ideal for those needing an efficient yet powerful solution to fix their pixelated images & even fix common JPEG & other photo errors.
Specialized Photo Repair Software (Ultimate troubleshooter)
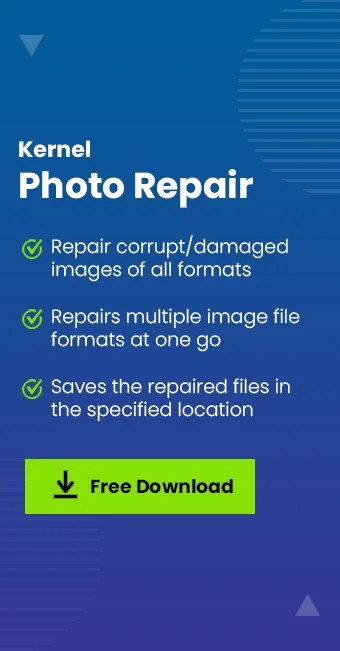
Pixelated images can be a real hassle for most users, as it’s hard to find a tool that can effectively repair them. Fortunately, there is one such tool available, i.e., Kernel Photo Repair. It is a robust repair tool designed to fix corrupted, distorted, and pixelated photos. It supports multiple image formats and enables users to repair them in one go.
This JPEG repair software helps fix these issues by using advanced algorithms to reduce the amount of pixels in an image without sacrificing its quality. It does this by combining similar pixels together and then removing the excess pixels from the photo. This results in a clearer and more detailed image with fewer pixels than before.
In addition to fixing pixelated images, the utility can also be used to multiple image file formats with its simple drag & drop feature. Whether you’re looking to fix pixelated images or recover lost/deleted media files from USB drive, memory cards or hard drives, this tool has everything you need. Get started now and bring your photos back to life.
Comparing Free Vs Paid Image Fixing Tools
Here is the comparison of top free and paid tools to fix pixelated images:
| Tools | Best For | Cost |
|---|---|---|
| Topaz Gigapixel AI | Photos and faces | $99 |
| Photoshop | Control, no AI look | $10/month |
| Lightroom | RAW workflow | $10/month |
| Upscaly | Free and offline | Free |
| Remini | Phone and fast | $5/week |
| GIMP | Alternative to Photoshop | Free |
| Canva | Quick and easy | Free |
| Pixlr/Fotor | Simple and browser-based | Free |
Prevention and Best Practices: Stop Creating Pixelated Images
If you follow some preventive tips before shooting or capturing images, it can save your hours of correcting them later. Here are some best prevention tips that you can use:
- Always capture images with highest-resolution available.
- Export correct size images, Web 2560px max, Print 300DPI at print size.
- Do not upload 6000px to Instagram, as it crushes it to 1080px.
- Use vector graphics (AI, SVG, EPS) for logos and illustrations.
- Do not enlarge image more than 100% of its native size.
Summing Up: How to Fix Pixelated Images
If you’re working with pixelated images, it can be frustrating trying to get them to look just right. But with the right tools and methods, you can achieve professional quality results. As you can see, there are a number of methods that you can use to try & fix your pixelated images. However, we believe that our Kernel Photo Repair tool is the best option available as it is quick and effective. Remember, if you want professional quality results, then you need to use professional quality tools and this tool delivers the same.
Frequently Asked Questions
A. There are few AI-Powered Upscalers such as Let’s Enhance and Topaz Gigapixel AI that you can use to fix pixelated images.
A. Use online tools like Picsart, Canva, and Pixelbin to fix pixelated photos for free.
A. Sharpen increases the contrast and pixelation is already high-contrast edges between the blocks that is why it looks worse.
A. The best way to fix pixelated images on iPhone is using built-in Photos App, which offers tools like Sharpness and Definition.