Read time: 8 minutes
“Recently, one of my friends shared some photos with me (in DNG format), but due to an interrupted internet connection, those files failed to open. I tried to re-download them but faced the same issue again.”
Ever since the popularity of professional cameras has increased, more and more individuals have become keen on capturing photos. Pictures are taken at every incident, from weddings to birthdays, from traveling to café visits. To maintain a higher quality for them, photographers often rely on DNG files, which are a type of raw format for images. Unfortunately, corruption in these files is becoming common trouble for users. But the troubleshooting approaches have also been simplified.
If you are struggling to repair your DNG files from any kind of corruption, errors, or inaccessibility issues, then you are in the right space.
What is a DNG File?
DNG simply stands for Digital Negative and refers to a raw file format that is widely known in digital photography. These files store uncompressed image data captured by cameras. It later allows users to edit and share them without hampering the quality of the original image.
This format was released in 2004 as a proprietary image format by Adobe. But now it extends its support to image editing tools like Lightroom, Photoshop, and Picasa, as well as camera models like Pentax, Leica, and Hasselblad.
What Causes DNG Corruption?
Before moving to repair corrupted files (DNG), it is equally necessary to understand the causes behind them. Make sure to prevent these in the future:
Before moving to repair corrupted files (DNG), it is equally necessary to understand the causes behind them. Make sure to prevent these in the future-
- Virus/malware attacks: The biggest culprit behind any corruption is a severe virus attack. It will make it difficult to even view your images.
- Using outdated PC drivers: If you are not using an updated driver, the file is bound to throw errors while opening it.
- Interrupted transfer/download: Interruptions can be caused due to several reasons. But when they occur in between a transfer or download process, they leave the images grainy, blackened, or faded. Then, it gets challenging to fix faded photos easily.
- Mishandling of camera or storage device: The camera as well as the storage devices, must be managed with care. You should avoid taking pictures in low battery modes and storing them in low space conditions of devices.
- Hardware problems: Often, hardware failures leave a direct impact on all the files stored in it and hence cause corruption.
Quick Method: How to Recover Corrupted DNG Files?
Fix 1. Use a Different Photo Viewer App
The application you are using to view can also be a potential cause behind images becoming inaccessible. Try to open DNG files with Photoshop or Lightroom or use a free RAW viewer application.
Fix 2. Reinstall Photo Viewer Application
Sometimes, due to the older version of the photo viewer application, your photos might face issues in opening. You can try to update the app or uninstall it and then reinstall it back again after some time to check if the error still exists.
Top Methods to Repair Corrupt DNG Files
A corrupted DNG file will continuously throw errors like “Unsupported file format”, “Unable to open DNG file”, and “Cannot open file because it is the wrong type of file”.
Irrespective of the error message, it is a clear sign that the images are heavily corrupted and need to be repaired urgently for any further access. The following methods will guide you in repairing all your DNG file.
Method 1. Run the System File Checker
The System File Checker is a unique utility for Microsoft Windows users, which runs a deep scan to restore any corrupted files in the system.
To repair corrupted files (DNG), you can run this utility by following the steps below:
- In the search box, type Command Prompt.
- Now, right-click on the search result and select Run as administrator.

- Type “sfc/scannow” in the prompt window and hit the Enter key.
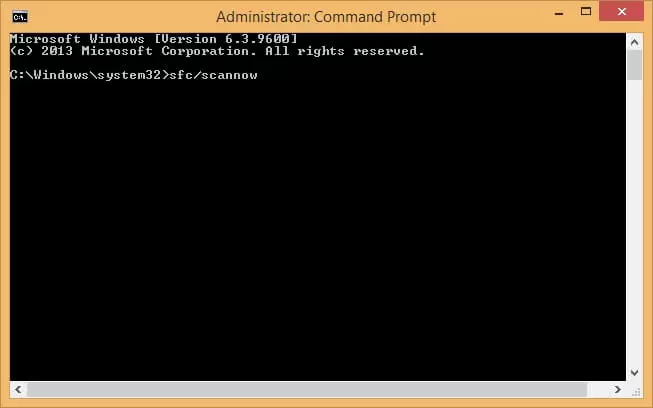
- The scan process will be completed shortly, and now, try to open the image.
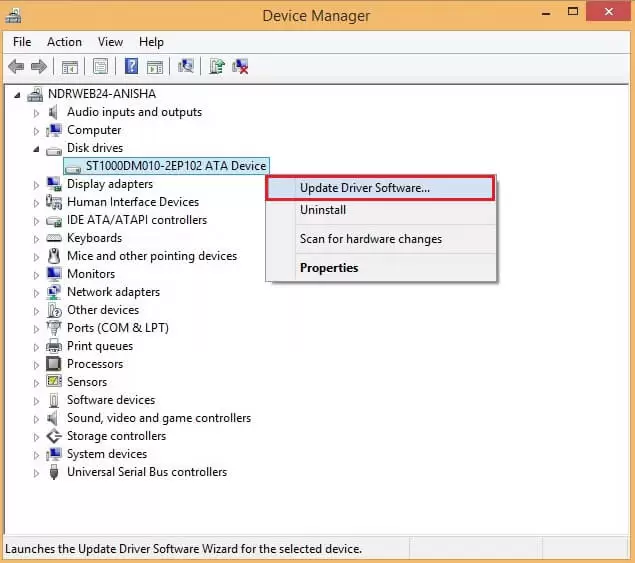
Method 2. Update PC Drivers
The Drivers in any system are programs that bridge the communication between hardware components and the operating system. Drivers are necessary for even the basic functioning of the computer and hence, need to be updated repeatedly.
You can update your outdated drivers using these steps:
- Search for Device Manager and hit Enter. From the complete list, find your drive.
- Expand and then right-click on it. Out of the options, click on Update Driver Software.
Method 3. Use System Restore
The System Restore facility enables users to revert to an earlier state of their Windows system. This process does not affect any files. Follow the steps to do so:
- Search for System Restore and open it; click on Create a Restore Point.
- Move to the System Protection tab. Select the drive and click on Configure.
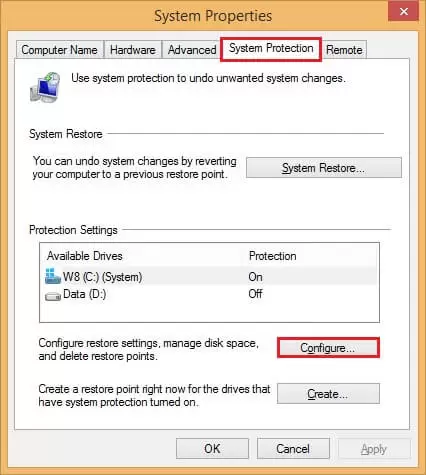
- Now, the dialog box for the System Protection for the local disk will open. Enable the Turn on system protection.
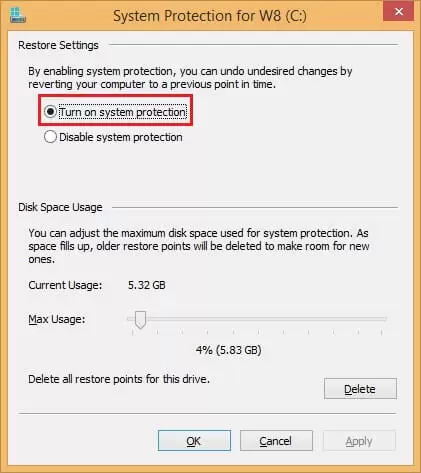
- Follow the instructions to use the Max Usage slider and click on OK.
Method 4. Scan and Repair Storage Device
If your DNG file is stored on any external storage device or memory card, then file system errors could possibly be the reason behind it. Fix it with the following steps:
- Connect the external drive or memory card to your computer.
- Search Command Prompt, then right-click on it and select Run as administrator.
- Type chkdsk y: /f /x /r (replace y with your drive letter in lower case) and hit Enter.
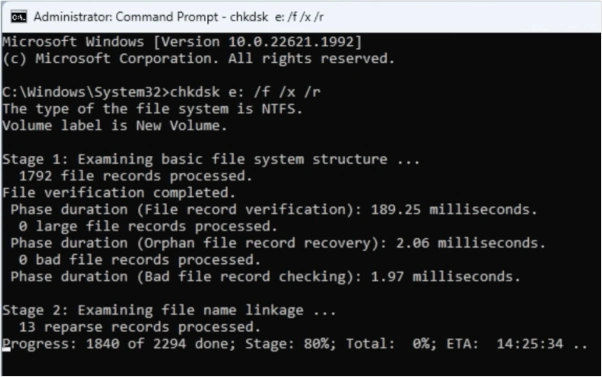
- The tool will analyze and repair all the bad sectors. Wait for the process to be completed.
- Once done, eject the external storage safely.
Method 5. Convert the Image Format
If your DNG images have been heavily damaged, you can easily convert them into any other file format like JPG, PNG, GIF, BMP, etc. This conversion process can be conducted using any available online converters. But they put the security of the data at stake. Hence, using professional software is a better alternative to convert the format securely and accurately.
Preventive Measures for DNG File Corruption
With some basic tips, you can backup your valuable photos and avoid corruption issues with your DNG files, such as:
- Format memory card inside your camera instead of deleting images and videos.
- Do not shoot anything with a full or partially full SD card.
- Always use branded and high-quality memory cards to store files.
- Never directly remove memory card from the computer, always eject safely.
- Always have secure backup to avoid issues like photos and images failing to open after recovery.
- Make sure you have a stable connection to avoid interrupted transfers.
Summing Up: How to Fix Corrupted DNG Files?
Photographers work continuously on raw images, and once they get corrupt or start throwing errors, it puts them in a risky spot. The impact on the image can be anything, and even the causes of corruption can be numerous, but the methods to resolve it are limited. We outlined the top methods to repair corrupt DNG files and running System File Checker helped me fix this issue. Try out the methods given cr.
Frequently Asked Questions
A. You cannot repair corrupted DNG files on mobile phone, you need to use a computer.
A. Yes, you can prevent DNG corruption in camera. Make sure to always use a high-quality, branded SD card to store files and have a stable connection.