Public folders in Exchange provide a shared space for sharing important files. But for this purpose, shared mailboxes more convenient. So, while migrating from on-premises Exchange to Exchange Online, many organizations migrate their on-premises Exchange public folders to Office 365 shared mailboxes. This is more convenient for users who want to access to data through mobile devices and apps.
The shared mailboxes do not require any separate license in Office 365. Also, administrators can associate users from the Office 365 account to provide them access to shared mailboxes.
Now, let us see how shared mailboxes can be created in Office 365. You can use either of the following 2 methods:
- Create shared mailbox using Office 365 Admin Center
- Create shared mailbox using PowerShell
Let us understand them both in detail:
Creating a shared mailbox in Office (through Office 365 Admin Center)
This is the simplest method to create a shared mailbox.
- Login to Office 365 with global admin account.
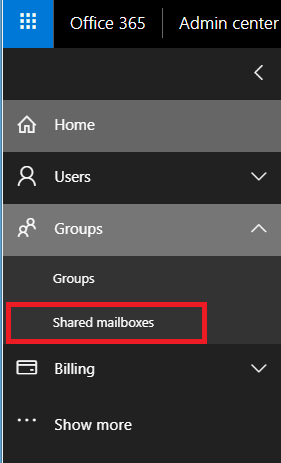
- Navigate to the Office 365 Admin center. In the left pane, go to Groups > Shared Mailboxes.
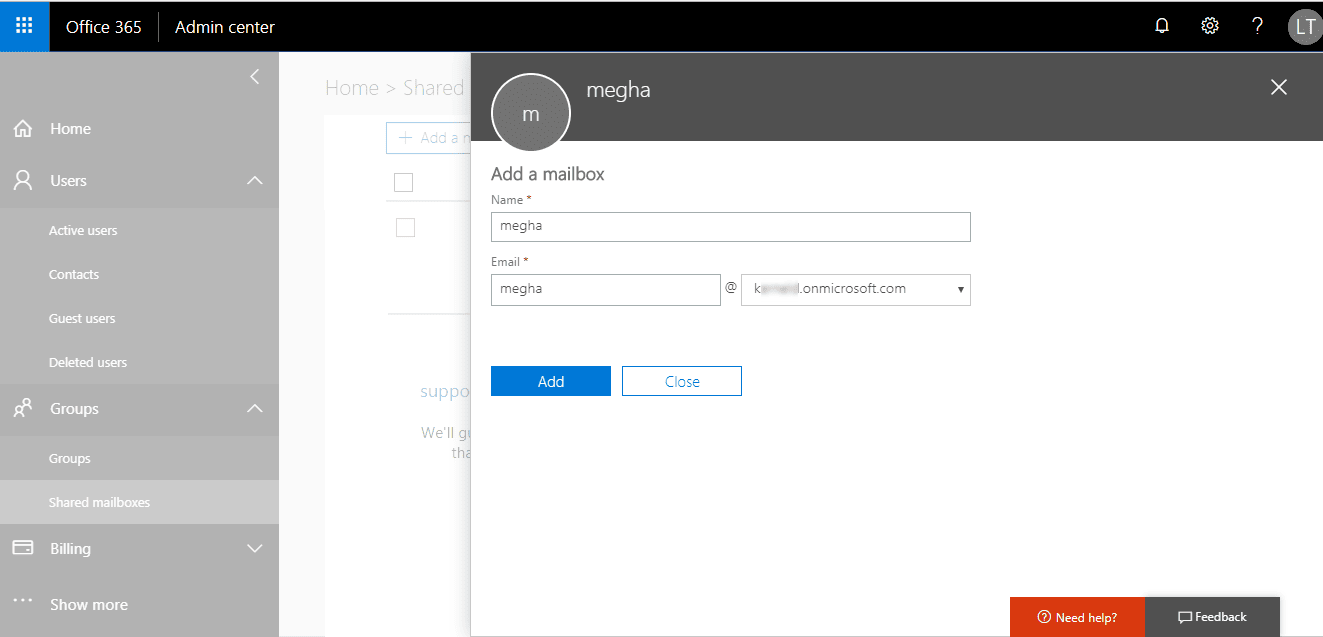
- Click + Add a mailbox sign to add a new shared mailbox.

- Now, specify a name (as per your choice) and email ID . Then click Add to add it.
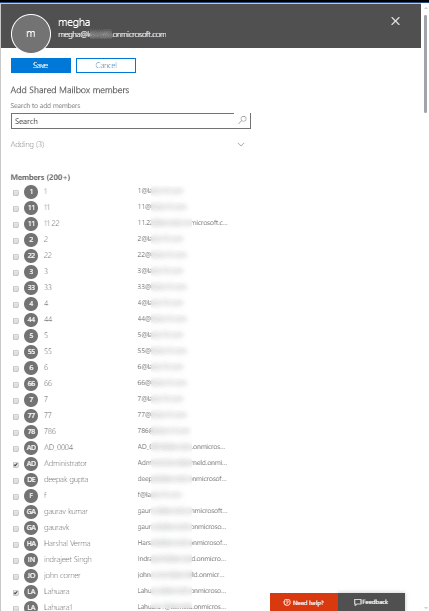
- The mailbox with specified name will get added in the list. Click Edit option on Members row to add user mailboxes as members of this shared mailbox.
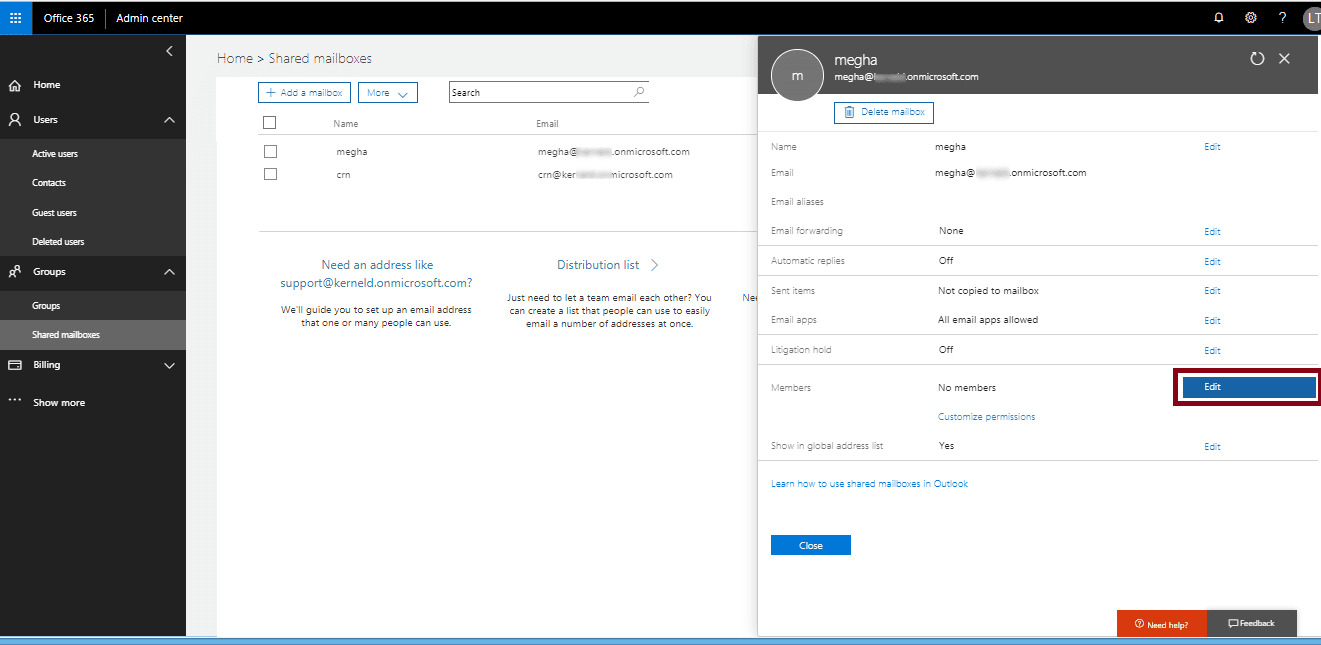
- Click + Add members and select the users whom you want to delegate access rights for this shared mailbox.

- After your selection, click Save to add these users to shared mailbox.
- Added mailboxes will be displayed like this.
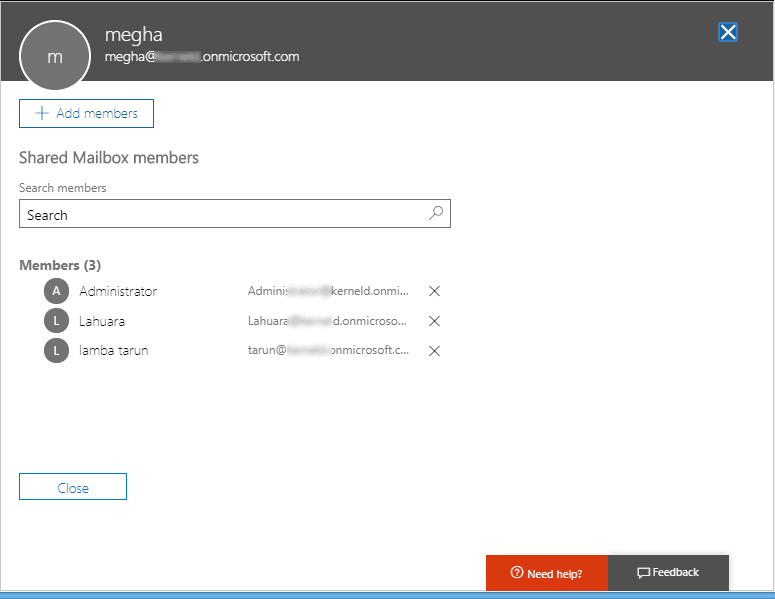
Thus, a shared mailbox is created with a specified username and members (with delegation rights to access it).
This procedure may look a little complex. But useful in some conditions as this is the only method in which you can set a Send on behalf permission.
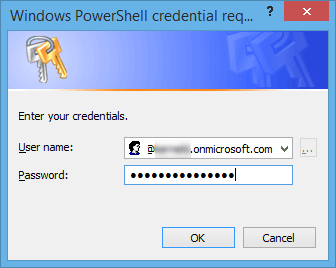
- Open Windows PowerShell on your local system. First, run:
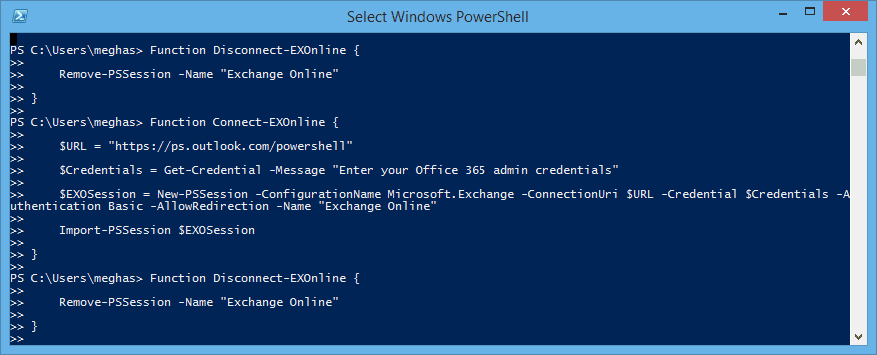
- Now connect to your Exchange Online by running the cmdlet:
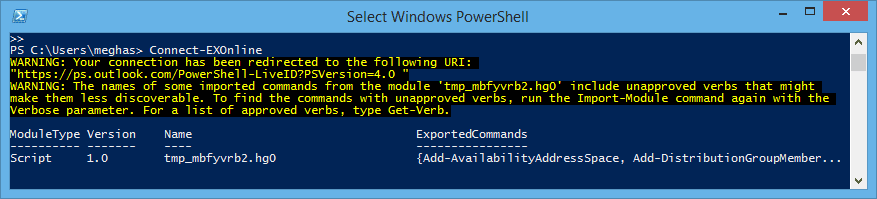
- Enter the login credentials and clicking OK.
- Now, run the following cmdlet to create a shared mailbox in your Exchange Online:
ew-Mailbox -Shared -Name "tom" -DisplayName "tom" -Alias tom | Add-MailboxPermission -User lamba tarun@-----.onmicrosoft.com -AccessRights FullAccess –InheritanceType All | Set-Mailbox -GrantSendOnBehalfTo lamba tarun@-----.onmicrosoft.com

Here, tom is a display name by which your shared mailbox tom@------.onmicrosoft.com will be created and lamba tarun@-----.onmicrosoft.com is the mailbox to which access rights are to be assigned.
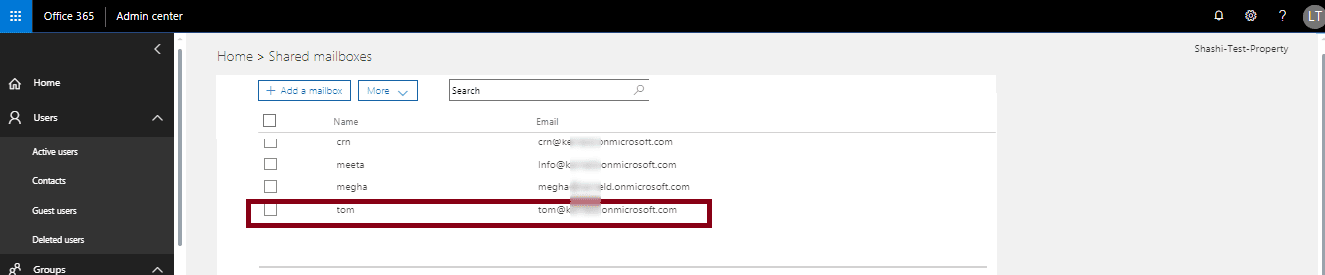
- After executing this cmdlet, you can view the shared mailbox with the specified name in your Office 365 account.
The user has successfully created a shared mailbox in Office 365. Now, the task is to export the Exchange public folder to Office 365 shared mailbox.
If you want to perform export or migration in a hassle-free way with complete accuracy, you can take the help of a robust, professional tool - Kernel Migration for Exchange – Express Edition.
Execute the steps sequentially and export public folders to shared mailboxes within minutes.
- Launch Kernel Migration for Exchange – Express Edition tool.
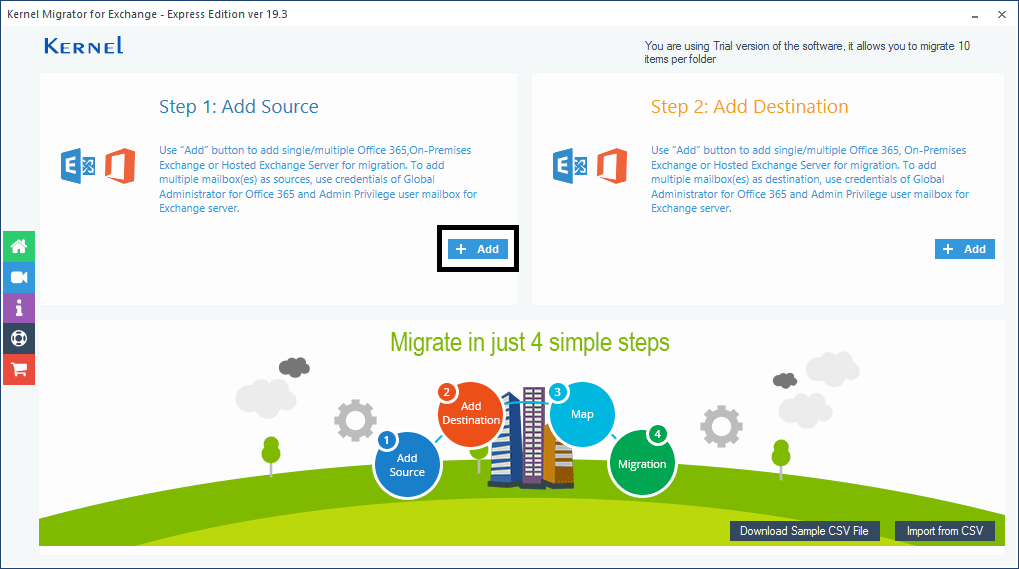
- Now add your Exchange Server as Source with its login details.
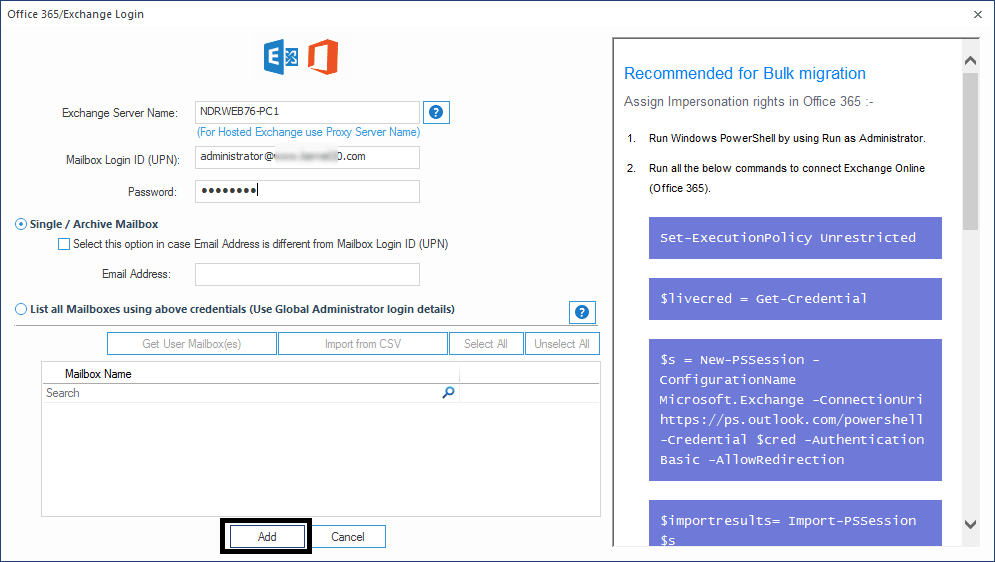
- Add your Office 365 account as a destination with the login credentials.
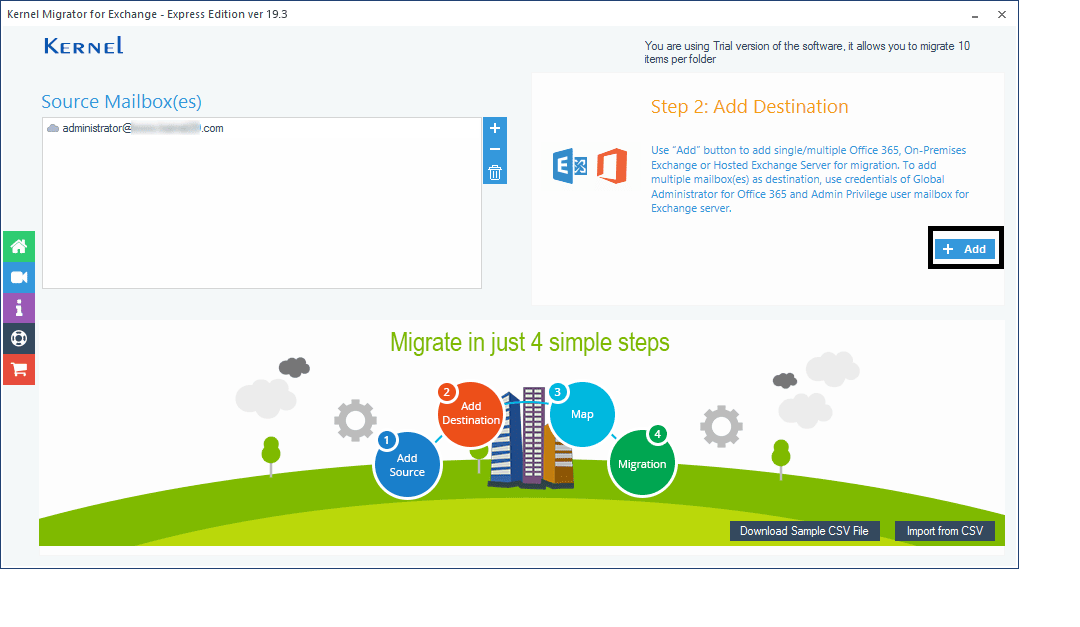
- Select the created shared mailbox (maybe one or multiple) from the list where you want to migrate Exchange public folder data. Click Add to add it as a destination.

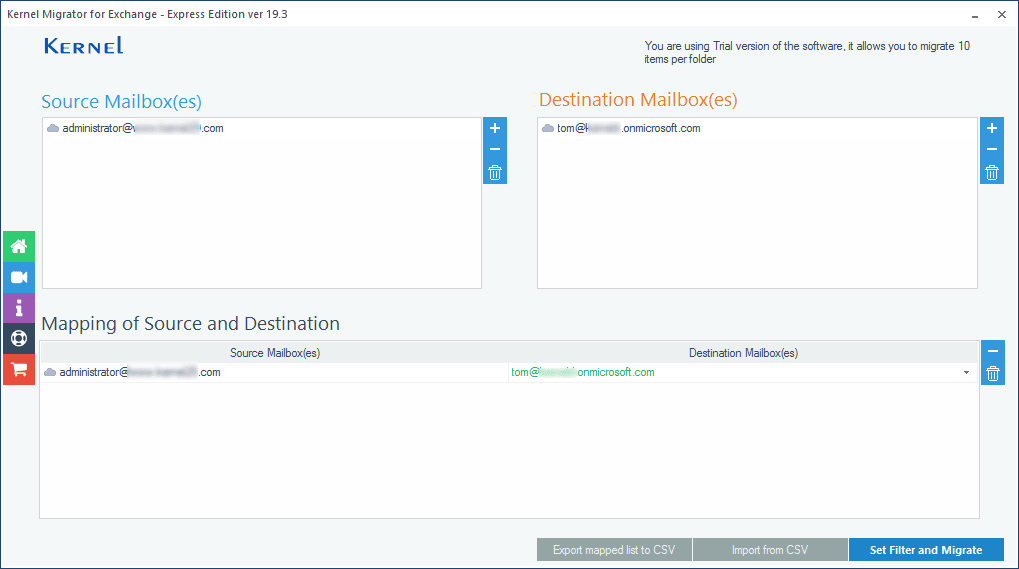
- Map the source and destination mailboxes in this section.
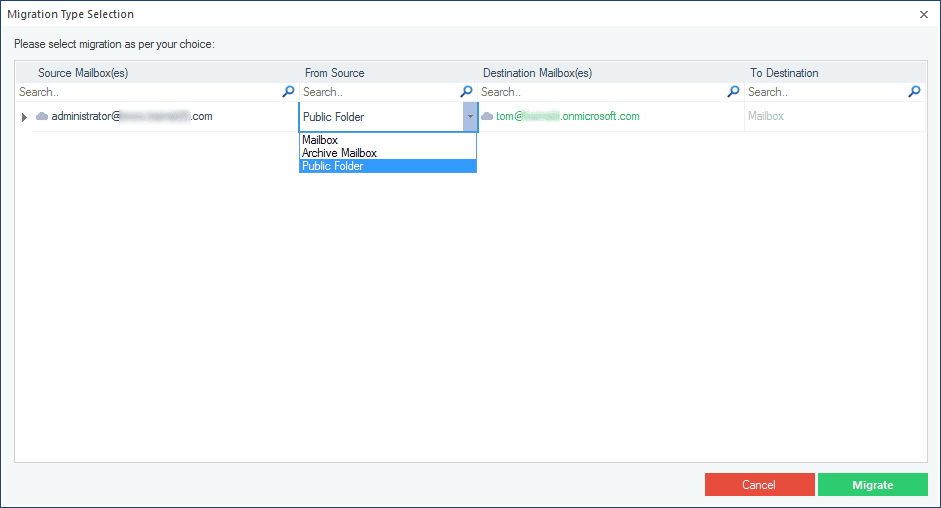
- In Migration Type Selection page, select public folder under From Source and your shared mailbox under To Destination. Now, click Set Filter and Migrate.
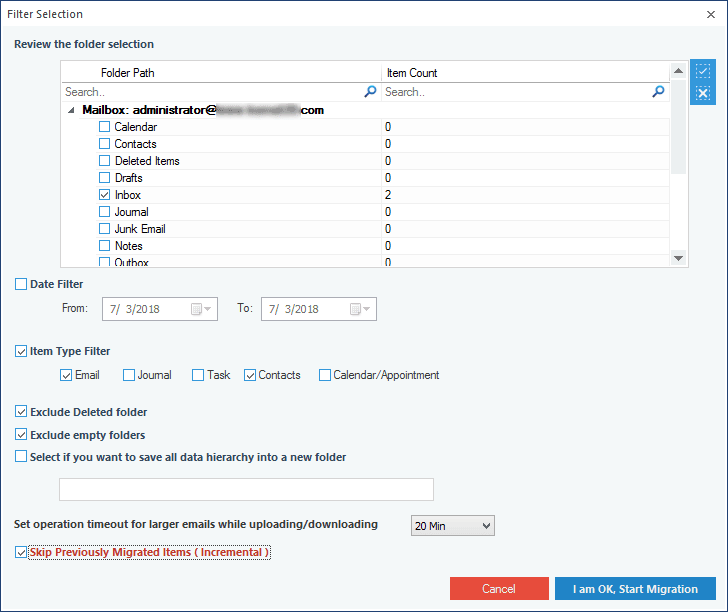
- Apply filters as per your choice and click I am OK Start Migration.
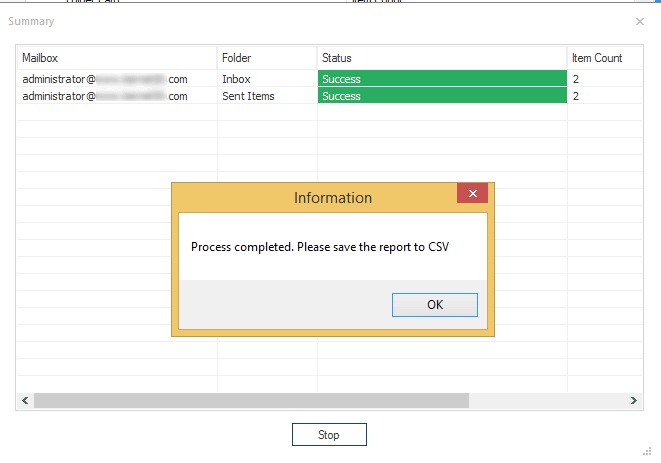
- Migration is successfully completed now.
So, it is clear that public to shared mailboxes migration is quite easy with Kernel Migration for Exchange – Expression Edition.
Conclusion
There are two methods for creating shared mailboxes in Office 365 – using Exchange admin center and Exchange PowerShell. Both methods are discussed here. After creating a shared mailbox in Office 365, you can export Exchange public folders to this shared mailbox using Kernel Migration for Exchange – Express edition.