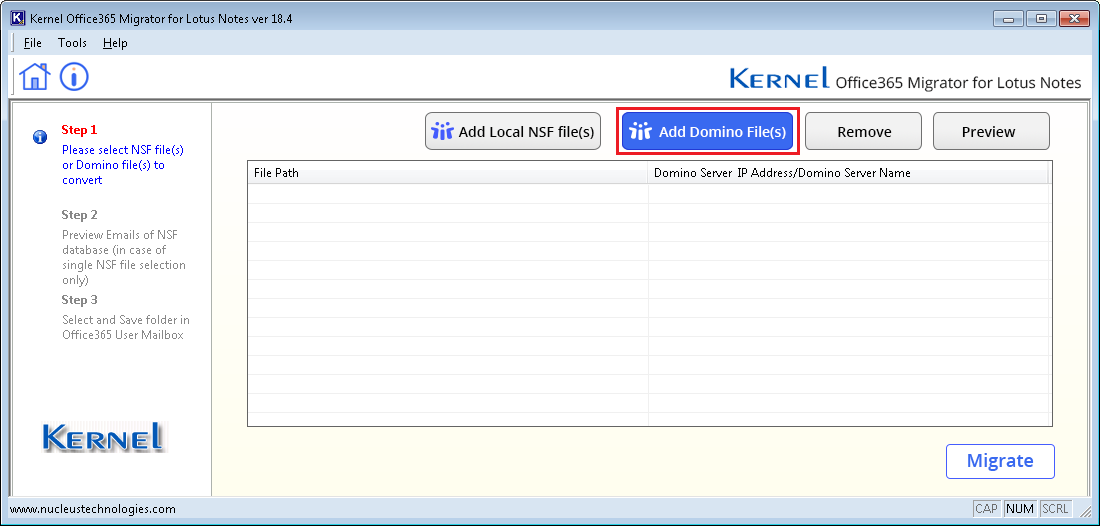
Migrate Domino Server files to Office 365 mailbox
- Step 1: Launch Kernel Office 365 Migrator for Lotus Notes. Click the Add Domino File(s) button.
- Step 2: Enter either the Domino Server name or IP address of Domino server and click Add Domino Server button.
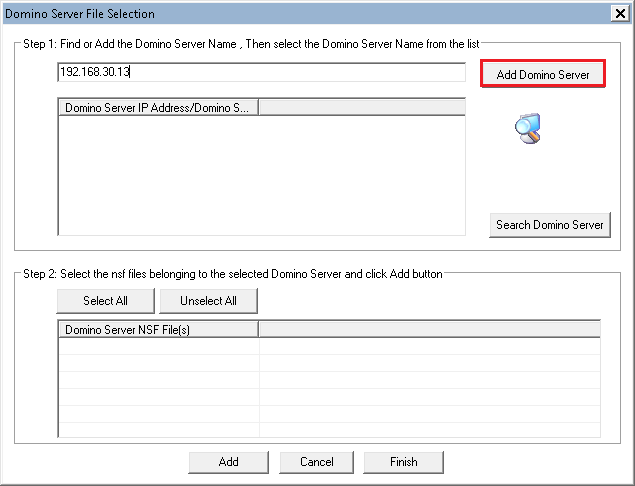
- Step 2.1: If you are not sure about Domino Server name or IP address, then you can choose to use the Search Domino Server feature. It will search all the available Domino Server in your network.

- Step 2.2: A pop-up message will inform you that enumeration of Domino Server may take several minutes. Click Yes to go ahead.

- Step 2.3: After completing the search, the tool will list down all the Domino Server in the network. Select any Domino Server.
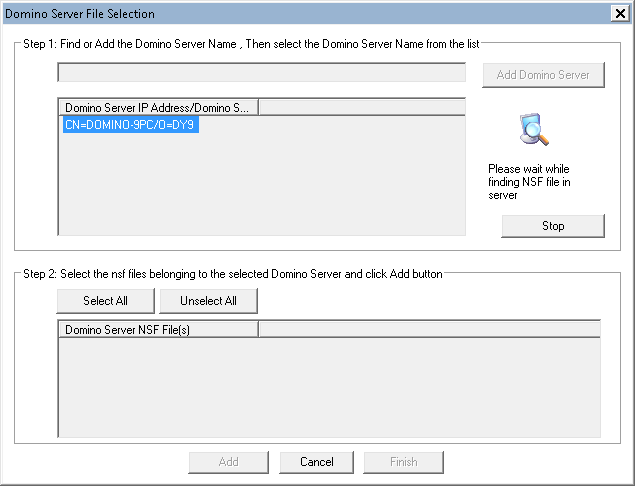
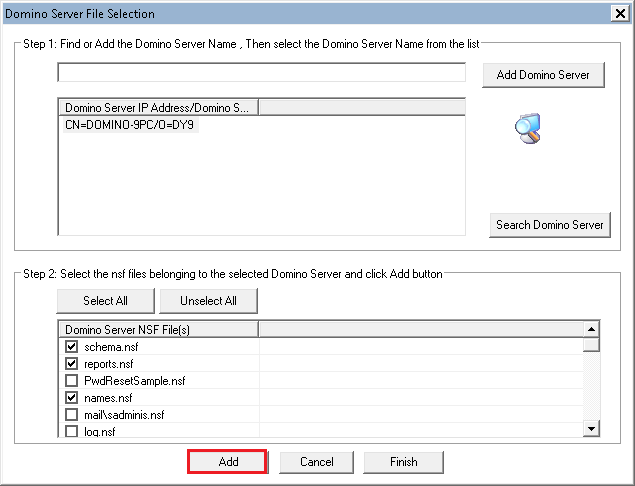
- Step 2.4: As soon as you select a Domino Server, all its NSF files will be presented in a list. You can easily select or deselect any number of files.
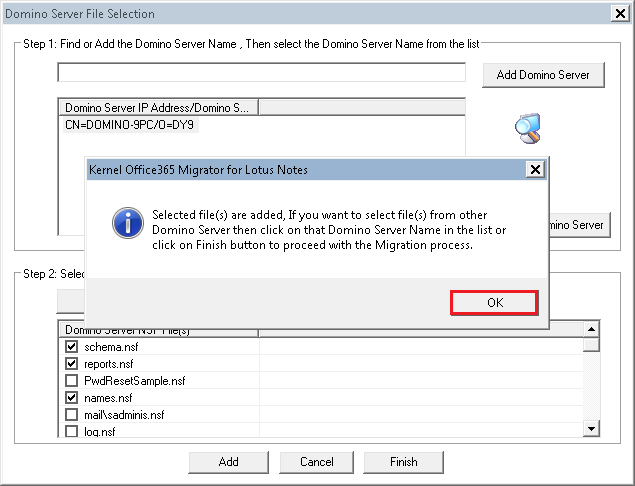
- Step 2.5: Another pop-up message will inform you that if you want to add more NSF file using different Domino Server, then you can select that Domino Server and include its files also. click OK.
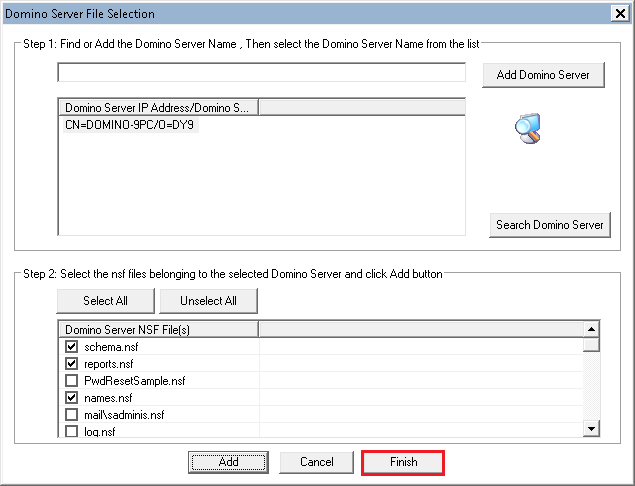
- Step 2.6: After selecting all the desired NSF files, please click Finish.
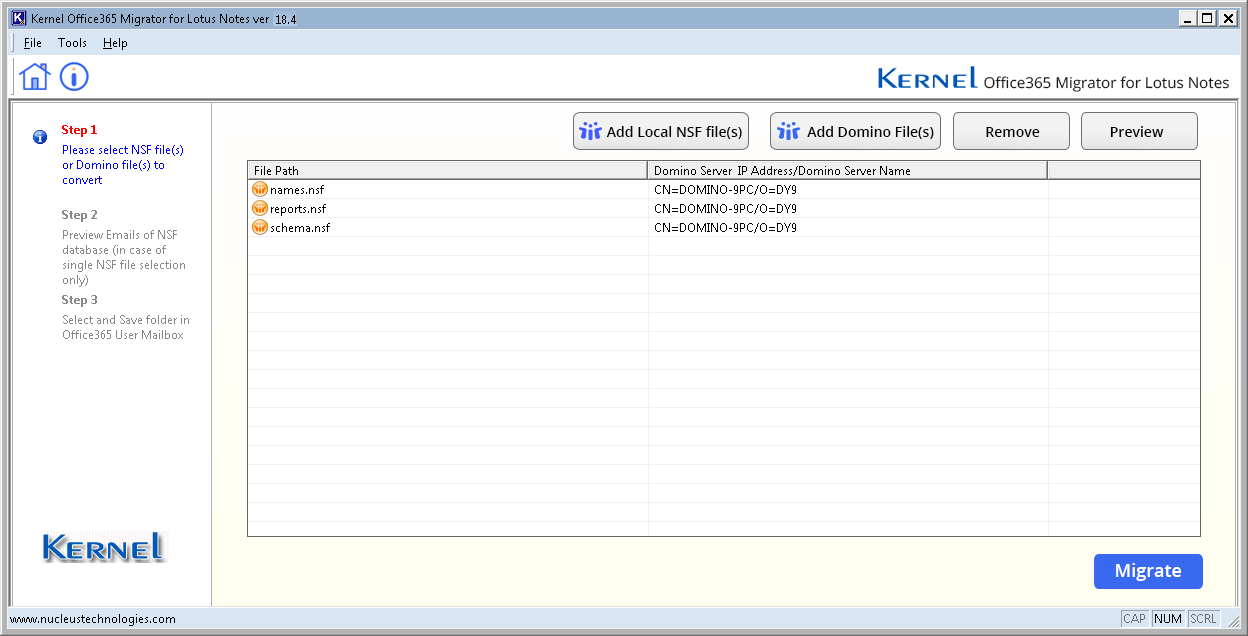
- Step 3: NSF files are successfully included as the source. Now, click Migrate button to export it to Office 365 platform.
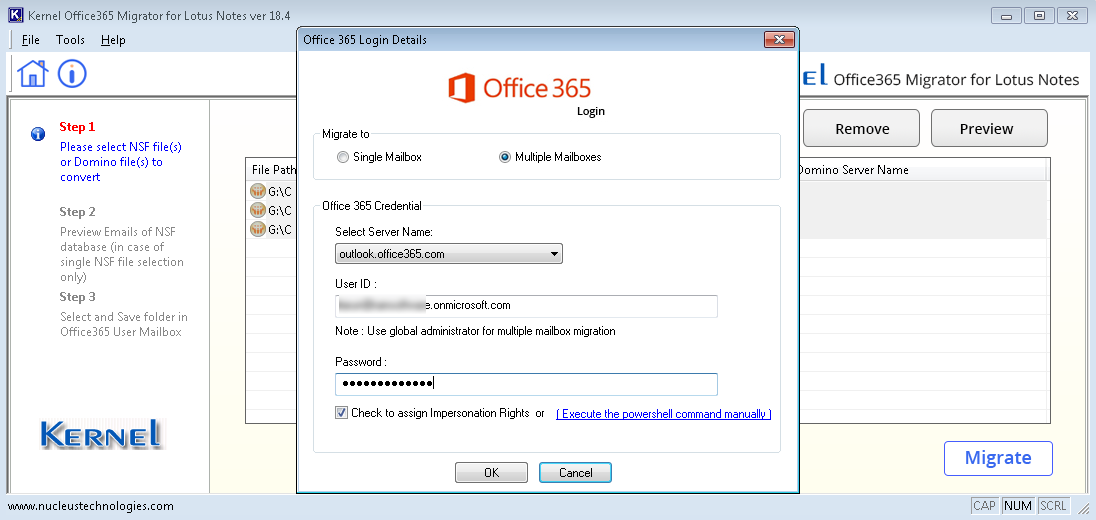
- Step 4: Input user ID and password of destination Office 365 account. You can also assign Impersonation Rights to the user mailboxes by selecting the checkbox or click the link to know how to assign these rights manually using PowerShell commands. Click OK.
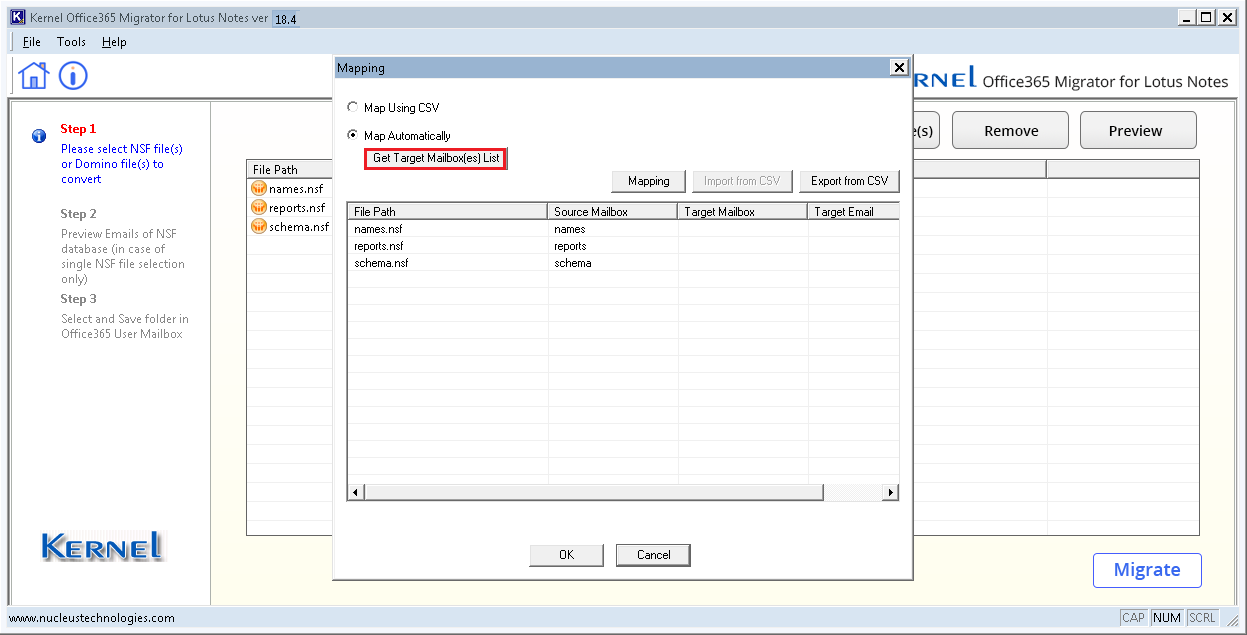
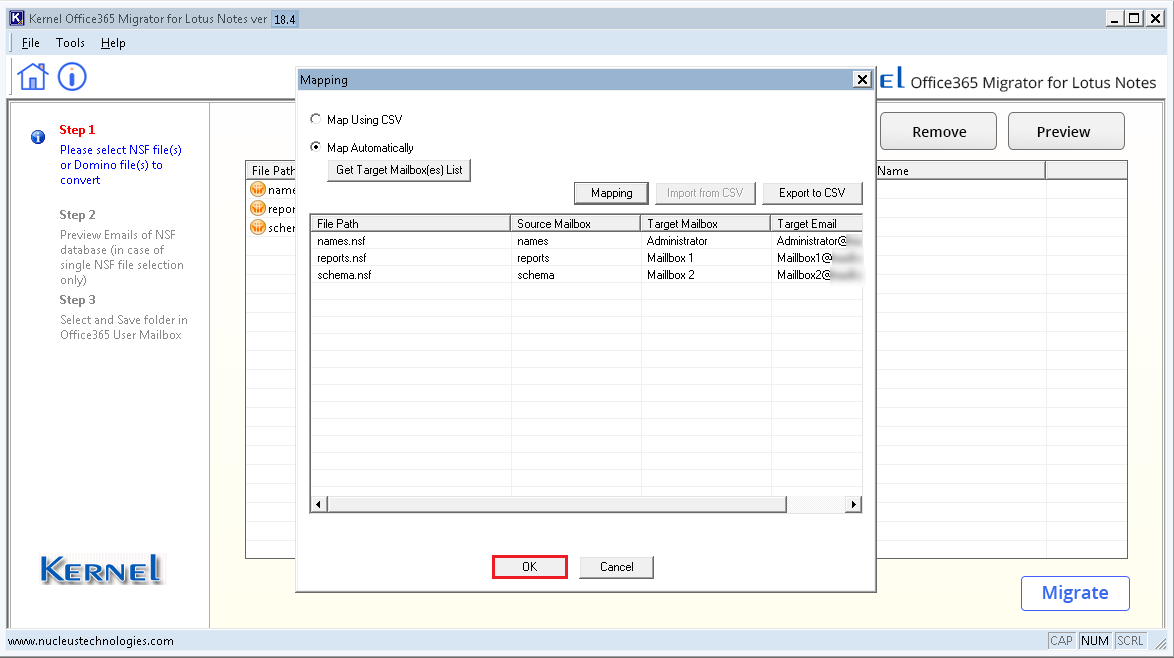
- Step 4.1: In the Mapping window, select the second option of Map automatically and click Get Target Mailbox(es)list button. The tool will search all mailboxes of respective Office 365 account and will automatically map such account which have same name as the source NSF file.
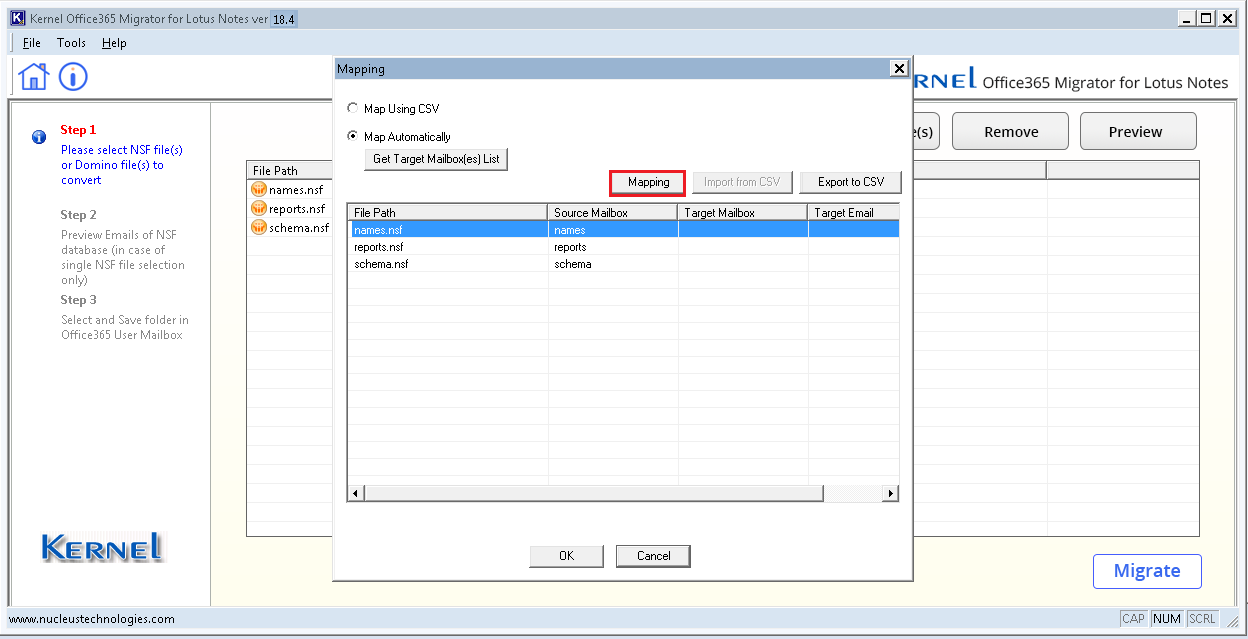
- Step 4.2: Click Mapping button to manually map the NSF files to Office 365 account.
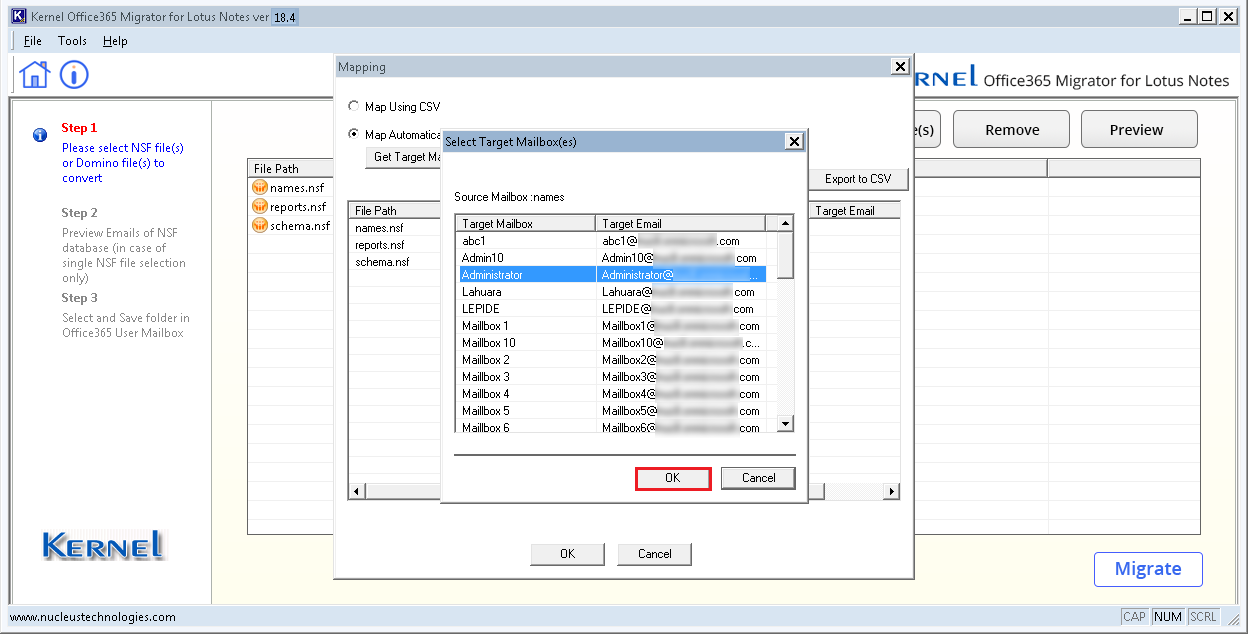
- Step 4.3: Select any account and click OK.
- Step 4.4: After all the NSF files are successfully mapped with an Office 365 account, click OK. The filter window will appear.
- Step 5: The Set Filters window has following filtering options for you to select:
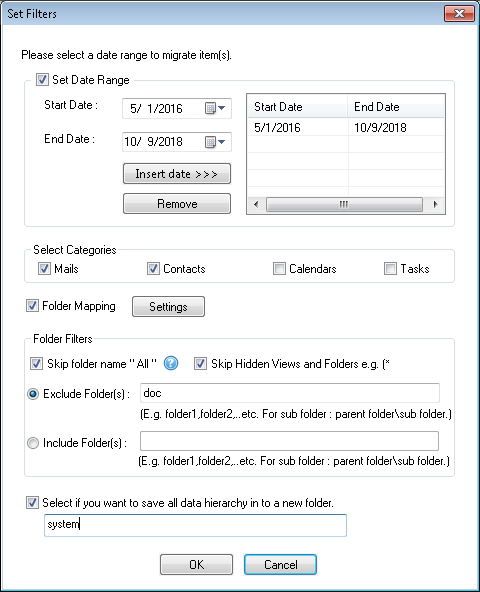
- Set Date Range - Create a date range to migrate NSF files from a start date to end date.
- Select categories - Select from various categories of Mails, Contacts, Calendars, and Tasks.
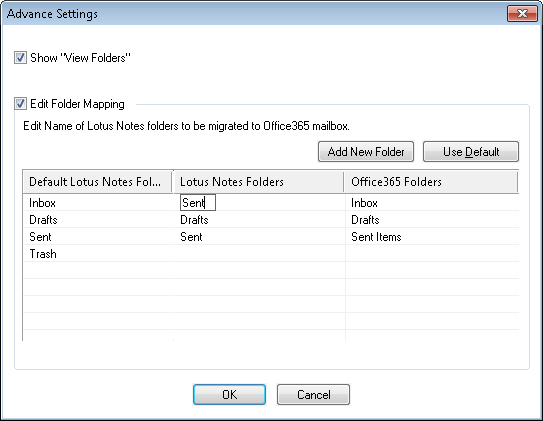
- Folder Mapping - Allows you to set folder settings on different criteria. You can select 'View Folders' option to view and Edit Folder Mapping between Lotus Notes and Office 365 mailbox folders as shown:
- Exclude Folder(s) - Write name of the folder which you do not want to migrate.
- Include Folder(s) - Write name of the folder which you want to migrate.
- Select if you want to save all data hierarchy into a new folder - Save complete NSF files in a single root folder.
After applying the filters, click OK.
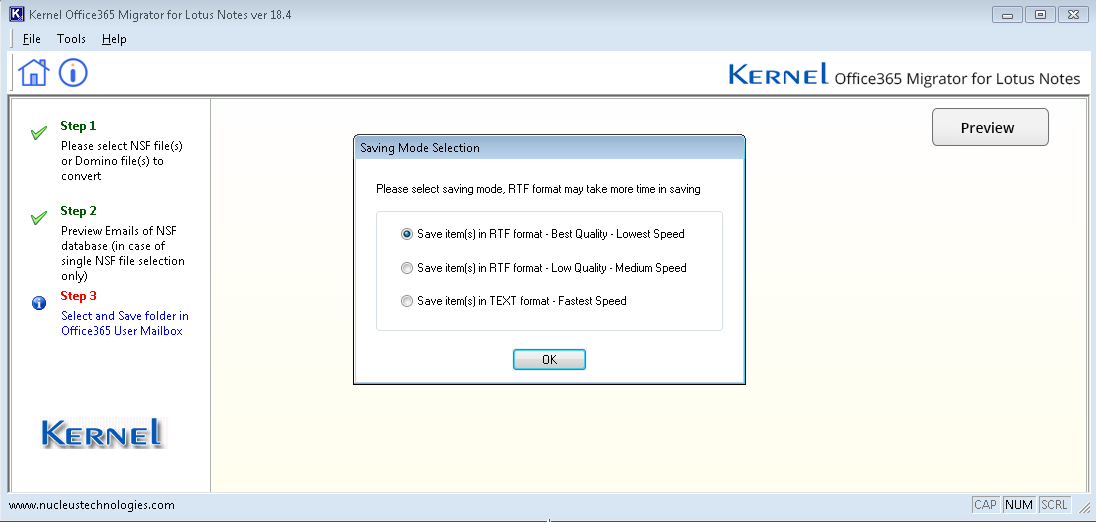
- Step 6: Select the most suited saving mode and click OK.
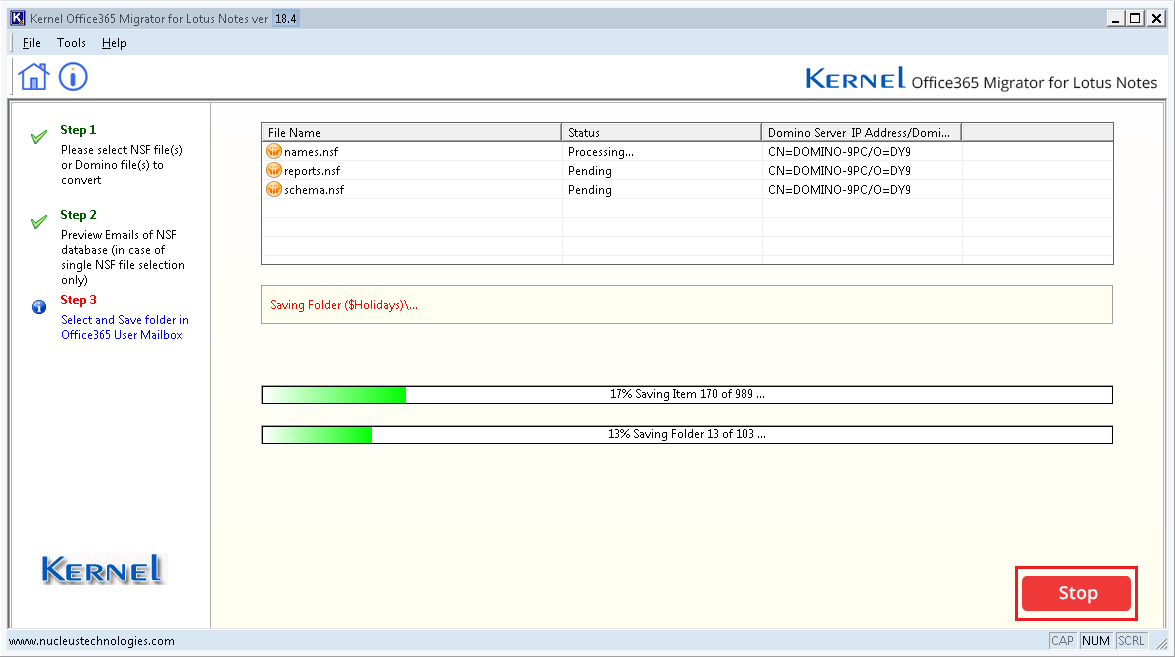
- Step 6.1: The migration process starts. It will display the name of current folder being migrated. You can choose to stop the migration using Stop button.
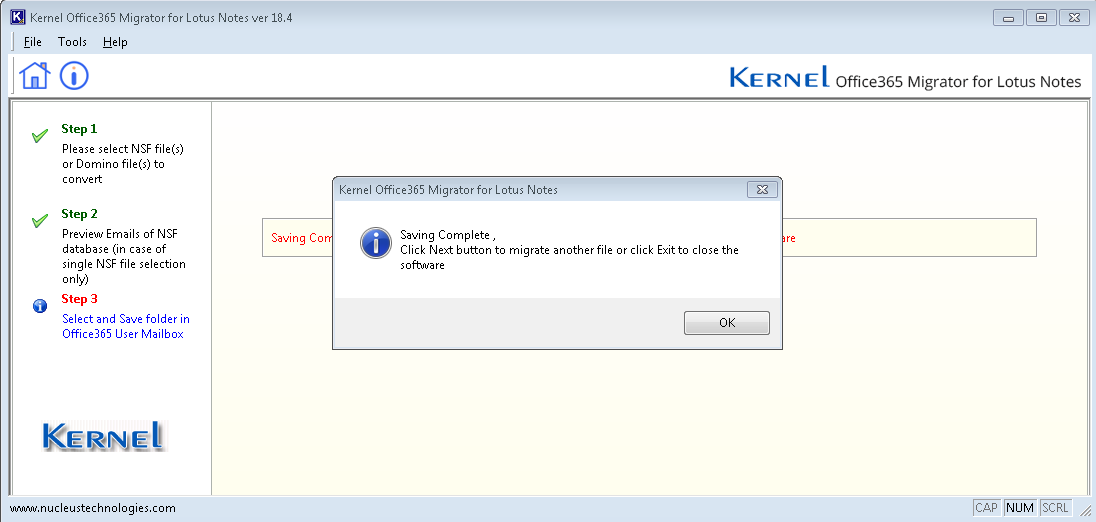
- Step 7: A message will be displayed after a successful migration. Click OK.
Related topic