How to Export Office 365 Public Folders to PST?
 Written By: Sahil Verma
 Updated On October 27, 2026 Written By: Sahil Verma Updated On October 27, 2026
Quick Answer: To export Office 365 public folders to PST using the classic Outlook, click File > Open & Export > Import/ Export > Export to a file > Outlook Data File (.pst). Then, choose the public folder and export it to PST on your system
eDiscovery portal is not the only way to export Microsoft 365 public folder to PST. A simpler way to do it is through Outlook. Using the Classic Outlook, you can export all or selective folders from the public folders associated with your Office 365 account. However, before you start exporting them, you must have access to read the content of those public folders.
In this guide, you will find the step-by-step process of Office 365 public folder export using the Outlook Import/Export feature. Additionally, we will also discuss a professional Office 365 backup tool that allows a more structured way for bulk public folder export.
These are shared folders that an administrator creates and shares with internal or external users in Office 365. They act as a safe online shared storage location to send and access common calendar entries, contacts, emails, and other shared data items. Office 365 (Exchange Online) can have multiple public folders, up to 500,000 in a tenant. All the data in the public folder is saved inside a special public folder mailbox.
Only authorized users can access public folders. If you have access to a public folder, it will automatically appear in your Classic Outlook desktop email client under a public folders tree on the right navigation pane.
If these shared folders are stored safely on the Exchange Server, then why export Office 365 public folders to PST on your local system? A few common reasons to do so are:
Yes, there are manual methods for Office 365 public folder export. The simplest way to create PST is to use the Import/Export function in the Classic Outlook. In addition to this, you can use the Exchange Server PowerShell or the eDiscovery Purview portal to export Exchange public folder to PST.
Using Outlook is best if you are a standard user with access to a few public folders and want to export them to PST. The cmdlets are great for those comfortable with executing accurate commands without syntax error. For those who need a powerful solution to search and save specific data, you can go for the Purview portal.
To export public folders using Classic Outlook, you must have the ReadItems permission assigned for those public folders. If you have the permission, use the following steps to create the PST file:
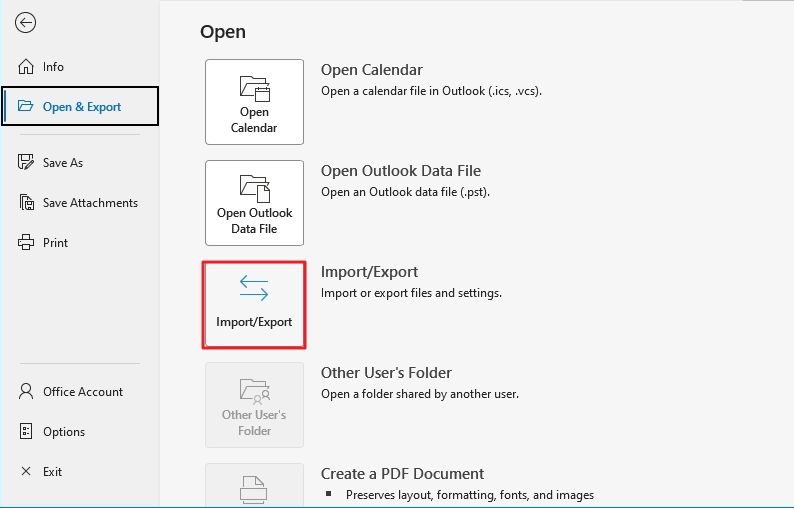
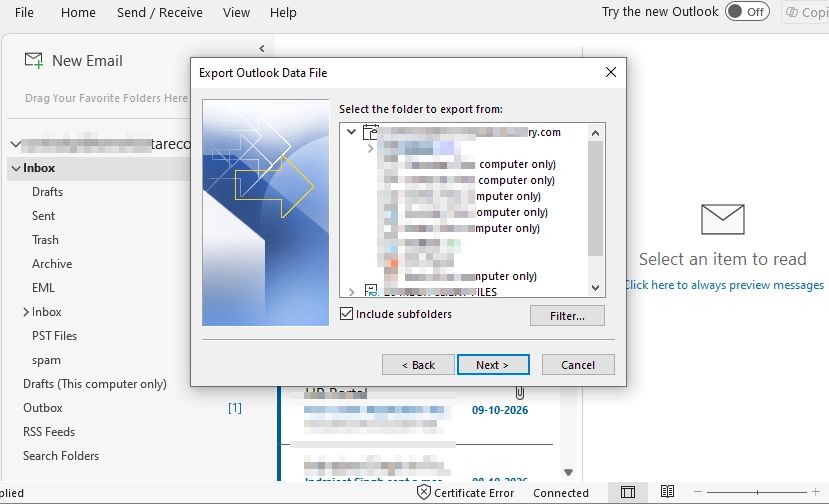
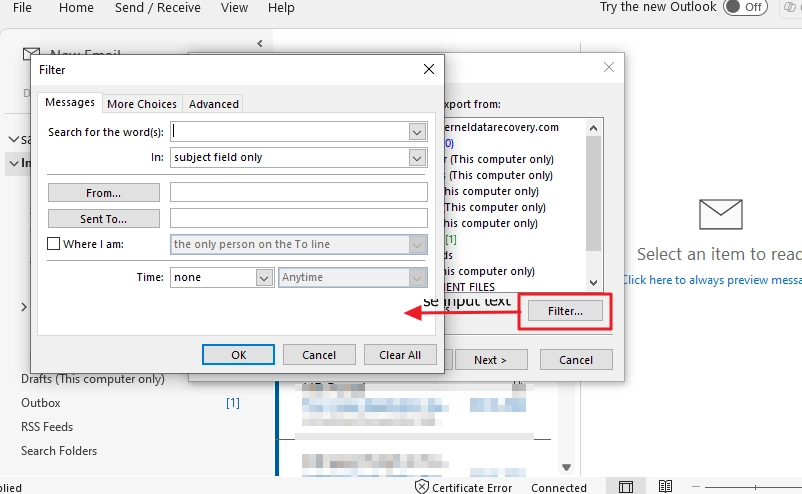
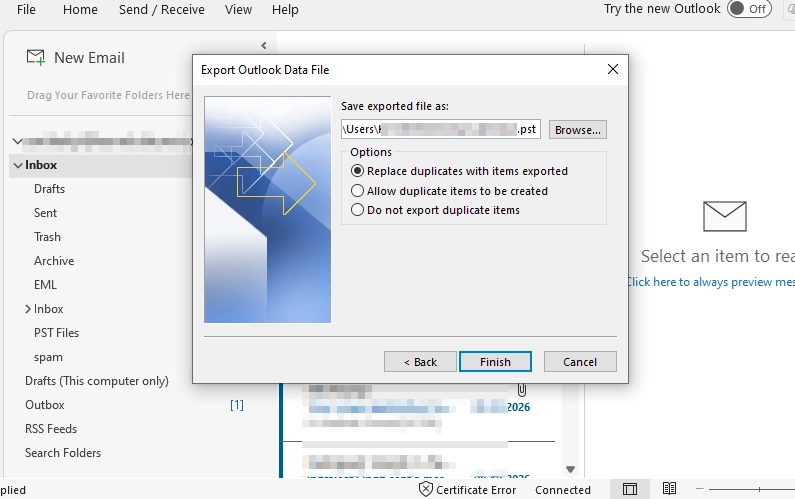
You can open the exported PST file in any version of Outlook or in a PST viewer tool. This manual method of exporting public folder is suitable for a few 100 folders. But if your Office 365 account has thousands or more folders, then using Outlook to export them all will create performance and usability issues.
A better way to bulk export a large number of public folders is to use a professional Office 365 export tool. Kernel Office 365 Backup and Restore supports all Office 365 plans and allows for saving all the public folders in the tenant with original folder name and structure.
The tool offers:
Steps to export Office 365 public folders to PST using the Kernel Office 365 Backup & Restore are:
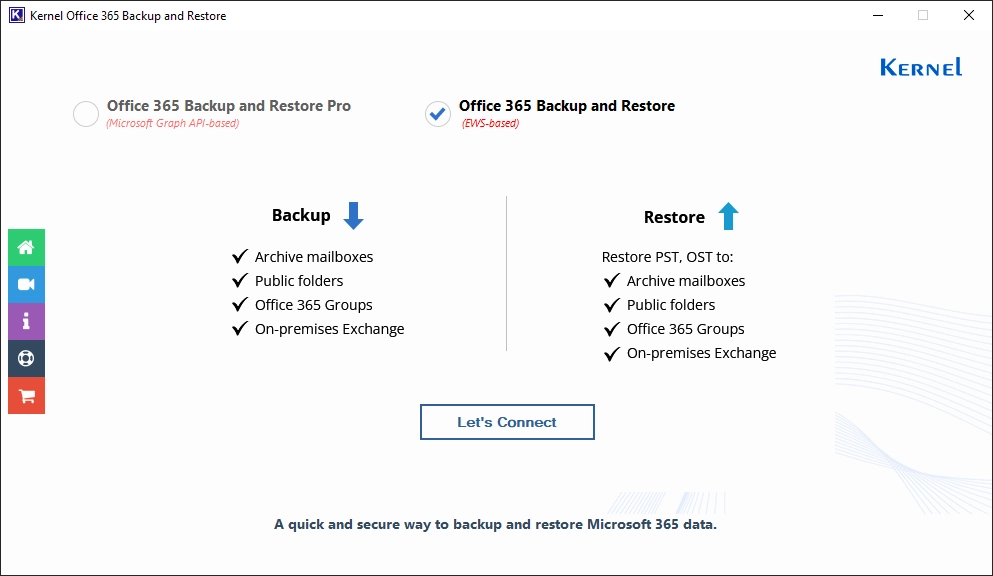
Step 1: Open the tool and select the "Office 365 Backup and Restore (EWS-based)" tool. Then, click on Let’s Connect.
Step 2: Click on the "Backup"button.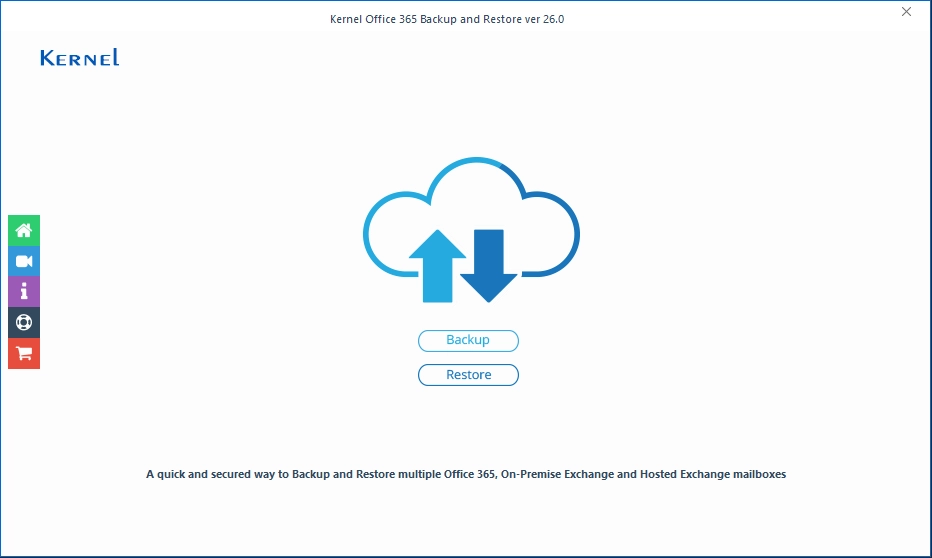
Step 3: Click the "Add" button and select the "Modern Authentication" option.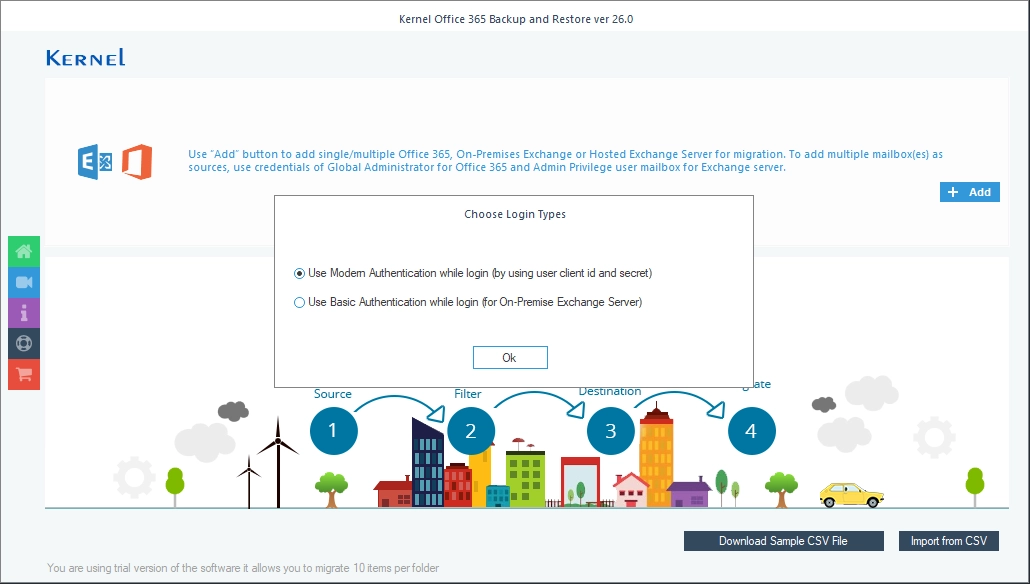
Step 4: In the Office 365/Exchange Login page, enter the required credentials. To backup data from a single mailbox, select "Single Mailbox" option. For bulk backup, click "List all Mailboxes..." option and click Get User Mailboxes. Then select the users and click Add.
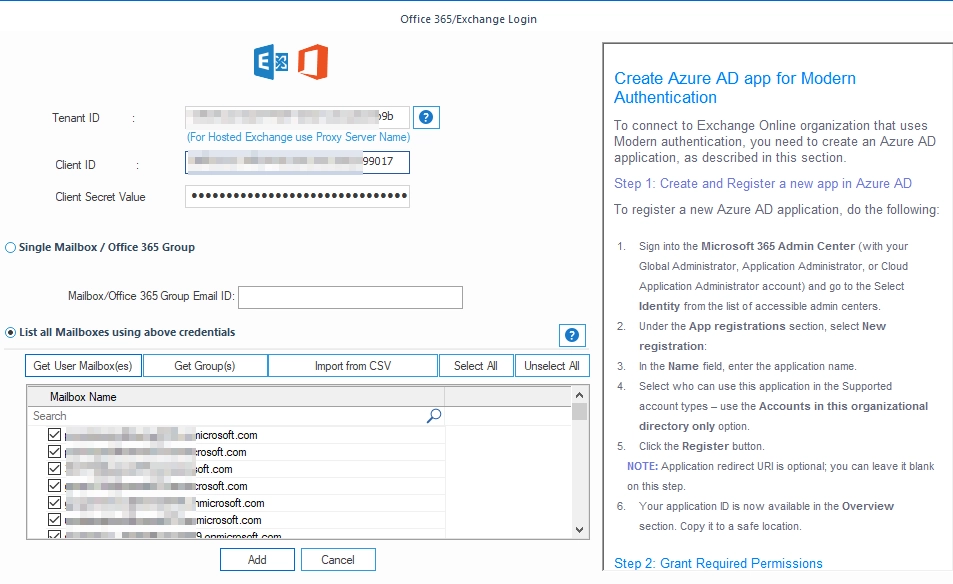
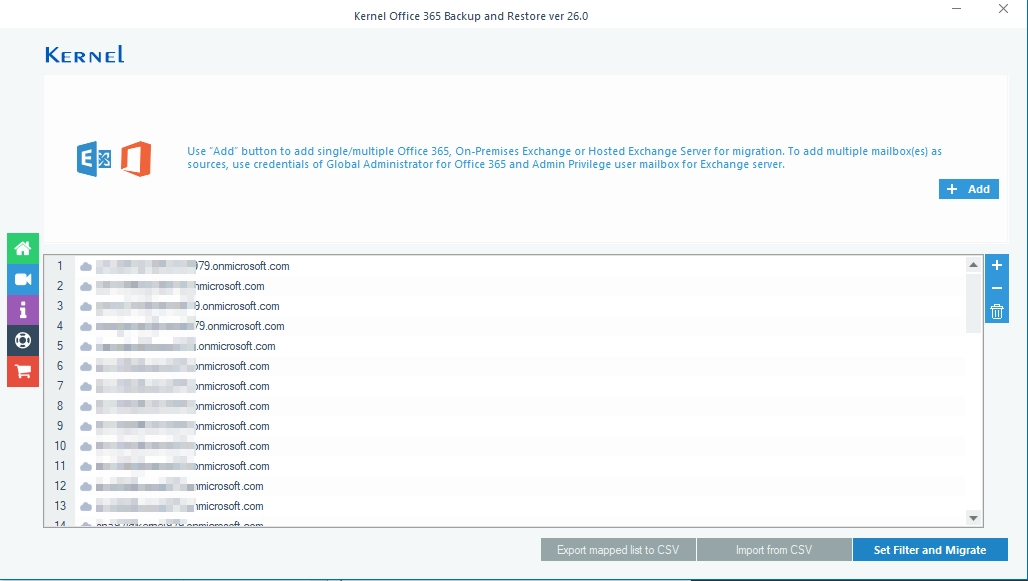
Step 5: Review all the added mailbox. Add or remove as per requirements. Then, click "Set Filter and Migrate" to proceed.
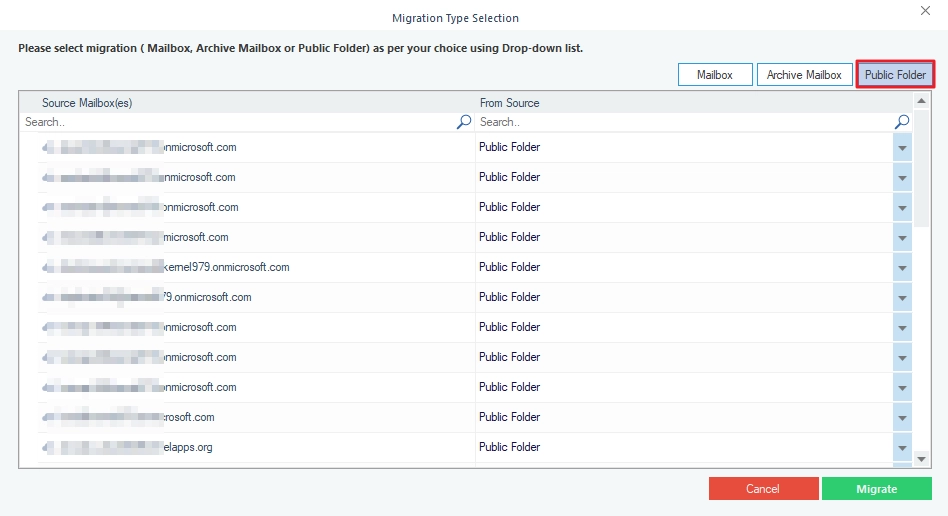
Step 6: Click the "Public Folder" button at the top right and click "Migrate".
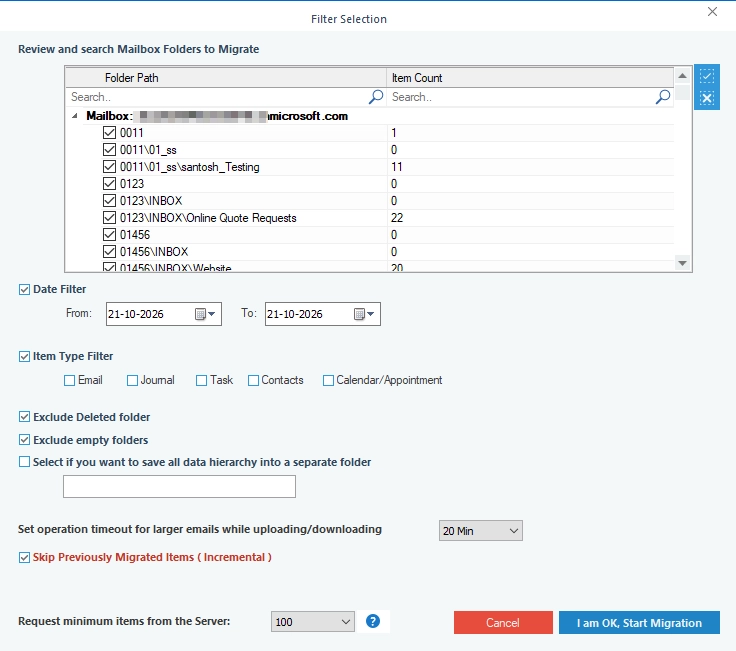
Step 7: If you need to selectively export Microsoft 365 public folder to PST, apply the filters as needed. You can:
Step 8: In the "Save As" wizard, select PST format. If you need to save the data in multiple PST files, tick the "Split Outlook PST File After" and define a size. 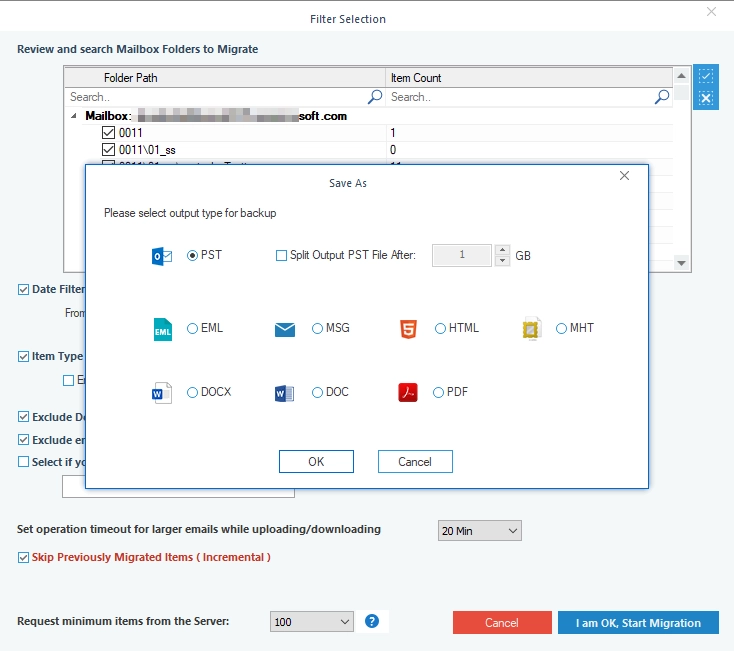
Step 9: Select the location where you want to save the output PST file and click OK to start exporting.
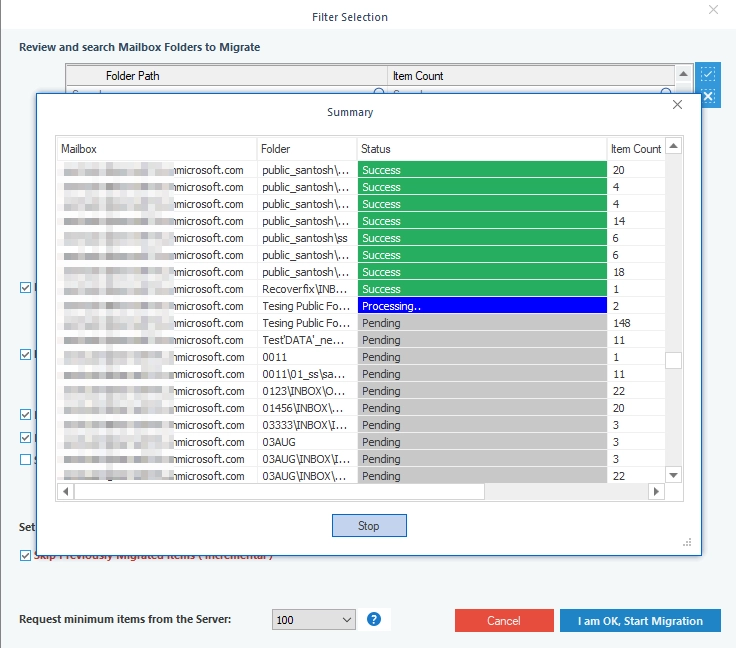
Step 10: The software starts to export Microsoft 365 public folder to PST. When the process is completed, it will display a success message.
It is easy to export Office 365 public folders to PST when you only have a few folders. You can use the Import/Export feature in classic Outlook, as long as you have access and the right permissions. Additionally, you can also use PowerShell or the Purview eDiscovery portal, but these need more technical skills.
Outlook becomes slow and hard to manage when you have hundreds or thousands of folders. In that case, a professional tool like Kernel Office 365 Backup and Restore is the better choice. Choose the method that fits the size of your data and your technical comfort.
Ans.Yes, you can. In Classic Outlook, select the top-level public folder and tick "Include subfolders" during export. All the subfolders will then be saved in a single PST file.
Ans. No, not directly. The new Outlook does not have the Import/Export to PST feature that classic Outlook has. To export public folders to PST, you need to switch to classic Outlook.
Ans.Yes. You can use the Purview eDiscovery portal or Exchange Online PowerShell to get your public folder data without opening Outlook. A professional tool like Kernel Office 365 Backup and Restore also works without Outlook and lets you export all public folders to PST in a few clicks, which is helpful if you are not comfortable with commands.