There are different versions of Outlook, such as Outlook 2016, 2013, 2010 or 2007. Every organization uses Outlook according to their preference and keeping a backup of this data file is very necessary because a hazardous situation like system crash can occur anytime which can result in loss of your Outlook data. But, you don’t have to worry about the Outlook data anymore, as there are several methods to backup Outlook data. In this article, we will take you through the process of how to backup Outlook 2010.
1. Manually Copy the Outlook File
All the Outlook data in a computer is stored in a single file with the extension “.pst.” This file stores all the data like emails, journal, notes, and contacts.
In Vista, Windows 7, Windows 8, and Windows 10, this file can be located via;
C:\Users\
<username>\Documents\Outlook Files
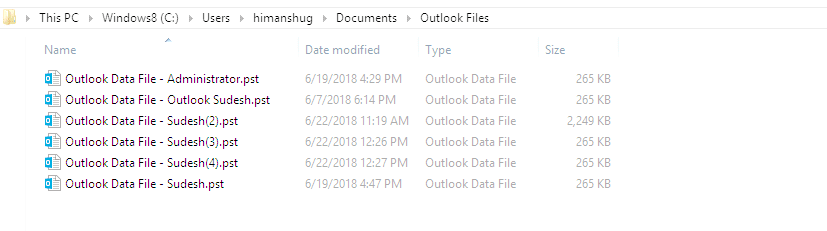
Once you find the PST file, you can easily copy it to any other secure space, such as a different drive, a CD-ROM, or a USB drive. Now, to restore data from this file, go to Outlook on your system and follow these steps;
Click the “File” tab, and then select “Open.”
Now, select “Outlook Data File” and browse the location where the PST file is stored. If any error occurs while opening this file, then right-click in the PST file properties tab and deselect the “Read-only attribute.”
2. Use Import/Export to Backup Data
The import/export option in MS Outlook allows users to create a backup of their data at a desired location in the computer. To create a backup with import/export option, follow these steps;
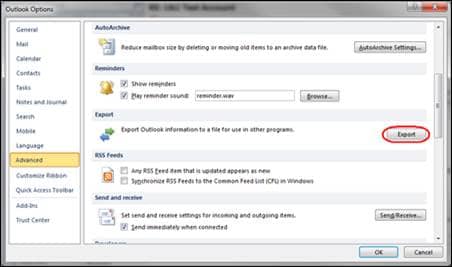
- Open Outlook, go to the “File” tab and click “Option” button from the menu.
- Now, select the “Advanced” option from here and click “Export” in the export section.
- A new wizard will appear on the screen, select “Export to a file” from the drop-down menu, and click “Next.”
- In the next step, select “Outlook Data File” and click “Next.”
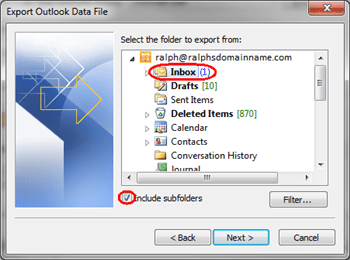
- Now, select the folders that you want to backup, and click “Next.”
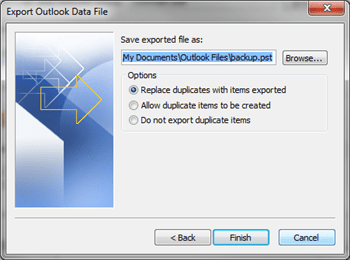
- Now, browse the location where you want to store this backed up data, and click “Finish” to complete the process.
This way you can quickly create a backup for the Outlook 2010 with the help of import/export option.
3. Use Professional Outlook Repair Tool
Kernel Outlook PST Repair is a helpful tool that is used to recover damaged/corrupt PST files, but it is also helpful in creating a backup of Outlook mailbox data to various platforms, such as Exchange Server, Office 365, Gmail, etc. One more advantage of this tool is that it is enriched with advanced filters, which allows users to backup selective data. Also, the user interface and working process of this tool are very simple and easy to understand.
To create a backup through this tool – upload the desired PST file in it, and then select the desired platform where you want to export this file.
Note: You can also save the PST file in different formats with the help of this tool.
These three methods mentioned above are best suited for creating Outlook 2010 backup. Users can pick any solution according to their preferences. But, we would suggest you to choose Kernel for Outlook PST tool, as it is an all-in-one solution for this issue.
Go through the steps given below to backup Outlook 2010 mailbox using Kernel for Outlook PST tool.
- Open the tool.
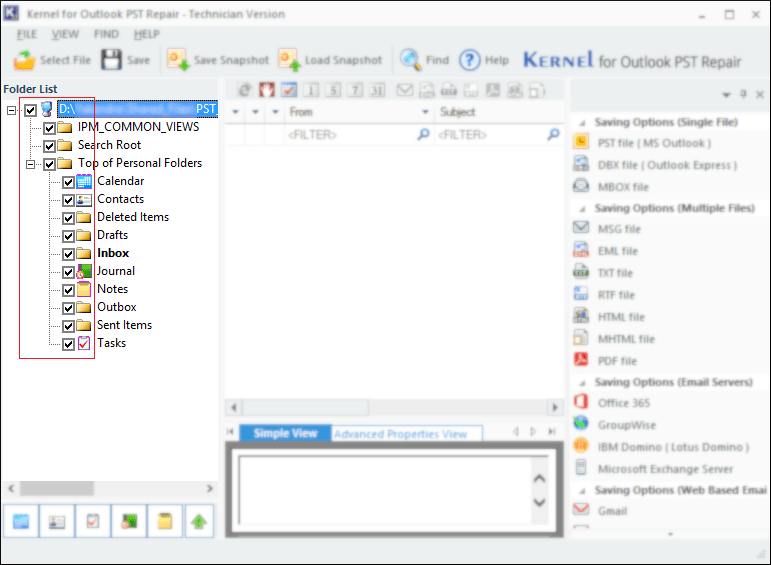
Once the tool is open, it’ll be as shown below.
Here, click on Select File button to select the PST file you want to back up.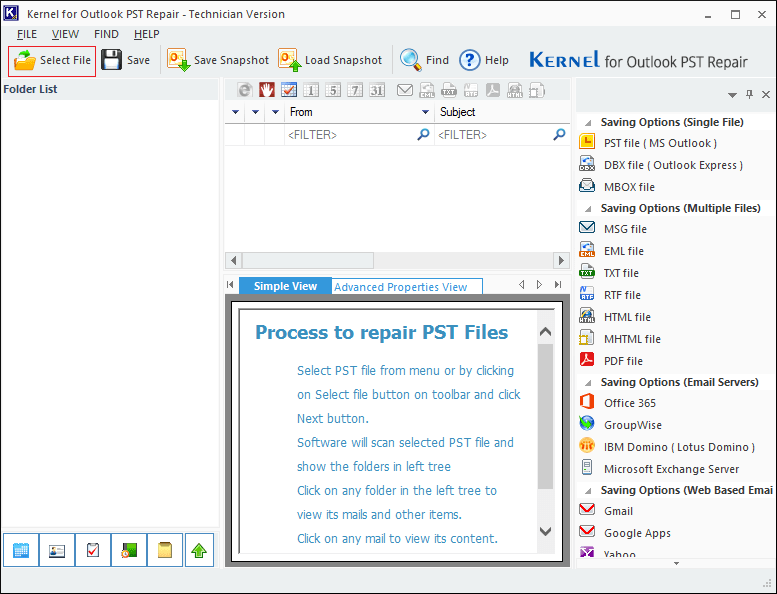
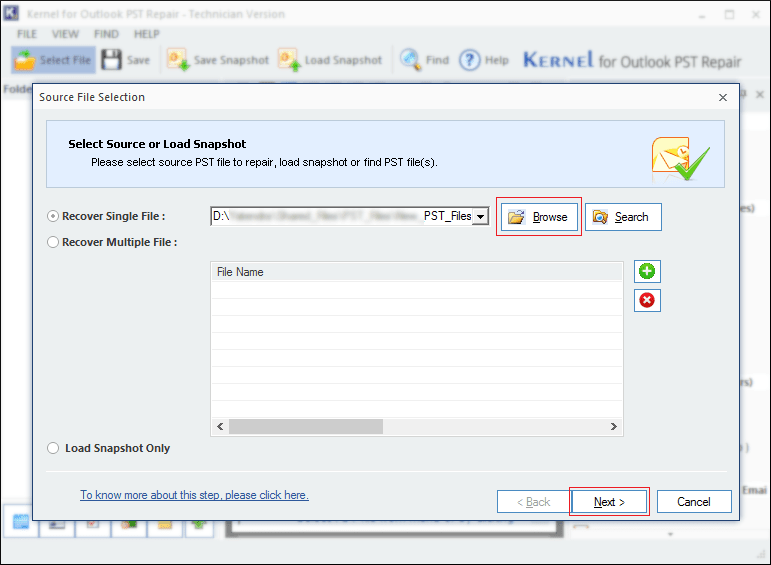
- The Source File Selection window would pop on-screen; click Browse and open the PST file and click Next.
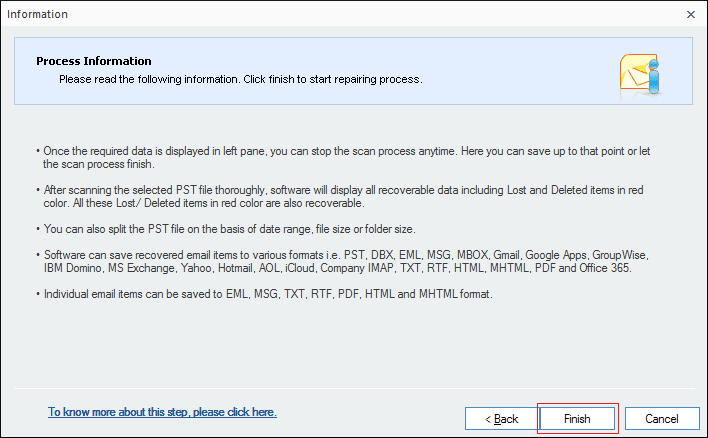
- Acknowledge the process-related information given inside the wizard and click Finish.
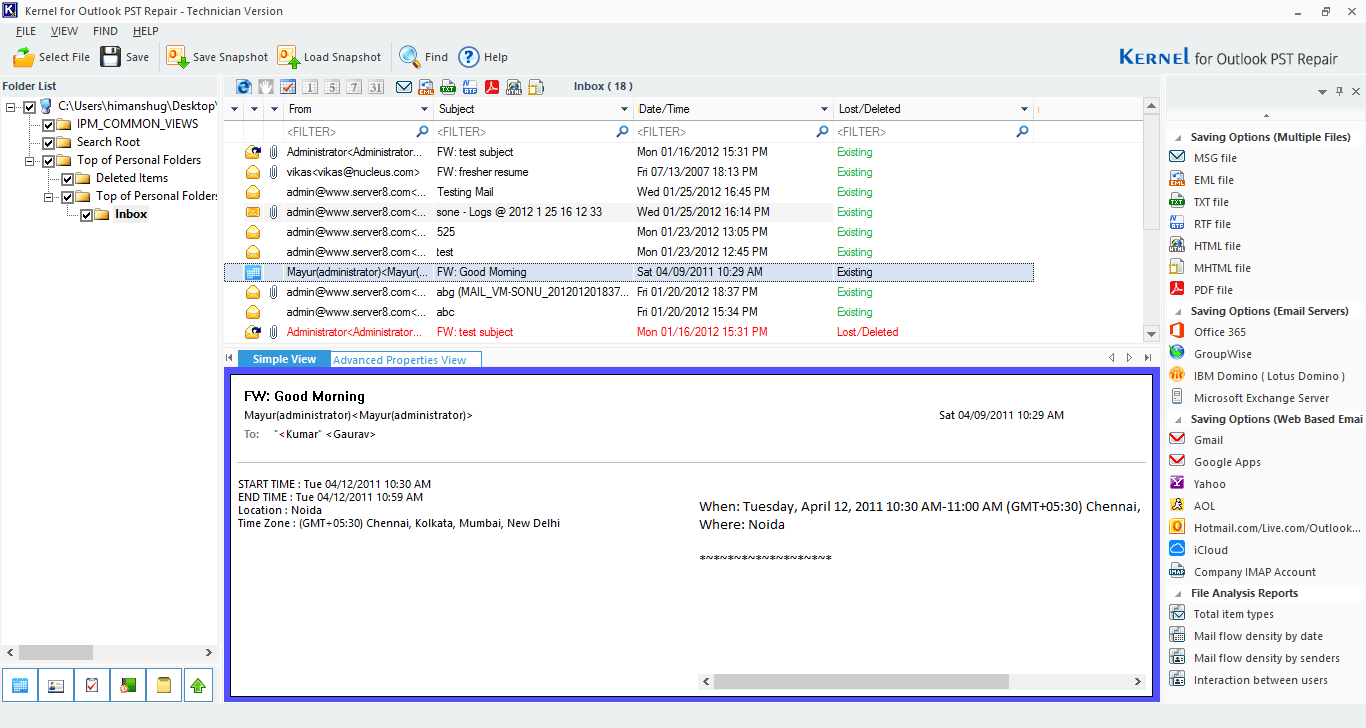
- Once the PST file is loaded successfully, the tool’s UI will refresh and display all mailbox contents in the tree structure.
To backup whole Outlook mailbox (the entire PST file) checkmark the mailbox folder.
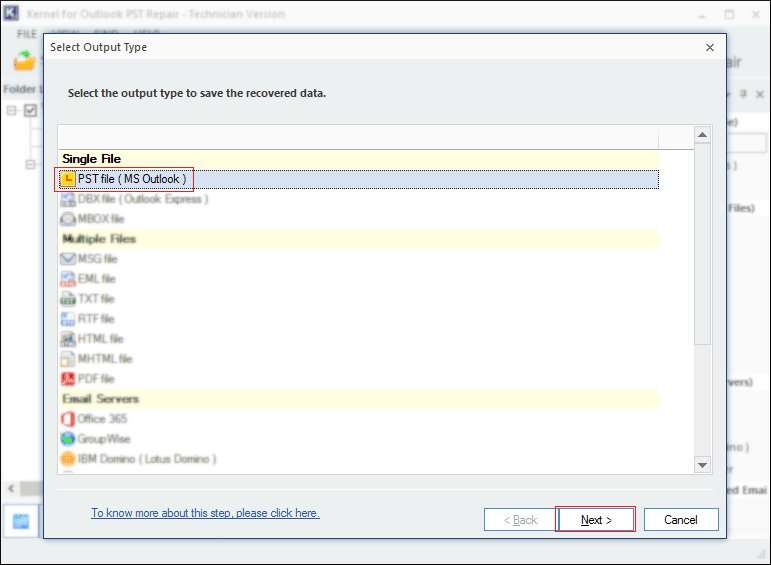
- In this right side, click on PST file (MS Outlook) to begin the backup process.

- With PST file (MS Outlook) being selected, click Next.
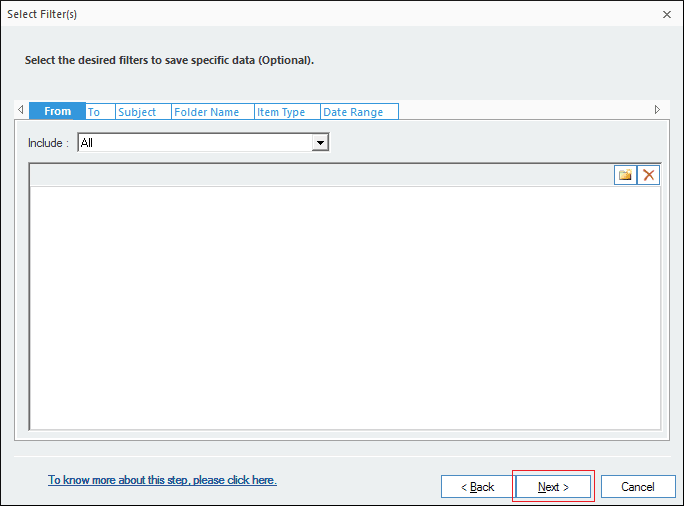
- To create the backup of selected mailbox items or to reduce the output file size, apply the filter(s) in this step. Click Next.
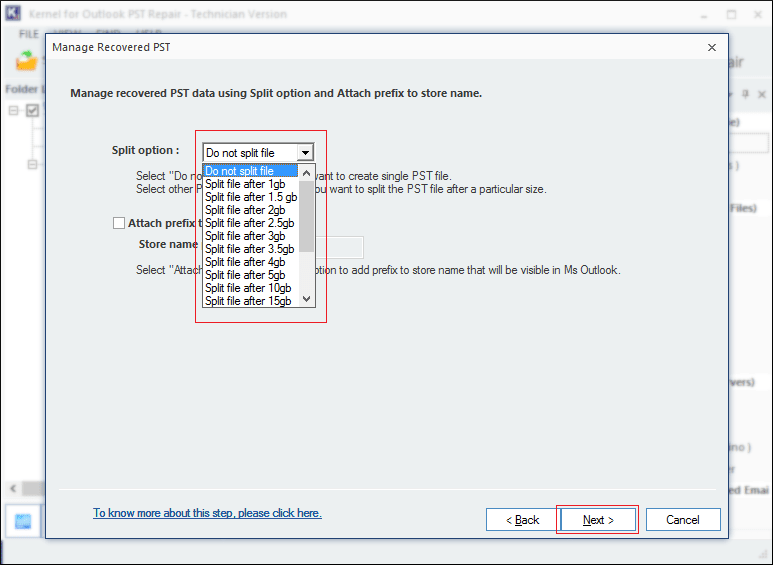
- In this step, you can select PST file size for splitting; click Next.
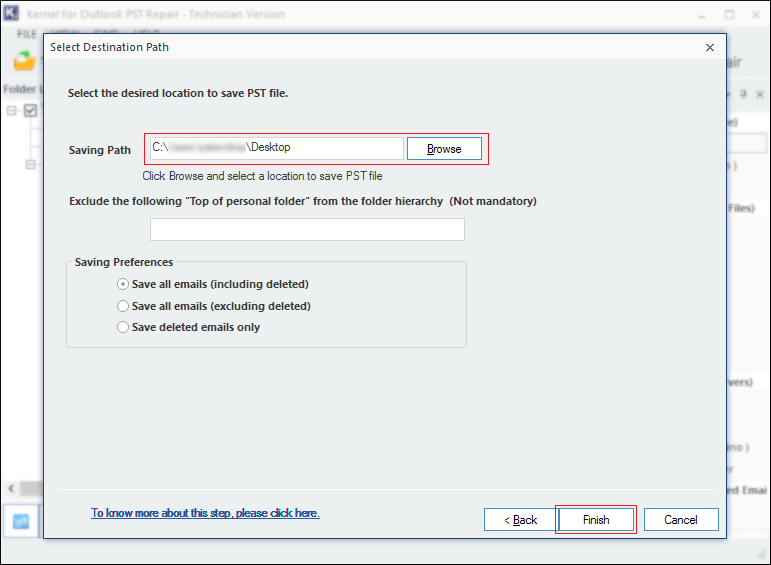
- Click Browse to select the file-saving location and click Finish
- Done, click Ok.
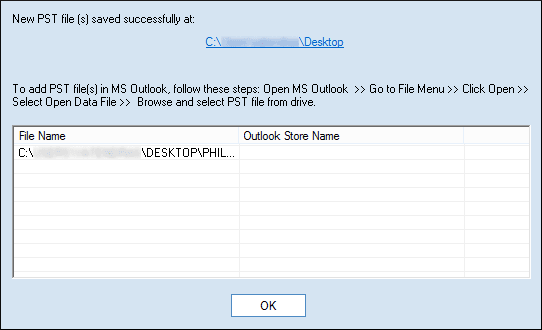
You’ve successfully performed Outlook PST file backup. With features like PST file split and filter(s), you can gain much control over what you want to back up and define the exact items to be saved.