An email signature after your email text represents the identity of the sender. It tells the reader about your professional email, contact number, logo, website, etc. You can say it is a business card which you are attaching with your email message. Many times, it appears like an original business card and shows all the information about your business. If you are using an email manager like Outlook configured with Office 365 account, then also you can add an Email signature to your emails.
However, there are different countries which have made it mandatory to use the email signature in a specific manner, and the business owner has to abide by these instructions. Here are some examples-
- Germany instructs businesses to mention their company name, registration number, place of registration, etc. in each business-related email.
- The Director of Corporate Enforcement of Ireland has made it mandatory for companies with websites to mention their business details in emails.
- United Kingdom's E-commerce Regulations have mandated for all limited companies to mention their business details in every email they send.
Create Email Signature in messages in Office 365
You can create a new email signature in Office 365 Admin portal by following the steps -
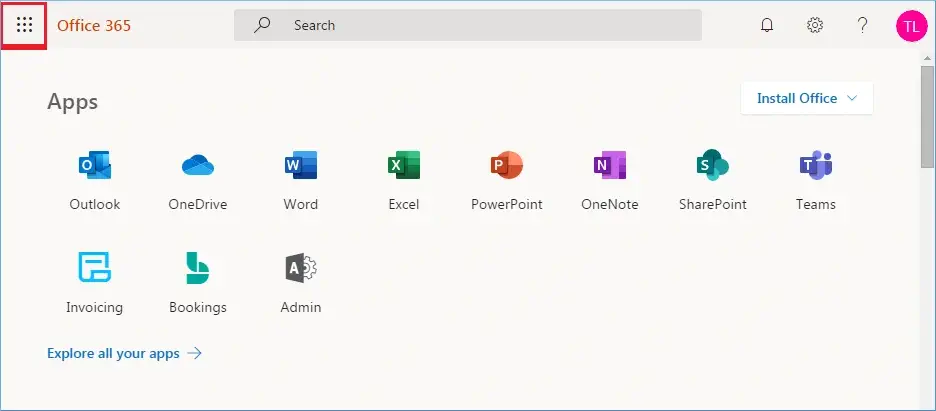
- Log in to your Office 365 account and click the All Apps icon.
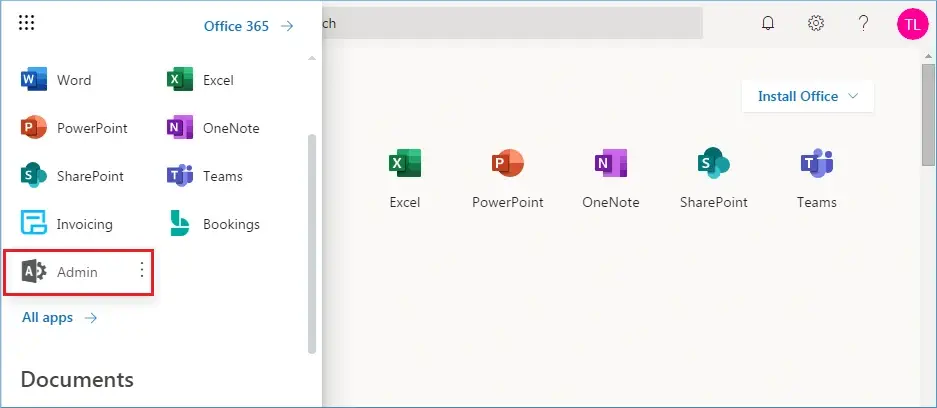
- Click the Admin option.
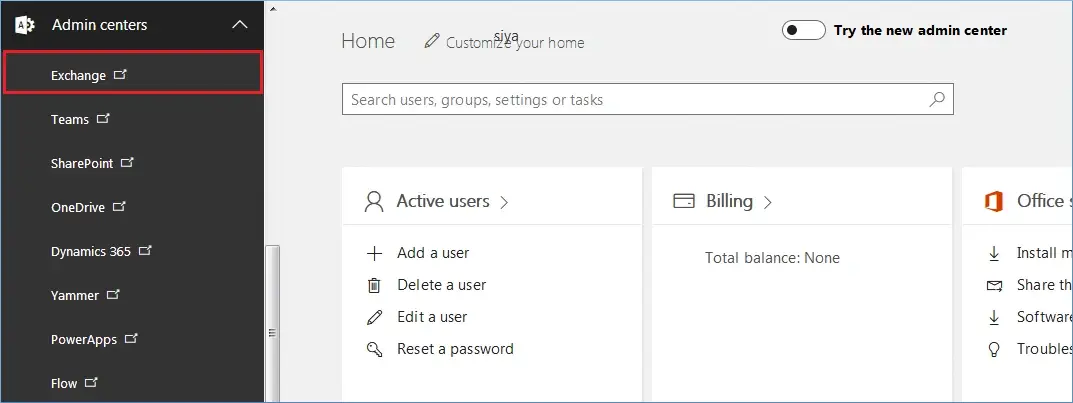
- Under the Admin Centers, select the option of Exchange.
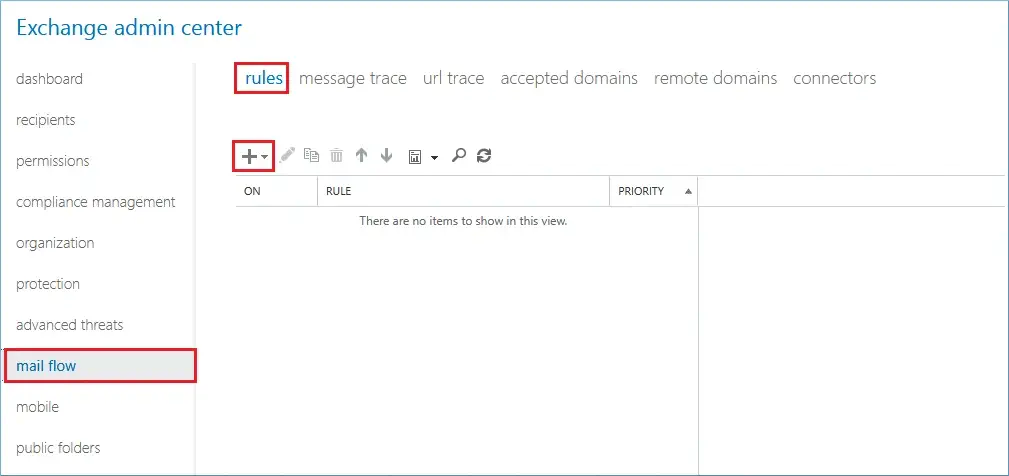
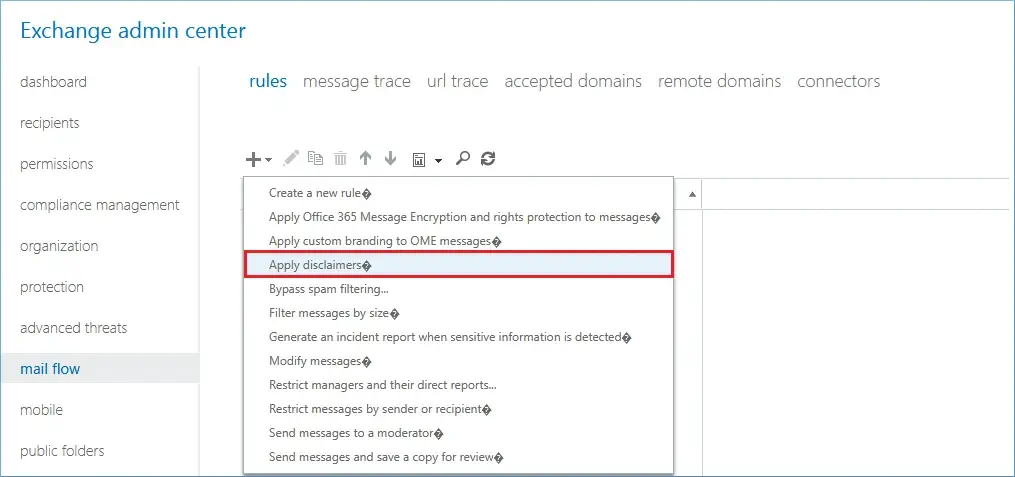
- Here, go to the Mail Flow category and click the Add (+) button in the rules tab.
- Select the option Apply Disclaimer.
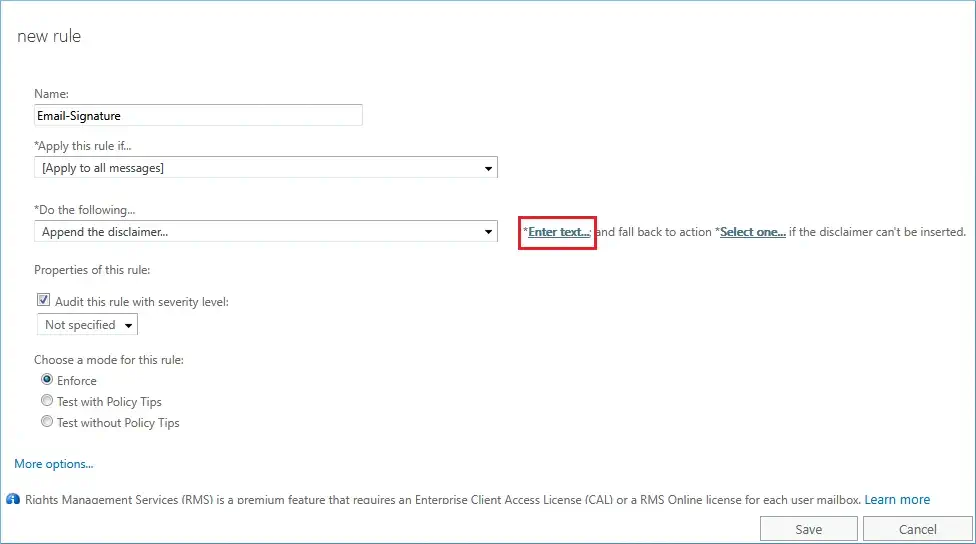
- There is a new wizard new rule:
- Provide a name to it.
- Select option ‘Apply to all messages’ from the drop-down.
- Select option ‘Append the disclaimer’ from the drop-down.
- Click the button Enter text.
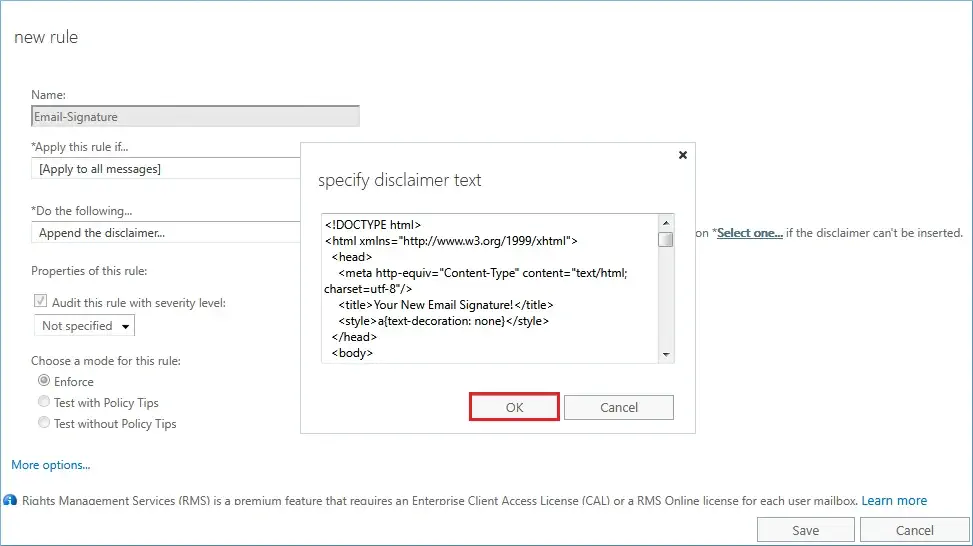
- Input the HTML text, which consists of the whole design of Office 365 Email Signatures. You can also input a simple text. Click OK. Also, click the option of ‘Select one’ and select the ‘wrap’ option in case the disclaimer can’t be inserted.
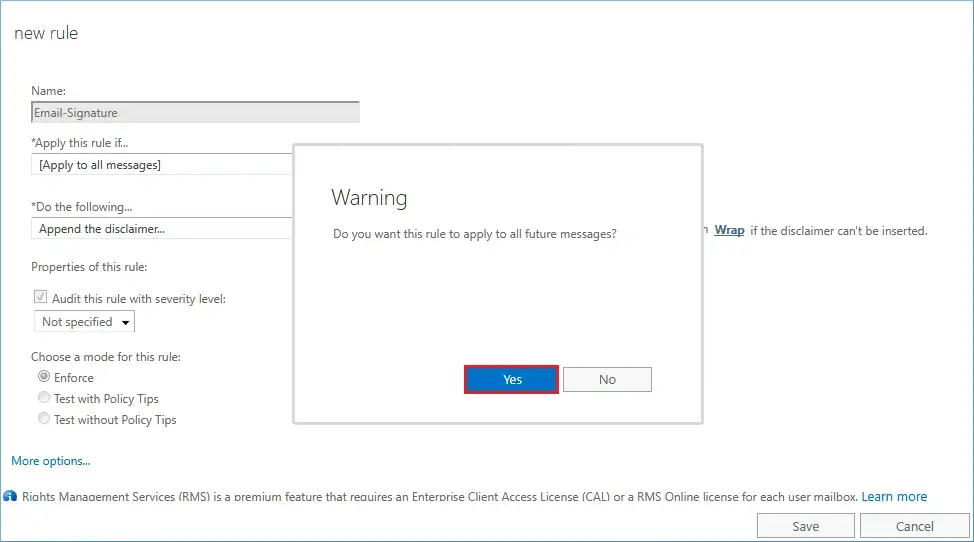
- Choose the ‘Enforce’ mode for the rule and click the Save button.
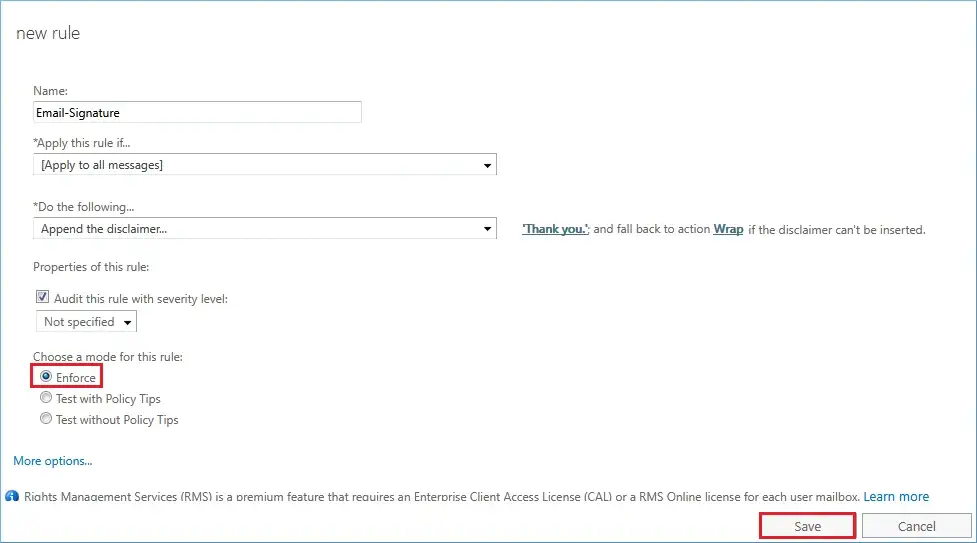
- A warning message asks if you want the rule to apply to all future messages. Click Yes.
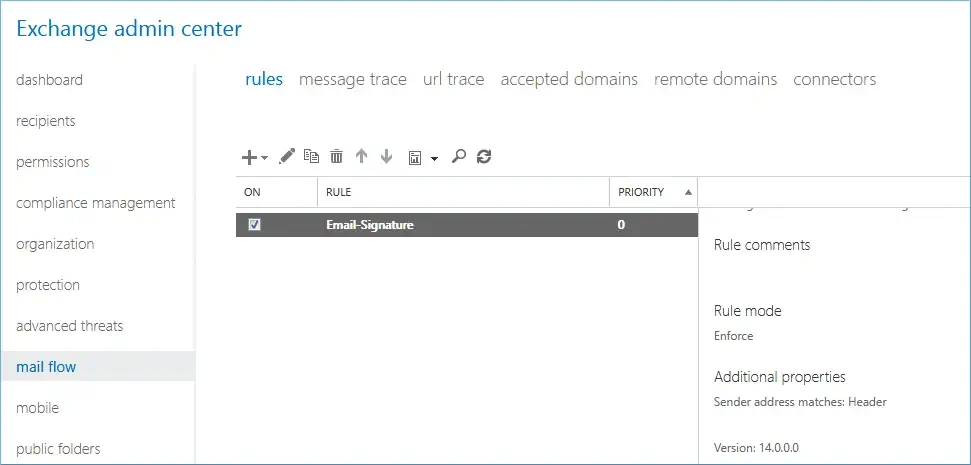
- You can see that a rule has been created.
Here is all about how to add signature in Office 365. Now, whenever you send a message to another person, then there will be an email signature at the bottom of the message.
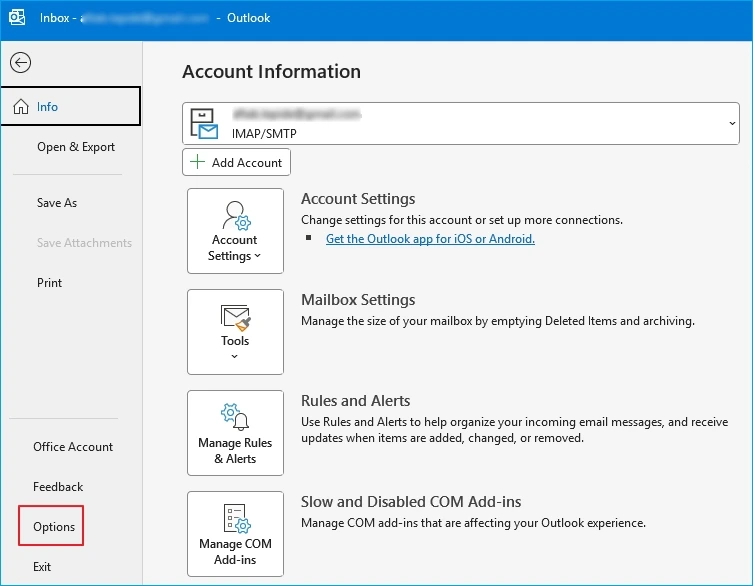
If you are using your Office 365 account in MS Outlook, then you can create more Office 365 personal email signatures with your personal and professional information.
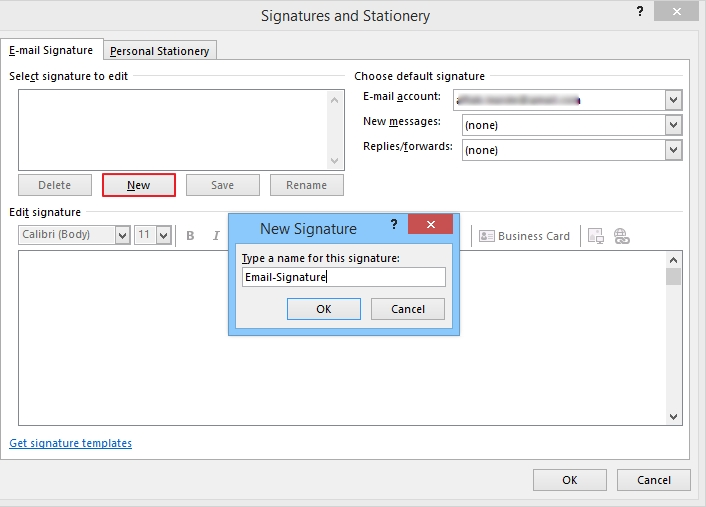
- In Outlook, click on File, then choose Options.
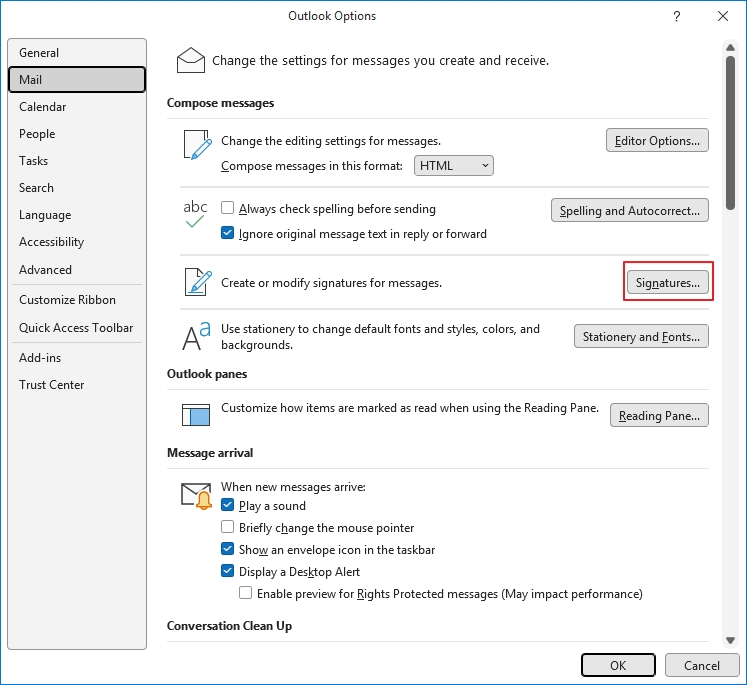
- In the Mail category, select Signatures.
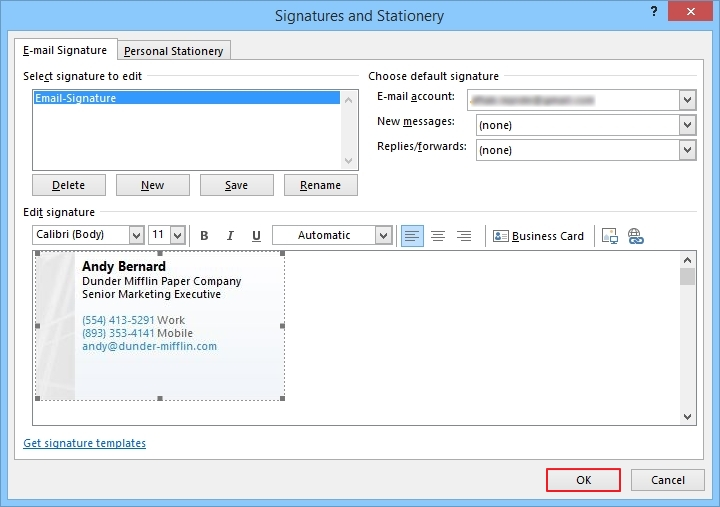
- Click on the New button and provide a unique name to the email signature. Click OK.
- In the body, you can type your information manually or create a pre-existing business card. It will be included in the body too. You can write further details too. At last, click OK.
As we are now through with everything you need to know about “how do I add a signature in Office 365”, there are some limitations for Office 365 email signatures for an entire organization, and the user should be aware of this limitation before going to apply to their messages.
- You cannot insert an email signature under an email reply or forward.
- You cannot display a server-side email signature in the user’s sent item folder.
- You cannot add images in the email signature.
- You cannot skip the lines which contain such variables that couldn’t be updated.
An email signature is a useful feature which not only increases the understandability of the reader of your business, but also makes it more appealing. When you want to take a backup of your Office 365 mailbox, then you need to make sure that the email signature remains fixed with the message even in the backup time and it gets to its original format during restoration. So, when you are going to take Office 365 backup, use such software which protects the whole schema of the mailbox message and maintains the email signature.
Final words
There is a unique tool called Kernel Office 365 Backup Software which accesses the Office 365 mailbox and saves it in a safe PST file. It specifically protects the arrangement of mailbox messages and does not change the message at all. It also keeps the status of the message means the unread message remains an unread message even after backup or restoration. The user can later restore the Office 365 file from PST again.
FAQs
Q - How do I add a company name to my Outlook email?
A - Start by navigating to your Profiles & select Manage Profile Settings. From there, you'll want to find the link underneath your name & contact information. Next, it will take you to a page where you can edit your display name - this is where you can add in your company name to make sure everyone knows who you're representing. With just a few clicks, your Outlook emails will be personalized & professional.
Q - Should I include company address in the email signature?
A - Including your company address in your email signature is a technical aspect that shouldn't be overlooked. Not only does it provide important information for those you correspond with, but it also adds credibility to your position within the company. Along with your work & personal phone number, including both the phone number & physical address of your company creates a professional representation of your business.
Q - How do I link my company email to Outlook?
A - To link you company email to Outlook follow the instruction given below:- Select File > Add Account in Outlook.
- Simply enter the email address & click Connect.
- When prompted, enter your password & click OK & tap on Finish.

A simple tool to Backup Exchange/Office 365 mailboxes to PST & Restore them