Read time: 8 minutes
Summary: Microsoft 365 upgrade subscription lets you access more features, storage, and users. To upgrade your Microsoft 365 subscription, you need to review your current plan, select the higher-tier plan, and purchase. In this article, you will learn how to upgrade your Microsoft 365 subscription step by step easily. Also, you will get insights into a trusted utility Kernel Office 365 Migration to fulfill your Microsoft 365 migration needs.
The ever-growing business needs to remain flexible and productive enough to accommodate the latest changes in the market. Over the past several years, cloud computing has given companies the capability to grow more with little monetary expense. Microsoft 365 provides the business with innumerable advantages as the MS Office Suite is present in the plan, including Exchange Online and SharePoint Online.
Microsoft 365 subscription provides access to some of the most amazing tools of Microsoft’s suite. However, many businesses often start with the basic subscription plan of Microsoft 365, so they need to upgrade their plans according to their requirements over time. In this blog, we will discuss how you can upgrade Microsoft 365 subscription, and you’ll also get to know how you can migrate from one Microsoft 365 tenant to another. But before that, let’s have a clear understanding of the types of Microsoft 365 plans & subscription.
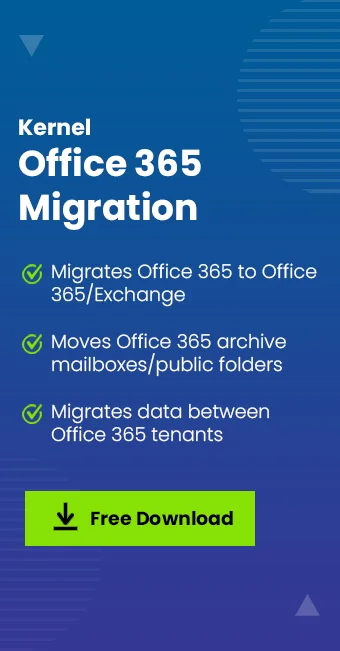
Apart from the up-gradation, if someone is looking to transfer data from one office 365 tenant to another, then try Kernel Office 365 Migration tool. It is a quick and accurate solution.
Types of Microsoft 365 Subscription
Generally, there are three types of Microsoft 365 subscriptions: Personal, Home, and Business. Every business often starts with a personal plan in the beginning, and then upgrades themselves to a home or business plan according to their needs.
With the Microsoft 365 Personal subscription, you get only one licensed user subscription that can be used on one system. However, the home or business subscription is completely different from it. Here are some points that rectify the differences between these two plans.
| Microsoft 365 Subscription | Categories | Features |
|---|---|---|
|
Personal & Family Plans (Designed for individuals and households) |
|
|
|
Business Subscription (Designed for organizations) |
|
|
|
Enterprise Subscription (Large organizations & corporations) |
|
|
|
Education Subscription (Schools, colleges & universities) |
|
|
As most businesses rely on a home plan in the beginning, they need to upgrade to a business subscription. However, if you’re using a personal license, then you can easily upgrade to home license using a product key.
Methods to Upgrade Microsoft 365 Subscription Plans
Now, if you’re planning to move to an upgraded version of the Microsoft 365 subscription, then you need to purchase a new plan so that you can easily switch from your current plan. Below, we have mentioned the detailed process to upgrade Microsoft 365:
1. Switch to Microsoft 365 Business Plans
The process to upgrade Microsoft 365 Personal to business is simple with the right strategy. When you switch to an upgraded account, all users will be assigned licenses automatically in the new plan, and your old plan will be cancelled. Follow the steps below to know how you can switch to business plans:
- Sign in to your Microsoft 365 account and go to the Admin Center.
- Now, go to Billing section and click the Subscription Page.
- On the subscription page, select Switch Plans to check the list of available new plans.
- Choose the plan that you want and check the total cost per month. Also, be sure to check the Key information about the plan, and then click Next to check out.
- If you need any help regarding the subscription, then go to the Microsoft Online Support page to directly communicate with the support team and raise any queries.
Note: Microsoft 365 will take some time to finalize the switching process. Once it is completed, you can use your new subscription right away. But the provided Switch Plans button doesn’t work in every situation, so you’ll have to switch plans manually. Also, this option applies to the old admin center. So, you can use the Upgrade tab in the new admin center.
2. Upgrade to Microsoft 365 Business Plans
The upgrade tab allows you to move to an upgraded plan of Microsoft 365. Once you move to a new plan, all users will be assigned licenses automatically. Follow the steps below to proceed:
- Sign in to your Microsoft 365 account and go to the Admin Center.
- Click on the Billing option. Switch the toggle to Try new admin center option on the top-right.
- Now, go to the Billing section and click Products & Services.
- The subscription details page will appear on the screen. Select Upgrade.
- Select the plan to which you want to upgrade, and then click the Upgrade button.
- Enter the number of licenses that you want and choose whether you’ll pay every month or for the whole year, and then click Checkout.
- On the checkout page, verify the Sold to Address, the Billed to information, and Items in order. You can select the payment method that best fits your needs. And if you need to make any changes in the subscription plan, then click Change next to the applicable section.
- Once you’re making changes to the plan, click Accept agreement & place order.
After the checkout, it will take some time to finalize the upgrade. Meanwhile, you can check the upgrade status. Once the upgrade is completed, you’ll get a notification confirming the same. You can get the detailed information to upgrade Microsoft 365 Home subscription to a business on official Microsoft website. Apart from this, it is recommended to backup your data before changing the Microsoft 365 plan for business.
Recommendations for Microsoft 365 Upgrade
If you have decided to upgrade Microsoft 365 subscription, then it is recommended to consider these points:
- Your system should meet the system requirements for the latest version
- Uninstall the earlier version of Microsoft 365 before upgrading, just to ensure that there are no errors while performing the upgrade
- Usually, the files are not deleted when you uninstall the earlier version of Microsoft 365 before installing the newer version. But if the earlier version contains Outlook, then it’s crucial to back up your Outlook data.
Well, upgrading the Microsoft 365 plan is easy, but when it comes to performing a Microsoft 365 tenant-to-tenant migration, the manual methods are not that easy, as they involve using PowerShell commands. So, using a trusted and professional tool is wise to migrate Microsoft 365 mailboxes from one account to another.
Ultimate Solution: Kernel Office 365 Migration tool
When we talk about the best Microsoft 365 migration solution, the Kernel Office 365 Migration tool stands out due to its feature-rich capabilities and easy-to-use approach. It is a useful tool that is especially designed to transfer Microsoft 365 mailboxes to another Microsoft 365 account. Features like selective data migration, include/exclude folders, etc., make this unique and helpful for all kind users and businesses of all sizes. With the help of this tool, you can also migrate Microsoft 365 mailboxes to Exchange account. Also, it is suitable for every Microsoft 365 subscription and Exchange versions.
Conclusion
Upgrading your Microsoft 365 account becomes a necessity when your business starts growing. Also, when you need advanced Microsoft 365 features, you’ll have to buy the business plans. So, here we discussed how you can upgrade Microsoft 365 subscription, and how you can perform tenant-to-tenant migration of Office 365 mailboxes. With the recommended professional solution, you can perform migration tasks without manual hassle and data loss.
Frequently Asked Questions
Ans: No, you don’t need to cancel Microsoft 365 subscription before upgrading. Simply purchase the required plan using the same Microsoft account. Microsoft will automatically convert your remaining subscription time to the new plan.
Ans: Upgrades activate immediately after the purchase of Microsoft 365 upgrade. You can start using the new features right away.
Ans: Yes. You can upgrade from Microsoft 365 Personal to Family by purchasing the Family plan with the same Microsoft account.