Read time 11 minutes
A MOV file format is a standard multimedia file format developed by Apple and is compatible with both Mac and Windows. Usually, MOV files commonly use the MPEG-4 codec for compression. Many QuickTime (QT) users are dealing with the ‘MOV file not playing’ issues and are looking for a solution to overcome this problem. In addition to this, many users are looking for ways to repair corrupt AVI video files. Here, we will shed some light on some of the most common causes behind this issue and a few of the resolutions to get past this error.

Causes behind the ‘MOV file not playing’ issue
- Viruses and malicious attacks
- Major compatibility issues with the codecs (incorrect audio codecs)
- Bad sectors on the storage device
- File corruption or damage to the system files
- MOV files got imported incorrectly
- An incorrect system update
- Errors in synchronization
- Updating media player incorrectly
- Different media players used for MOV files
- Your program has a big media cache
If any of the above issues are there, then the QT player may refuse to recognize its proprietary file format .mov, creating panic among the users. Well, there are ample third-party tools and some DIY techniques that one can try before giving up!

Try the automated tool – Kernel Video Repair Tool to resolve the issue “MOV files not playing” in few simple steps.
Ways to fix the ‘Mov files not playing’ issue
The most efficient ways to fix this issue are listed below:
Method #1 Change the file extension
Some individuals have stated on numerous forums and posts that their issue was resolved by just changing the.mov or.mp4 extension to .3gp, .avi, or .m4v. Sometimes changing the file format makes things work. Therefore, before continuing, we urge the user to attempt this temporary solution.
You will need to follow these steps to fix the issue.
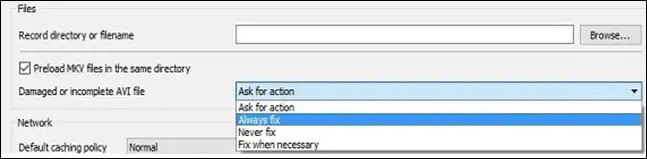
- First, you need to create a copy of the corrupted MOV file. Then change the .mov extension to .avi.
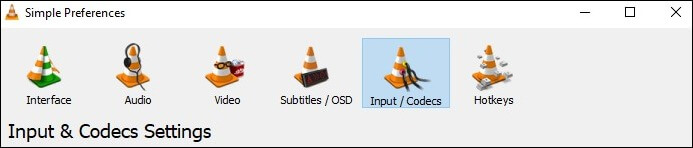
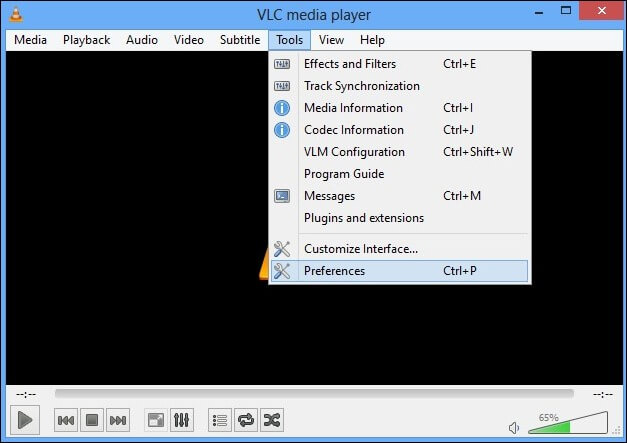
- Launch the VLC media player. Select Tools. Click Preferences.
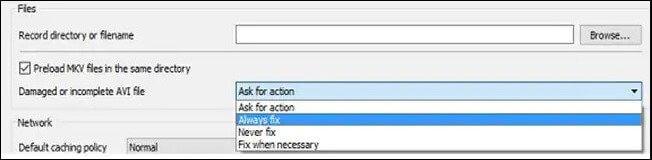
- Under the Simple Preferences option, you need to tap on Input/Codecs. Click on the Save button.
- Under the option damaged or incomplete AVI file, a few options will come up. Choose Always fix.

Note: In case, this trick doesn’t work for you, you can try converting the video formats. Converting the video file format can also give the desired results, as doing this allows you to convert the video file to a format your media player will surely support. With this article, you can learn to convert 3GP video file to MP4 without losing quality.
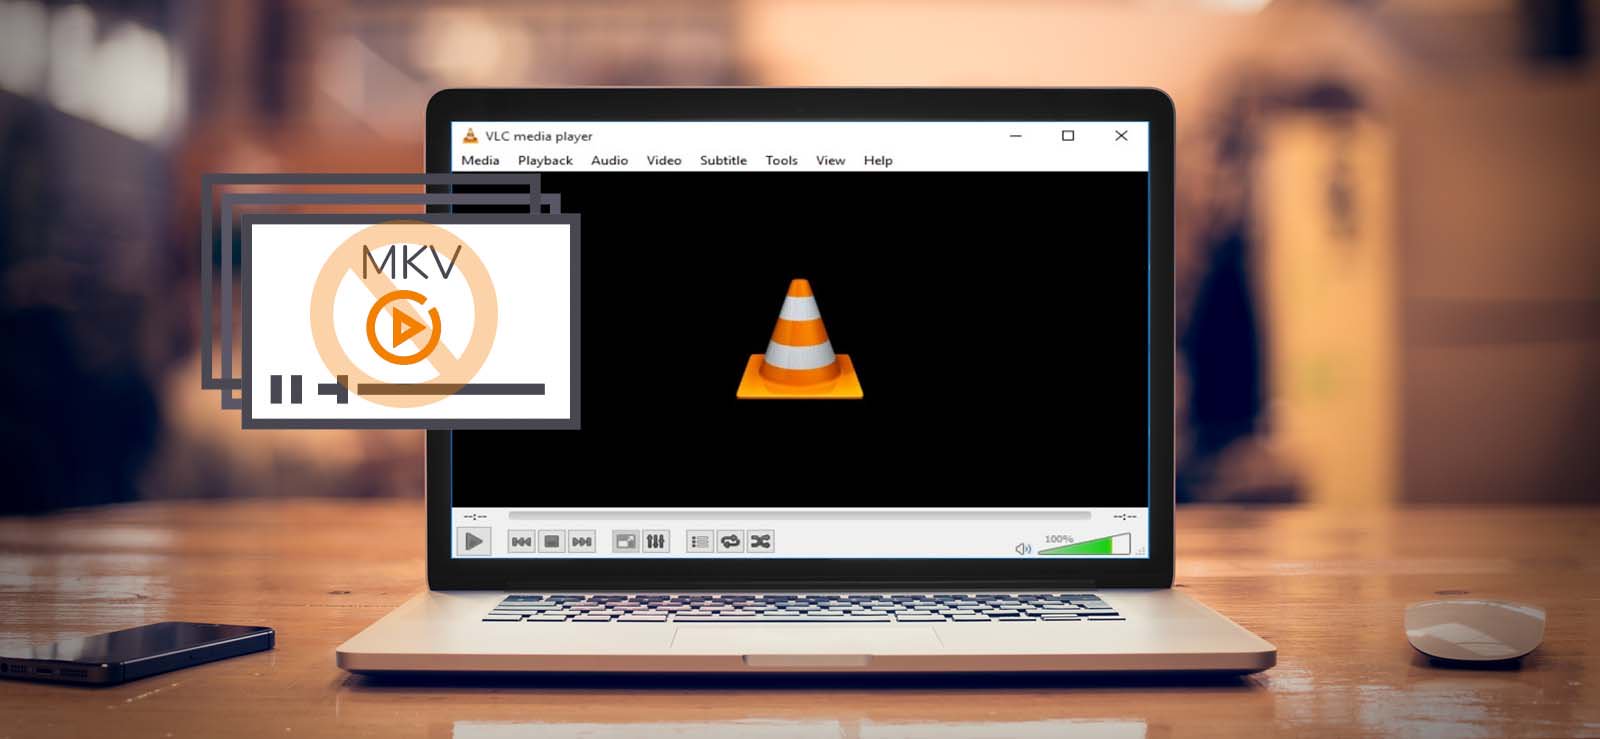
Method #2 Use alternative players
One might be able to play the earlier unusable MOV files by trying other media players. Useful third-party applications include VLC, GOM Player, DivX Player, Media Player Classic, and others. Below, we’ll use VLC Media Player to fix our faulty MOV files.
Repair using VLC media player
VLC Media Player has a lot of tricks up its sleeve, making it much more than just a media player. Users of this program, which is available for both Windows and Mac, may easily fix their damaged video files. It can, however, fix a small variety of errors and corruption.
Follow these steps to repair the video-
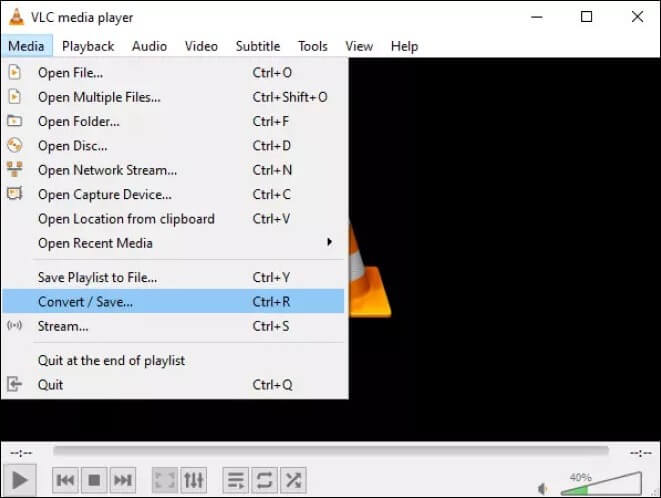
- Launch the VLC Media Player and click on Media to open a drop-down menu of options. Tap on Convert/Save.
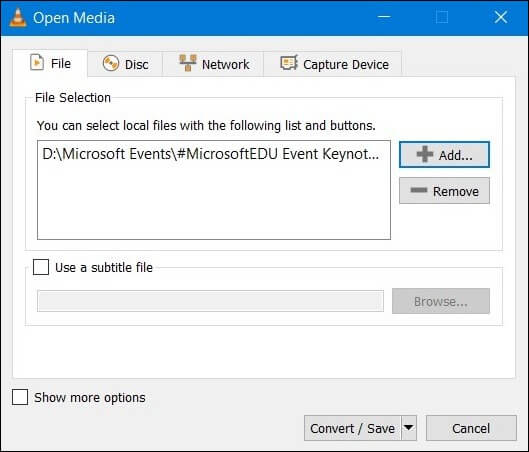
- Select +Add to open the video with VLC. Click on Convert/Save.
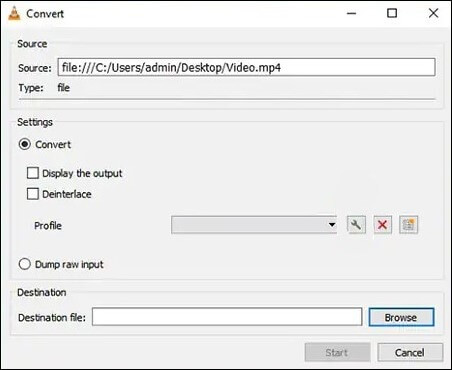
- Within the Settings option, opt for the correct codecs. Select AVI as the preferred format.
- Click on Browse to choose a location to save the video and tap on Start.
- From the main menu, select Preferences. Choose the Always fix option and click on Save.
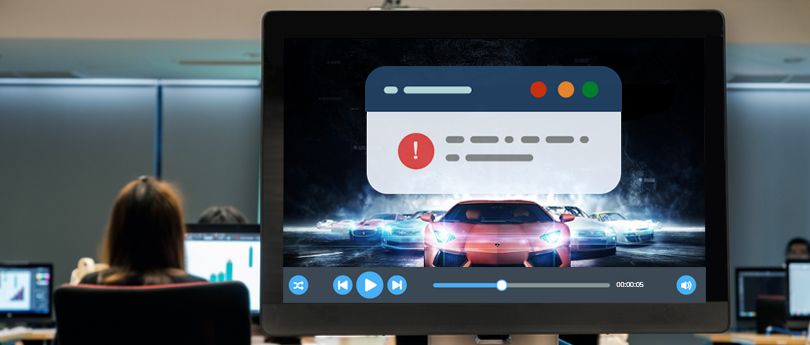
Method #3 Check with QuickTime
Even QuickTime media player can be used to check a corrupt and damaged video file. You can have a detailed check on your MOV videos and then, play it with the same media player.
Follow these steps to check your video using QuickTime player-
- Open the MOV video in the QuickTime player.
- Select the Window tab and click on Show Movie Inspector. A detailed description of the video will be displayed.
- If the video is corrupted, a black screen will be displayed.
- If, the MOV file is corrupted, tap on the Edit option within the QuickTime menu.
- Select Preferences and then tap on QuickTime Preferences. Use the Update button to update your player.
- Restart the QuickTime Media Player.
- Lastly, check if your MOV video is repaired or not. In case, the black window still appears, move on to our next solution.
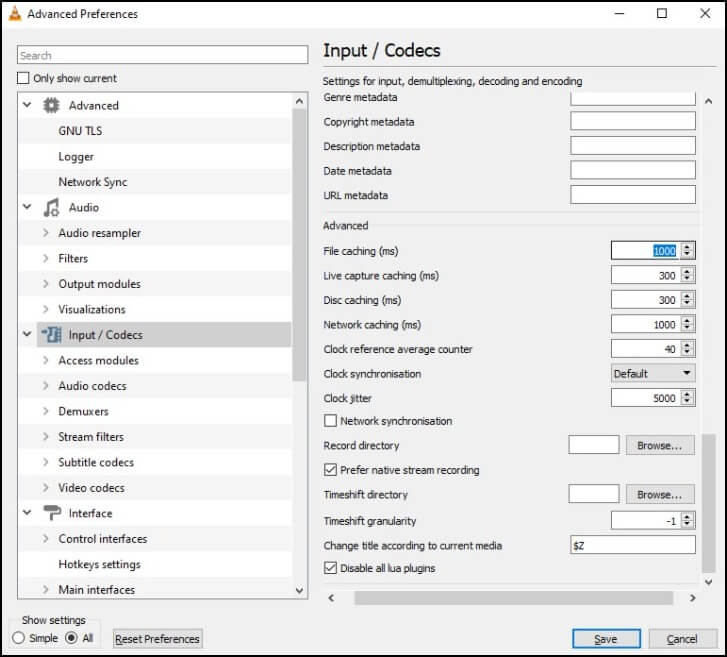
Method #4 Increase Cache Values in the VLC Player
In addition to fixing fully corrupt MOV files, this method also works to fix the video lags or stutters associated with MOV files. The following steps will show you how to increase the Cache values in VLC.
- Open the VLC Media Player and tap on the Tools option.
- Within the Tools menu, click on Preferences.
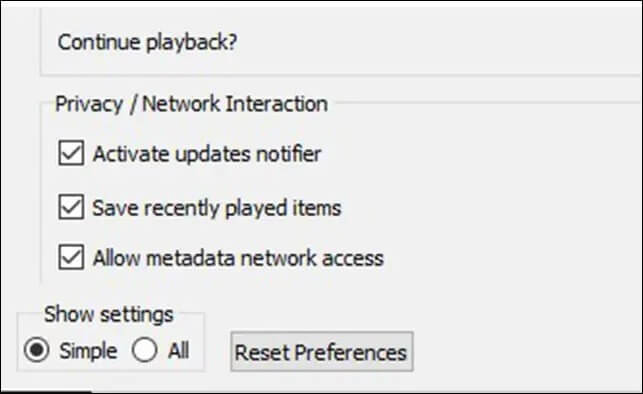
- Under the Show Settings option, two options appear – Simple & All. Click on All
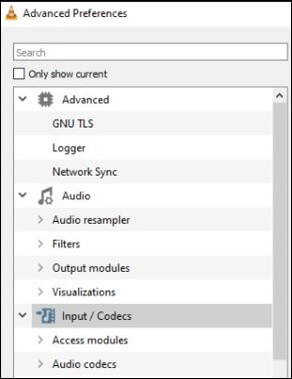
- Next, click on the Input/Codec option and choose the Advance option.
- Within the File caching(ms) option, you need to increase the cache value to 1000.
- Lastly, click on Save and restart your VLC player.
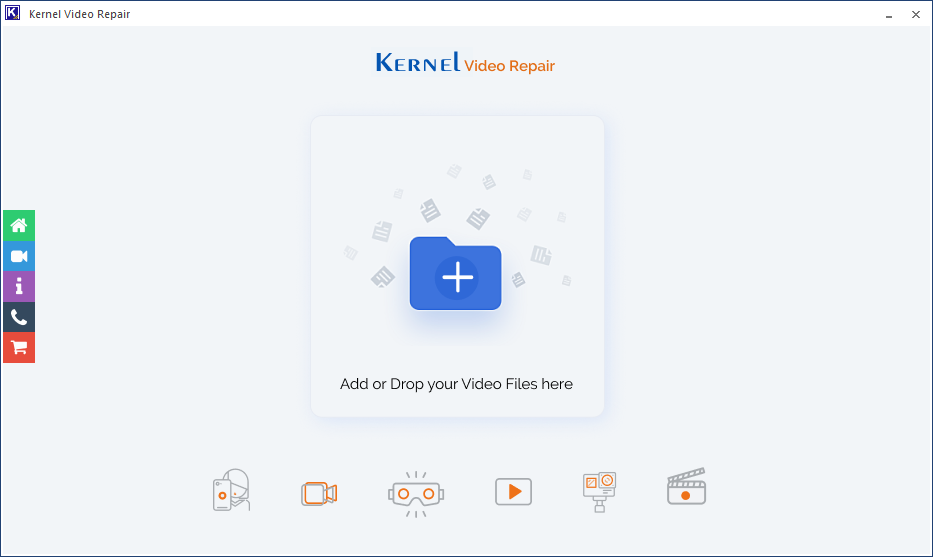
Method #5 Kernel Video Repair
If the above-given methods didn’t work out for you, then it means that your video file is severely corrupt, and it is the right time to look for a reliable third-party tool. An advanced tool such as the Kernel Video Repair Software can be used in this adverse situation. This tool can very quickly repair inaccessible or corrupt video files. The preview feature of this tool lets you preview the repaired files prior to saving them. It is worth mentioning that this tool can also repair corrupt WEBM video files, which is a format that YOUTUBE uses for all its videos
Let us now look at the working of this tool in detail. Please follow the steps outlined below:
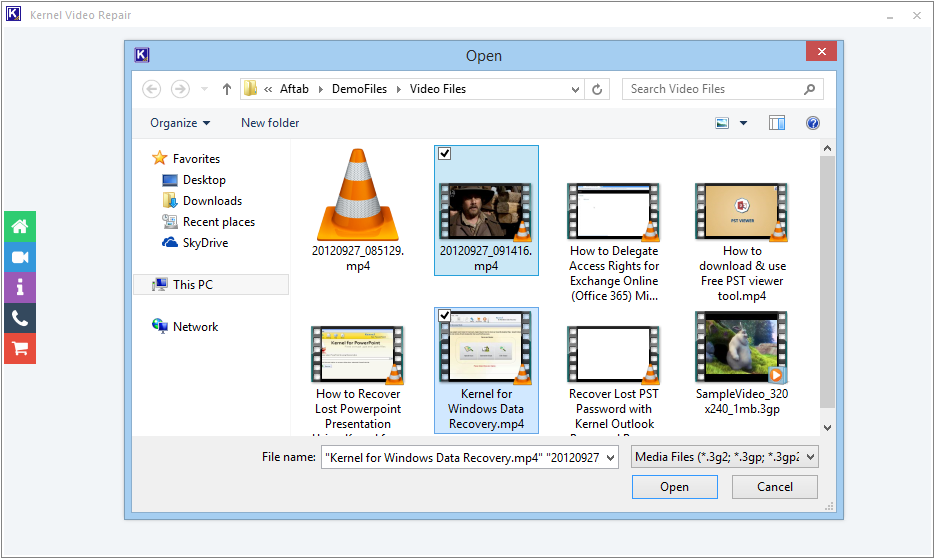
- After starting the software, click the big Plus button to add the videos.
- Select the corrupt videos and click Open.
- When you have selected the video files, click the Repair Files button.
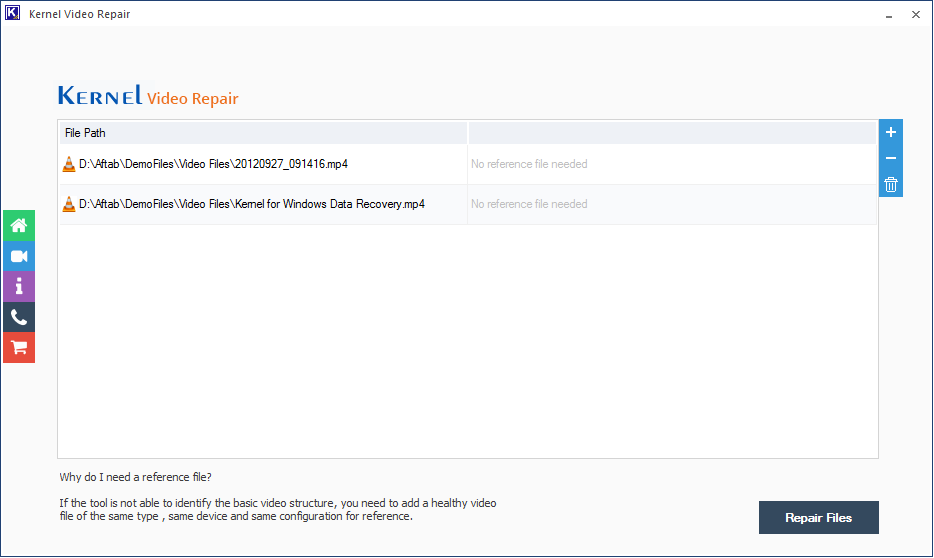
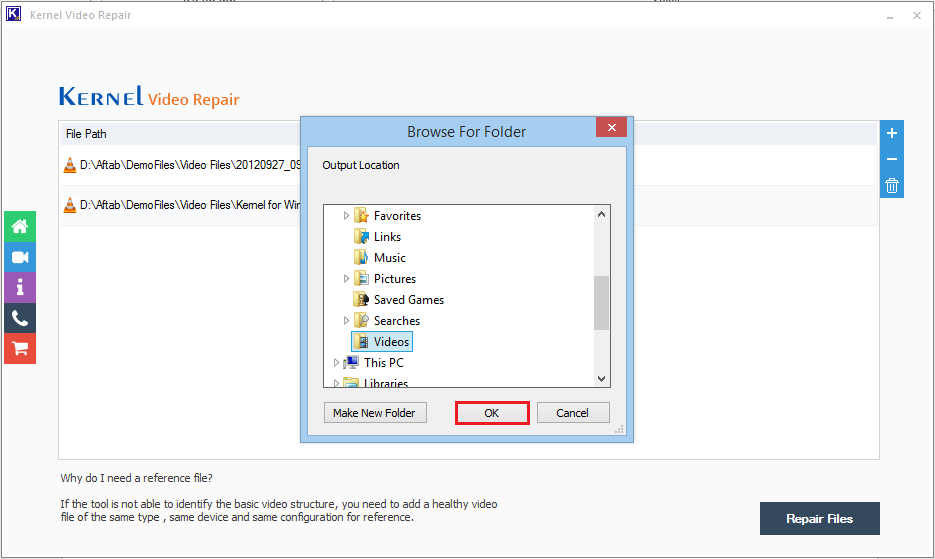
- Select the location where you want to save the repaired file. Click OK.
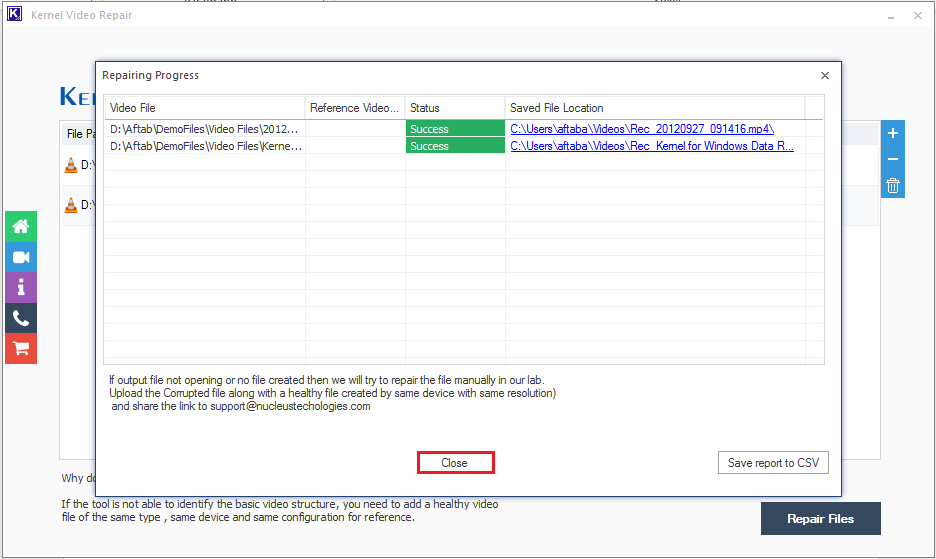
- The tool has repaired the video files. You can see the status gets changed to Success. You can check the status of the Report in the CSV file also. Later, you can click the Close button.
Your video file corruption will be resolved after carrying out all of the aforementioned workarounds. This application is so strong that it can repair all types of video file corruption and damage in all common video file formats. You can save the repaired file with this utility in any chosen location on your computer.
Conclusion
The ‘MOV file not playing issue’ with QuickTime has been extensively covered. The main contributing factors to this problem have been identified, along with several expedient solutions. One should attempt the software if the user is unable to remedy the issue with these simple fixes. The blog post describes how it functions. In the event of serious video file corruption, we strongly advise using this utility.