Read time 6 minutes
When a user removes an unnecessary file from their system, it is immediately sent to the Recycle Bin or Trash folder, where it will stay until the user decides to either empty the entire bin or delete that specific file from the folder. It is commonly believed that once a file is deleted from the Trash, it is permanently removed from the system. However, this is not entirely accurate. Even after a file is deleted and the Trash is emptied, it is not completely erased from the system.
When you delete a file you just send instructions to Windows that the space the file occupies is now available to write again. In between deletion and over writing the space is the time you can easily recover the data with the help of any efficient data recovery tool. This, however, also comes with a risk of unauthorized access to your confidential data. One way to overcome this risk is to try overwriting the deleted files with appropriate methods. Enterprises and individuals with confidential data on their systems employ these methods to delete data permanently from PC.
In this article, we will explore effective ways to permanently delete files and ensure that the empty space they leave behind becomes utterly unrecoverable. We’ll cover both professional tools and manual techniques to accomplish this task. To begin, let’s delve into some widely used manual methods for permanent file deletion on your system.
Method to delete files permanently
Here we will talk about all the legitimate methods to delete your files permanently so you can free up space in your system.
Method 1: Delete files permanently through command prompt
To delete files permanently via Command Prompt, follow the steps given below:
Step 1: Go to Start and type Command Prompt in the search box.
Step 2: Right-click the Command Prompt icon and select Run as administrator.
Step 3: Type the following commands and execute them one by one as per the given order.
- diskpart
- list disk
- select disk ‘x’ (here, ‘x’ stands for the unique identification of the disk where the files that are to be deleted resides, typically assigned as numbers)
- clean all
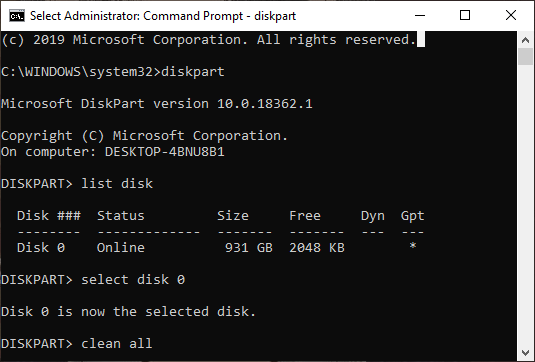
When you execute the ‘clean all’ command at last, it will clear the complete data within the selected drive.
Method 2: Delete files via formatting the required partition
A partition of your hard drive can be formatted using the Disk Management feature provided by Windows OS. Disk formatting clears the data in the selected partition and ensures that the memory allocation for the previous data also gets cleared with deletion.
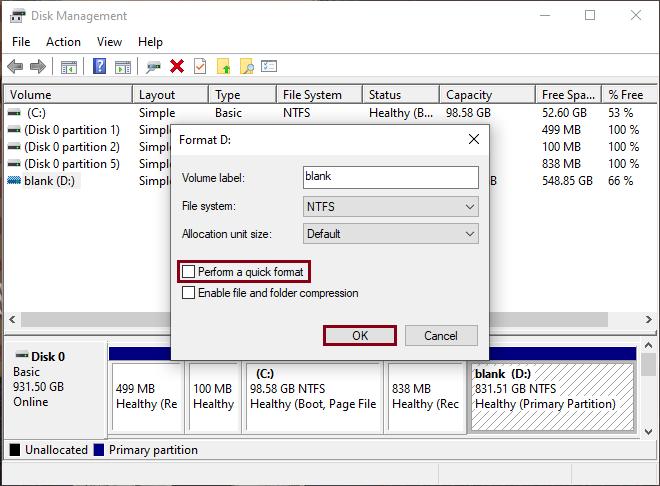
Note: While formatting the partition through Disk Management, make sure to uncheck the ‘Perform a quick format’ option.
To format the partition containing the useless files, follow these steps:
Step 1: Press Win + R to launch the Run Command dialog box.
Step 2: Type ‘diskmgmt.msc’ and hit Enter.
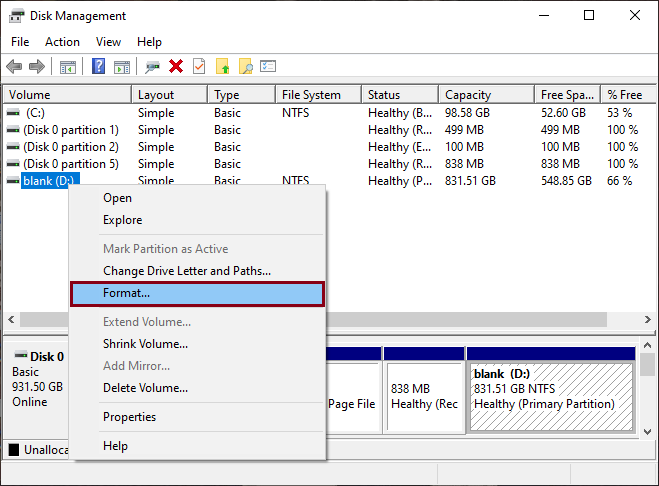
Step 3: Choose the partition containing the files you want to delete. Next, right-click on the chosen partition and select the Format option.
Step 5: In the Format partition dialog box, uncheck the ‘Perform a quick format’ option and click on the OK button.
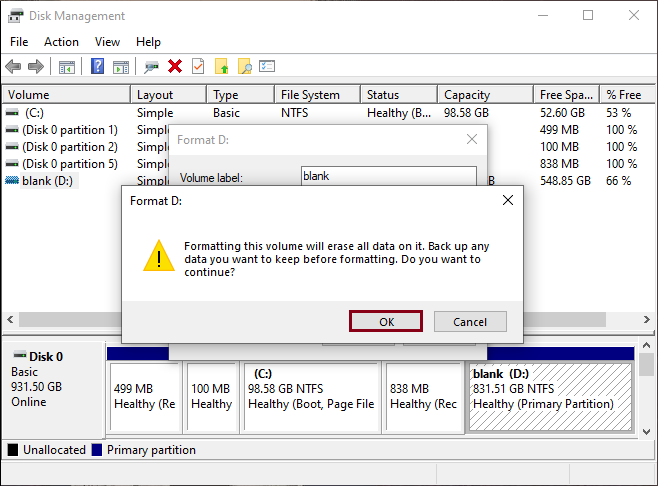
Step 6: A dialog box asking to confirm the formatting process prompts on your screen. Click OK to initiate.
Automated tool to delete files permanently from hard disk
Instead of going for the manual approach, you can also use an automated third-party to perform the deletion. Numerous online tools are at your disposal, both free and paid, for the purpose of permanently deleting files. Yet, the process of searching for these tools online can be rather arduous. As a solution, we’ve identified an efficient file shredder program that ensures the permanent erasure of data from your hard drives, rendering it utterly irretrievable.
The Kernel File Shredder is designed to securely eliminate unwanted or sensitive data from your hard drives, ensuring it cannot be recovered. This tool employs advanced file shredding algorithms to carry out the data destruction process effectively. Additionally, you have the option to schedule the shredding of your hard drives at a specific, predetermined time. Thanks to its user-friendly interface and straightforward steps, it is particularly well-suited for everyday PC users.
The trial version is free to download and you can upgrade it to the licensed version any time. Here are the steps one needs to follow in order to shred their data using Kernel File Shredder.
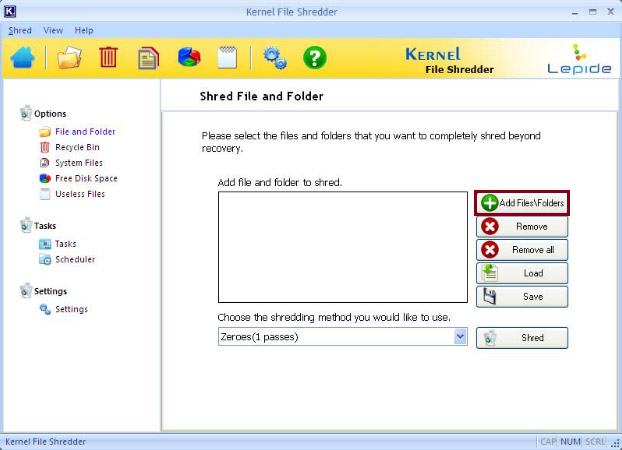
- Launch Kernel File Shredder and click on Add Files\Folder to add the directory or the files you need to clear permanently from your system.
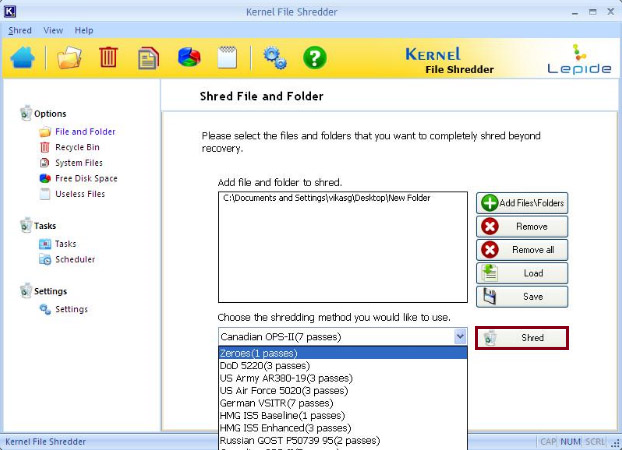
- Once the required files or folders are added to the interface, select the shredding method as per your choice. Click on the Shred button to initiate the deletion of files.
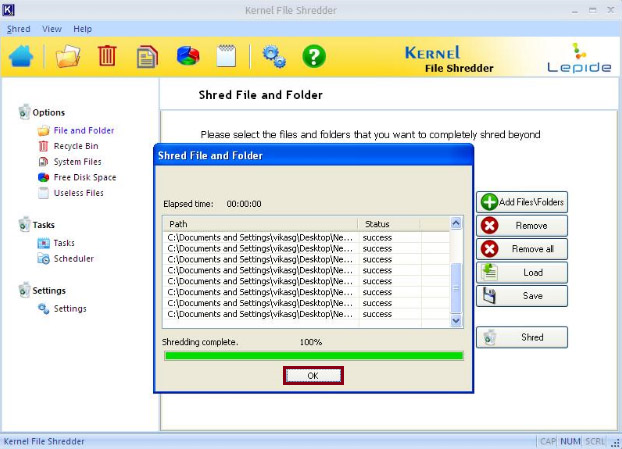
- Once the process is complete, all the selected data gets cleared from their respective locations. Click OK to finish the process.
Read Also : Easy Way to Delete Skype Conversations and Call History from Computer
Wrapping up
Efficient permanent file deletion becomes straightforward when you employ the correct technique. Our provided methods encompass both manual and automated approaches to achieve this objective. We highly recommend utilizing the Kernel File Shredder as the optimal method for file deletion, as it streamlines the process, saving you valuable time and effort. This versatile tool is suitable for both personal and professional use, ensuring the secure and permanent removal of sensitive data from your systems.
![Does Formatting a Hard Drive Delete All Data? [Explained]](https://www.nucleustechnologies.com/blog/wp-content/uploads/2022/06/900x416-8-16.jpg)