Read time 13 minutes

MS Outlook is the most trusted and widely used email client. PST and OST are the two prominent file formats that are used by Outlook, respectively, with POP and IMAP accounts. In this post, we will be looking for ways to import OST files to Gmail.

Instant Solution

Try automated tool Kernel Import OST to Gmail to import multiple OST files to Gmail account. It supports OST files from all Exchange Server versions.

How does OST Work?

Offline Outlook Data File or OST is used with account types such as IMAP, Office 365, and Exchange, to store and synchronize a copy of your mailbox information on to your system. Even while working offline, you can use Outlook, but you won’t be able to send out any emails. Once the server connectivity is restored then all of the changes made in your OST file (during the time of network drop) will be synchronized to the server. In short, your OST file data and server data will be identical again.

Now we will focus our effort on the problem in hand- importing OST files to Gmail.

Using Manual Method

Using Automated Method

Import OST to Gmail Manually

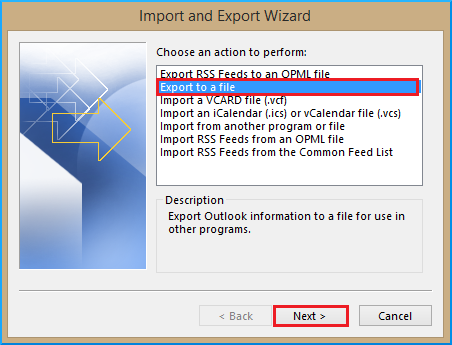
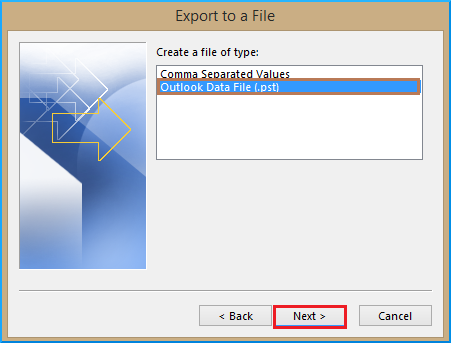
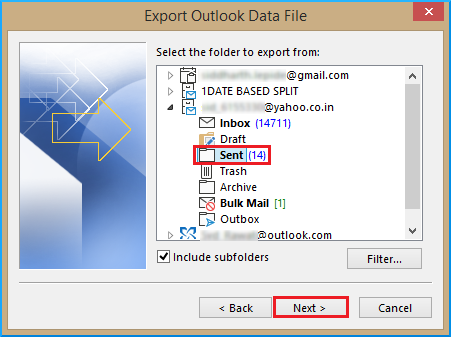
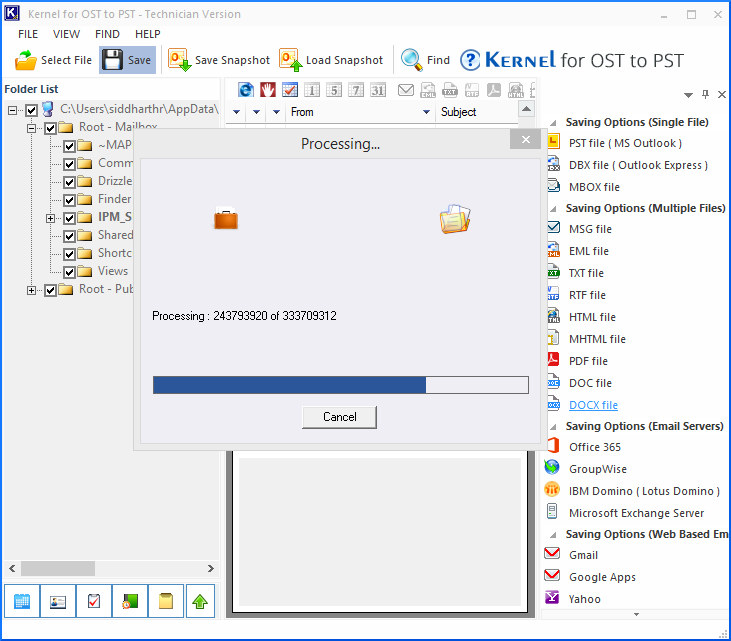
It is not possible to import OST files to Gmail directly; hence, it is considered better first to convert them to PST format. FYI, most of the time, it is your third-party email accounts (which you have previously configured in your MS Outlook desktop client with IMAP setting) such as Gmail accounts, AOL, or Yahoo, which save the email data in an OST file.

To import OST files, one needs to find the location first. One can easily do that by following the steps mentioned below:

Step #1 Locate your OST Files

  1. Click File > Account Settings > Account Settings.
  2. Account Settings

  3. Now, click on the Data Files tab, select any OST file, and click on Open File Location button.
  4. Select and Open File Location

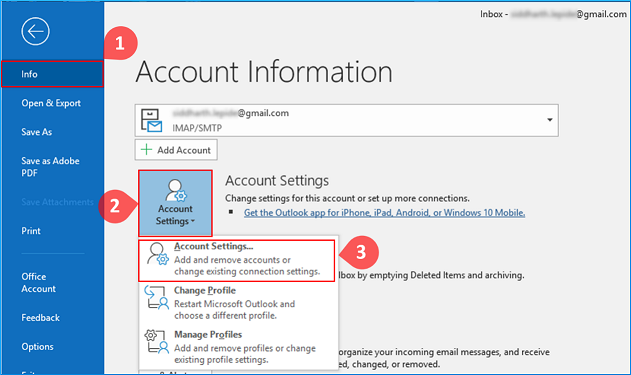
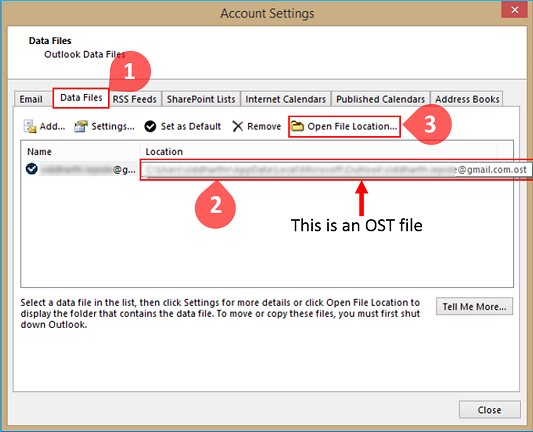
    Note: Generally, OST files can be found here irrespective of the Outlook version-

    C:\Users\user\AppData\Local\Microsoft\Outlook

Note: It is to note that the AppData folder might be hidden; hence, the user has to unhide it first. To do so, in C:\Users\user, click on View tab > Options. Go to the View tab, expand Hidden files and folders, and select Show hidden files, folders, and drives.

Step #2 Export your OST File as PST

  1. In MS Outlook, click on the File tab > Open & Export > Import/Export. This will open up the Import and Export Wizard.
  2. Here, select the Export to a file option and hit Next.
  3. Import and Export Wizard

  4. This will open up Export to a File dialog window, select Outlook Data File (.pst) option and hit Next.
  5. select v

  6. Now click on the required email account and select the item that you want to export as a PST file and hit Next.
  7. select OST file to export in PST

  8. Now click on the Browse button to save the PST file to the desired location and hit Finish.
  9. Finish the process to save OSt in PST file

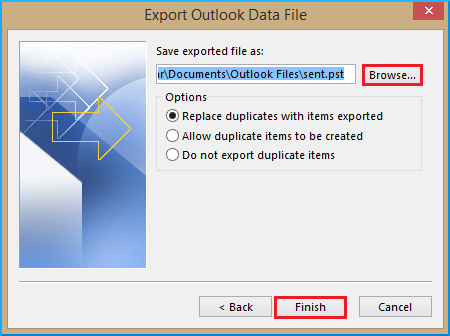
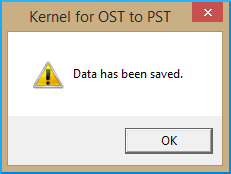
Congratulations! You have successfully converted an OST file to PST. Now we will explore ways to import this file to Gmail.

Step #3 Import PST to Gmail via. G Suite Migration for Microsoft Outlook (GSMMO) tool

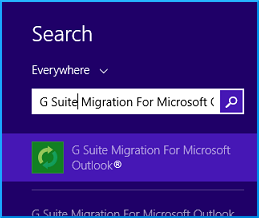
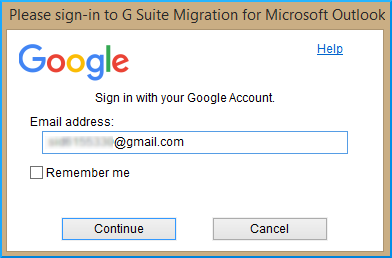
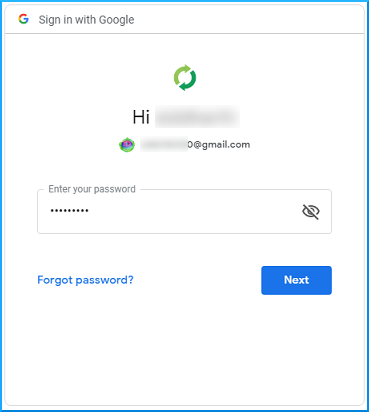
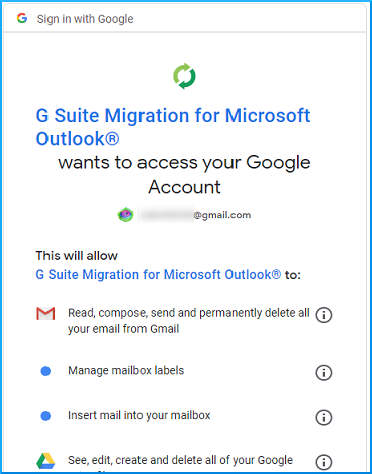
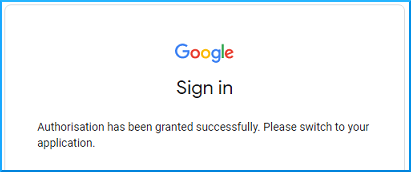
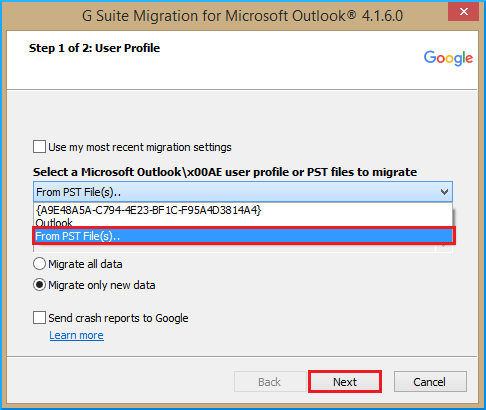
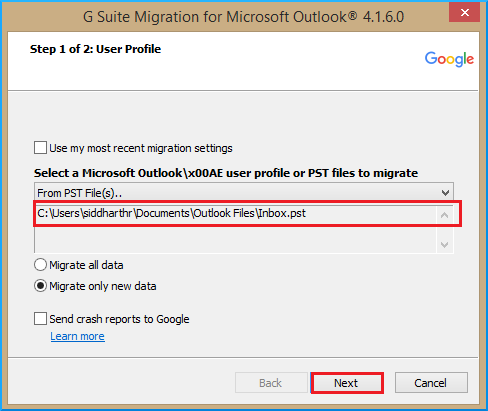
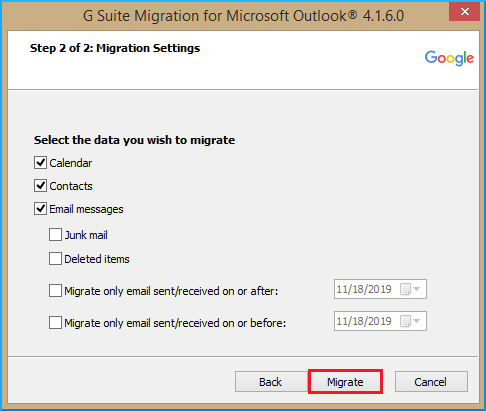
G Suite Migration for Microsoft Outlook (GSMMO) desktop application lets the user import the PST file to the user’s Gmail account. The process is described below:

  1. In any browser, search for G Suite Migration for Microsoft Outlook and download the application.
  2. Launch the application by searching for it.
  3. G Suite Migration for Microsoft Outlook

  4. You will be asked to provide the login information, click Continue to proceed.
  5. login G Suite Migration for Microsoft Outlook

  6. This will open up the sign-in page in your default browser.
  7. open up the sign-in page

  8. Next, you will be asked with a message that GSMMO wants to access your Google account. Scroll down and click on the Allow button.
  9. Allow to access Google account

  10. If everything goes well, then you should see a confirmation message as shown below:
  11. confirmation message

  12. This will open up a new dialog window. From the drop-down menu, select From the PST file(s) option and click Next.
  13. select the PST file

  14. You will be taken to the location where all outlook PST files are saved. In step 1, if you have saved your converted PST file to a different location, then paste that location’s filepath in the Address bar.
  15. The file is now imported, click Next to proceed.
  16. PST file imported

  17. Adjust the migration settings as required. Once done, click on Migrate.
  18. Adjust the migration settings

  19. This will initiate the migration process. Depending upon the size of your PST file, the process might take a while. Once done, you will be prompted with a message of successful migration.
  20. successful migration done

  21. Log-in to your Gmail account and look for the newly imported PST file in the left pane.
  22. New PST file created

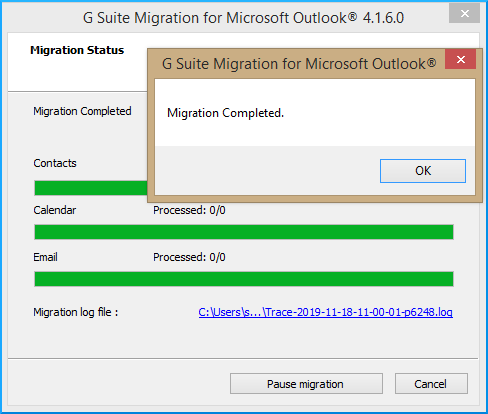
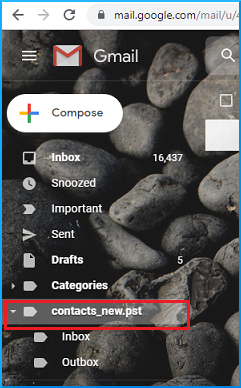
Congratulations! You have successfully migrated your Outlook PST file to Gmail.

Direct Method to Import OST Files to Gmail

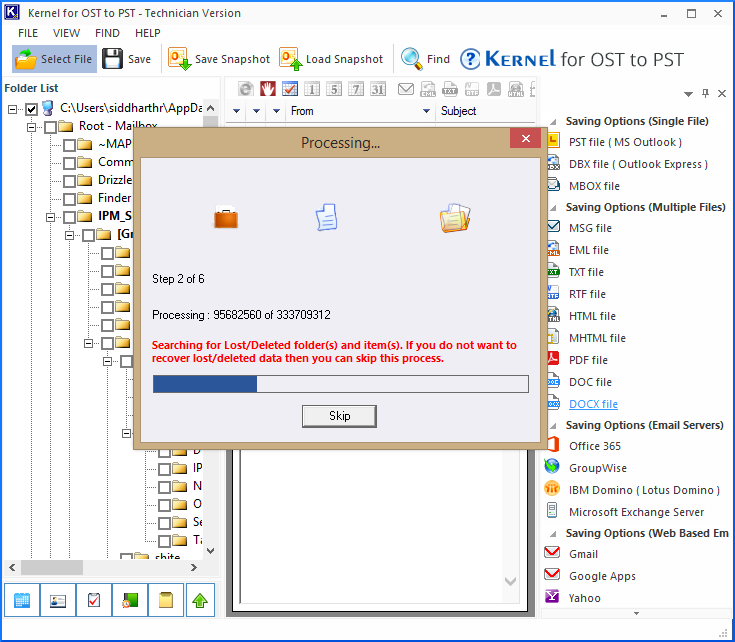
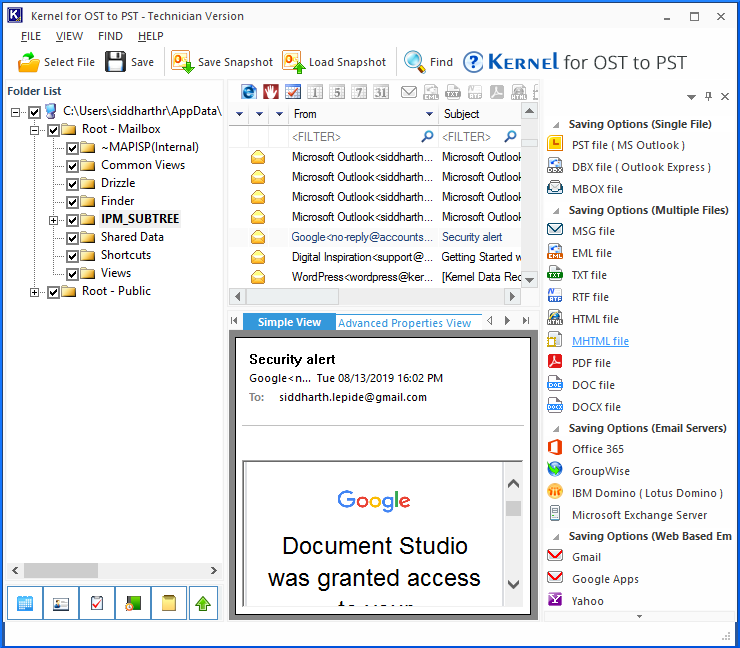
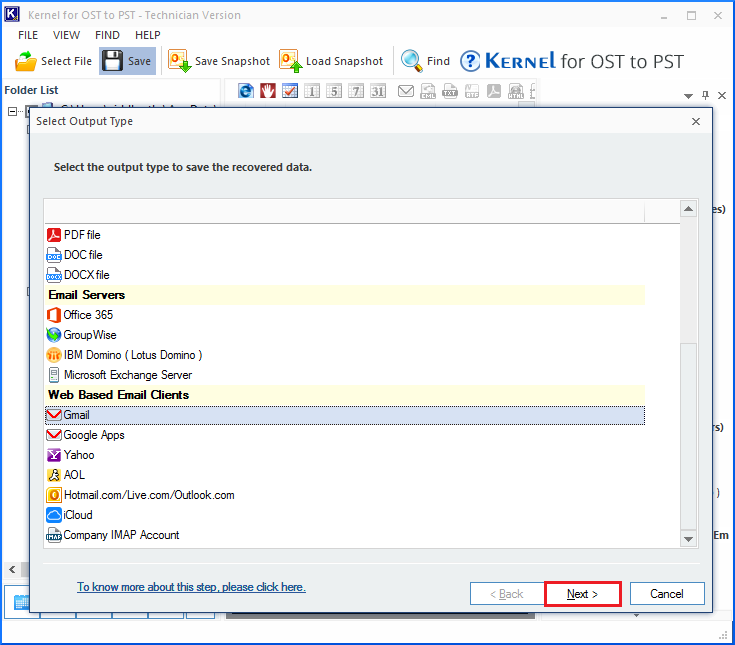
The best way to directly import OST files to Gmail would be a third-party tool. Kernel Import OST to Gmail is an excellent tool for this kind of migration. It is an all-in-one tool that can recover permanently deleted Outlook mailbox items maintaining the hierarchy during migration. It is also possible to save the OST to PST, MBOX, PDF, DBX, EML/MSG, and more. One important feature is that it can directly export the OST data to live Exchange Server and webmail clients such as Gmail, Yahoo, AOL, and more. Additionally, it can easily repair corrupt OST files which have gone inaccessible, prior to conversion.

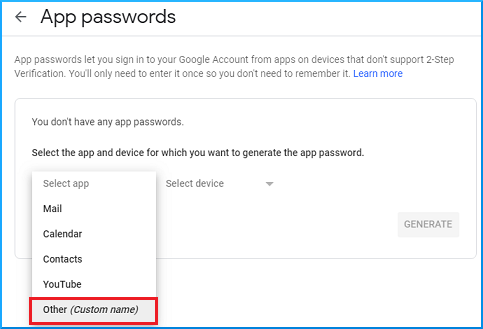
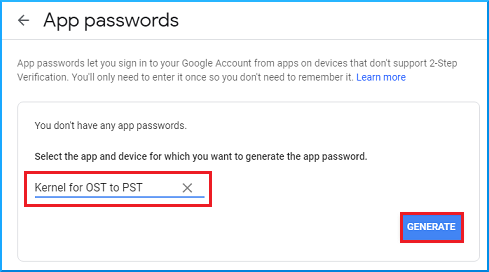
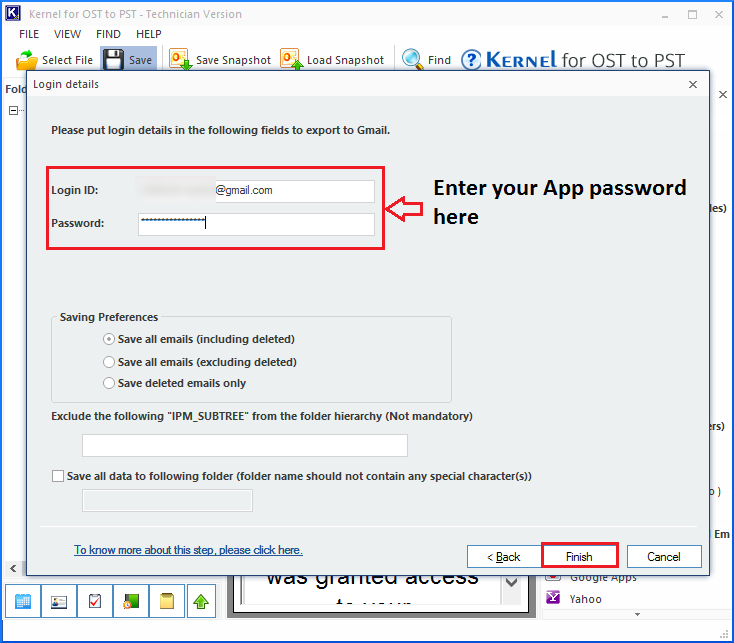
Prerequisite: To use a third-party tool such as Kernel Import OST to Gmail tool to log-in to your Gmail account, you need an app password instead of your account password. To set an app password, follow the steps mentioned below:

  1. Click on your Google Account icon and select on Manage your Google Account button.
  2. Manage Google Account

  3. From the left navigation, pane choose Security. Make sure that the 2-step Verification is turned on (otherwise, this won’t work!). Next, choose App passwords.
  4. choose App passwords

  5. Now, from the drop-down menu, choose Other (Custom name).
  6. choose custom name

  7. In the text box, enter Kernel Import OST to Gmail and click on GENERATE.
  8. GENERATE Kernel for OST to PST

  9. Copy the generated password for later use. Click Done.
  10. Copy the generated password

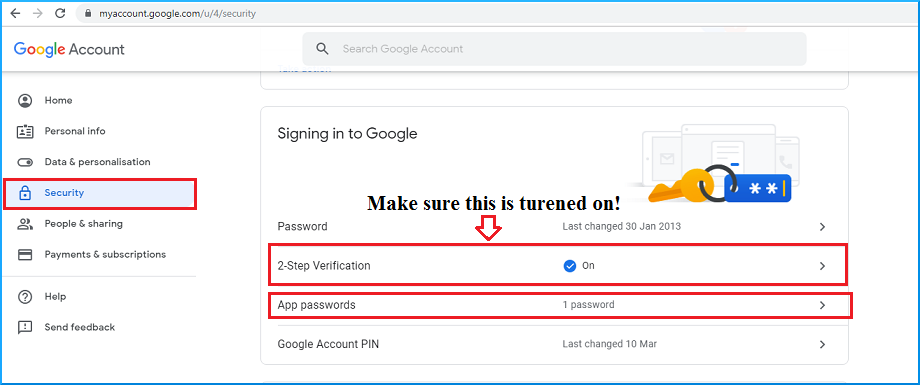
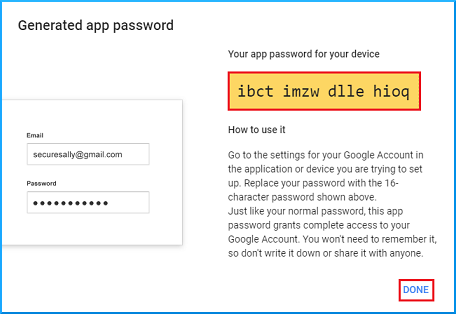
This is your app password, which you will be using instead of your Gmail account password to migrate the OST file to Gmail using Kernel Import OST to Gmail tool.

Import OST file to Gmail using Kernel Import OST to Gmail
  1. After launching the tool, click on the Select File tab. This will open a new window. Click on the Browse button to add the OST file.
  2. add the OST file

  3. Read the Process Information carefully and click Finish to proceed.
  4. Read the Process Information

  5. Depending on the size of the data, the processing might take a while.
  6. processing start

  7. Select the files/folders that to want to migrate from the folder hierarchy and click on the Gmail icon.
  8. Select the files/folders to migrate

  9. Click Next to proceed.
  10. Click Next button

  11. Apply the mail filters to migrate specific data and hit Next.
  12. Apply the mail filters

  13. In the Login ID section, enter your Gmail account id, and in the Password text box, enter the earlier generated app password (see the Prerequisite section).
  14. enter the earlier generated app password

  15. The migration will take some time, depending upon the file size.
  16. migration in process

  17. If the migration is successful, then you will be prompted with the following message:
  18. migration is successful done

  19. Check your Gmail account to see if the folders were successfully imported to Gmail.

Conclusion

In this blog post, we have looked at G Suite Migration for Microsoft Outlook desktop application to migrate OST files to Gmail. The process is time-consuming and tedious. To save time and effort, we have also discussed Kernel Import OST to Gmail utility. This tool comes equipped with various useful features that set it apart from its counterparts. Hence, we recommend the user to try Kernel Import OST to Gmail tool for smooth migration experience.

Video – Ways to Import OST File to Gmail

Video

Kernel Import OST to Gmail