Kernel Import MBOX to Gmail
Import MBOX file to Gmail with complete data integrity and access all your emails in one place. Transfer emails, folders, and attachments from 20+ MBOX-supported email clients. Use smart filters to migrate only essential data to Gmail, Outlook, Office 365, etc.
- Import MBOX files or folder containing MBOX files to Gmail.
- Preview all the content with attachments of the selected file.
- Advanced filters to upload MBOX file to Gmail precisely.
- Transfer MBOX to Gmail in a separate folder with ease.
- Migrate from Thunderbird, Apple Mail, and other major MBOX email clients to Gmail.
- Import MBOX to Gmail without using Thunderbird.
- Compatible with all Windows Operating Systems and Windows Servers.

I needed to move a massive 150+ GB Apple Mail MBOX file to Gmail and was stressed until I tried Kernel Import MBOX to Gmail tool. It worked perfectly! My entire inbox transferred in hours with zero data loss. I highly recommend it for easy, hassle-free migration.”

After switching from Thunderbird to Gmail, we struggled to move our MBOX data to Gmail. We found Kernel Import MBOX to Gmail tool that imported entire data securely and kept our folder structure intact. We even imported selective emails with attachments using its advanced filter feature.”
Import MBOX to Gmail Software | Key Benefits
Explore all the potential benefits of the software to enhance the import MBOX file to Gmail process without facing any issues.
Import MBOX file Instantly
Move MBOX to Gmail or any MBOX-supported platform effortlessly without any technical skills.
Preserve Email Structure
Maintain folders, attachments, and metadata for organized and smooth migration.
Zero Data Loss
Transfer MBOX files while maintaining complete integrity and zero data loss at the destination.
Secure & Encrypted
The software utilizes advanced algorithms to keep data secure and encrypted to prevent it from any external threats.
No Size Limitations
Import MBOX files of any size to Gmail with original email formatting, zero error, and minimal downtime.
Works in Offline
Import MBOX file to Gmail without an internet connection, ideal for sensitive or restricted environments or zones.
How to Import MBOX file to Gmail?
Go through the simple step-by-step guide to transfer MBOX to Gmail with ease.
- Step 1: Install and launch the Import MBOX to Gmail software.
- Step 2: Select MBOX files or MBOX files containing folders and click Finish.
- Step 3: The software will retrieve all the MBOX data and display it in the software panel.
- Step 4: Select specific MBOX file and preview its entire data, including metadata.
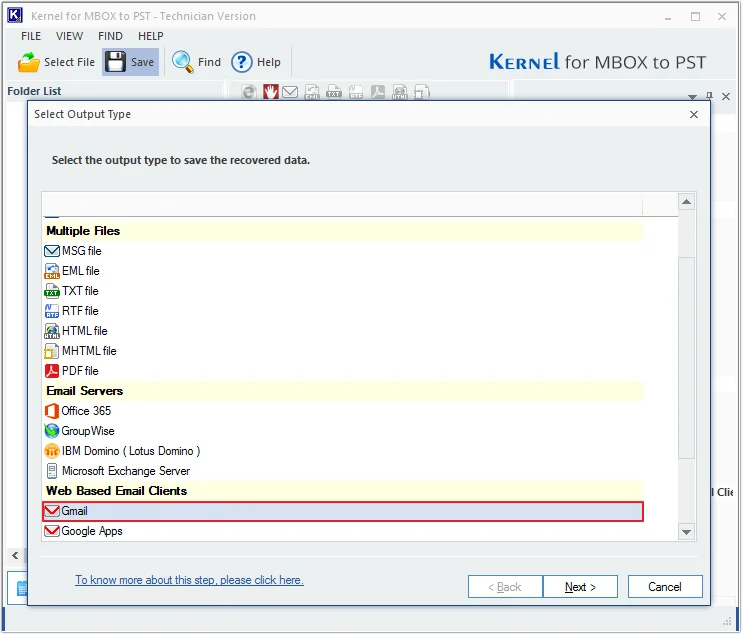
- Step 5: Select Gmail in the select output type and click Next.
- Step 6: Apply required filters and click Next.
- Step 7: In the Login Details window, enter Gmail credentials and click Finish.
- Step 8: Once the data has been imported successfully, the software will pop up a "Data has been saved” message and click OK.
Kernel Import MBOX to Gmail Software Features
Learn about the tool's exclusive features designed for customized MBOX to Gmail migration, ensuring flexibility and precision to cater to specific migration needs.
Direct Import MBOX files to Gmail
Instantly import MBOX files to Gmail with zero data loss. The software ensures secure authentication and a smooth migration process. Easily add files from any email client, preview data, and transfer to Gmail without interruptions.
Add a folder with MBOX files
Add a folder containing MBOX files to the software and import multiple MBOX files at once. This feature allows for quick, bulk migration, saving time and effort. Simply select your folder, and transfer MBOX to Gmail securely.
Preview MBOX data
Ensure data integrity and completeness with the live Preview feature. Verify MBOX data, including email content, metadata, and properties, facilitating informed planning for selective migration to Gmail.
Support all MBOX email clients
Import MBOX in Gmail from all MBOX-supported email clients, including Thunderbird, Apple Mail, Eudora, Entourage, Postbox, PocoMail, Netscape, Spicebird, PowerMail, Claws Mail, Opera, Evolution, Sylpheed, SeaMonkey, Mulberry, Gnu, GyazMail, Sparrow, and The Bat!.
Import MBOX to G Suite
G Suite users can import MBOX files to G Suite mailboxes without administrator assistance. The import process is similar to that for importing MBOX files to Gmail, ensuring a smooth transition.
Selective MBOX import
Achieve selective MBOX import effortlessly by applying filters, such as From, To, Subject, Folder Name, and Date range. Save only selected items based on specified criteria across multiple MBOX files.
Migrate to Office 365/Exchange/Outlook
Experience versatile saving options with this advanced tool. Easily migrate MBOX to Office 365, live Exchange, Outlook, major email servers, popular WebMails, and common file formats.
Access Gmail using the app password
Enhance security with the MBOX to Gmail converter tool, accessing your Gmail account via an app password. Enable two-step verification and create an app password for Gmail to get secure connection.
Preserve data originality
Keep mailbox content intact and upload MBOX files to Gmail while preserving the original folder structure with attachments. The MBOX to PST converter tool seamlessly import MBOX emails to Gmail as they were in source.
Import MBOX to Gmail without Thunderbird
With this software, there is no need of Thunderbird to import MBOX to Gmail. This MBOX to Gmail converter lets users directly import MBOX files to Gmail in just a few clicks. It ensures a Fast, simple, and secure migration for all emails.
Generate file analysis reports
Create a detailed file analysis report based on different criteria including total item types, mail flow density by date, mail flow density by senders or interaction between users.
Support Complete MBOX Family
Migrate data from entire MBOX family, including MBOX, MBX, MBS, and MSF files directly to Gmail. Our software handles all MBOX file types and ensures a complete, seamless transfer of email data with just a few clicks.
Download Now and Unlock Software Free Trial Version
Use our free trial version to import mbox files to Gmail. It is free of cost.
FAQs - Import MBOX to Gmail
- Step 1: Add the MBOX files or the folder containing MBOX files.
- Step 2: Preview the MBOX file data and select Gmail as Output format.
- Step 3: Apply the necessary filters and complete the process.
Now, you can open MBOX file in Gmail.
Video tutorial of Kernel Import MBOX to Gmail
Watch our quick video guide to learn how our software import MBOX files to Gmail without data loss.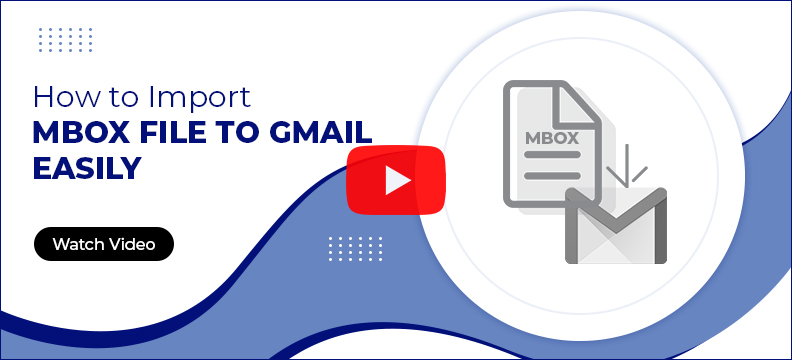
What Our Users Say About Kernel Import MBOX to Gmail
This tool helped me import bulk MBOX files to Gmail seamlessly. The preview feature saved my time by checking data with attachments before initiating the import process. Highly efficient tool.
I had 50 GB+ MBOX files, and this tool imported them to Gmail without data loss. The Filters of this software helped me to migrate selective MBOX data to Gmail.
Migrated multiple users' MBOX data to Gmail in one go. The software retrieves data in a tree-like structure and helped me to view the entire content before the import process.
Finally, a tool that lets me to move MBOX to Gmail without Thunderbird. The Process was quick, and all files, folders, and attachments were intact. Very satisfied with the result.
Software Prerequisites & recommendations
Version: 26.0
Release Date: Sep 2019
Update Date: Dec 2025
License Type: Home, Corporate & Technician
Outlook: Office 365 Outlook, 2021, 2019, 2016, 2013, 2010, 2007, 2003, 2002, 2000, 98 and 97
Hard Disk: 512 MB of disk space
Memory: 1 GB Minimum
Processor: Intel® Pentium Processor compatible (x86, x64) or equivalent
Operating System: Windows 365, 11, 10, 8.1, 8, 7, Vista, XP
Windows Server 2022, 2019 & older versions