Step 1: Download and install the Kernel Import MBOX to Gmail software.
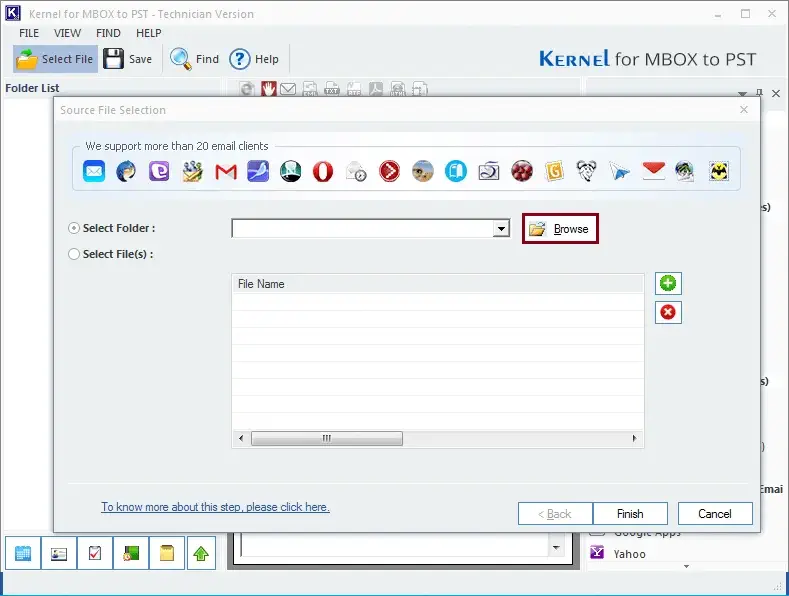
Step 2: Launch the tool and on the home screen, click on Browse to Select Folder containing MBOX files.
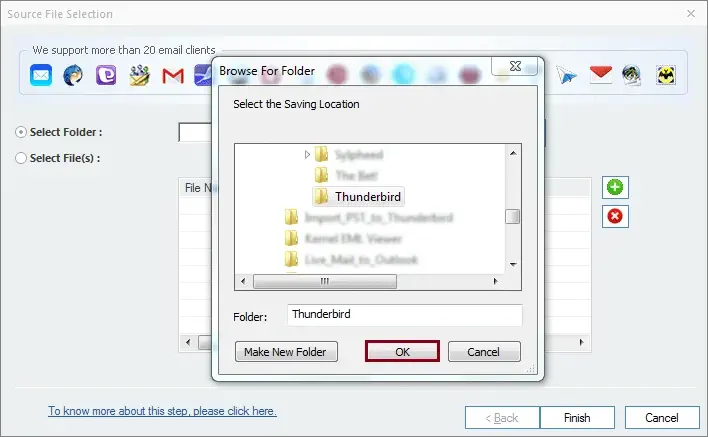
Step 3: Select the Folder from your local drive and click OK.
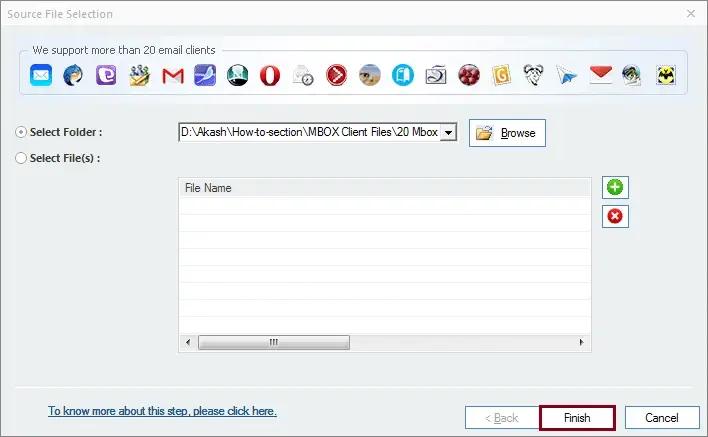
Step 4: Again, in the Source File Selection window, click Finish to add MBOX files or folder in the software.
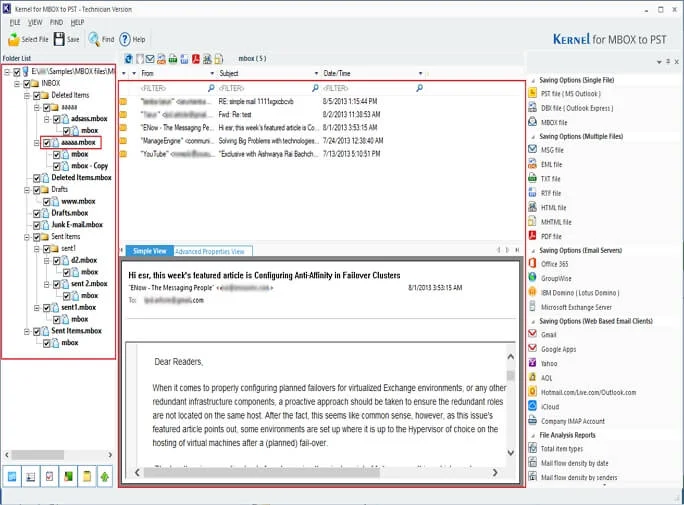
Step 5: The software will list the entire MBOX data in a tree-like structure. Select MBOX file email or folder and view its data in the Preview Pane.
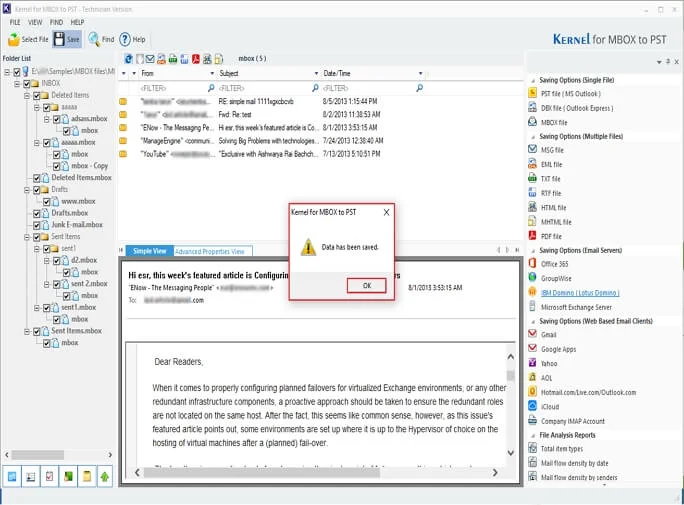
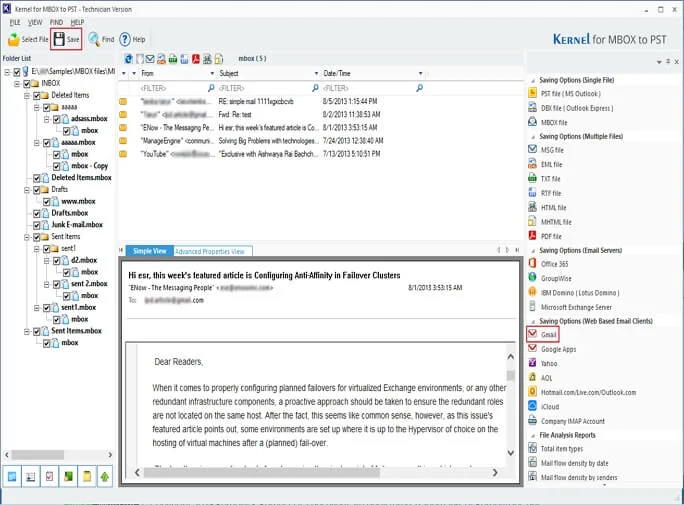
Step 6: Click on Save option to import MBOX file in Gmail. Also, you can click on the Gmail option from the given Saving Options.
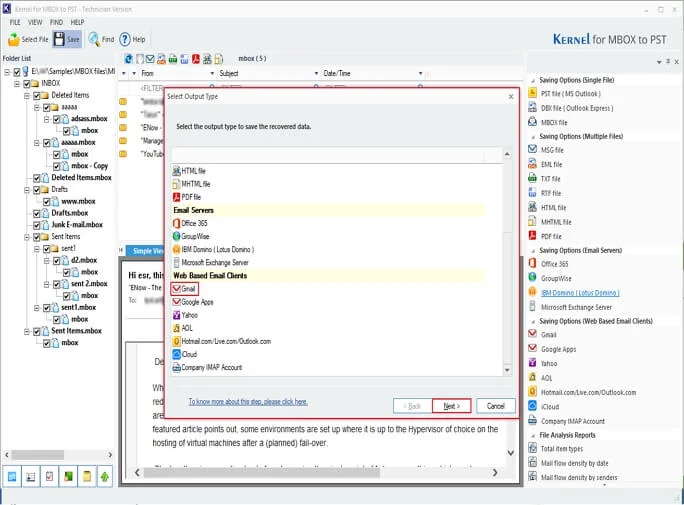
Step 7: In the Select Output Type, scroll down to the Web Based Email Clients and select Gmail. Click Next.
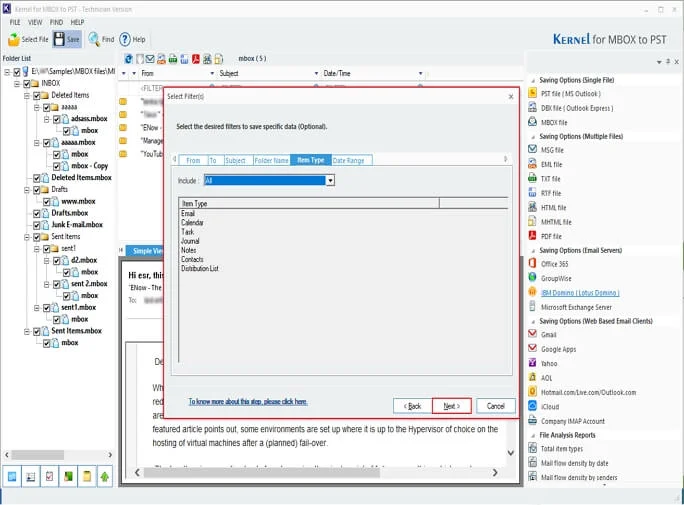
Step 8: In Select Filters wizard, select multiple filters: From, To, Subject, Folder Name, Item type, and Date Range to import data according to your needs.
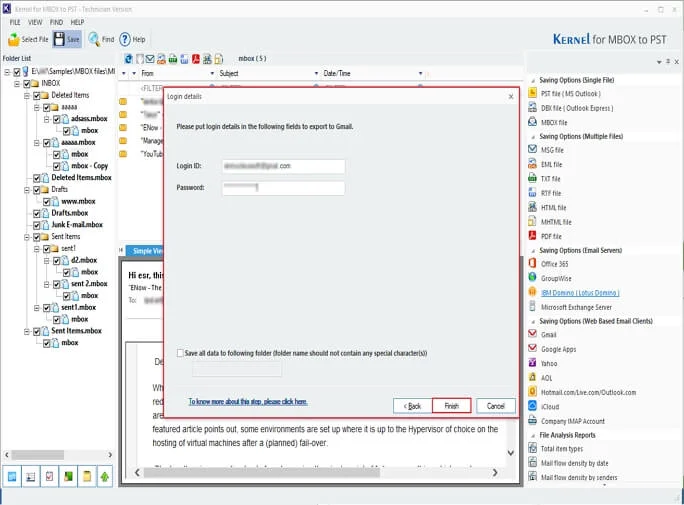
Step 9: In the Login Details window, enter Gmail credentials, like Login ID and Password. Click Finish.
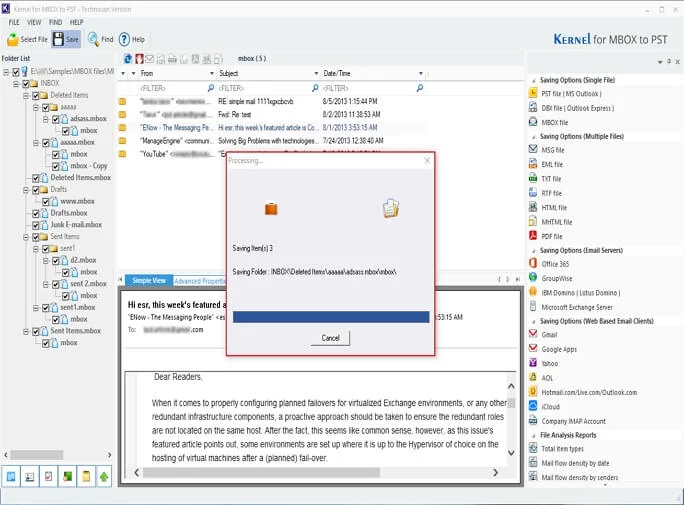
Step 10: The software will start migrating MBOX data files to Gmail.
Step 11: After importing the entire data, the software will pop up a “Data has been saved” message and click OK.