Office 365 has become the go-to productivity suite for many organizations, with its cloud-based services and accessibility. As an Office 365 admin, it's your duty to manage your users' mailboxes and ensure that they are in compliance with your organization's retention policies. This can be a challenging task, especially if your organization has a large number of users. Fortunately, Office 365 provides several tools to help you manage your users' mailboxes, including archiving and deletion policies.
Messaging Retention Management (MRM) is one such tool that allows administrators to customize retention policies for their organization's email messages. By using MRM policies, admins can automatically move email messages from a user's primary mailbox to an archive folder and then delete them once their purpose has been served. Also, admins can assign a retention tag to a particular folder or message, which determines the message's entire lifecycle.
Setting up MRM policies can be a complex process, and it's important to understand how it works. Today, we'll dive deeper into how you can customize Office 365 archiving policy and deletion policy. We'll cover the steps you need to take to create retention policies, how to assign retention tags, and we'll also provide tips on how to manage your archived messages effectively.
Tasks that the administrator needs to perform for policy creation are:
- Enable user’s archive mailbox
Enable the archive mailbox for each user in the organization so that the retention tag will find it easier to move the objects in it. Also, the user can also archive information manually. It allows more storage space for the user’s data.
- Create retention tags as per the criteria
- Move the messages which are older than 3 years from the primary mailbox to the archive mailbox. It will give you some free space in the primary one.
- Delete the 5-year older messages from the deleted items folder permanently. This will free up some storage space and in fact these messages can be recovered at any given time.
- Permanently delete the 7-year older messages from both archive and deleted items folder. Sometimes, businesses must follow the compliance regulations, but most of the time, 7 years is enough period to delete the messages permanently.
- Create custom retention policy
Create user-defined retention tags to handle the content. These are custom tags that a user assigns to a specific message of the mailbox.
Setting up of MRM policy and Retention tag is a detailed process. But before we proceed to that, these are certain pre-requirements which are to be kept in mind-
- Only a global admin can perform these procedures.
- A default MRM policy is already in existence. The admin replaces it with the new one. Only one policy can be applicable at one time.
Now, these are the steps which you need to conduct-
- Enable Users’ Archive Mailboxes
- Create new Retention tags for Archive & Deletion
- Create a new Retention Policy
- Assign new Policy to User Mailboxes
Items in the user's mailbox that are older than the archiving policy given to the mailbox will move to the new archive mailbox once the archive mailbox is active. Two years after the date an item was sent to or generated by a user in an Exchange Online mailbox, it is moved to the archive mailbox by default as part of the retention policy applied to such mailboxes.
To begin with, ensure each user has an enabled archive mailbox so that the messages with the retention tag ‘Move to archive’ can perform the task uninterruptedly. These are the steps to follow:
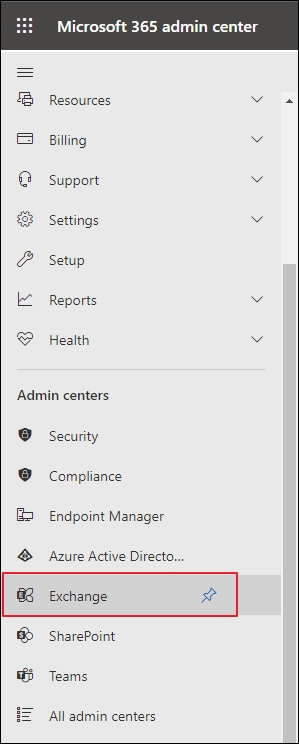
- In Microsoft 365 Admin Center, go to Exchange Admin Center and click on it to open.
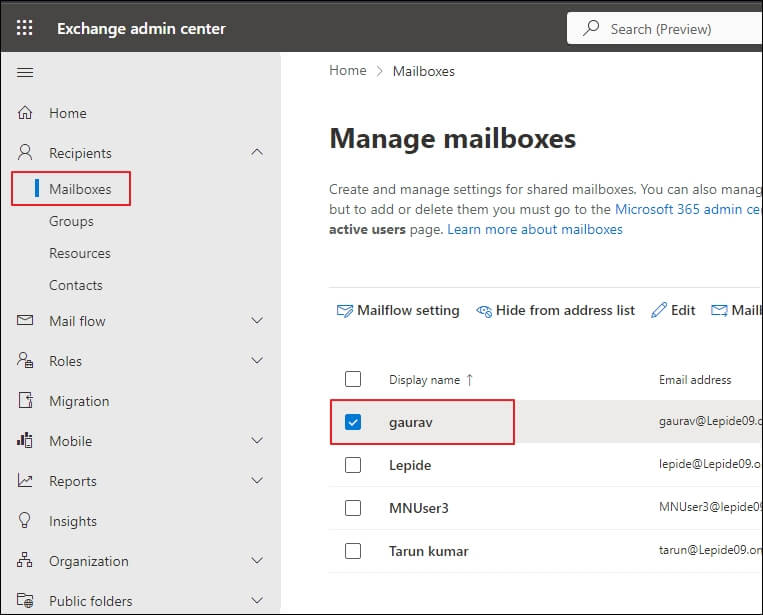
- In the Recipients category, select Mailboxes and from the available Mailboxes, choose a mailbox in which you want to enable Archive mailbox. Single-click on it.
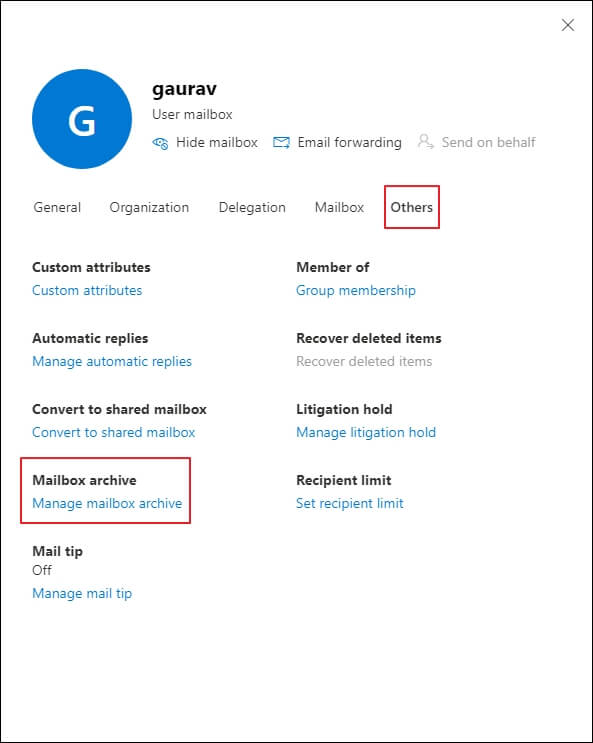
- Go to the others section and open the Manage Archive Mailbox option.
- Move the toggle from Off to On and Save the changes.

We are going to create three types of retention tags for the new retention (Archive and Deletion) policy in this step. Let us assign a common name (as per your choice) for these retention tags. Here, we are using Kernel.
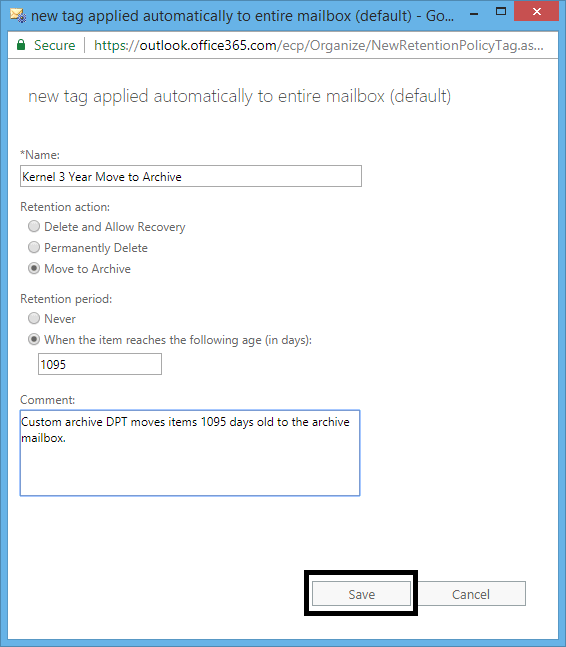
- Kernel 3 year Move to Archive (Custom Archive Policy)
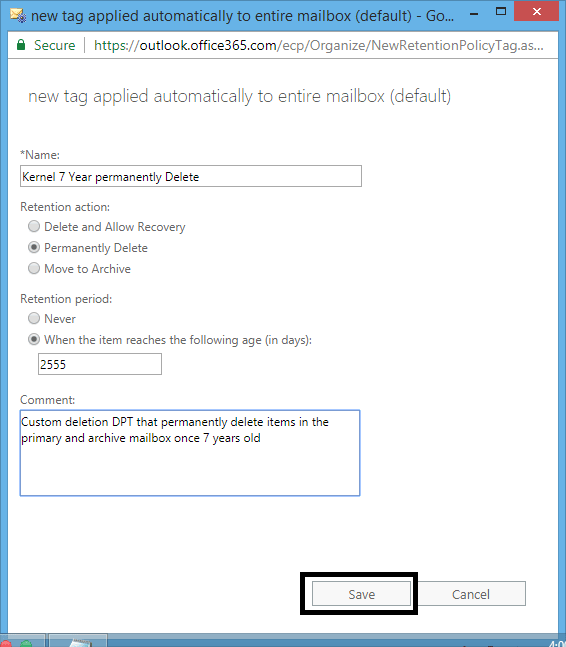
- Kernel 7 year Permanently Delete (Custom Deletion Policy)
- Kernel Deleted Items and Allow Recovery 5 years (Custom tag for Deleted items folders)
This tag will automatically move items older than 3 years to Archive mailboxes. To create the custom tag, just follow the steps:
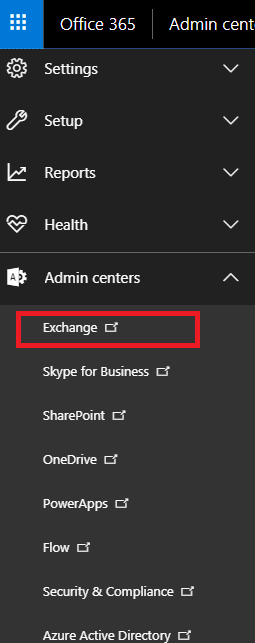
- In the Office 365 admin center, click Admin Centers > Exchange.
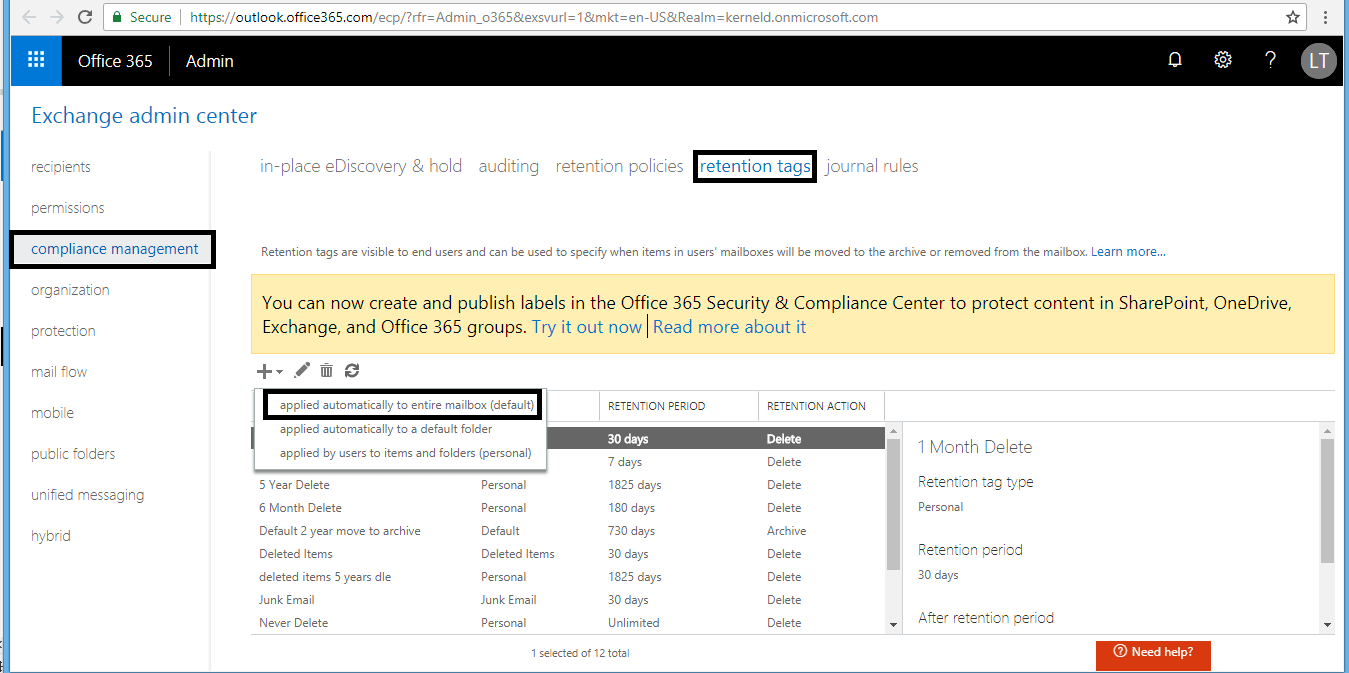
- In the Exchange Admin Center, go to Compliance Management and click Retention Tags. Click the + button and select the first option applied automatically to the entire mailbox (default).

- On the new tag applied automatically to the entire mailbox (default) page, provide the required details like Name, Retention action – Move to Archive, Retention period – 1095 days (3 years) with Comment (optional). Click Save to save the entries.
This tag will permanently delete items after 7 years. To create a custom retention tag, perform the steps:
- In Exchange Admin Center > Compliance Management > Retention Tags, click the + button and select applied automatically to the entire mailbox (default).
- It will open the with a new tag applied automatically to the entire mailbox (default). Here, provide Name, select Retention action as Permanently Delete. Enter the Retention period as 2555 days (7 years). Then, click Save to save the settings for this Retention tag.
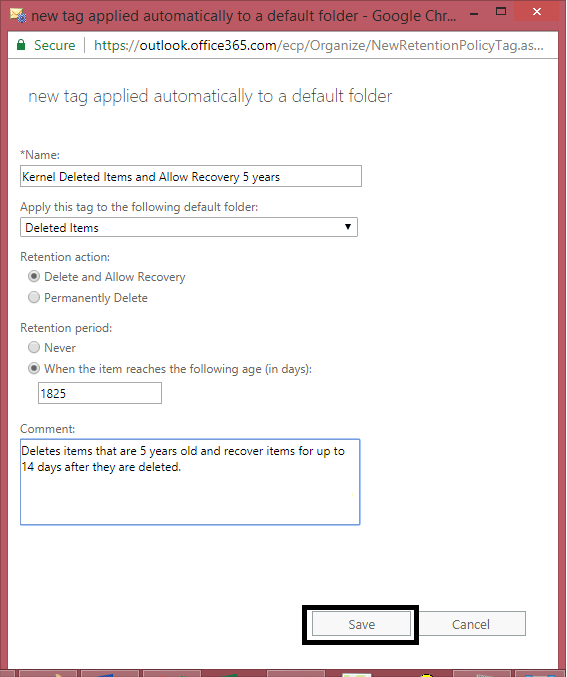
This tag will automatically delete folder items after 5 years. It also provides a recovery period in which the user can recover those items using the Recover Deleted Items feature.
- On the retention tags page, select applied automatically to a default folder option from the list now.
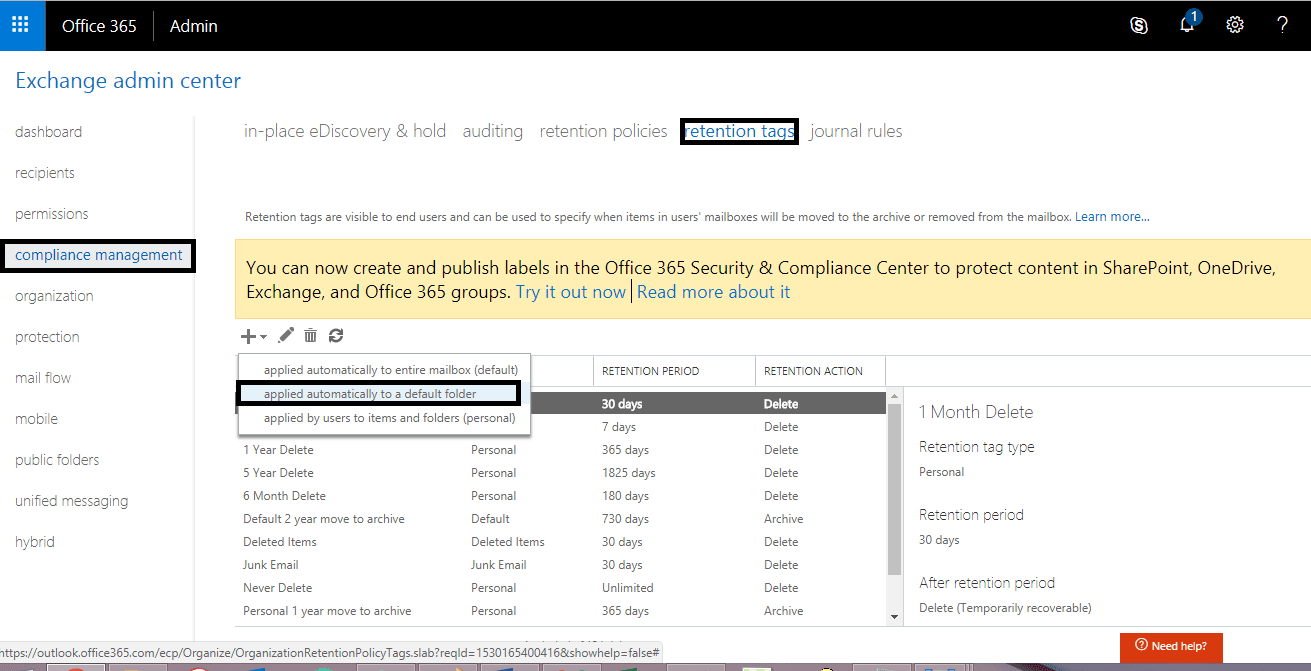
- A page named new tag automatically applied to a default folder will open. Provide a Name, select Deleted items from the list, select Delete and Allow Recovery as Retention action, and enter 1824 days (5 years) as Retention period. Click Save to create this tag.
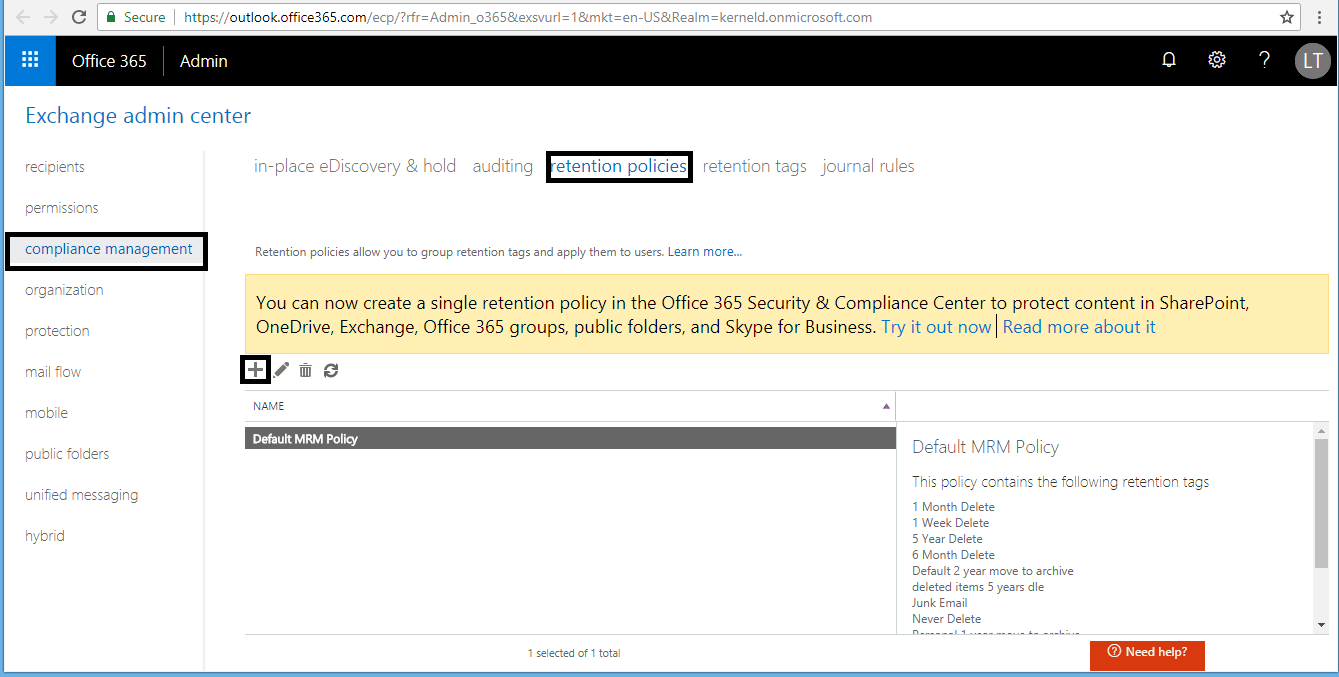
When you create an account in Office 365, a Default MRM Policy is created. You have to create a new retention policy and replace it with the Default MRM policy. First you should know about retention policy then creating a new retention policy, the user has to assign the created retention tags to it. Let us see how to create the retention policy and add retention tags to it.
- Go to Exchange Admin Center > Compliance Management > Retention Policies. Click the + button.
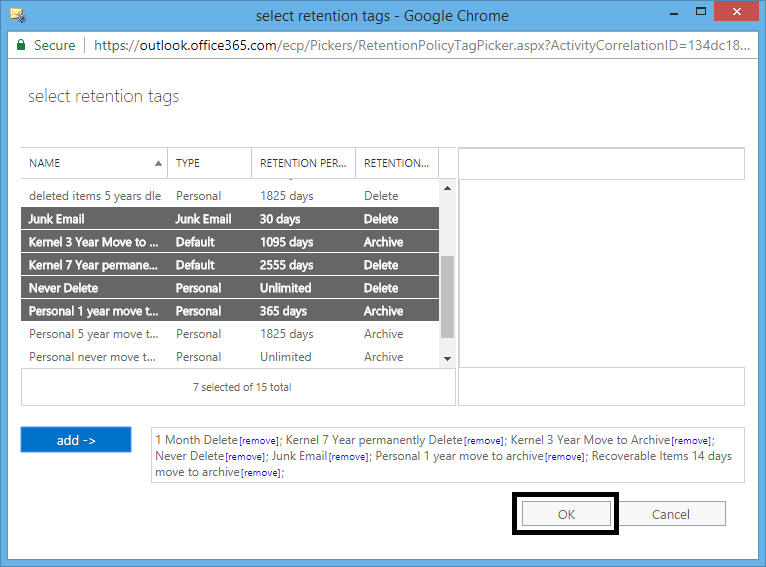
- In the new retention policy page, enter a Name and then click the + (add) button under Retention tags.

- In select retention tags, select the three newly created retention tags. Along with them, select the following tags:
- Junk Email
- Never Delete
- 1 Month Delete
- 1 Year Delete
- Personal 1 year move to archive
- Recoverable items 14 days move to archive
After the selection, click add option to add the tags. Click OK to save the Retention tags.
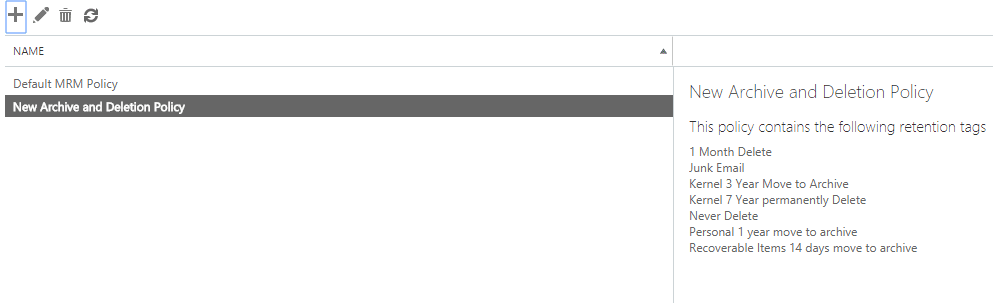
- On the Retention policies page, select your created retention policy and click Save. You can view the tags linked to it within the right pane.
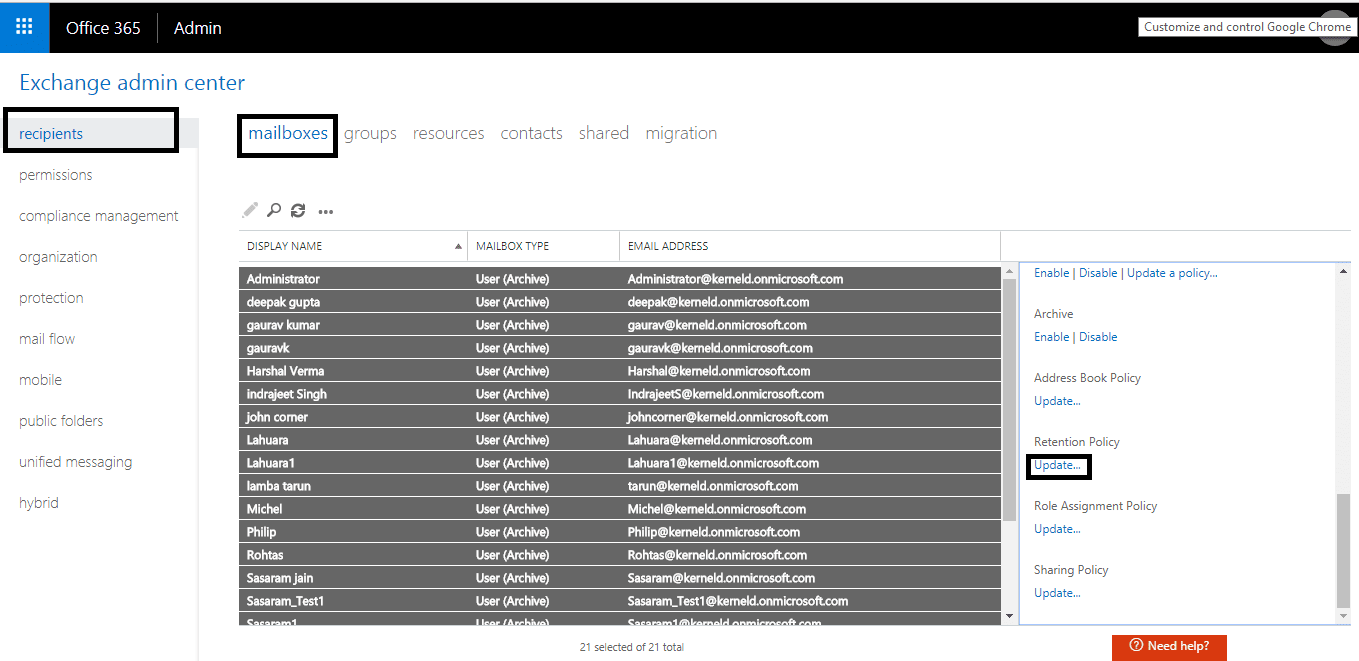
This step requires assigning a new retention policy to the user mailboxes of the Office 365 account. Perform the steps below to do this:
- Navigate to the Exchange Admin Center, select Recipients, and then click Mailboxes. Select the user mailboxes you want to assign the policy and on the right-side panel, click More options and click Update for Retention Policy.
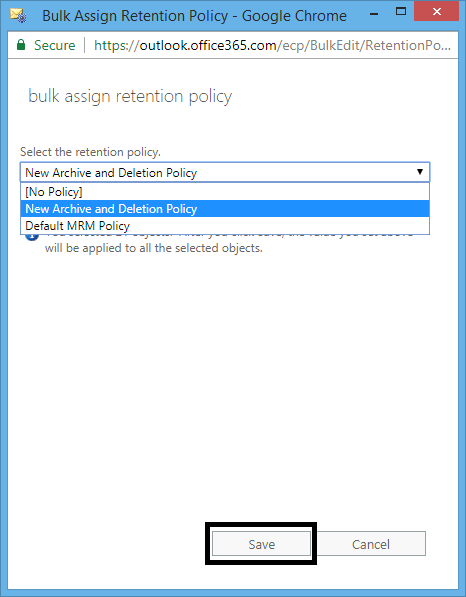
- On the Bulk Assign Retention Policy page, select your created retention policy from the drop-down list and click Save.
Hence the new Retention Policy is assigned to all the selected user mailboxes. To confirm, go to the Mailboxes page, select the mailbox, and click Edit and then on the Mailbox features option where you can confirm the assigned retention policy.

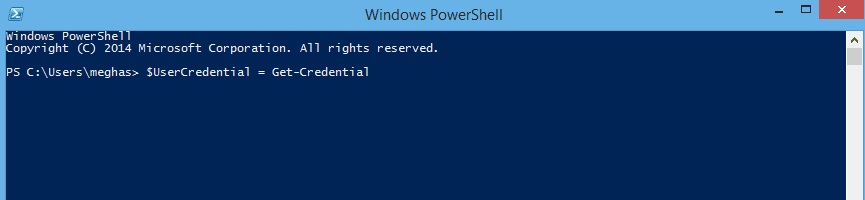
We have seen how to set up Office 365 Archive Policy and Deletion Policy. It may take 7 days for new retention policies to be applied to user mailboxes in Office 365. However, you can force this using the cmdlet: Start-ManagedFolderAssistant in Exchange Online PowerShell cmdlet.
To do this, execute the following command.
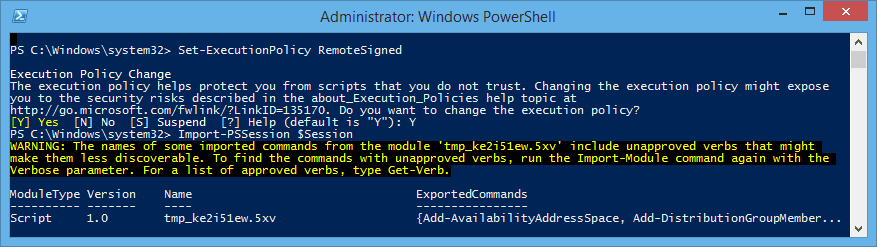
- Open your Windows PowerShell on your local system (run it as administrator).
- After opening, run the following command.
$UserCredential = Get-Credential
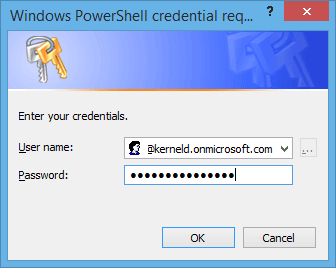
- Then a dialogue box named Windows PowerShell Credential Request gets opened. Type your Office 365 global admin account username and password and then click OK.
- Execute the following command:
Session = New-PSSession –ConfigurationName Microsoft.Exchange –ConnectionUri https://outlook.office365.com/powershell-liveid/ -Credential $UserCredential –Authentication Basic -AllowRedirection
Then, run this command:Import-PSSession $Session
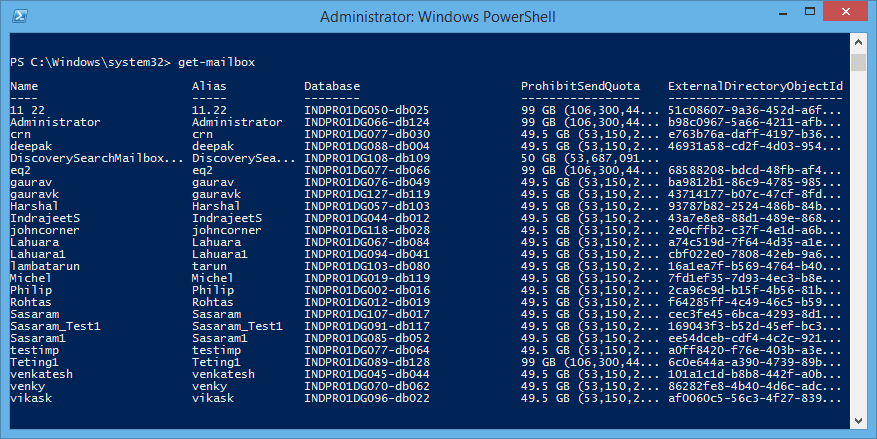
Get-Mailbox
Now run:Get-mailbox -resultsize unlimited
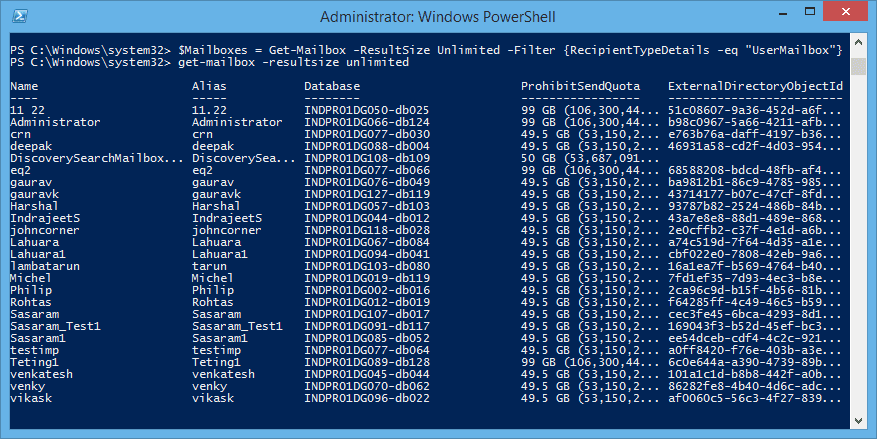
Finally, run this command to complete the process:$Mailboxes.Identity | Start-ManagedFolderAssistant

Users are provided with a detailed manual procedure for assigning Office 365 Archive Policy and Deletion Policy. It may take 7 days for the policy to come into effect. However, you can implement it forcefully (by starting Managed Folder Assistant using Windows PowerShell cmdlets) to apply retention policy immediately to the Office 365 mailboxes.
Archiving and retention features of Office 365 are mainly for specific items. You shouldn’t be solely dependent on them since they are not suitable for the backup of the entire Office 365 data. However, many professional tools allow complete and accurate Office 365 backup, including mailboxes, public folders, and archive mailboxes and saves them into the user’s preferred output format. It acts as a precautionary step which must be taken for the security of all your essential data. Also, it supports the all Office 365 backup plans.
Conclusion
Custom archive and deletion policies in Office 365 helps in the better management of data especially since it is specific to your own organization. These Office 365 Archive Policy & Deletion policies can be created by a global administrator and applied using the Exchange admin center and Exchange Management Shell. It is a lengthy procedure which involves a lot of steps but for your ease, all those have been discussed in detail above. However, if you need a comprehensive backup of Office 365 data, you need a professional Office 365 mailbox backup software.
FAQs
Q - What is the default policy for archive mailbox in Office 365?
A - By default, Office 365 has a 2-year move to archive policy for mailbox folders. This means that after 2 years, emails will be automatically moved to the archive mailbox (if the user has one).
Q - How do I assign a retention policy to my mailbox in Office 365?
A - To assign a retention policy to your mailbox in Office 365, you'll first need to navigate to the Recipients menu & select the Mailboxes option. Once you've found your User Mailbox, click on Mailbox features to access the Retention policy list. From there, you can choose the specific policy that you want to apply to your mailbox, & simply hit Save to finalize your selection.
Q - Do retention policies apply to archive mailboxes?
A - When implementing a retention policy in Exchange Online, it's important to note that it will also apply to any archive mailboxes that exist. This means that emails will be moved to the archive mailbox if it's enabled & the retention policy tag has been set for two years.
A simple tool to Backup Exchange/Office 365 mailboxes to PST & Restore them