Evolution stands as a free email client application, offering classic email functionalities such as a Calendar, address book, to-do list, and others. Evolution Mail is available on Windows, Linux, and Unix-like systems, and it is mainly popular among Linux and Unix-like system users. Remarkably, its user-interface closely resembles that of Outlook, encompassing most of the same features and capabilities. Furthermore, Evolution boasts additional incorporated features, including:
- Secure network encryption for enhanced experience.
- Support both POP and IMAP for email retrieval.
- Smooth email transmission through SMTP support.
- Efficient email filtration option available.
- Provide advanced spam filtration feature.
- Support automatic synchronization with SyncML, SyncEvolution and Palm OS devices.
- Direct connectivity to Novell Groupwise and MS Exchange Server.
- Calendar support for iCalendar file format.
However, when compared to Microsoft Outlook, Evolution lacks advanced security features, collaboration, scheduling, integration, and Windows-platform support. Additionally, as a free email client, Evolution is more susceptible to external threats such as virus intrusions and malware attacks. This is prompting many users to migrate to a more dependable alternative like Outlook.
Methods to migrate MBOX files of Evolution to Outlook PST
There is no direct method for migrating Evolution files to Outlook. However, to migrate Evolution files, you need to perform the procedure in three parts. Below we have mentioned all the three parts in detail, follow them carefully:
First, you must export the Evolution files to MBOX format, then only you can move further to convert them to PST format. It’s important to note that Evolution mailbox data is stored in an SQLite database file (.db) on the local system. Typically, you can locate the source database file in the following location:
~/.local/share/evolution/mail/local/folders.db
Once the source database file is located, you can export the Evolution file to MBOX format via the client itself. Given below are the steps to export your Evolution data to MBOX format.
- Launch Evolution Mail and go to the mailbox folder.
- Click on Edit > Select All.
- Then, go to File and click on the Save as mbox... option.
If you are utilizing Evolution Mail on a Unix-based operating system, the converted file will be stored at the specified location on your local system.
~/.local/share/evolution/mail/local/”
After exporting Evolution files to MBOX format, now you need to convert them into PST format. There is no direct method for this, hence it can only be done with an automated tool. In this regard, we have highlighted an efficient third-party software Kernel for MBOX to PST to ramp up the conversion task for you. This tool is developed to provide a smooth conversion process with a few easy steps. This tool offers other additional benefits as well, which includes:
- The tool supports about 20 email clients, including Thunderbird, Apple Mail, Eudora, Evolution, Opera, PocoMail, Claws Mail, Sparrow, Spicebird, etc.
- An in-depth overview of the mailbox's current contents is provided to ensure the precision of its items.
- You can convert both single and multiple MBOX files into a single batch operation.
- Apart from supporting the PST file format, the tool also has the capability to preserve data in MSG or EML file formats.
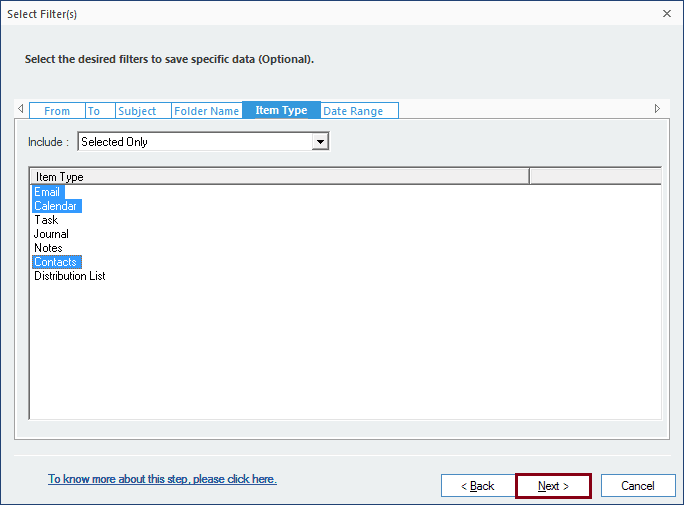
- Users can save specific items using the advanced filtering options.
- It seamlessly integrates with all Microsoft Outlook versions.
- Launch Kernel for MBOX to PST software.
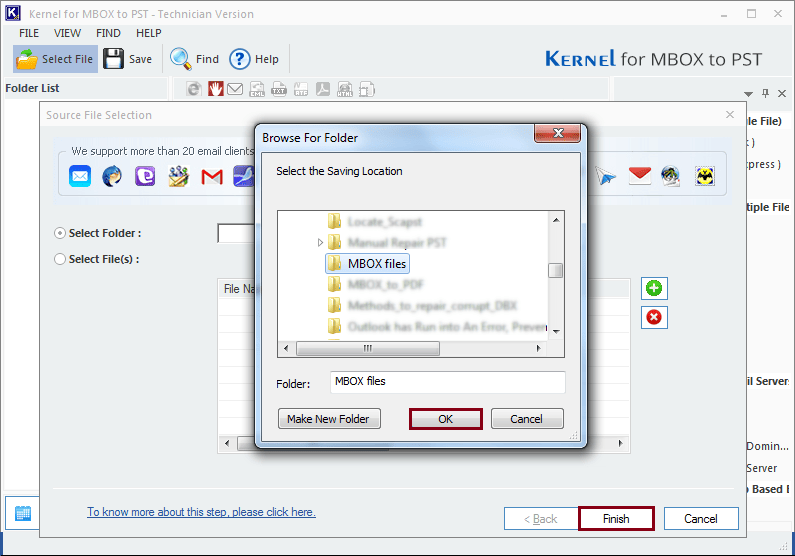
- Browse to locate the folder containing MBOX files.
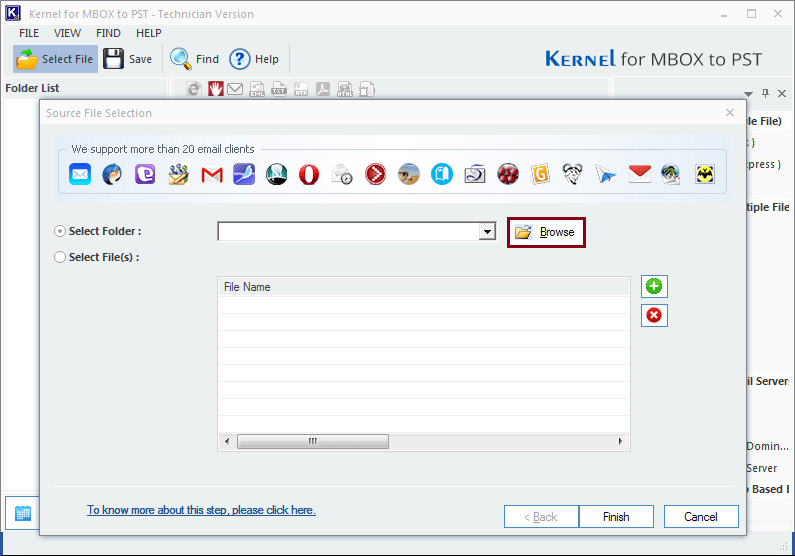
- Select the required folder and click on OK to add it. Then, click on the Finish button.
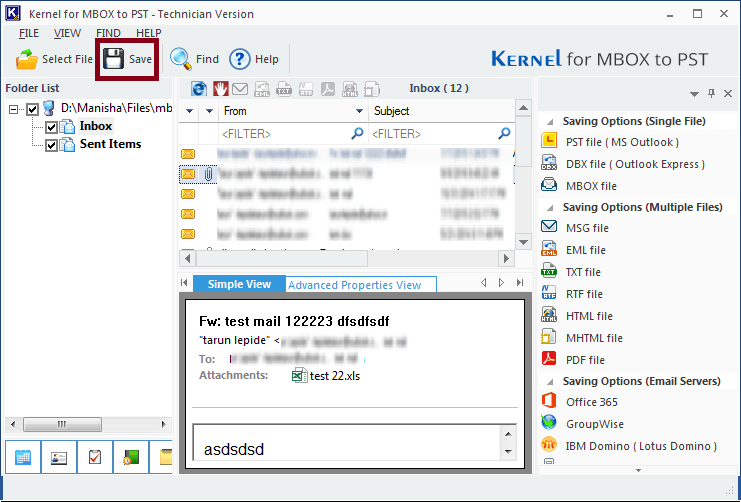
- You can preview the emails by clicking on individual items from the mailbox folders. Once done, click on the Save button to save the file in the desired format.
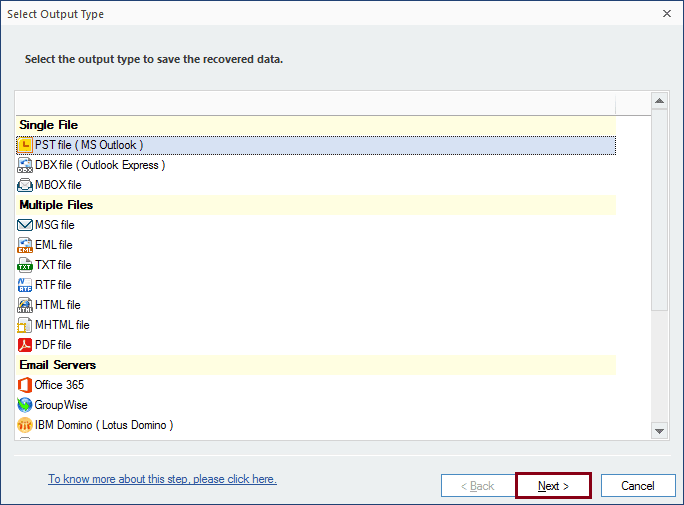
- Now, select PST file (MS Outlook) as the output format and click on the Next button to proceed.
- Apply filters for a customized conversion - and click on Next once done.
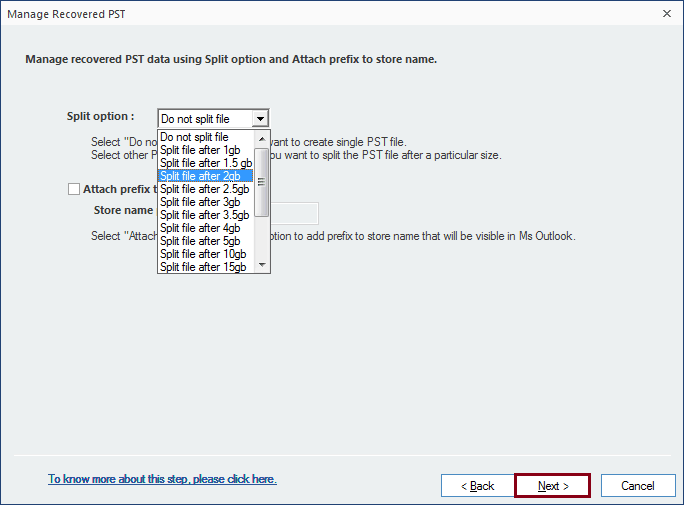
- You have the choice to divide your file into multiple PST files of equal size to enhance organization, and you can also assign a prefix to give it a distinct identifier, once done then click Next anyways.
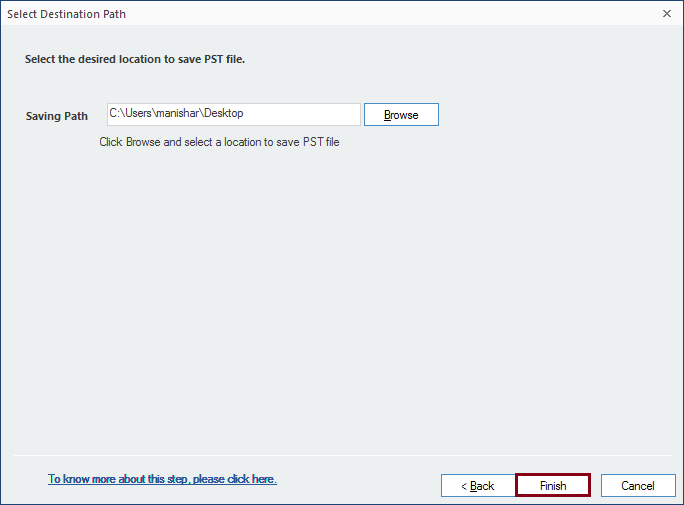
- Choose a destination for the file by clicking on the Browse button and click on the Finish button once specified.
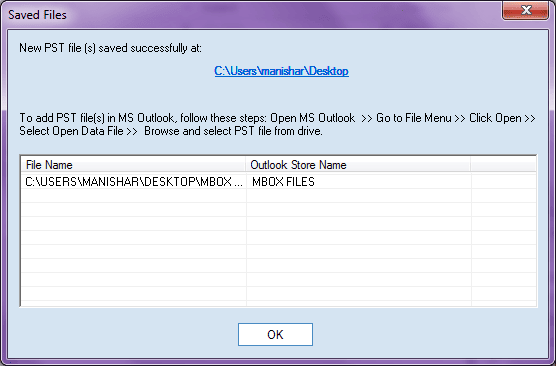
- When the saving part is completed, click OK to finish the process.
After successfully converting your MBOX files of Evolution into PST format, now it’s time to import the PST file into Outlook.
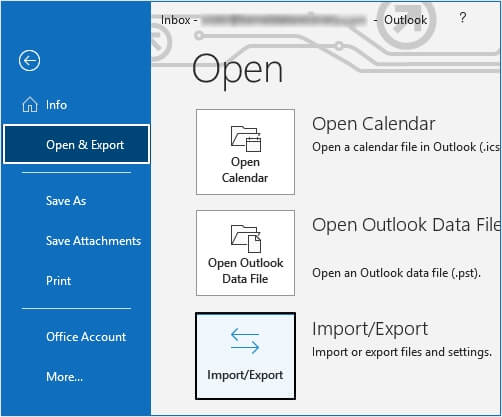
- Open Outlook on your device and tap on File option.
- Now, click on Open & Export, and then click on Import/Export option.
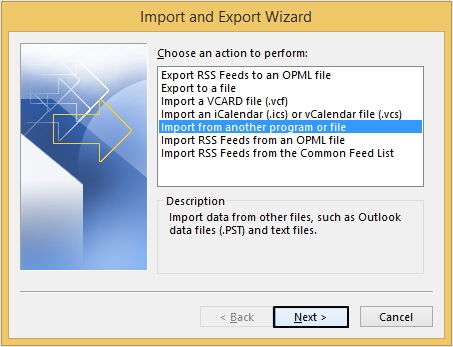
- Select Import from another program or file option and press Next button.
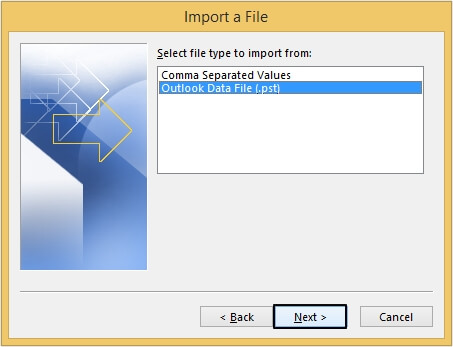
- Select Outlook Data File (.pst), then proceed to Next.
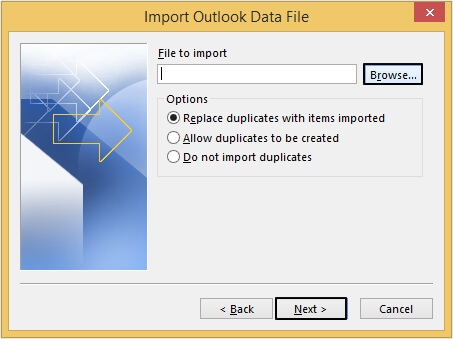
- Browse to choose your converted PST file and click on Next.
Conclusion
Professionals are willing to shift from Evolution to MS Outlook, because of Evolution's limited security features and many reasons. Therefore, we have provided a detailed three-step guide of how you can easily migrate from Evolution to Outlook PST. We have also recommended a professional third-party tool Kernel for MBOX to PST to efficiently migrate Evolution's MBOX files to Outlook's PST format.