Read time 6 minutes
Videos have become the dominant source of entertainment for everyone around the world. It has experienced a sharp rise with the increase in new technology and its advancement. From home movies to big-screen movies, from reels to long-duration videos, from shooting on mobile photos to shooting through professional cameras, it truly is the prime source of content.
However, these videos become grainy, and tiny squares start appearing, which are visible to the naked eyes, which is called pixelation. Grainy or pixelated videos can become quite irritating since they disturb and bring down the smooth and enjoyable video-watching experience.
What Causes Grainy or Pixelated Videos?
To start with, it is essential to know about the root causes of grainy or pixelated videos. Having the right knowledge can also prove to be useful to fix the video not playing issue.
These are the top causes that contribute to making videos grainy or pixelated
- Shooting videos in low or improper lighting or during night hours.
- Compression of videos, basically, converts a large-sized video into a relatively small size to save storage space.
- Converting to a different video format to save space.
- Shooting videos on a camera that has a small sensor.
- Incorrect camera settings while shooting the videos.
- Shooting videos on low aperture settings since it does not allow the lens to open as much to let the light pass through the camera.
- Shooting videos on high ISO settings, which make the sensor of the camera more reactive to light.
Methods to Fix Grainy or Pixelated Video
Learn effective methods to fix grainy or pixelated video issues. Improve video quality using editing software, correct resolution settings for clearer playback.
Move Back to the Original Size
Video compression is often done to reduce the size of the video files in case of a lack of storage space in memory cards. But this leads to the quality getting degraded, resulting in grainy or pixelated videos. To begin with, the conversion of videos is usually done using online conversion tools, which degrades the quality of the video. It is recommended to shift back to the original size and quality of the video to avoid any type of errors in the future.
Retrieve from backup files
It is rightly said, “precaution is better than cure.” In this situation, backup video files prove to be the best precautionary measure only if you have taken a proper backup of the videos. If the video has become heavily pixelated or grainy, you can always retrieve the original video from the backup and enjoy the viewing experience.
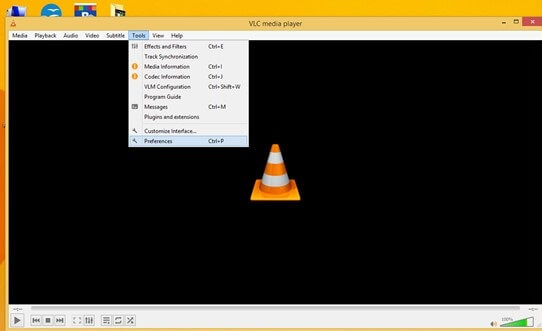
Use VLC media player
VLC media player proves to be a resourceful tool apart from being an open-source and free multimedia player. It comes with various distinctive features, including conversion of audio and video files to a different format, streaming of videos, recording the desktop, and fixing minor errors in the videos. However, it usually supports only a few video file formats, including AVI for repairing and in case of a MKV file, it might show ‘VLC not playing MKV file’ error.
Follow these steps to fix grainy or pixelated videos:
- Open the VLC media player on your system.
- Click on ‘Preferences’ under the ‘Tools’ category.
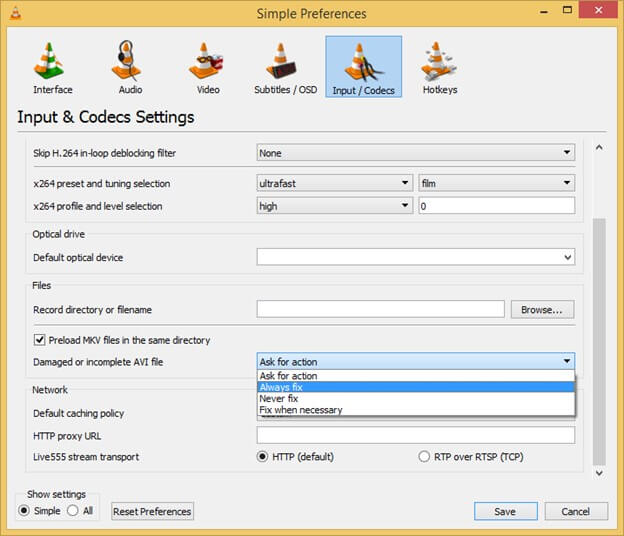
- Move to the ‘Inputs/Codecs’ category and opt for ‘Always fix.’ Lastly, click on ‘Save’ to confirm the changes.
Compatibility Issues with Multimedia Players
There is a high possibility that the videos are completely fine but might not be compatible with the multimedia player on which you are playing them. This may lead to a grainy or pixelated video.Just right-click on the video and open it with some other video player that is well suited to all kinds of video formats.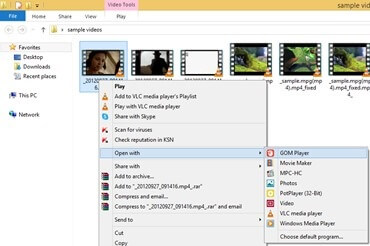
Fix the Grainy or Pixelated Video File
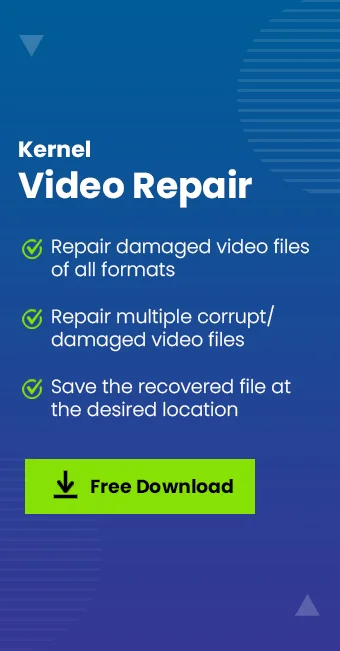
If any of the above methods do not fix the grainy or pixelated videos, it indicates the videos are highly damaged. To resolve this issue, professional software like the Kernel Video Repair is helpful. It is capable of repairing any file format which is corrupt, inaccessible, or damaged.
The Kernel Video Repair software is capable of fixing any type of video file format with its premium approach and does not have any limitation on the size and number of files. In addition, it is compatible with all Windows versions. Most importantly, it does not affect the video quality and keeps the original quality intact.
Follow the simple steps to repair the grainy or pixelated video file-
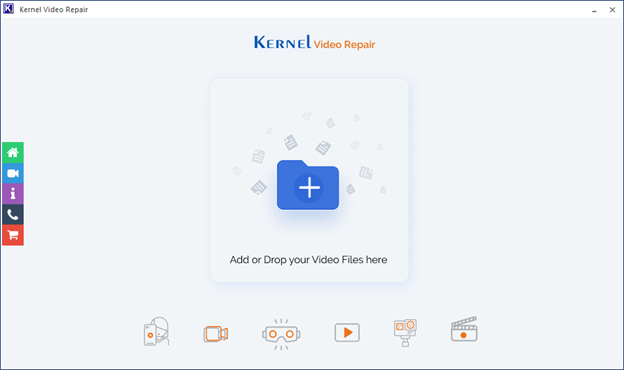
- Install the Kernel Video Repair in your system.
- Add the damaged files using the ‘+’ option.
- Select all the videos which you want to repair and click on ‘Open’.

- All the files will be displayed in a list, and click on ‘Repair Files.’
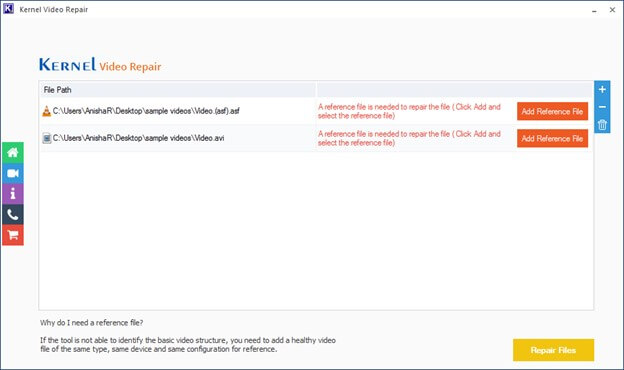 Note: If asked by the software, add a healthy reference file for easy repair.
 - Select a destination to save the repaired videos and click on ‘Ok.’

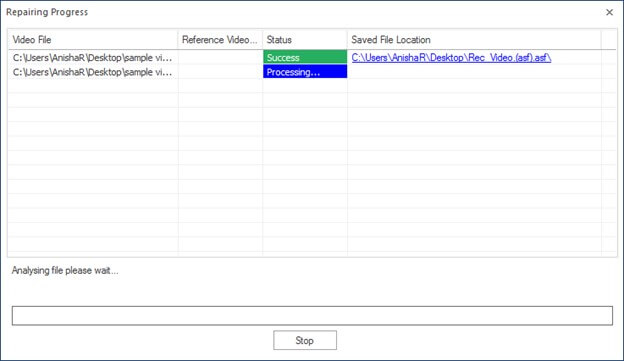
- The repairing process will begin. After its success, click on ‘Save file to CSV.’
Conclusion
Grainy or pixelated videos are the result of shooting in low light, high ISO settings, low aperture settings, and a small sensor of the camera. However, even after the shooting process, the video can get grainy due to compression on the video file. However, these issues can be resolved by using different ways. Using a premium approach like the Kernel Video Repair is the recommended solution in the case of highly damaged files.