Read time: 7 minutes
If you’re a user of Microsoft Outlook, you may have encountered the ‘We couldn’t create the Outlook data file’ issue. It’s a common problem that presents a significant hurdle for users trying to add their Gmail accounts to the Outlook email client. The error message usually appears during the initial setup process that prevents the account from being added to the client entirely.
In this blog, we will get into various practical solutions that you can implement to get rid of this annoying issue once and for all. So, if you’re one of the users who has experienced this problem, stick with us to find the right solution to resolve the ‘We couldn’t create the Outlook data file’ error.
Reasons behind the ‘We couldn’t create the Outlook data file’ error
This is becoming a well-known error, and to avoid it from occurring, you must be aware of all the reasons which cause it-
- Bugs in Outlook
Bugs exist even in Outlook. These bugs prevent the users from adding a new account through the File> Add Account approach. - The Simplified Account Creature feature
Simplified Account Creation is a relatively new feature that was introduced with the aim of making things easier. However, even this contains many bugs and becomes one of the main culprits for this error. - Lack of space on the hard disk
To add a new account, some amount of free storage is needed on the hard disk. A storage media overfilled with files is not recommended. - Email client permissions
Certain security permissions for email clients often come in the way of using them on a different platform. Ensure that all settings are properly set. - IMAP and two-step verification are disabled
If you are trying to add a Gmail account to Outlook, the IMAP and two-step verification settings must be enabled properly.
Methods to resolve the ‘We couldn’t create the Outlook data file’ issue
Outlook is throwing this error either due to an underlying problem with itself or with the email account which is being added to the platform. The following methods focus on resolving both the aspects of the error-
Method 1: Free up disk space
Any email account which is being added requires sufficient free space in the hard disk of the system. You can quickly check if it has space or not-
- Open This PC which will mostly be present on the desktop itself.

- Under Devices and drives, you can check the remaining space in the hard drives.

However, if it is full, you must delete the applications which are no longer used and run a quick scan through the Disk Cleanup tool. In addition, consider clearing the Outlook cache and Windows cache data.
Method 2: Remove Write Protection from the hard disk
The Write Protection forces a storage medium to be in the Read-only zone. When this is enabled, the disk cannot apply modifications and other amendments. If that is the case here, it must be removed from the hard disk.
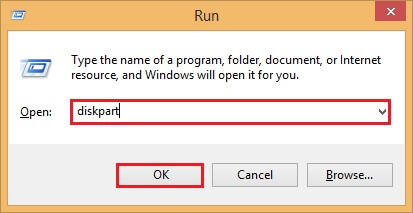
- Open the Run window (press the Windows and R keys together).
- Type diskpart and press OK.
- Now, type the commands below and click Enter after each of them:
- Disable the Read-only protection. Type the exit command and press Enter.
Select disk (number)
Attributes disk clear read- only
Method 3: Disable Simplified Account Creation facility
If you are using the ‘Connect Outlook to Office 365’ wizard to add your email account to Outlook, this error is bound to occur. This Simplified Account Creation facility has to be disabled to prevent this.
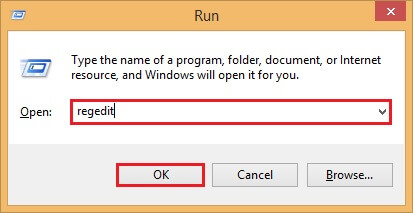
- Open the Run window (Windows + R).
- Type regedit and click on OK. The command will open the Registry Editor.
- Now, you can go to the following address path-
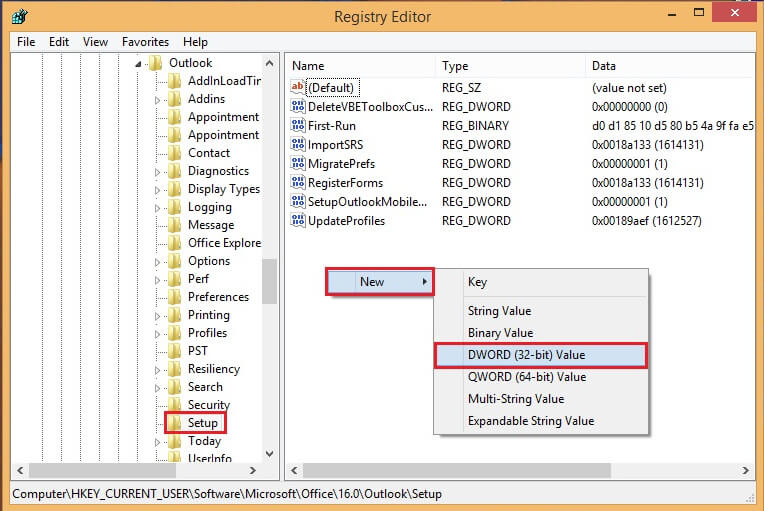
- Right-click and select New. Click on DWORD (32-bit) Value.
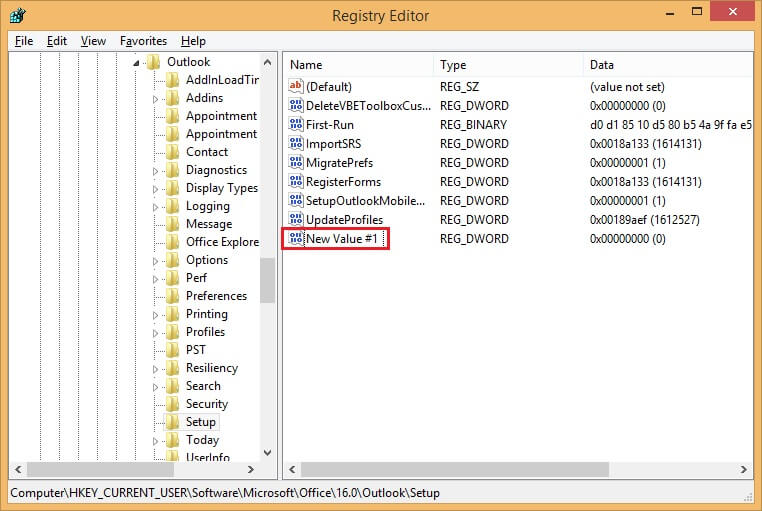
- Change the name of the file to DisableOffice365SimplifiedAccountCreation. Enter 1 as the Value data and press on OK.
- Close this window and restart Outlook.
Method 4: Check account settings
There is a possibility that the problem lies with the email account which you are trying to add and not Outlook. The email client is not allowing complete access to the user. Also, make sure you are entering the correct email address and password. And if you are trying to add your Gmail account, then also check for the following-
- IMAP setting is enabled
- Two-Step verification is successfully completed
Method 5: Add a new account in Outlook
If the above-mentioned methods have not helped you to resolve the Outlook data file error, you can try these other approaches to add your account to MS Outlook.
- Using Control Panel
- Open Control Panel; click on Mail.
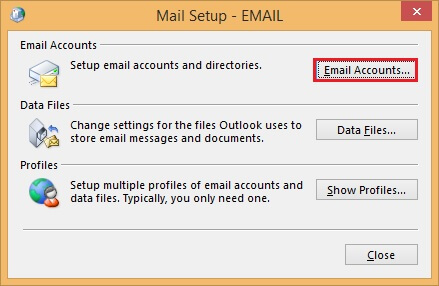
- Open the Email accounts in the Mail Setup window.
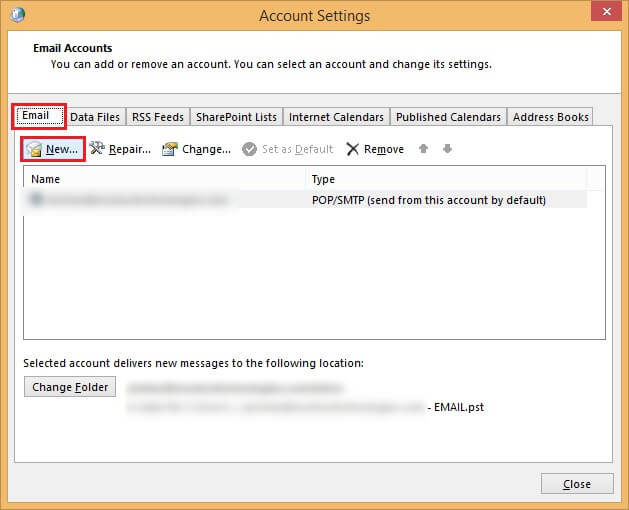
- Click on New from the Email tab.
- Enter the details and click on Next.
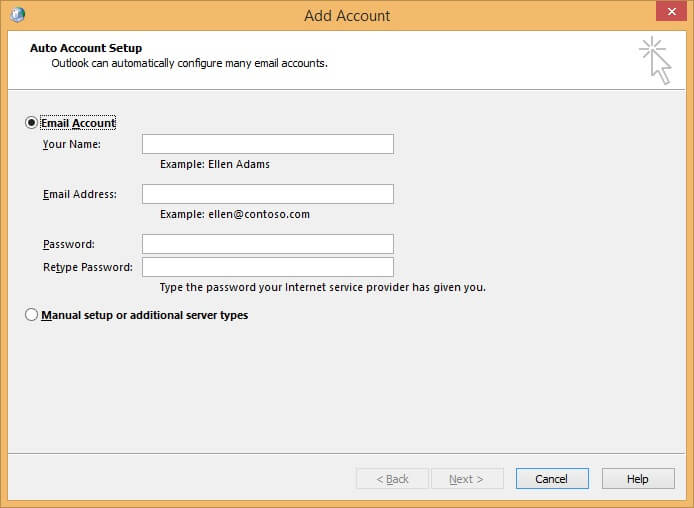
- The creation process will begin.
- Using Manage Profiles
- Launch Outlook; click on the File menu.
- Select Info and click Account Settings. Also, select Manage Profiles under it.
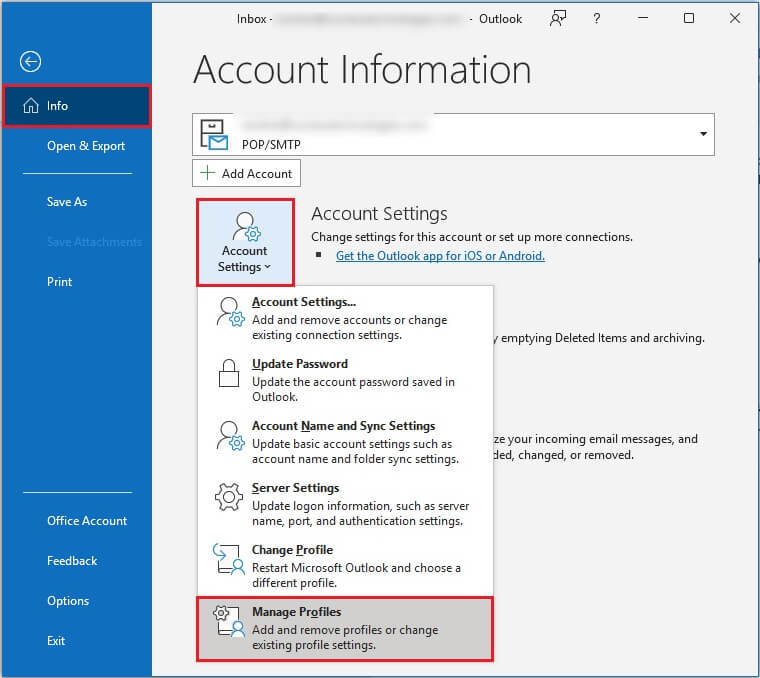
- Now, similar to the previous method, click on the Email account and then on New.
- Enter all the details, and the process will start.
Outlook saves the user’s information in the PST format, and these files are prone to corruption. To repair them at your convenience and to resolve oversized Outlook PST file issues, you can make the most of the professional software- Kernel for Outlook PST Repair. With a simple interface, it is powerful enough to recover the data irrespective of the size of the data file.
Conclusion
With the methods provided, the problem “We couldn’t create the Outlook data file” can be resolved. However, if these methods do not work or if data is lost, it is recommended to use the Kernel for Outlook PST Repair tool.
With its advanced algorithms and user-friendly interface, it is capable of restoring all corrupt PST files and recovering lost data. This will provide users with a safe and secure solution to the problem.


