Read time: 10 minutes
Here’s how to add watermark to video in few simple steps:
- Select a trusted video editing tool.
- Add video file to the tool.
- Add your watermark; be it a text, logo, or an image.
- Set the size, transparency, and the accurate position of your watermark.
- Export and save the video with the added watermark.
Imagine after shooting and editing a video for hours, you post it online on a platform only for it to be wrongfully claimed by another individual. Frustrating right? Watermark prevents this from happening so that no one else can claim your hard work and efforts as their own. Now, you may ask, how do you put a watermark on a video? That’s exactly what we cover in this blog, along with advantages and some essential tips to add watermark to video files.
What is a video watermark?
Watermark can be in any form including name, image, pattern, text, brand logo, etc. embedded into a photo or video. Watermark helps you to protect your copyright as it discourages the sharing, circulation, publishing, and exploitation of your work without your consent or permission. It also helps you to create, give identification, disperse, and protect your brand. It adds an extra layer of protection to your video files. Adding watermark restricts others from posting or sharing your content or videos.
What are the advantages of adding watermark to video?
There are various advantages of adding watermark to your video files. Some of them are:
- Brand identification and promotion: Watermark makes it easy to recognize the brand or company which has posted the data or video.
- Copyright protection: Adding watermark prevents unauthorized sharing and use of your data.
- Protection against theft: Watermark helps in protecting videos and images from theft and maintains originality.
Methods to add watermark to video files
Adding watermarks to videos can be challenging for some users without knowing the correct way of doing that. Here are a few methods by which you can insert watermark in video files easily:
Method 1. Use online video editing tool
When talking about editing videos online, Canva stands out as one of the best applications for that. Following are the steps of how you can add watermark to video using Canva:
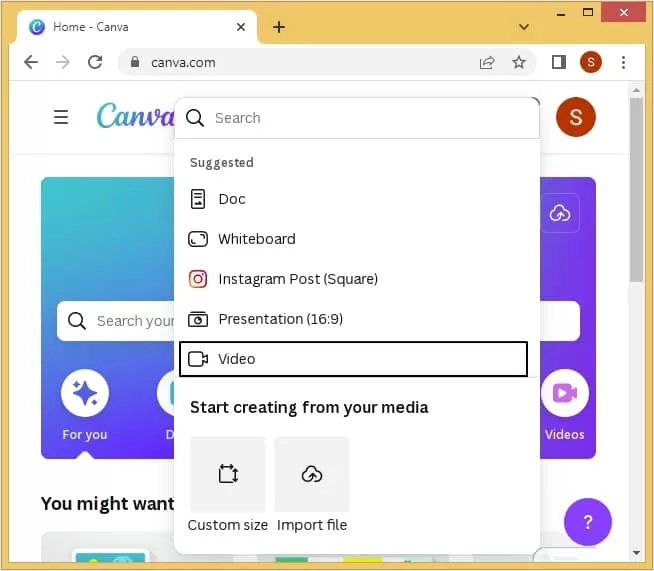
- Install the Canva application on your device or visit the website and login to the application and click Create a design.

- Now, select Video from the drop-down list.
- Go to Uploads and then tap on Upload files option.
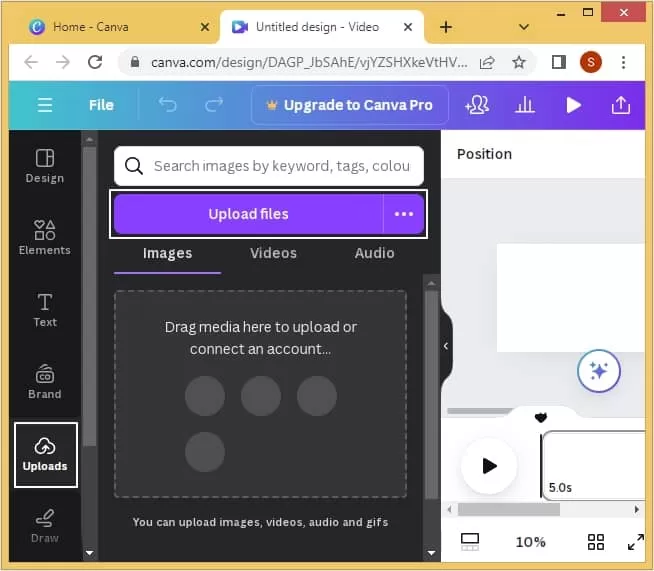
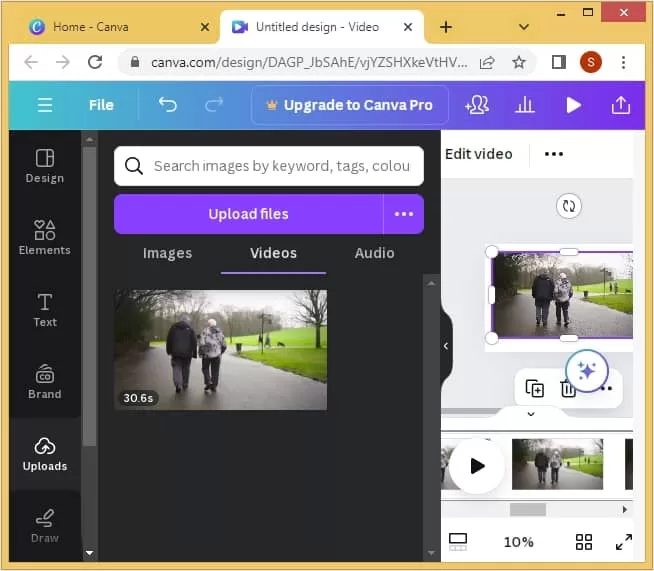
- Moving ahead, drag the video file to the Edit video section.
- Go to Text option and click on Add a text box to add watermark to your video file.
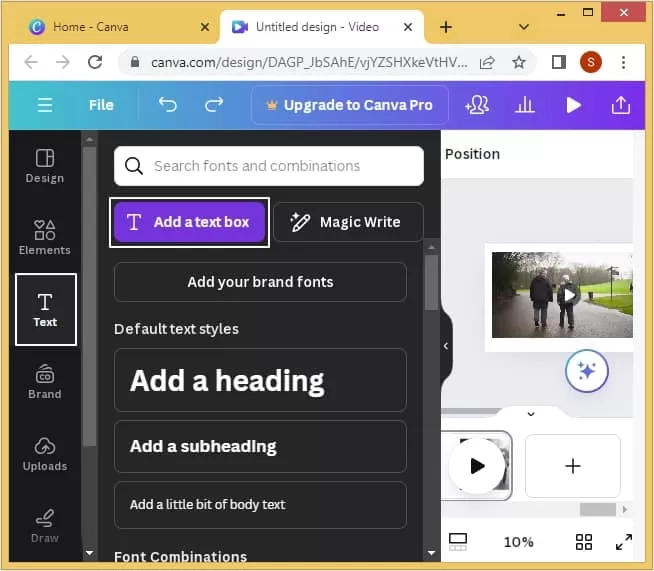
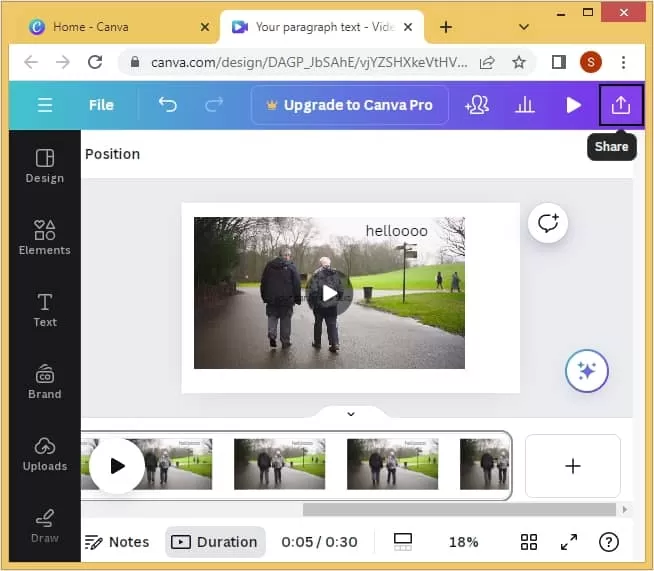
- Add the text of your choice and click on the Share button located at the right side of the interface.
Method 2. Use in-built Video Editor tool (for Windows 10)
There is an in-built utility named Video Editor for video editing purposes in Windows 10 system. You can use this application to add watermarks to your videos. Here are the steps of how you can do so:
- Launch Video Editor application on Windows 10 system.
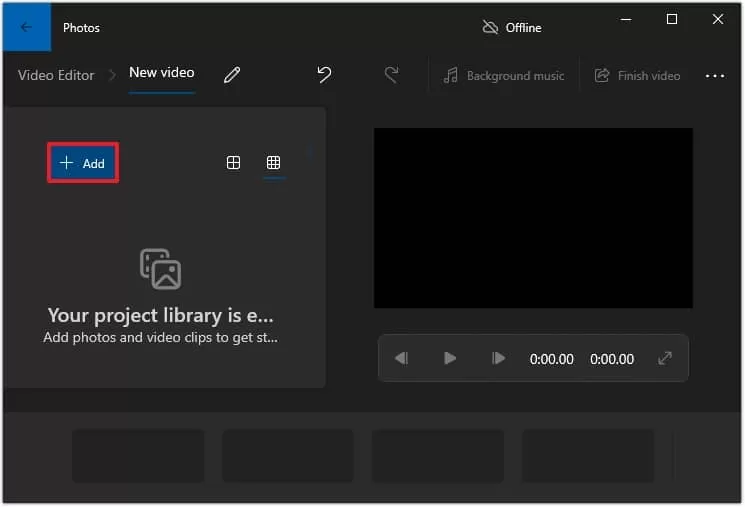
- Click on the New video project option and enter the name of your project.

- Now, click the Add button to upload video file to the application.
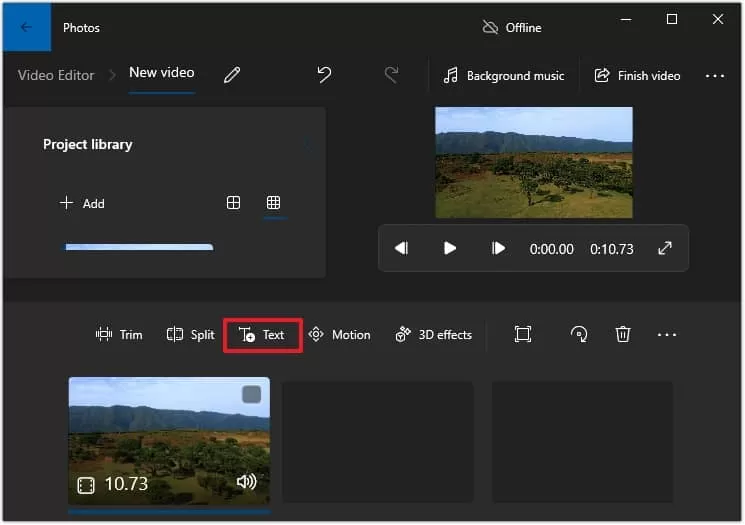
- Moving ahead, select the video file from Project library and drag it to Storyboard section.
- Click on Text to add watermark of your choice.
- Enter the watermark text and click on the Done button.
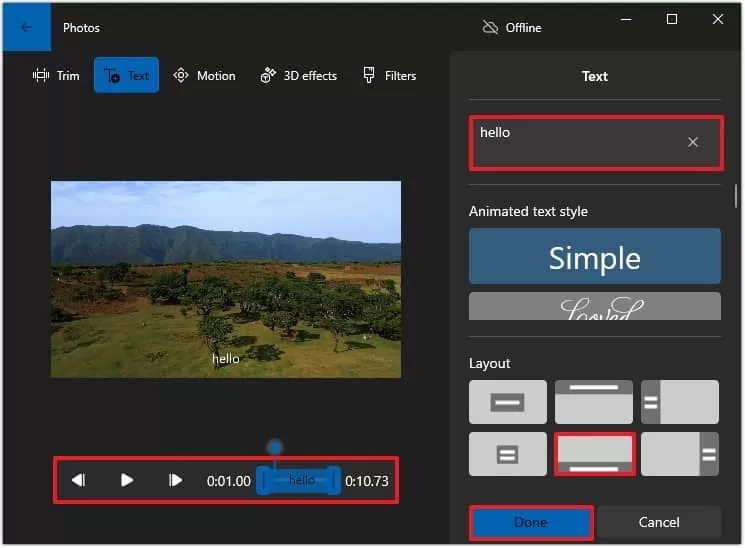
In this way you can easily add a watermark of your choice to video files in Windows 10 system.
Method 3. Add watermark to videos of Android device
If you want to put watermark on videos of your Android phones, you can follow the steps outlined below:
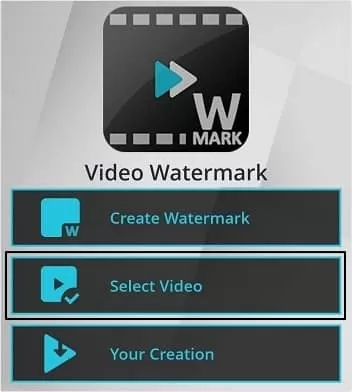
- Install the Video Watermark application on your Android device and open it.
- Upload the video you want to add watermark by clicking on Select Video option.
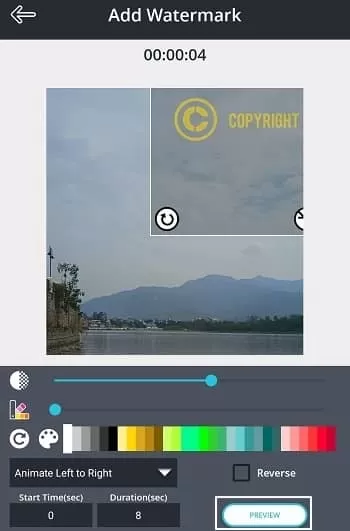
- Select the watermark according to you.

- Edit the watermark and click Preview option.
- Check if it’s applied properly and click Apply.
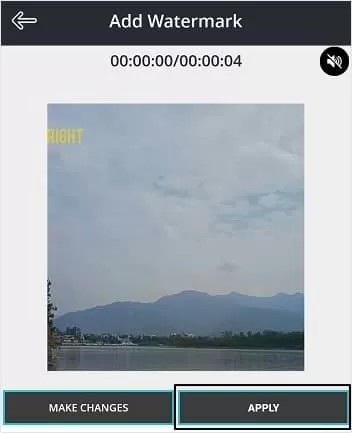
- Once done, you can share it or save it in your gallery.

Best tips to insert watermark in video files
Watermarking is a great way to protect your intellectual property without worrying about data theft. It requires great attention to detail and must be done with great care. We have given some of the best tips to easily insert a watermark in video files:
- Watermark must be visible: Make sure your watermark is translucent (has low opacity) and is small in size. The added watermark should not distort/hinder the viewer experience.
- Be consistent in branding: Use the same font, style, and position of your watermark to maintain consistency and create a professional and recognizable brand image.
- Proper placement: Make sure your watermark is placed in such a way that it doesn’t cover any important info or video content. Preferably, place your watermarks in a corner of the video to keep it out of the way, yet still visible.
- Make a subtle watermark: Make sure your watermark isn’t distracting for users. Use soft colors and create a subtle watermark.
Challenges users face when trying to watermark videos
Sometimes, users can face some problems when they want to watermark their videos. We have talked about some of those issues in detail:
- Video looks blurry because of watermark: If your video looks blurry due to watermark, then the image/logo used as the watermark could have low resolution. It can also happen due to over compression of images, which usually happens with JPEG images.
- Watermark can’t be seen in final video output: If your watermark was visible in the video editor but can’t be seen in the final exported video, then maybe the opacity of the watermark is too low, or the color choice isn’t correct.
- Pixelated watermark after export: The added watermark can look sharp in the editor and still look pixelated in the final output video. It usually happens if the watermark image is scaled much higher than its original resolution or if the export bitrate is far too high.
- Watermark shifted positions after export: Sometimes, the watermark can shift positions during the export process. Usually this happens because of aspect ratio mismatch or automated crop settings.
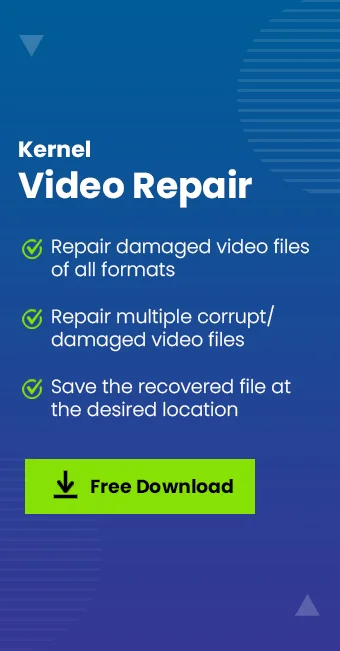
- Video can’t be played with watermark: If the video was playing perfectly in the editing software but can’t be played after adding the watermark and exporting the video file, then the issue came up during the export process. This video playback issue can happen if the rendering process gets interrupted in between or if an issue with codecs appears. It can corrupt the video file and damage the video permanently if it’s not repaired promptly. Try editing the video file again if you’ve a backup of it. But if you don’t, then repair the damaged video file with a Video Repair tool before trying to edit or export it again.
Ending note: How to add watermark to a video?
Users can put watermark in video files with the help of built-in video editing tools, professional video editing tools like DaVinci Resolve, or via open-source online tools. Before choosing any of the approaches, make sure that the watermark you’re adding is subtle and doesn’t take away attention from the main video. A proper watermark protects your intellectual property without trying to distract users from the provided content.
People also ask
A. Yes, watermark can be easily added to MP4 files as these files are supported by all the major video file formats.
A. No, adding a watermark won’t necessarily reduce a video’s quality. However, incorrect export settings and improperly editing the video file can ruin video’s quality.
A. Yes, watermark can be removed from a video if it’s not embedded permanently.
A. PNG works perfectly as the best format to add as a watermark because it uses lossless compression and supports alpha channel transparency.