Read time 10 minutes
While we watch our favorite movie or web series on our Windows system, the instant feeling is always atrocious when an error or issue pops on the screen out of nowhere, stopping the entertainment. You’ll probably try to close the video window and play it again from the point where it stops. In some cases, it works, but it won’t work for most of the other video issues.
Video and playback issues are usually associated with the program you’re using or the audio-video configuration you’ve set. For every specific error, you’ve got to find a relevant fix without messing it up more. Not all users face or encounter the same video & playback errors, but some remain common because of the Windows ecosystem. So, we’ve come up with our compilation of the top five common video & playback errors.
Common causes for video error
There could be many careless usage and intrinsic causes for video errors in Windows Media player, but we’ve listed some common reasons for the error that might be the culprit for the same:
- Corrupted storage media and files.
- Incompatible media player or incomplete download.
- Incorrect conversion of video format extension.
- Sudden shutdown or using outdated PC drivers.
Common video error in Windows Media Player
Here, we’ll see five common video errors that might be encountered while playing video in the Windows Media Player application. We’ll also try to fix them manually:
1. Cannot play the file
The error message “Windows Media Player cannot play the file. The Player might not support the file type or might not support the codec that was used to compress the file” pops on-screen when you try to play a video file with Windows Media Player that is not supported.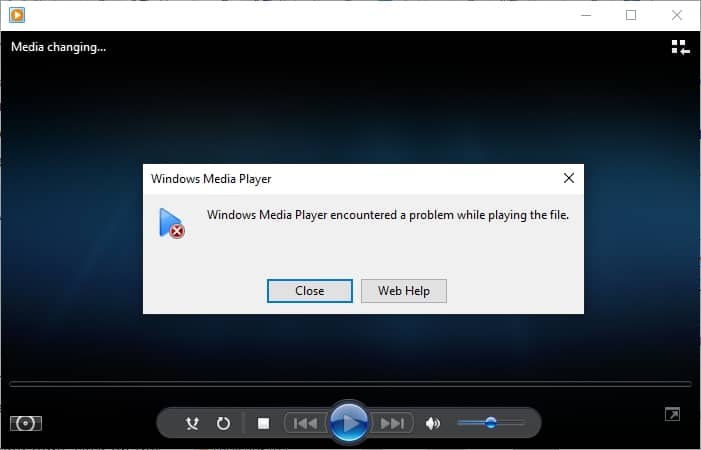
Windows media application is not as flexible as other paid and open-source multimedia programs and is incompatible with all video formats. So, opening something out of the application’s bounds will throw you the same error message.
To get rid of this annoying error message, there are two fixes you can choose from. The first is to change the video file format to the one supported by Windows Media Player. The other solution is downloading and using a more robust media player application, such as a VLC media player. VLC is a much more robust application than the Windows Media Player. It supports more video file formats and is available for free.
And the other is to download and use a more robust media player application, for example, VLC media player. VLC is a much powerful application than the Windows Media Player – it supports more video file formats and is available for free.
2. Frozen frame
Another common issue that users face while watching videos is Frozen Frame or Frame Freeze. This usually happens due to an interruption in video file download due to an unstable Internet connection or multiple file downloads in parallel. Though the program runs the video, it can’t continue as the rest or some parts of the file stand missing.
Interrupted video file download is not the only reason for the occurrence of the error. It can also happen because of display and graphics driver problems. Issues due to Display & Graphics drivers can be critical and may affect your system & its performance in adverse ways. To get rid of display & graphics driver issues, you can uninstall the driver and install it again, or you can update the preinstalled driver:
- Right-click the Start button and select the Device Manager.

- Inside the Device Manager, expand the Display Adapters dropdown.
Right-click Intel(R) HD Graphics and select Update Driver Software.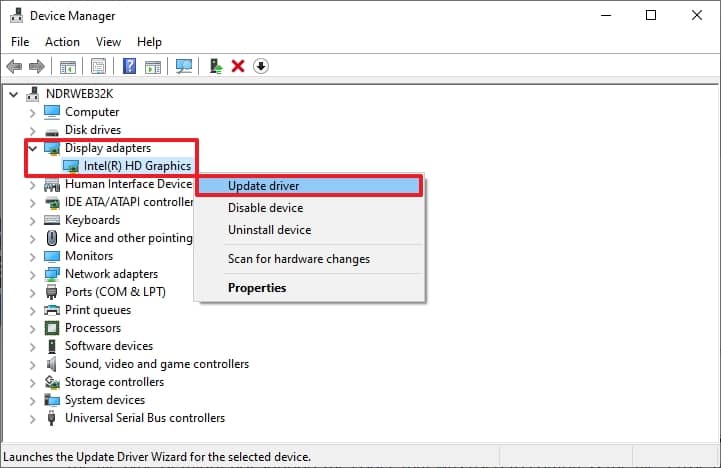
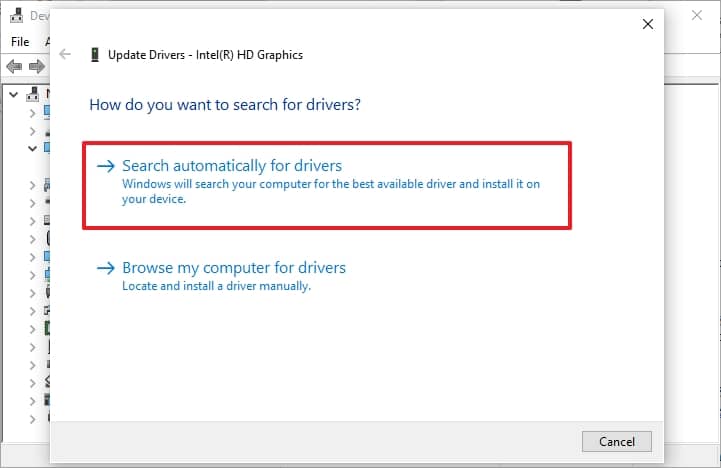
- Choose Search automatically for driver.
3. Codec issue
You may again encounter the “Windows Media Player cannot play the file. The player might not support the file type or the codec used to compress the file” error. Changing the video file format could cause a problem with the video codecs installed on the system if it doesn’t get fixed.
People used to install a Codec package installer like K-Lite, Shark007, or CCCP to deal with codec issues, which is an old trick, but doing this creates conflict within the system, and the player would fail to play the video file.
The solution to this problem is to uninstall all the Codec packages installed, restart the system, and try to play the video file again using the default video player application. If the issue persists, we’d suggest installing the VLC media player. It supports an immense range of video and audio file formats.
The solution to this problem is to uninstall all the Codec packages installed, restart the system, and try to play the video file again using the default video player application.
If the issue persists, we’d suggest installing the VLC media player. It is backed by the best developers in the field and is open-source. VLC supports immense range of video and audio file formats and has lots of advanced features.
4. Crackled & distorted sound
While watching the video content, the issue is not always related to video and playback errors; it could also relate to sound. Sound crackling and distortion is another problem that might break the flow of entertainment; the crackled and distorted sound is more than irritation, and you’d wish to do anything to stop it. Ensure that all the wires are appropriately connected to the speakers or headphones, and try to play the video on different media players.
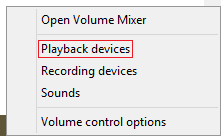
- On the system tray, right-click the Sound icon.
- Click on Playback devices.
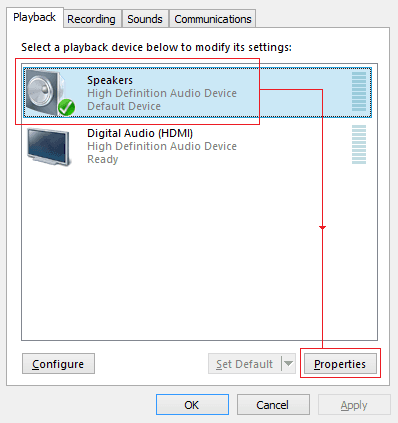
- The sound dialog box will open. Select Speakers, click on Properties button.
- Switch to Enhancements tab. Checkmark Disable all enhancements and click Ok.
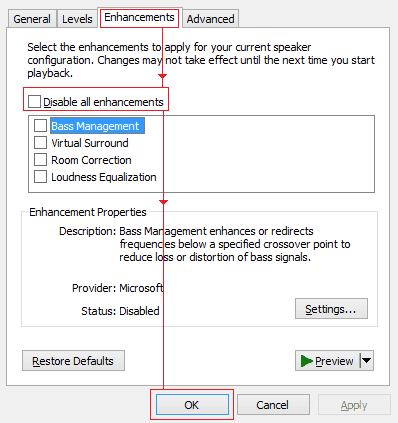
- Click Apply; click Ok.
5. Video crash & black screen
If the video file you’re trying to play in Windows Media Player repeatedly crashes, the video file may be corrupted. So, you may have to download the video again. The occurrence of black screen is compression, read/write errors, or virus attacks. The same can happen when the format of the video file has changed. Well, there is no direct way or method to tackle this issue, as there could be various reasons behind it, but you can try the following workarounds:
- Reduce Graphics Hardware Acceleration.
- Reinstall the device drivers again.
- Try a different media player application; again, we suggest using VLC.
Above, we’ve listed the most common video errors users encounter on the system they are using. Neglecting the issues solved by making small changes in audio and video settings or replacing the settings with the default ones. Thus, we’d recommend using a professional tool of the same genre to fix corrupted or damaged video file errors and other errors that couldn’t be fixed normally.
Use the automated tool to repair and recover video file
Kernel Video Repair is an advanced tool that eliminates all video file errors without extra effort. The tool offers wide compatibility for video file formats like MP4, WMV, AVI, MKV, 3GP, MPEG, WebM, etc. It can simultaneously repair multiple corrupt, faulty, and inaccessible video files. You can also recover lost/deleted pictures or videos from any hard drive while preserving data quality and integrity. This tool has a simple interface that recovers and repairs all cameras’ videos.
The stepwise procedure of this software:
The process of repairing a video file is smooth like that of a hot knife on butter, below are detailed steps for proper guidance:
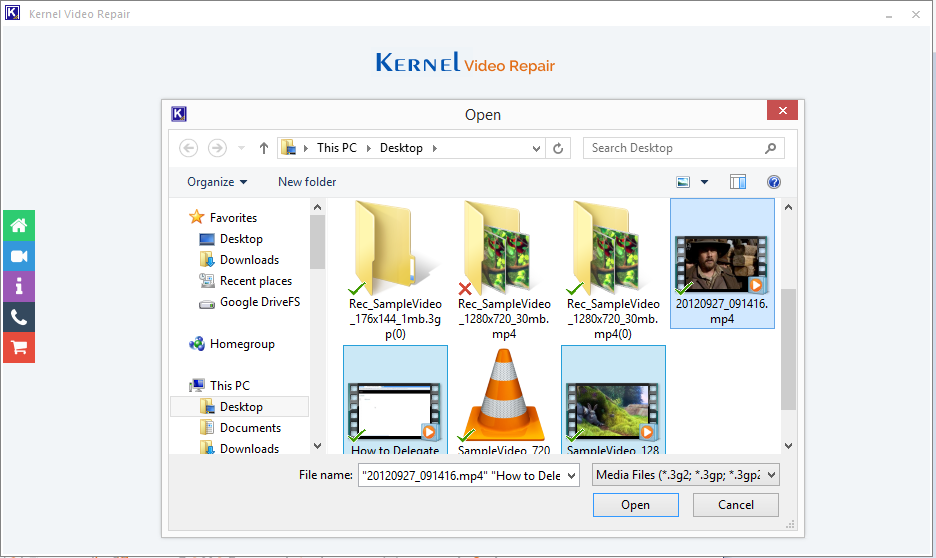
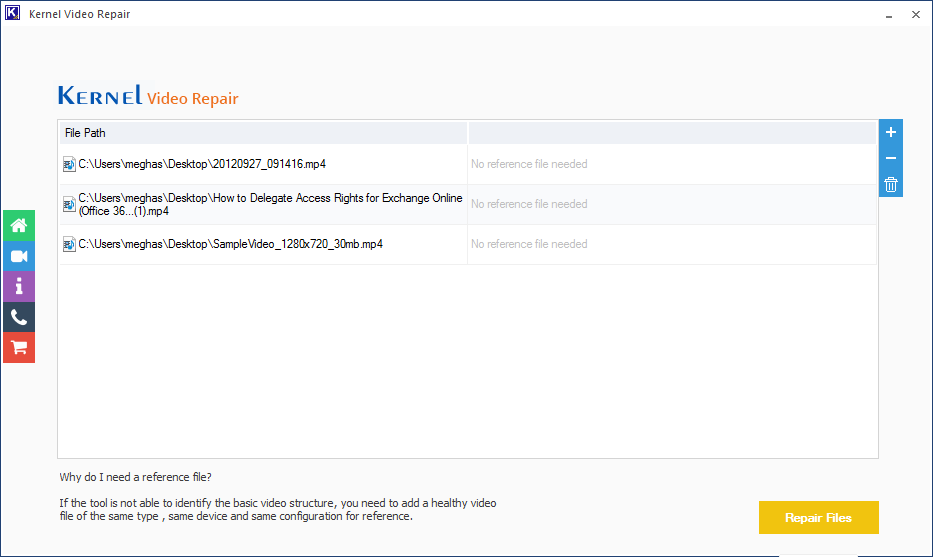
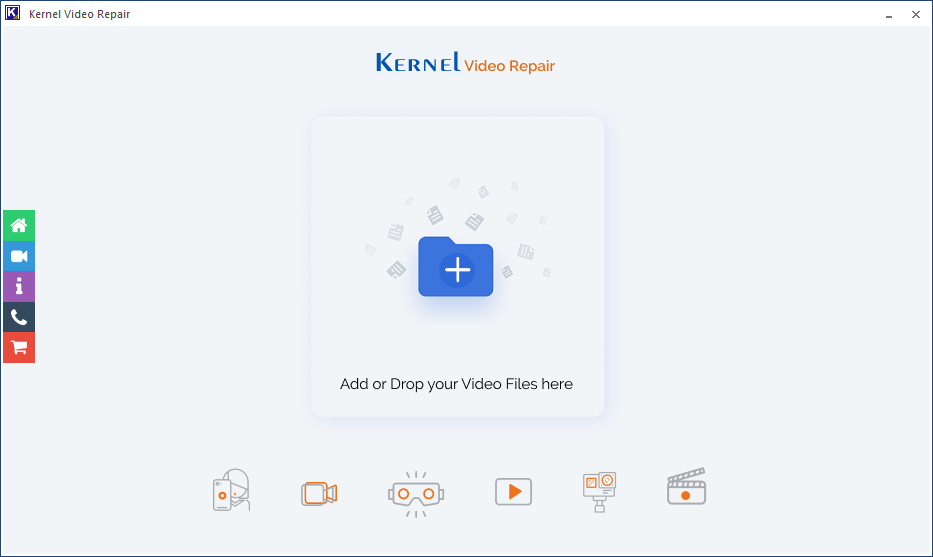
- Launch the Video Repair tool. Click the + icon to add corrupt videos, or them here.
- In the Open window, select the corrupt video files; click Open.
- The files will get added. Now, click on the Repair Files button and initiate the process.
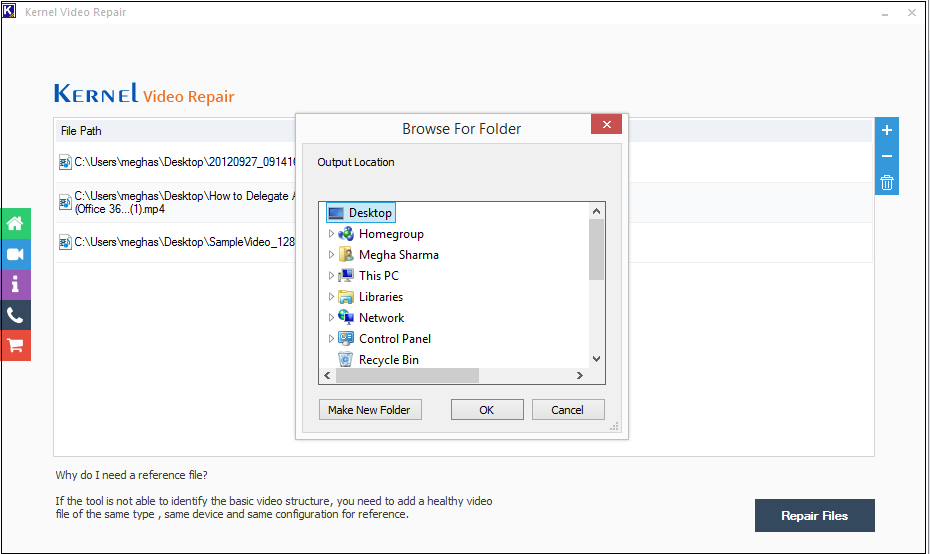
- Finally, browse for a location to save the repaired file.
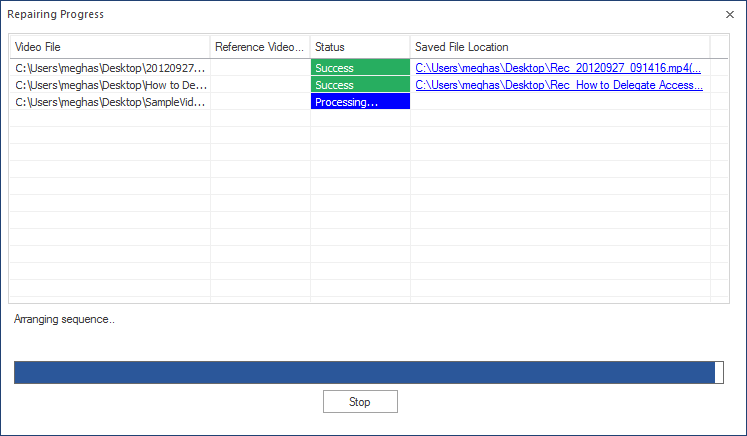
- The file will start repairing. View the live progress.
Note: You can also add multiple video files.
After a while, your corrupted video file will be repaired and saved in the location you provided.
Conclusion
Hence, some essential measures discussed with the respective errors can eliminate the common video errors. It’s always best not to change or mess with the video and audio settings unless you’re aware. If the essential perquisites don’t resolve video errors, your video file is corrupt/damaged severely. We’d suggest to use the Kernel Video Repair for fixing video-related issues immediately, which is compatible with all Windows versions.