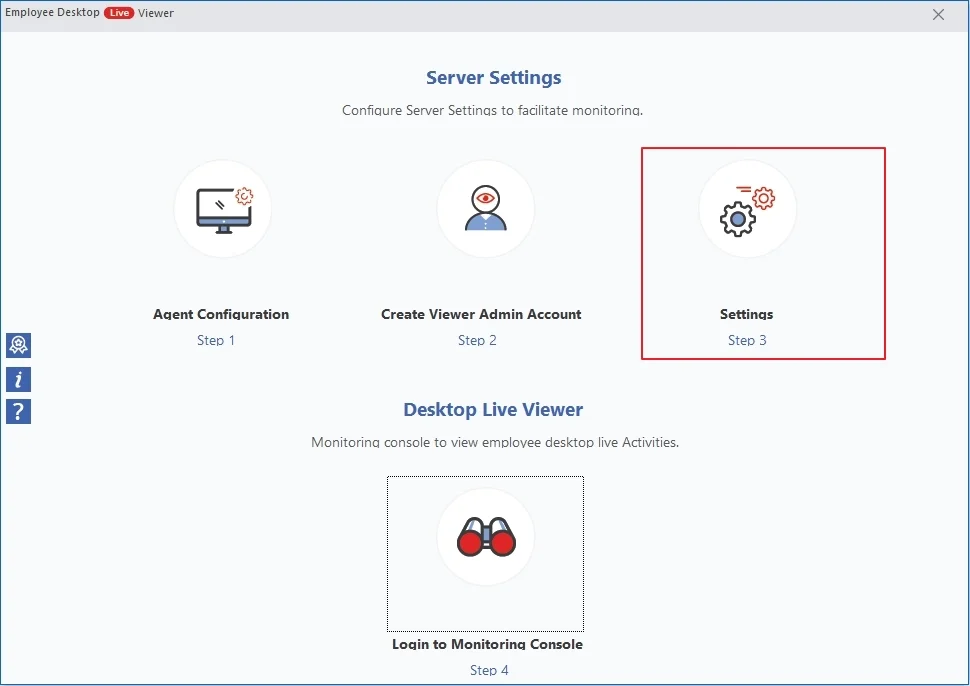
Launch Kernel Employee Desktop Viewer Software on your system to find the home screen showing multiple step process to monitor the system of your team members.
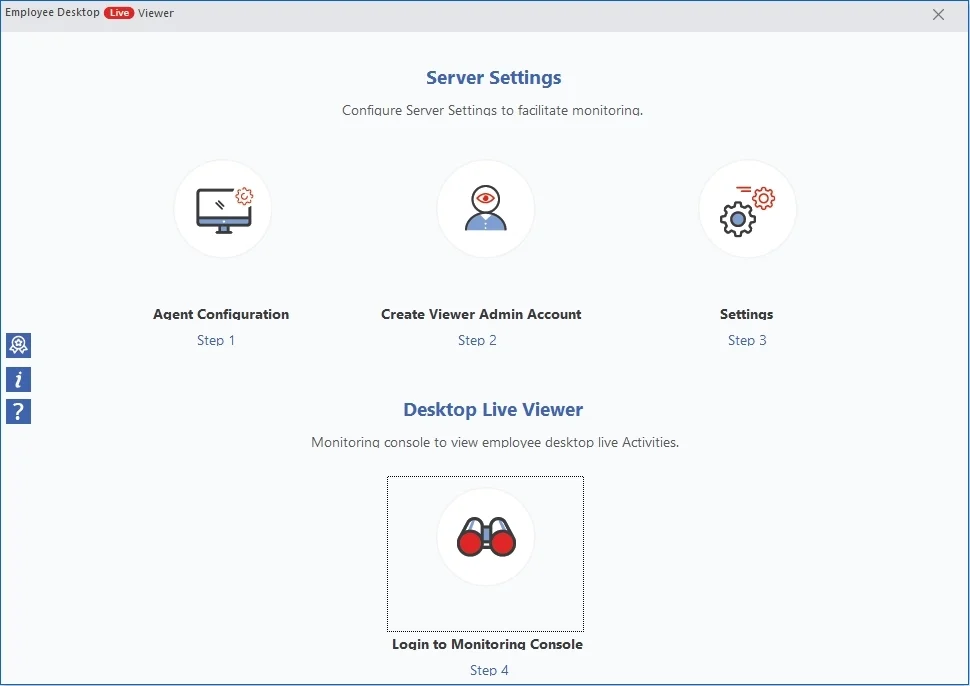
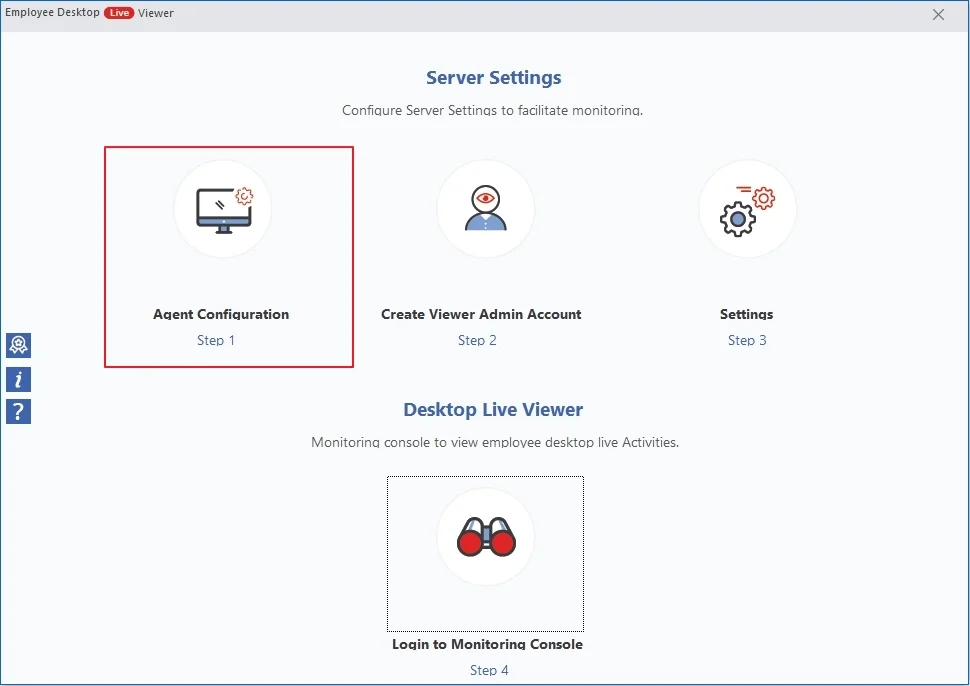
Step 1: Agent Configuration
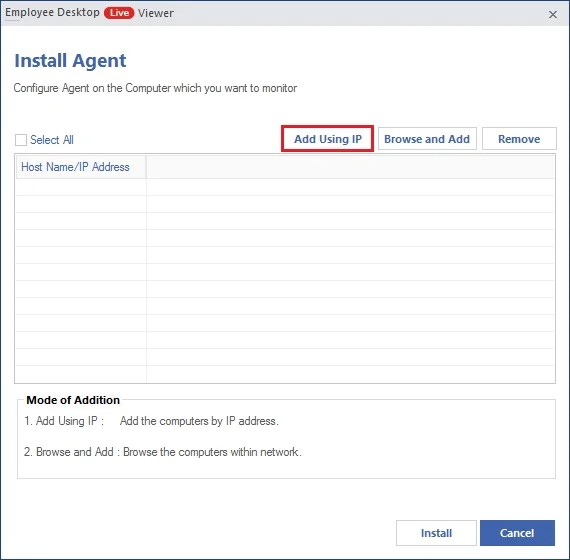
Click on Agent Configuration to configure the agent on the computers.
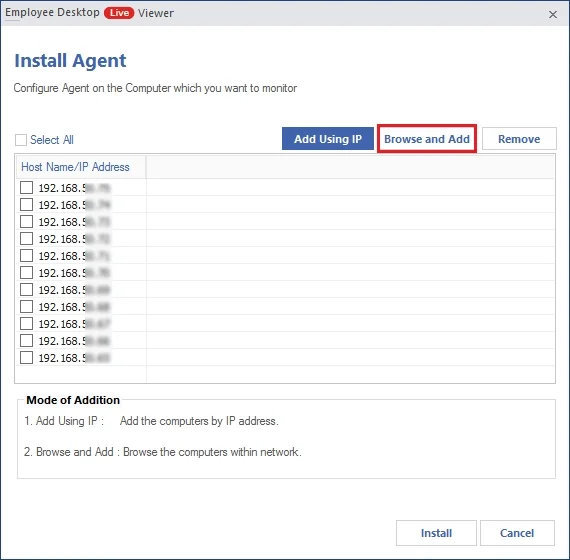
- Install Agent (Remotely) on computers you want to monitor.
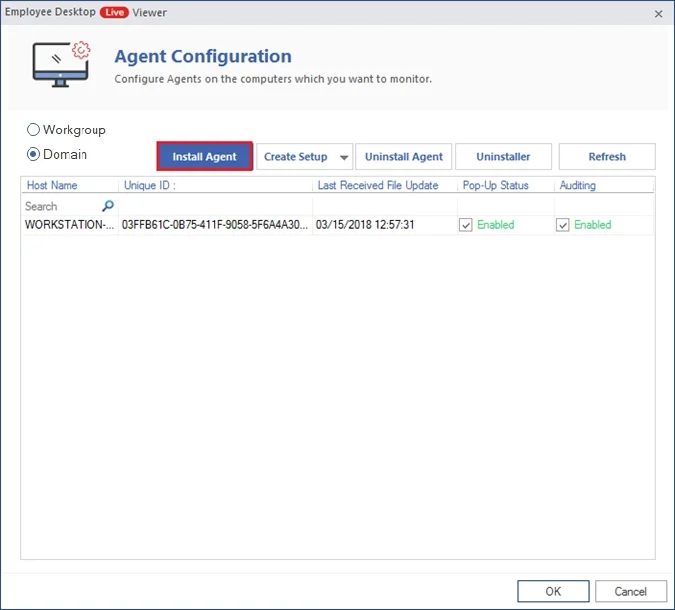
- There are two ways to add a computer to the monitoring tool:
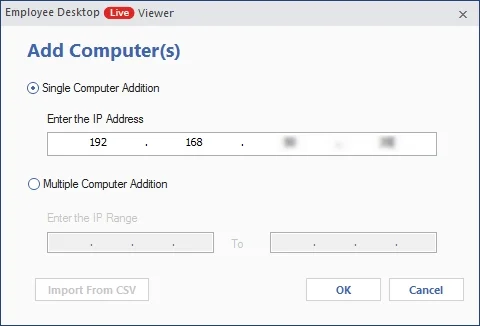
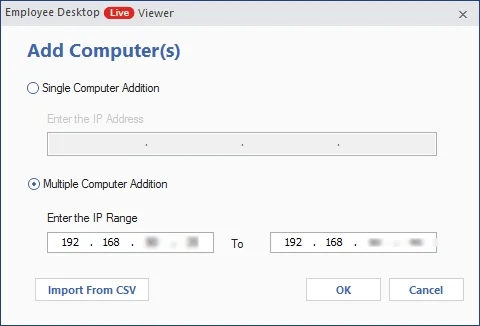
Add monitor using IP address
- Input IP address to Add single computer.
- Input IP range for multiple computer addition or import IP range using CSV file.
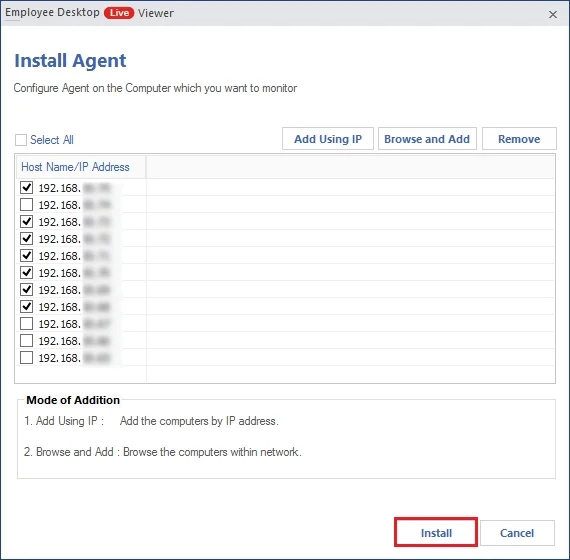
- Select IP addresses of the computers where you want to install the agent and click Install.
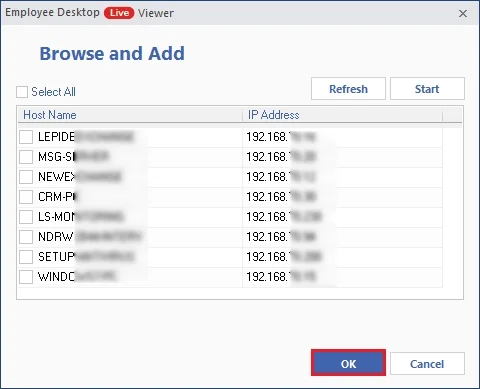
Browse and add computers within the network
- Click on Browse and Add button to add computers from your network.
- Select the computers to install the agent and click OK.
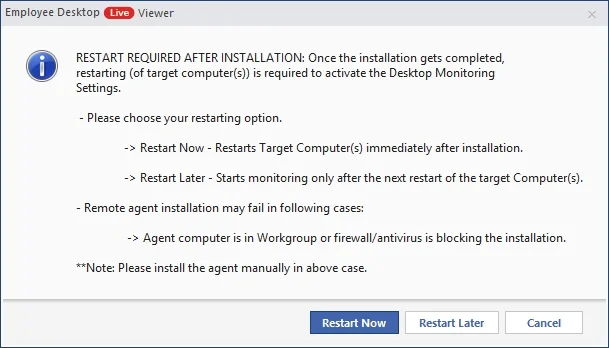
- Select to Restart Now or Restart Later.
- Login to the host using the Username, Password, and IP address of the Server.
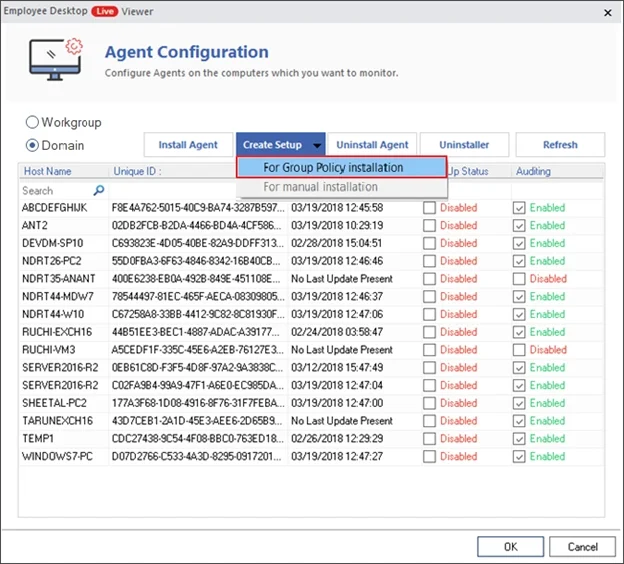
- There are two methods to install agents:
Group Policy Installation
Group Policy installation is used when you need to install the monitoring tool on multiple systems in a single domain. Here is its complete procedure:
- Tap on Domain and then click Create Setup dropdown to select For Group Policy installation.
- Click Browse to provide the path to save the setup, input IP address of the server, and click OK.

- The setup gets created at the entered location. Click OK on the confirmation message.
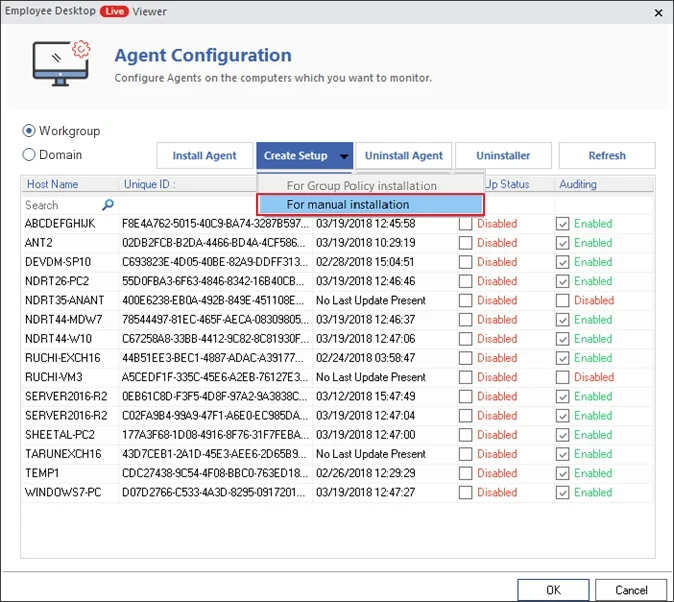
Manual Installation
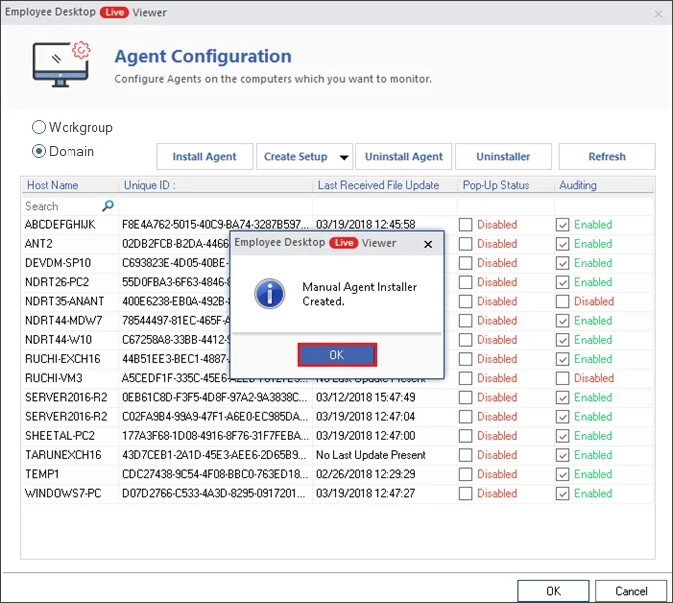
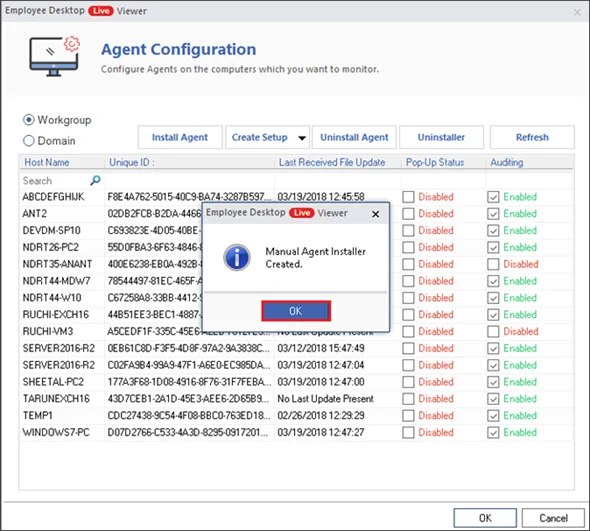
- Select Workgroup and then For Manual installation in the Create Setup dropdown.
- Enter the path, input IP address of the Server, and click OK.

- Click OK on the message confirming the creation of a Manual Agent Installer.
Step 2: Create Viewer Admin Account
- From home screen, click on Create Viewer Admin Account.
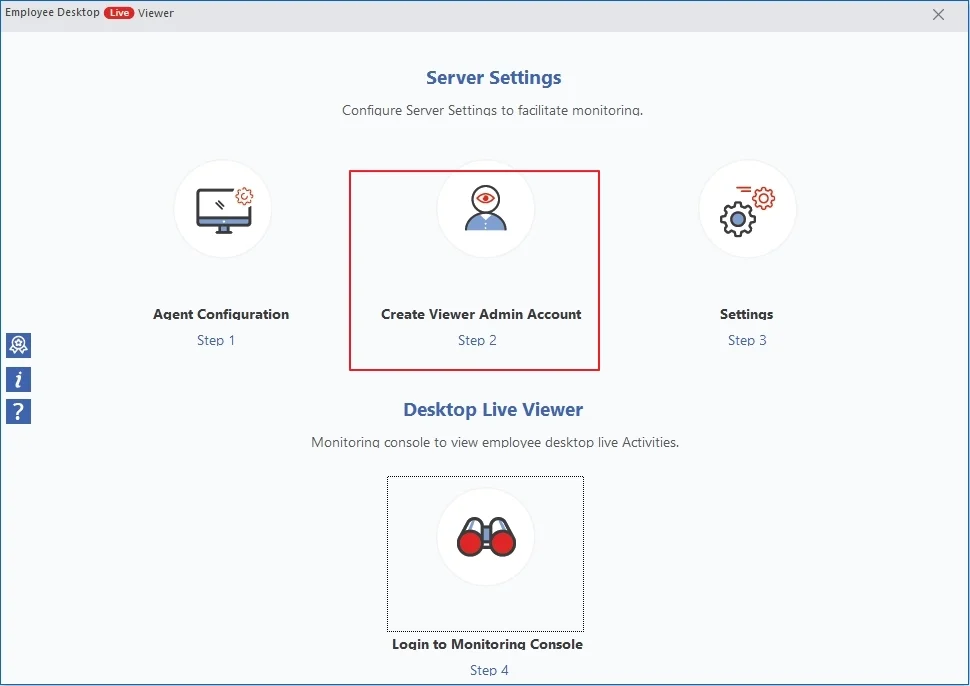
- Click Add to create a viewer account, enter a username and password, and select computers.
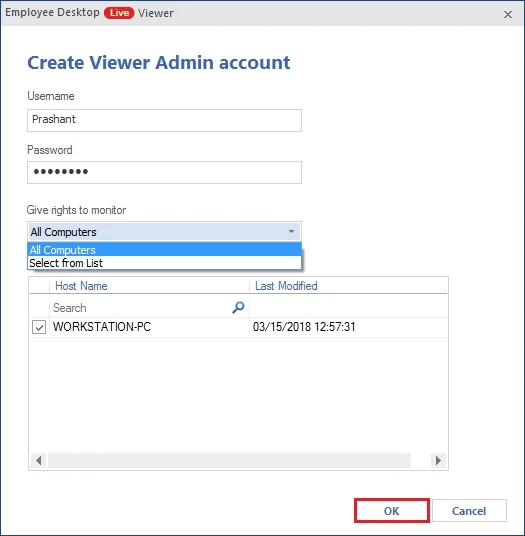
Note: Use Modify button to make changes in the viewer admin account and use Delete to delete any account from the list.
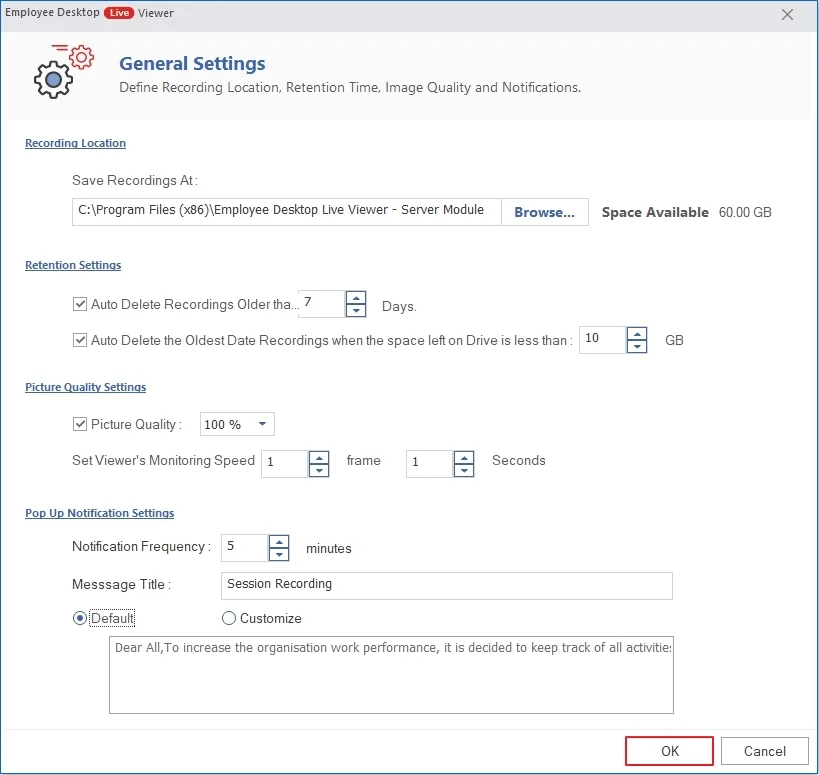
Step 3: Settings
Click on Settings tab from the home screen to adjust the tool’s settings to monitor the computers.
The General Settings window show a multitude of options that you can adjust as required.
- Recording location specify the path where your recordings are saved and also shows the available space.
- Retention settings denote the options to auto-delete the recordings.
- Picture quality settings allows you to select the picture quality.
- Pop-up Notification settings allow customization on the Message Title and text that the user will see as a pop-up message at different intervals. The maximum Notification Frequency is 120 minutes.
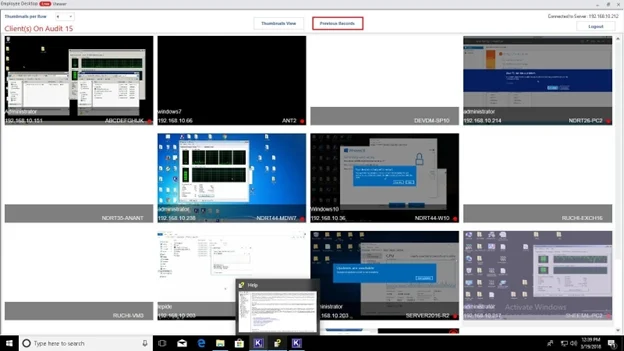
Step 4: Login to Monitoring console
Click on the Login to Monitoring Console tab and follow the instructions.

- Enter the Server IP address, Login Name, and Password. Finally, click Login.

- Select Previous Offline Monitoring radio button to view old recordings. Browse the recording from local drive and click Open.
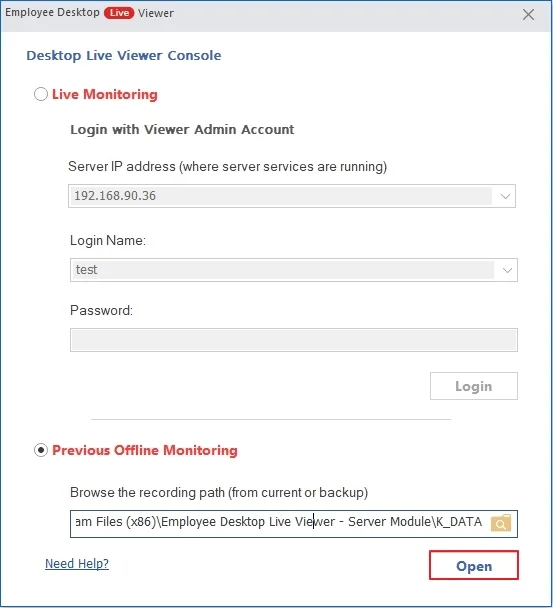
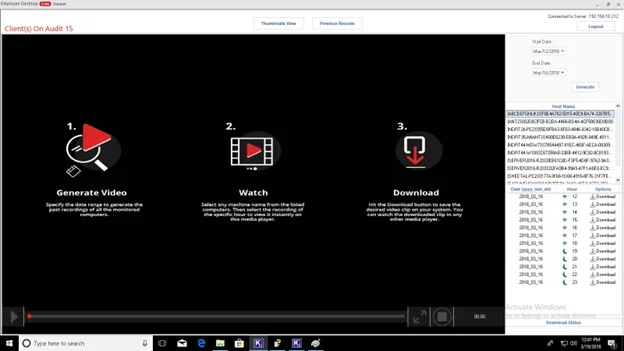
You can now view all the computers and monitor their activities in real-time.
- Watch or download the recorded video in Employee Desktop Live Viewer.