Overview
Kernel for OST to PST
Convert OST to PST and save to Exchange/Office 365. It is widely used by Outlook users and Exchange administrators to retrieve emails, attachments, contacts, & calendar from orphaned & corrupt OST files. It supports OST files of all Exchange/Outlook versions.
- Restores OST to live Exchange, Office 365, or Outlook PST
- Saves OST emails to Gmail, Outlook.com, EML, MSG, etc.
- Retrieves large OST files and saves to muliptle PST files
System Requirements
Before you start installing Kernel for OST to PST, make sure that your computer meets the following requirements:
Supported Versions
- MS Exchange Server - 2019/2016/ 2013/2010/2007/2003/ 2000/5.5 and 5.0
- MS Outlook - Office 365/2019/2016/2013/ 2010/2007/2003/2002/2000/98 and 97 Outlook Express - 6.0/5.5/5.0 and 4.0
Operating System
- Windows 365, 11, 10, 8.1, 8, 7, Vista, XP, 2000, 98, NT, 95
- Windows Server 2016/2012/2008 R2/2008/2003 R2/2003
Processor
- Intel® Pentium Processor compatible (x86, x64) or equivalent
Memory + Hard Disk
- 128 MB Minimum + Minimum 50 MB of disk space
Help Guides
Install Kernel for OST to PST
You have to download the installer file of Kernel for OST to PST https://www.nucleustechnologies.com/ost-to-pst-converter.html Please make sure your computer meets the system requirements and user rights for installing this software.
Perform the following steps to install Kernel for OST to PST.
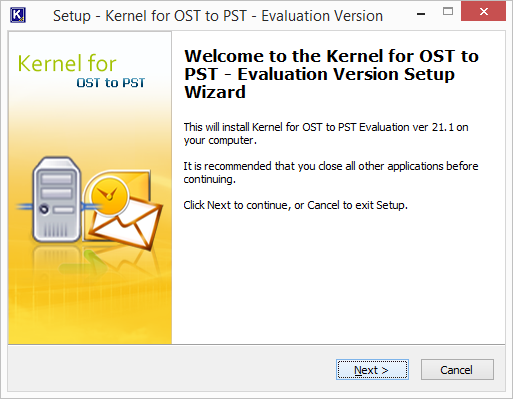
- Double-click the downloaded installer file to start the installation.
- Click Next to proceed to the next step.
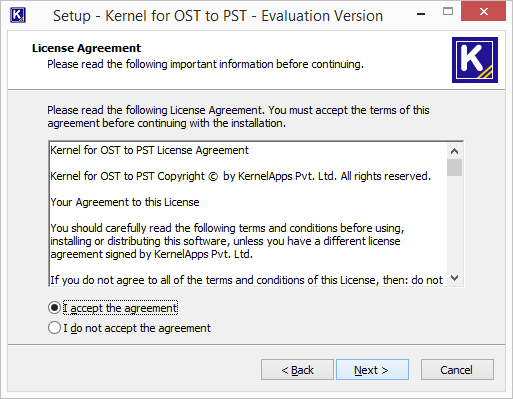
- It is recommended to read the license agreement carefully before installing the software. If you agree to the license agreement and want to continue the installation, then click I accept the agreement and click Next.
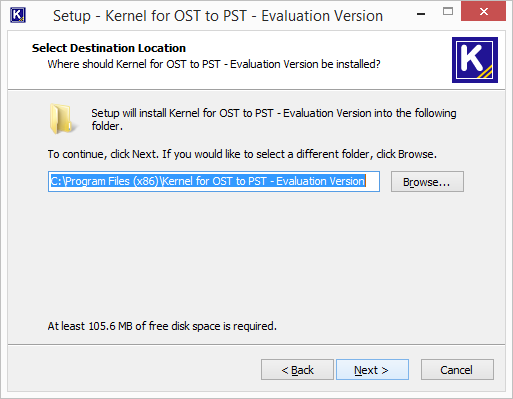
- The following screen appears, which allows you to modify the destination. If you want to modify the installation location, click Browse and select the desired location. Click Next to proceed further.
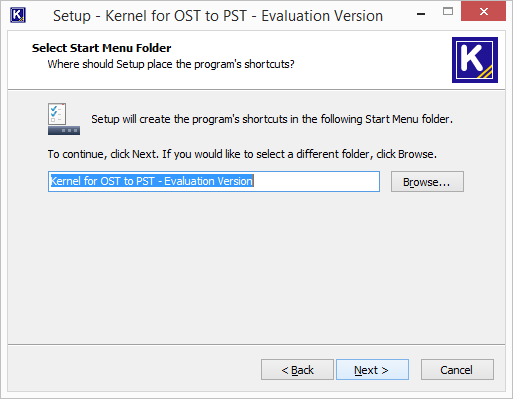
- Here, you can customize the location of the shortcuts folder in the Start Menu. Click Browse and select a different location to modify the location of the shortcuts folder in the Start Menu. Click Next to use the default or customized shortcuts folder.
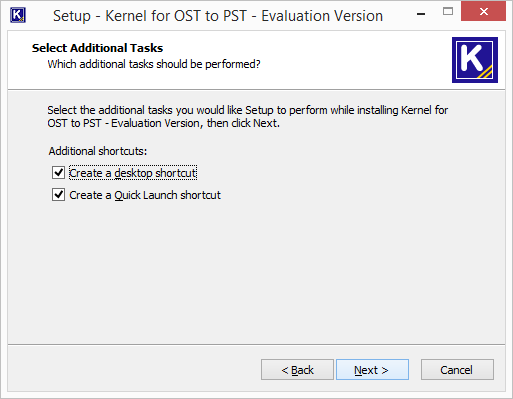
- The next step displays the option to create the additional shortcuts. Check the boxes titled Create a desktop icon and/or Create a Quick Launch icon if you want. Click Next to proceed to the next step.
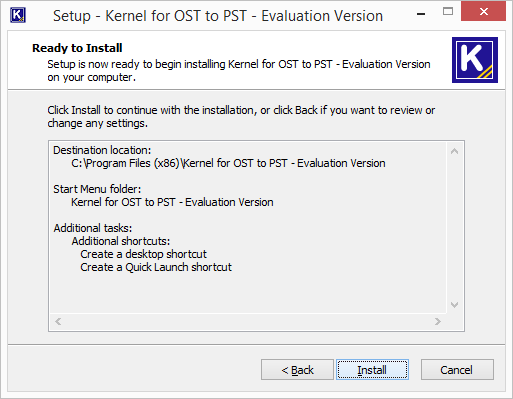
- Click Install to begin the installation procedure.
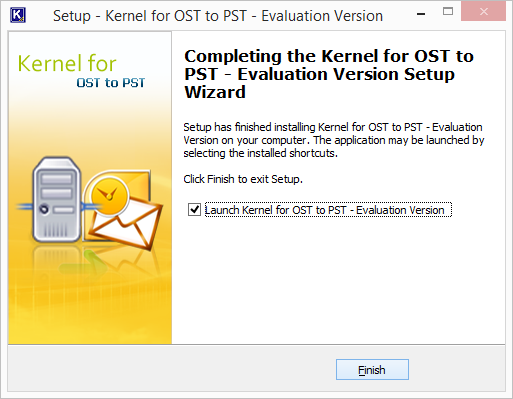
- When the installation process is completed successfully, the user receives the following message. Click Finish to complete the process. It will launch the software if you have kept the option Launch Kernel for OST to PST checked.
Uninstall Kernel for OST to PST
There can be a situation when you need to uninstall Kernel for OST to PST. Please make sure to close the software before uninstalling it. Follow the steps below to uninstall it.
There are two ways to start the uninstallation.
- Go to Start → All Programs → Kernel for OST to PST, click Uninstall Kernel for OST to PST.
- Click Start → Control Panel. Launch Add/Remove Programs or Programs. Select Kernel for OST to PST and click Remove.
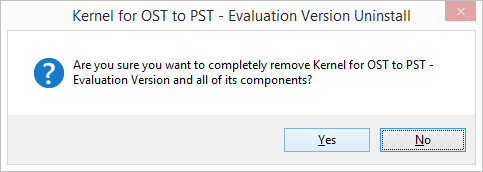
- Following any of the above methods displays a warning message. Click Yes to uninstall the software.
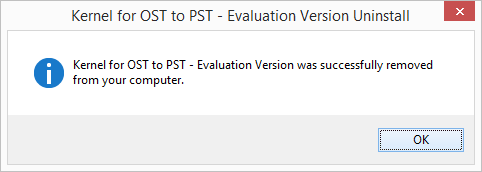
- When the software is removed, the following message box appears onscreen.
Click OK to finish the process.
After following the above steps, Kernel for OST to PST will be uninstalled successfully from your computer system. By default, the software is configured to retain the license file, behavioral data to handle source and destinations, and other settings in the program installation folder.
To remove the remaining elements, delete its program installation folder manually and then empty the Recycle Bin as well. Kindly do not remove this folder if you want to retain the license file and/or have to reinstall the same/upgraded version of the software. The default path of the program installation folder is %ProgramFiles%\Kernel for OST to PST – for both 32-bit and 64-bit OS.
Video
Kernel for OST to PST
Download Trial Version
Download the free version of Kernel for OST to PST Converter to use and analyze the software. The free version is like the full version, except that it has only a limited saving capacity. It supports all Outlook versions too.
- Repair inaccessible OST files easily
- View OST emails, contacts, calendar, etc.
- Save 10 OST items free to selected formats
Purchase Software
Perform a complete OST to PST conversion by purchasing the full version of Kernel for OST to PST. The full version allows you to save emails, contacts, calendar, etc., with complete metadata and properties.
- Recover OST mailbox data completely
- Retrieve the deleted items save safely
- Export to multiple formats/destinations
Online Support
Customer support is not a service, it’s an attitude.
Our dedicated team is available 24x7 to provide fast responses to all of your queries. For any technical support you can register or submit a ticket here.
- Register
Register a new account to submit tickets. click here. - Submit a ticket
Submit a new ticket for your query. Our support team will contact you. click here. - Knowledgebase
Search support helpful articles and find answers to frequently asked questions. click here.
Kernel for OST to PST - OST to PST Converter Full Version
Convert OST to PST with Full Version
There are unlimited number of benefits with the licensed version of OST to PST Converter tool. You can avail unlimited multiple file saving facility. The tool also lets you migrate OST file data to cloud platform Office 365 mailbox and direct migration to several email clients such as Exchange Server, Lotus Notes, Novell GroupWise and so on.
Let’s take a tour of the conversion process using the tool. Follow the below mentioned simple steps for successful conversion of OST to PST:
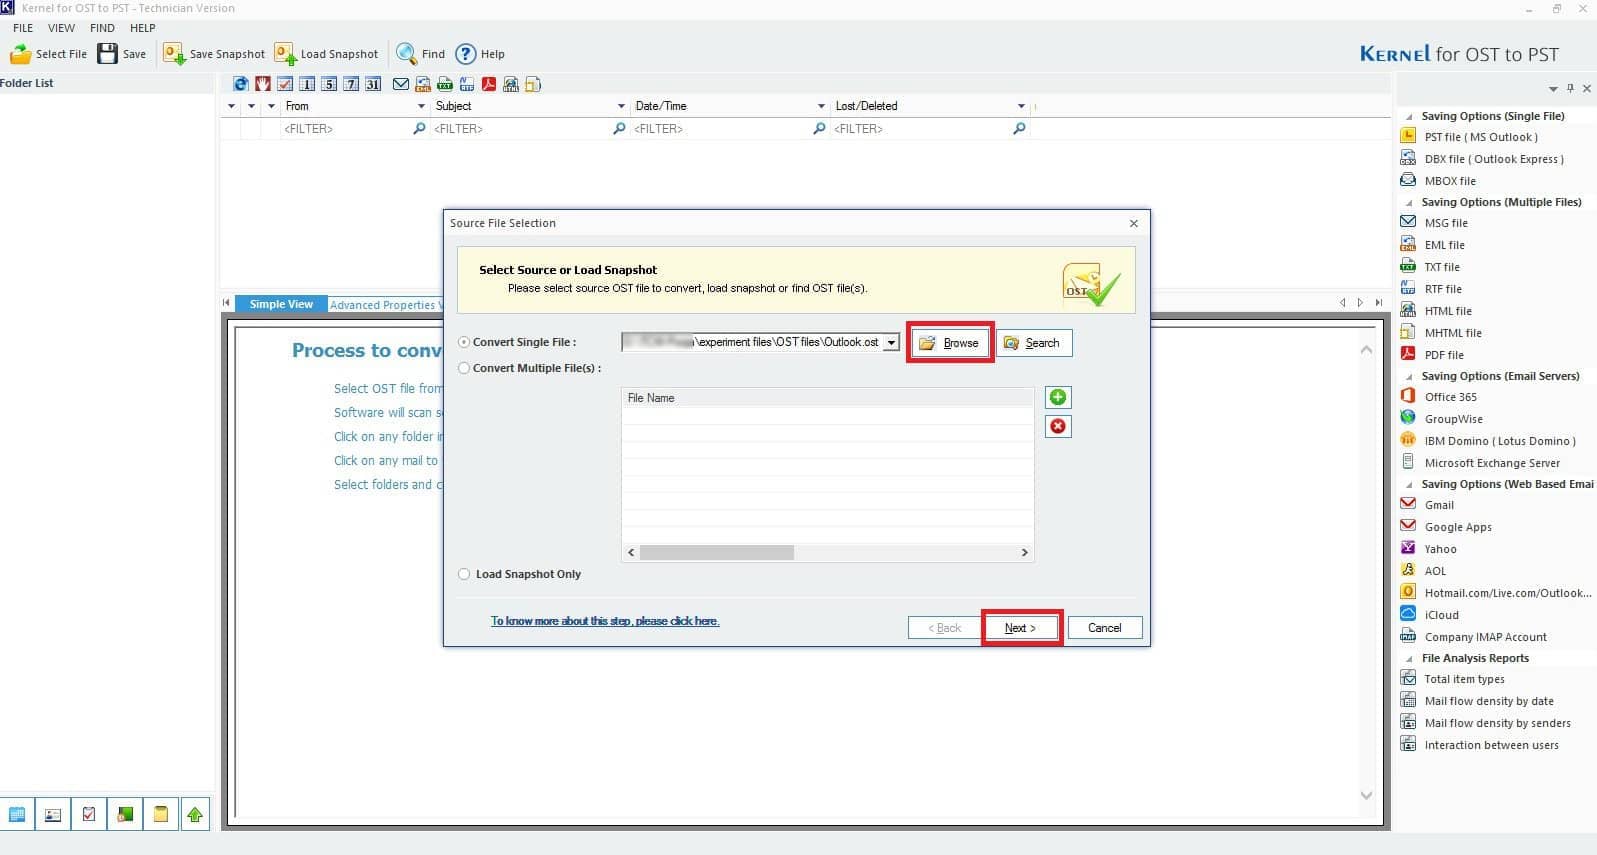
- Step 1: Launch Kernel OST to PST Converter tool and select OST file from your machine by click on Browse button.
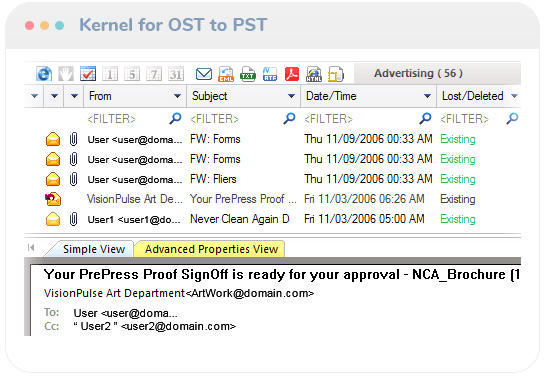
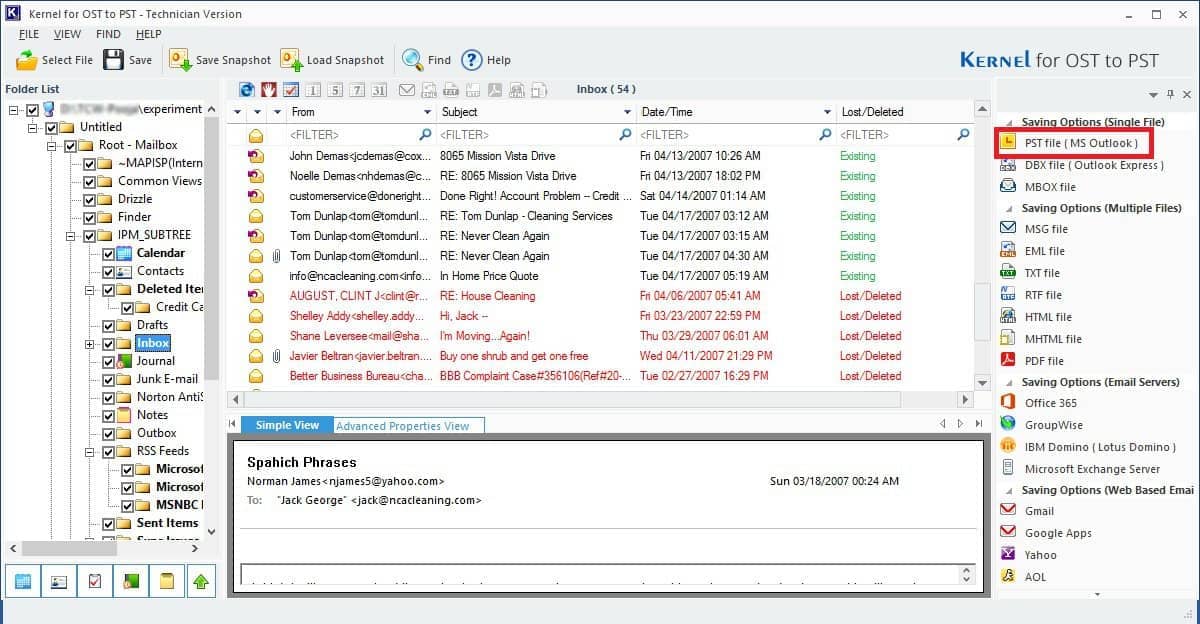
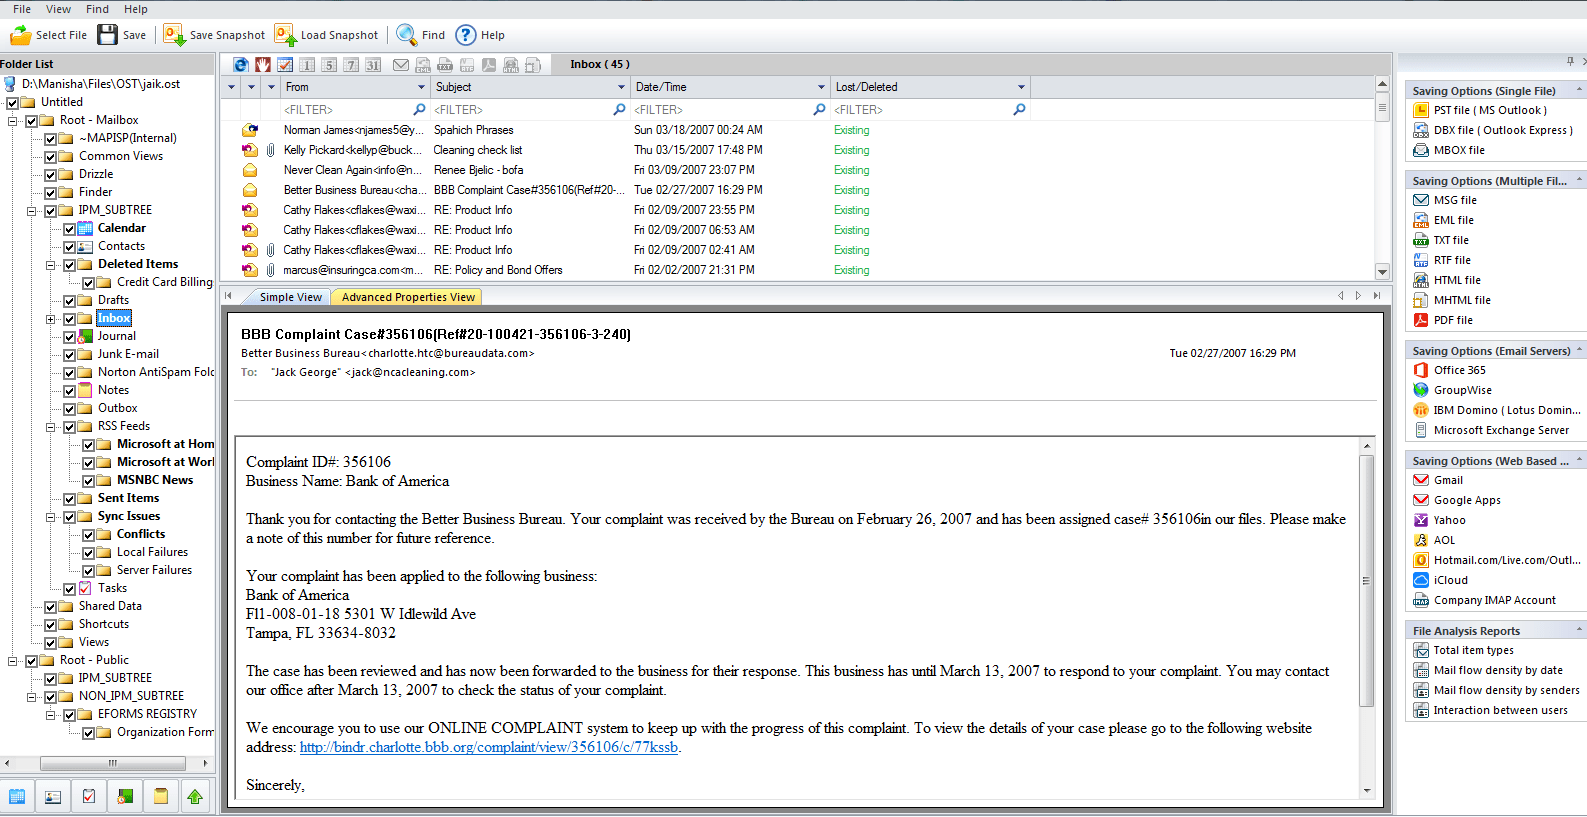
- Step 2: After selecting the file click Next, the tool interface will take to the preview window of complete OST mailbox content.
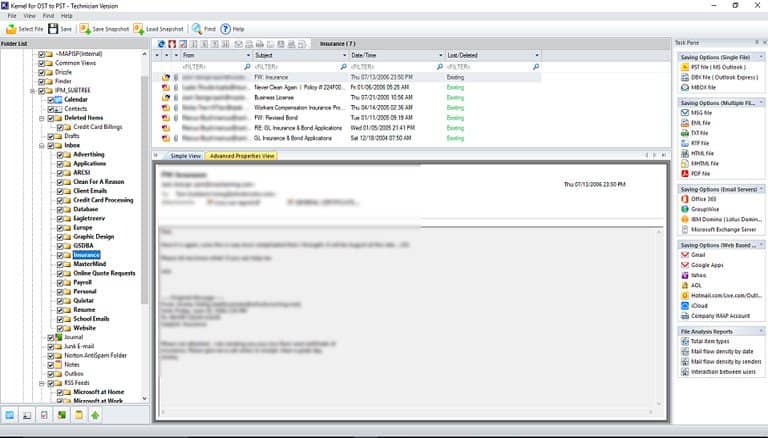
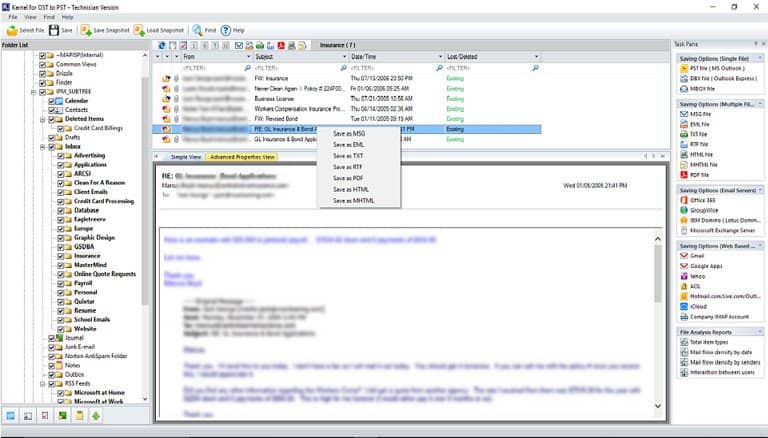
- Step 3: If you will right click on any specific folder, you will see multiple saving options, you can choose the desired one as per your choice.
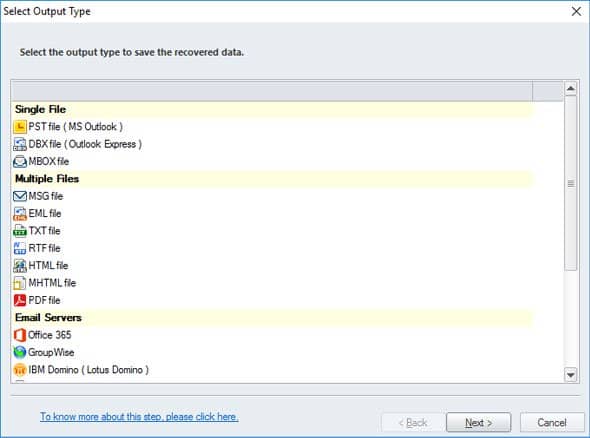
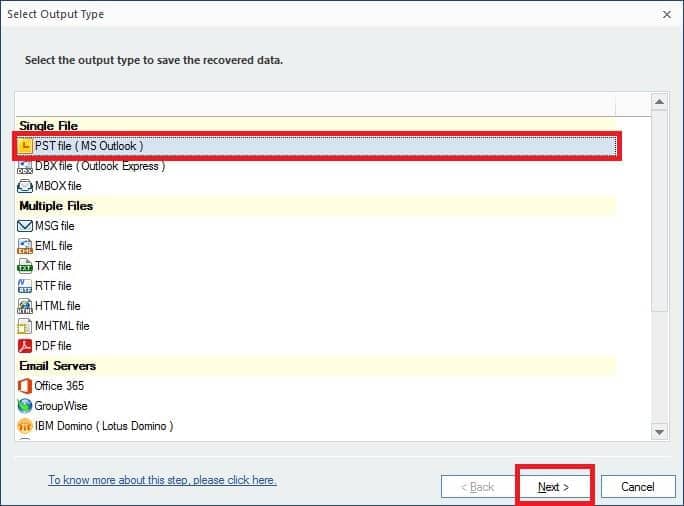
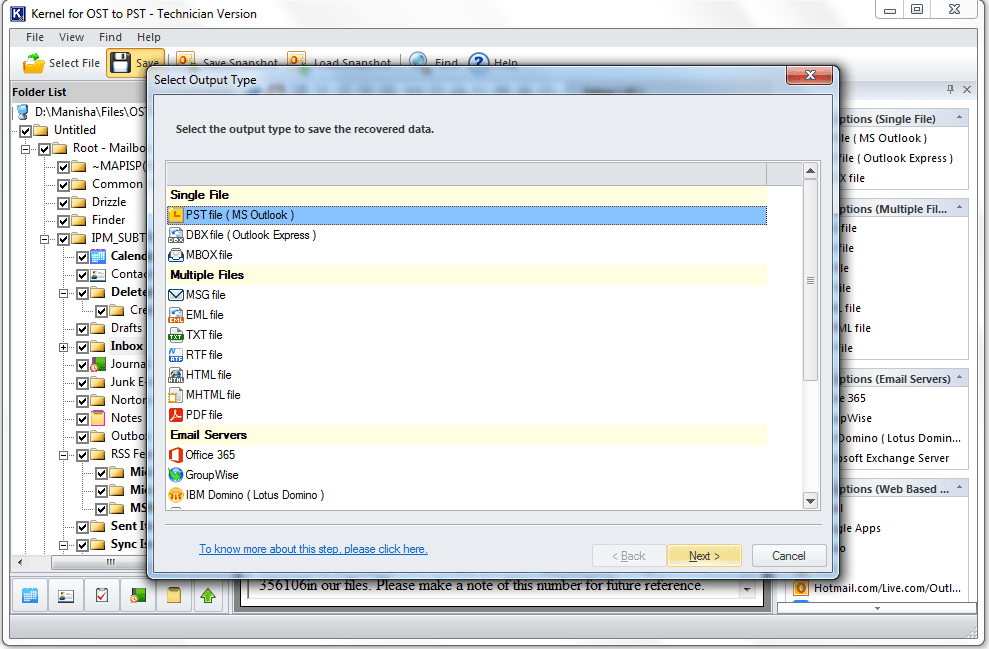
- Step 4: Save OST file using the full version to PST file format as shown below and click Next.
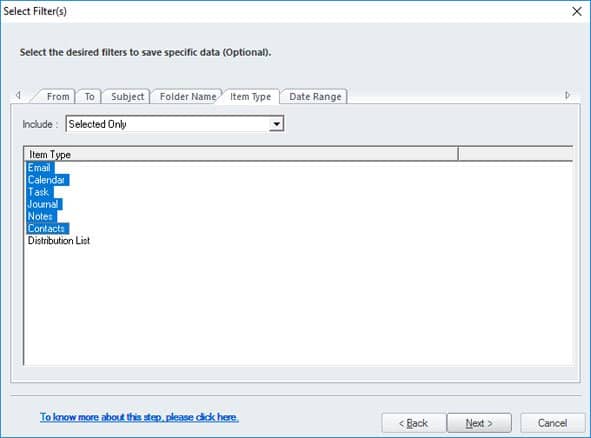
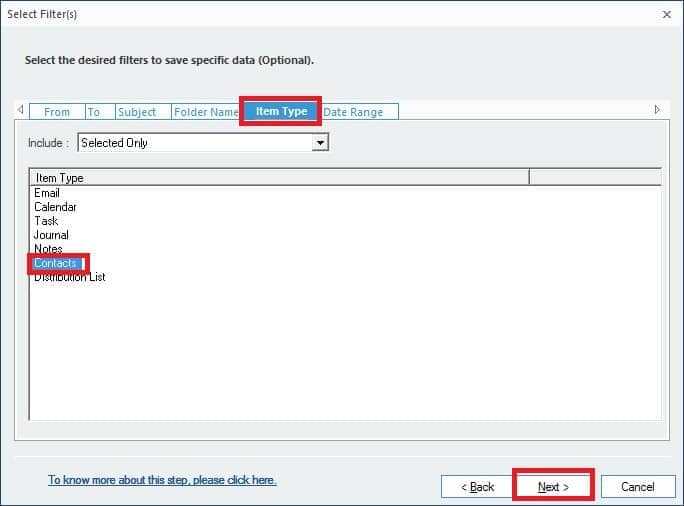
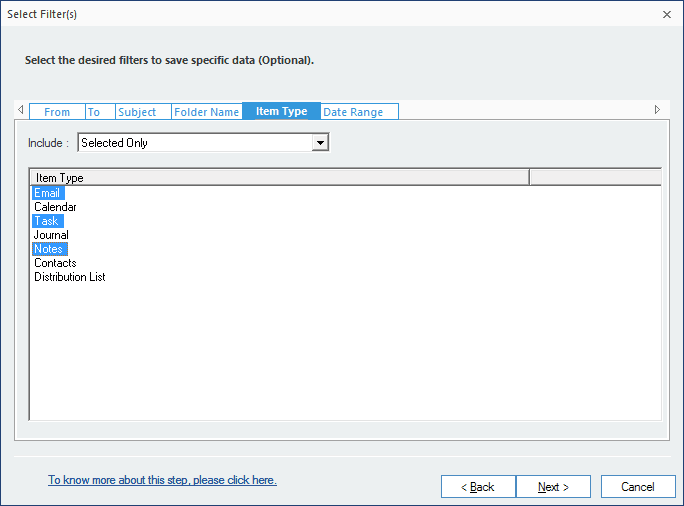
- Step 5: You can select and save specific data with the help of data filters offered, take a look as shown.
Kernel for OST to PST - How can I export my contacts from an OST file?
Export my contacts from an OST file
Kernel for OST to PST Converter offers full recovery of a corrupt OST file. The recovery is not for emails only, but also for attachments, contacts, deleted items, notes, etc. There are ample of features in the software that allows you to choose either a single item, folder, or whole mailbox. The conversion process is customizable as per the requirement.
You can export OST file contacts to a PST file smoothly with our tool Kernel for OST to PST Converter. The steps are:
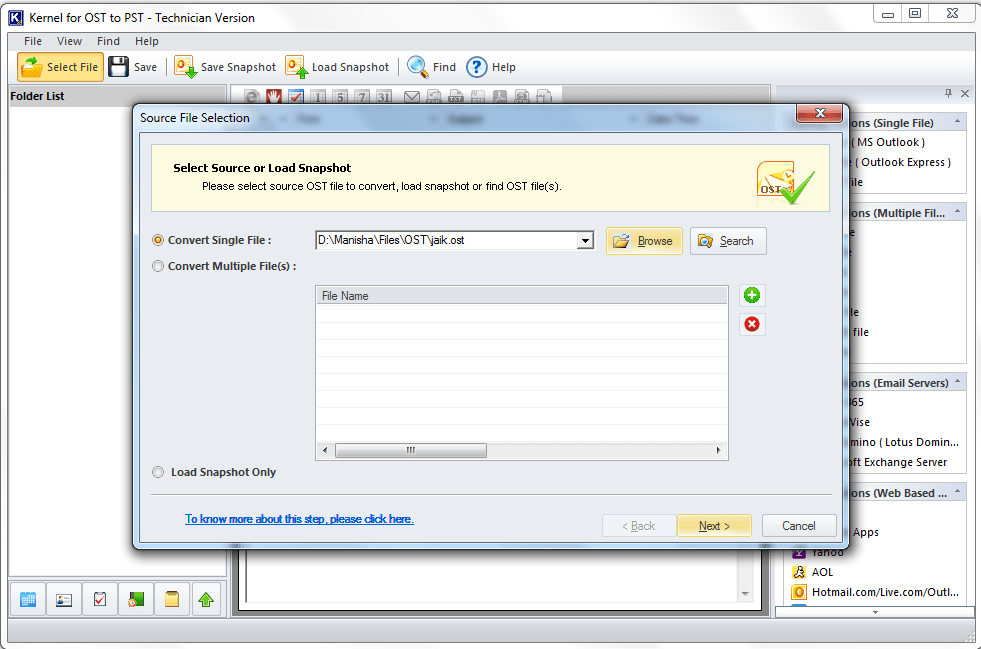
- Step 1: Launch Kernel for OST to PST Converter tool. Choose Convert Single File and then select your OST file using the Browse button.
 Note: You can also select multiple OST files if needed.
 - Step 2: Next, you can preview the full content saved in the OST file before saving. Select the saving option from the right panel as shown.
- Step 3: Now, you can save the OST file content to PST (you can also use other formats as per your requirement).
- Step 4: In the Select Filters dialogue box, go to the Item Type tab and select Contacts from the list as you want to export only contacts from the selected OST file.
- Step 5: If you need, you can split the recovered OST file into smaller PST files for better performance.
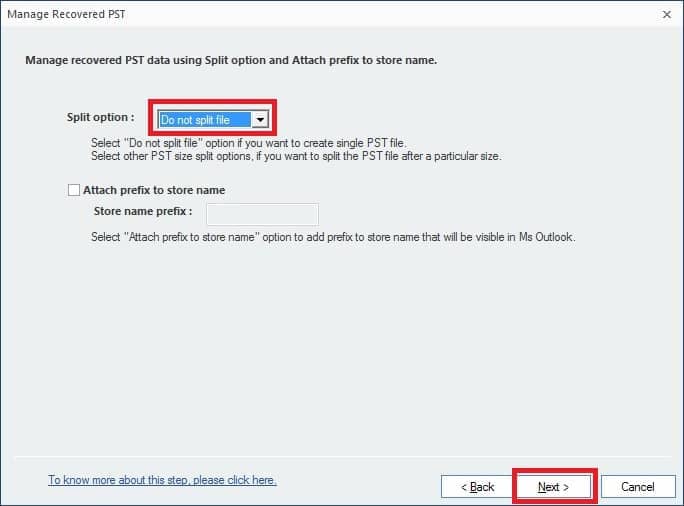
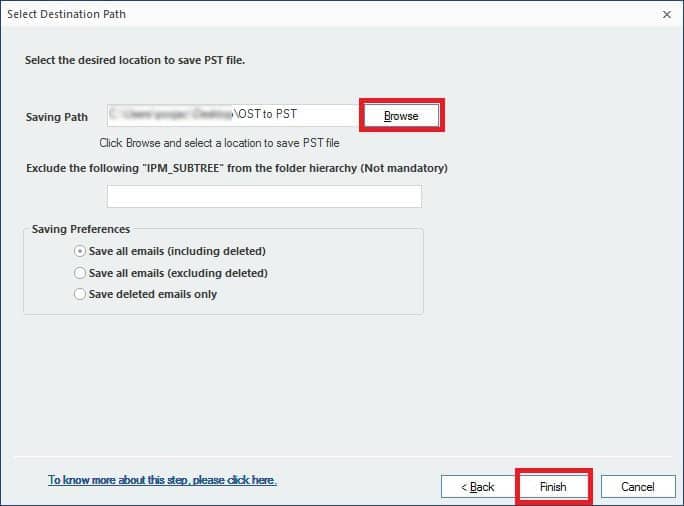
- Step 6: Click Browse button to save the PST file to the desired location.
Kernel for OST to PST - Import OST to Outlook 2016
Import OST to Outlook 2016
Those who use Exchange/Microsoft 365 accounts in Outlook might be familiar with the OST file, which is used to store mailbox data offline. In general, an OST file is the copy of mailbox data, which is created automatically on your system. OST files are profile specific, which means they cannot be accessed or read without the original profile. This means if you don’t have access to the specific profile of the OST file, you can neither read it nor import it to any other platform manually.
But, with the help of automated solution like Kernel for OST to PST Converter, you can convert OST files to PST format and access it via MS Outlook. The tool not only imports OST to PST, but it is capable to convert OST to MBOX, PDF, DBX, EML/MSG, etc.
Here, we have highlighted the situations when it becomes crucial to convert OST to PST, as well as we discussed how you can import OST to Outlook 2016 quickly with Kernel for OST to PST Converter.
Reasons to Convert OST to PST File
There could be various scenarios that require OST to PST Conversion. Some of the most common reasons could be:
- When the server is down, and the Outlook OST file is now orphaned, then it is required to convert OST to PST and later import data from that PST file.
- Exchange database files are inaccessible due to corruption or server crash.
- When backing up a few Exchange mailboxes.
- In a scenario when you have decided to close an Exchange account and would like to access those emails later. Before removing the mail account from Exchange, one should export all the mail items to a PST file, which can be accessed then by importing these PST files in an Outlook desktop client.
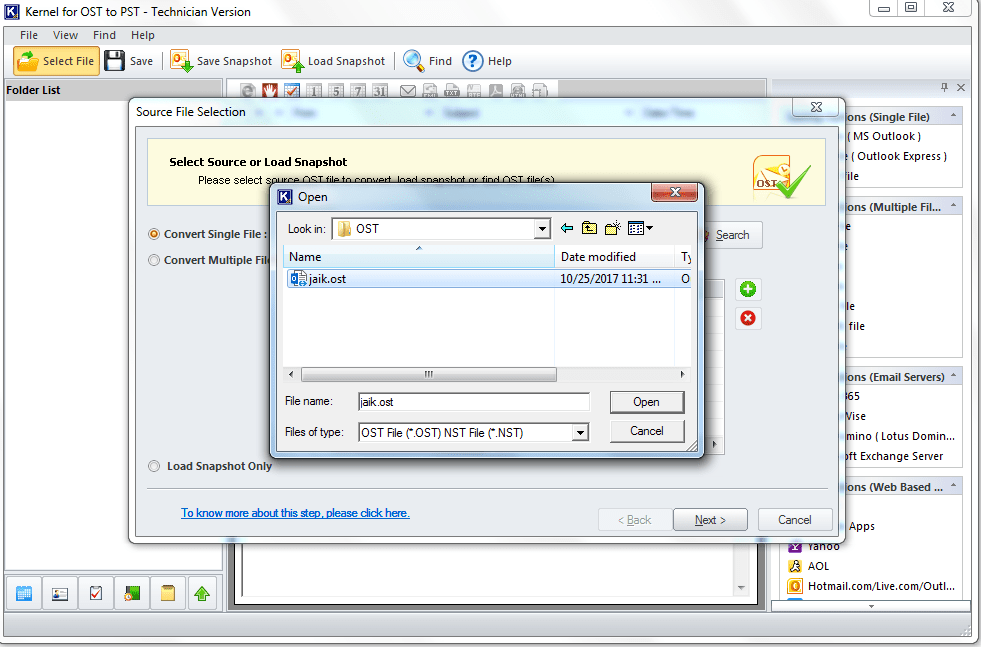
- As soon as you the tool, you will get this welcome screen, where you can select an OST file by clicking on the Browse button.

- Select the desired OST file and click on Open.
- Once the file , click on the Next button to proceed.

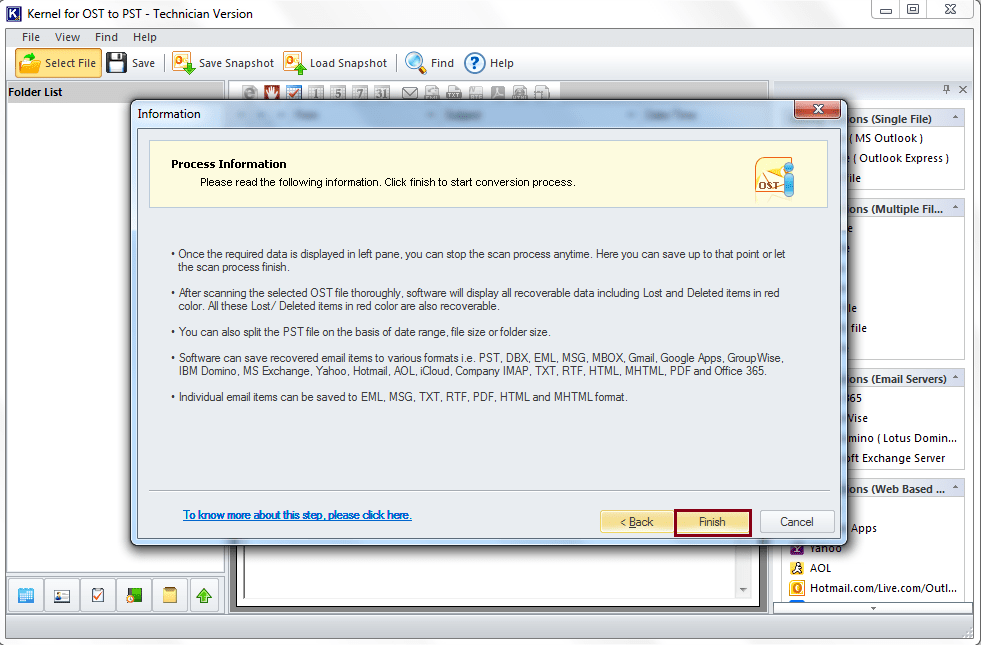
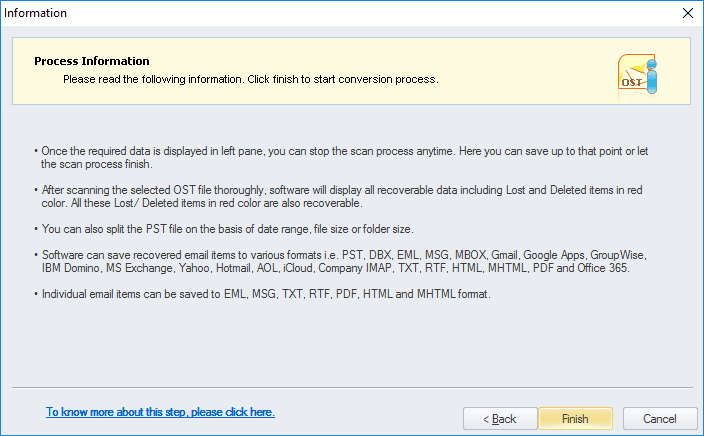
- In the next step, the tool will show you the information about the whole process. Click on the Finish button.
- If you want to have the preview of the files or items, then is the step where you can do it. Just click on the desired file item and have the preview.
- Because you are going to import OST TO Outlook 2016, in this step, you need to select the PST file (MS Outlook) as the saving option and then click on Next.
- Apply filters as per your requirements and proceed by clicking on Next button.

Kernel for OST to PST - Step by Step guide to convert OST to MBOX
guide to convert OST to MBOX
This tutorial describes how you can convert OST to MBOX with Kernel for OST to PST converter, step by step. Let’s know a little bit about the tool first:
- Converts or migrates healthy or corrupted OST files to MBOX
- Converts OST file to MBOX files of emails clients like Thunderbird, Gnu, etc.
- Converts even the large-sized OST files without causing any interruption
- Filter option to set the desired criteria for the conversion process.
- Snapshot feature to save the progress of your work, & resume later
There are many such exciting features of the tool you would like to know. Here is a step by step guide on how this tool works:
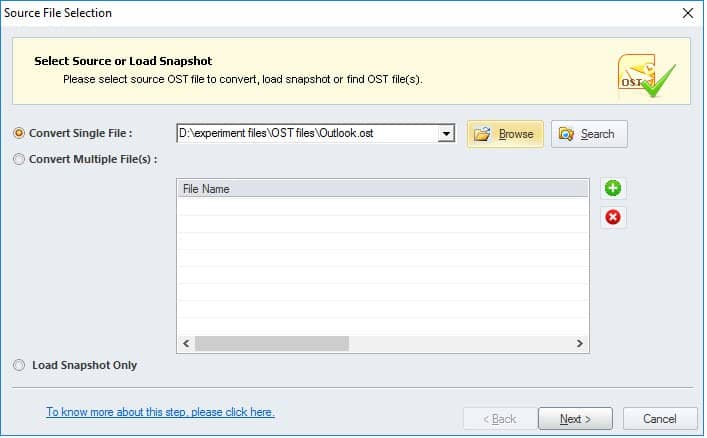
- When you the software, you will see that a dialogue box of ‘Source File Selection’ is already opened, click on the Browse button there. (If not opened already, you can click on Select File option to open the ‘Source File Selection’ page.)

- Now, select the OST file you wanted to convert and click on Open.

- After selecting the OST file, click on the Next button.
- Here, you can get all the about the process. Click on the Finish button.

- The tool has the preview feature with the help of which you can have a look at the inside content of a file or item. helps you to decide whether you want to convert the particular file or not.

Kernel for OST to PST - How to Export an OST File to Live Exchange Server?
Export OST to Live Exchange with Kernel OST to PST Converter
Kernel OST to PST converter is a unique tool that is designed to export OST file data to multiple platforms, such as PST, Office 365, MSG, and Live Exchange. Using this utility, you can even migrate OST file to Exchange Server. So, let’s see how the software works for OST to Live Exchange migration.
-
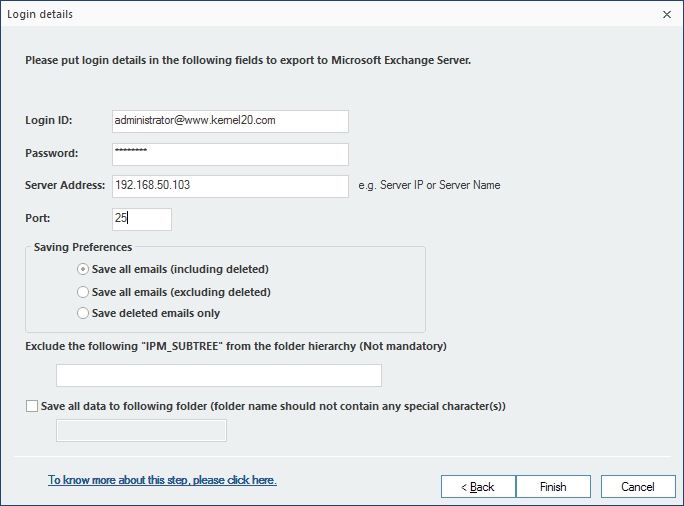
- Now, enter the credentials for Live Exchange (a Login ID, Server Address, & Port Number), select your saving preferences, and then click Finish.
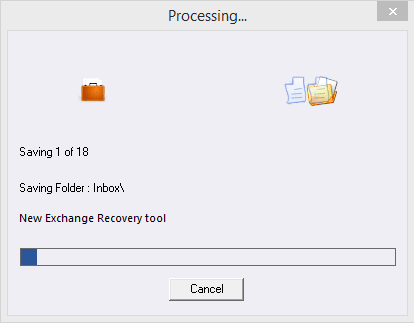
- The software will start moving the data to Live Exchange; you can see the process on the screen.
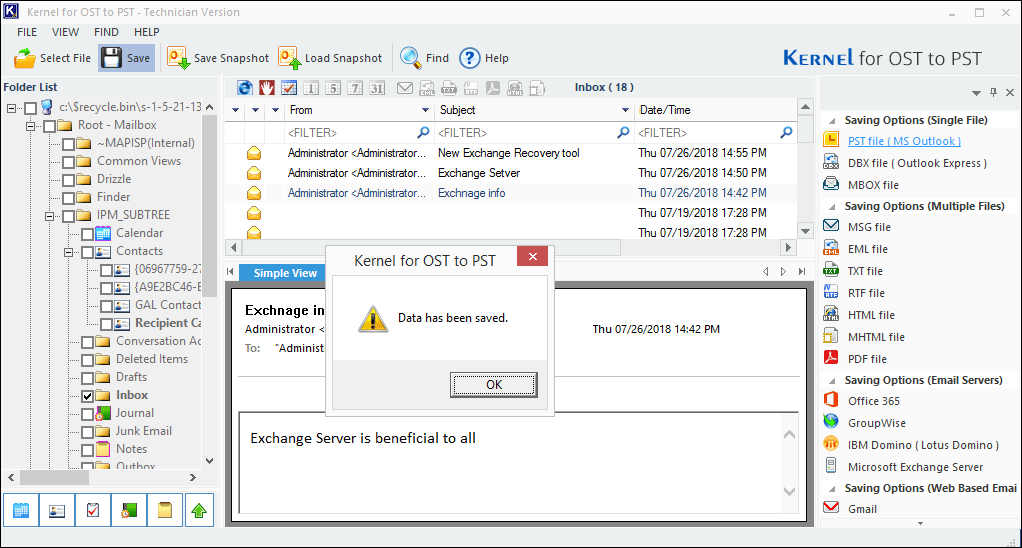
- Once it is complete, a notification will appear on the screen displaying Data has been saved. Click Ok to end the process.
Kernel for OST to PST - Convert OST2PST File
A manual method for OST to PST conversion
The ideal manual approach for converting OST to PST is using MS Outlook.The Import/Export wizard of Outlook helps to convert OST files to PST. However, this is possible only when Exchange Server is available. The steps are:
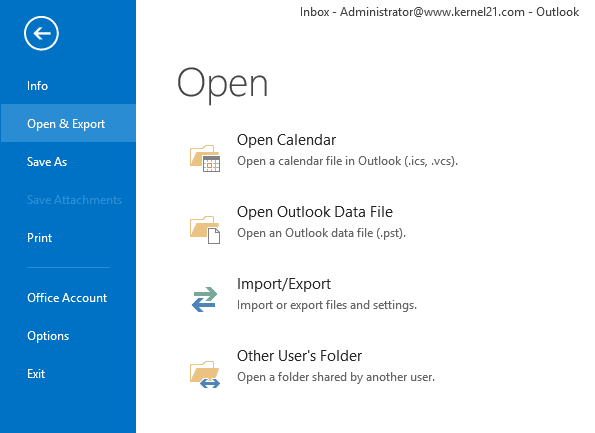
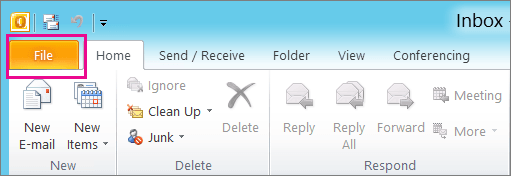
- In MS Outlook, click File menu, select Open & Export, and click Import/Export.
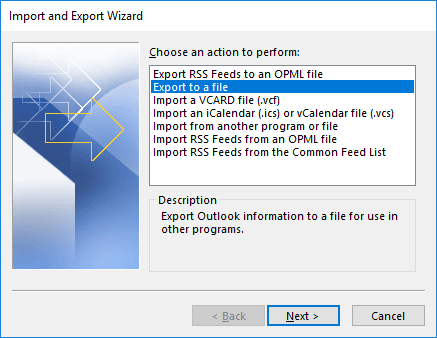
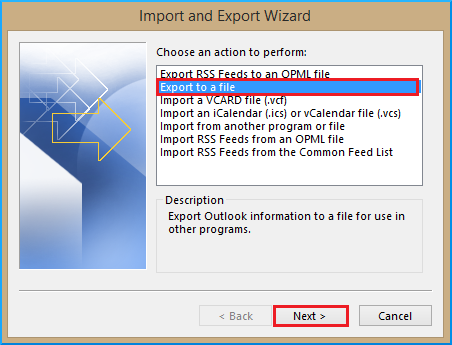
- In the Import and Export wizard, choose Export to a file and then click Next.
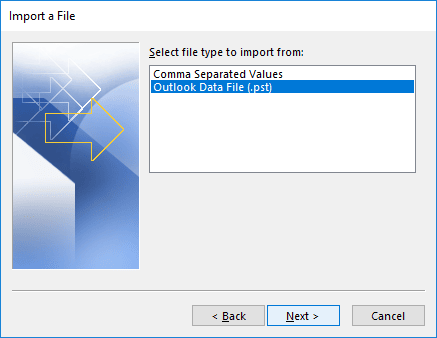
- In the Import a File dialogue box, select Outlook Data File(.pst) and click Next.
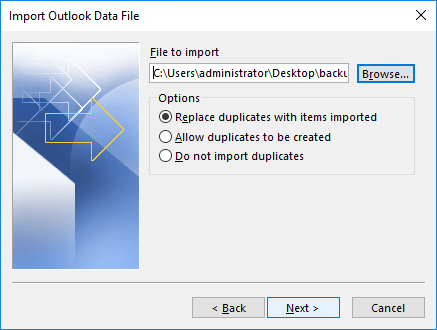
- Browse the location where you want to save the exported file. Also, choose the required option and click Next.
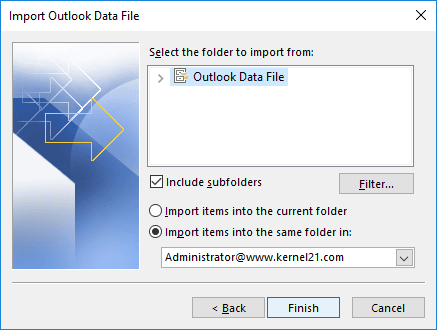
- Now choose the required saving options and click Finish.
This method can help you convert OST to PST, only if the Exchange Server is connected and Outlook is configured with Exchange account.
An easier method for OST to PST conversion
The manual method for OST to PST conversion has many disadvantages. After Exchange crashes and disasters happen, this cannot be used for the restoration of Exchange mailboxes. However, OST2PST tools like Kernel for OST to PST is helpful at this time also. This OST2PST tool does not demand any technical skill, and there is no need to connect Outlook to Exchange Server. It can retrieve emails and other items even from damaged OST files.
- Open Kernel for OST to PST converter tool. Click Select File to choose the ost file which you want to convert.
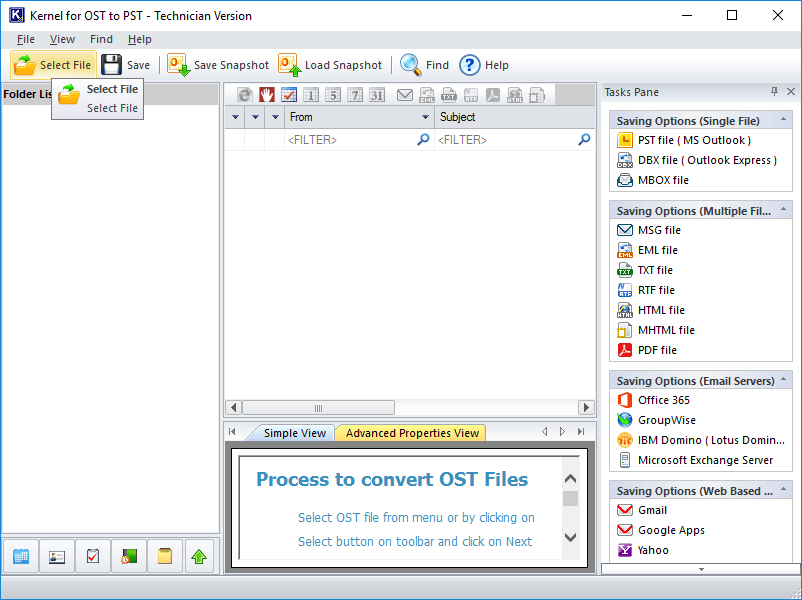
- Click the Browse button to browse for the OST file location (you can click on Search button to search and locate the OST file on hard disk or drives); then click Next.

- Now click on Finish after reading all the process information.
Kernel for OST to PST - How to Download Microsoft OST to PST Converter?
Download Microsoft OST to PST Converter
MS Outlook is the most popular email client today all around the world. The platform stores mailbox data in two different formats OST (offline storage table) and PST (personal storage table). And, working with OST files is a tedious task if you have no experience and knowledge about the platform. The need for OST file arises when the Exchange Server becomes inaccessible due to several reasons. But, fortunately, there are many solutions for supporting the tough times of Exchange Server that are helpful for converting your OST files to workable and compatible PST file.
Let’s know the basic reasons behind Microsoft OST to PST file conversion.
Reasons for Converting OST to PST
There are times when it becomes crucial to import or convert email messages from OST to PST file. Let’s take a look at the most important top 5 reasons which forces a user to convert OST file to PST file:
- Unexpected Crash in Exchange Server
- Maintenance or Inaccessibility of Exchange Server
- Data Migration for one Exchange to another
- Switching from one organization to another
- Data Recovery after accidental deletion.
Manual Methods to Convert Microsoft OST to PST:
MS Outlook is designed with built-in features that can be considered initially for converting all your mailbox data to PST file.
Method 1: Use Archive Feature for OST to PST Conversion
- STEP 1: Start MS Outlook on your personal computer. Open OST file that you want to convert to PST file.
- STEP 2: Click File >> Info >> Cleanup Tools.
- STEP 3: Click Archive from the list.
- STEP 4: Choose Archive this folder for all subfolders (checked by default), the select folder that you desire to move, select date range.
Kernel for OST to PST - Ways to Import OST File to Gmail
Import OST to Gmail Manually
It is not possible to import OST files to Gmail directly; hence, it is considered better first to convert them to PST format. FYI, most of the time, it is your third-party email accounts (which you have previously configured in your MS Outlook desktop client with IMAP setting) such as Gmail accounts, AOL, or Yahoo, which save the email data in an OST file.
To import OST files, one needs to find the location first. One can easily do that by following the steps mentioned below:
Step #1 Locate your OST Files
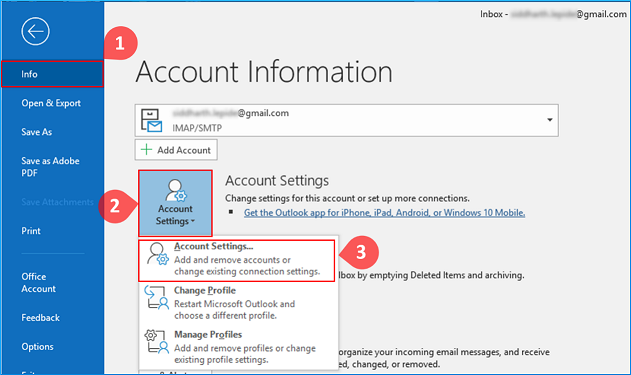
- Click File → Account Settings → Account Settings.
- Now, click on the Data Files tab, select any OST file, and click on Open File Location button.
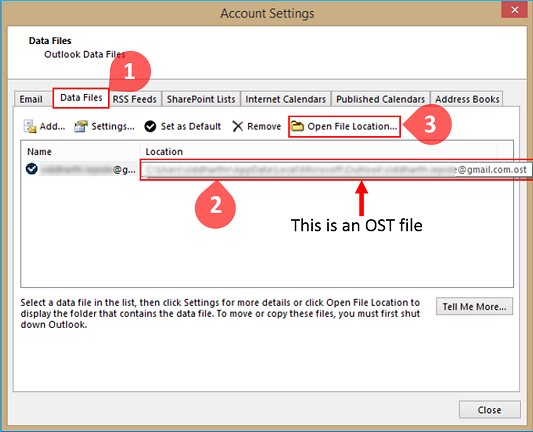 Note: Generally, OST files can be found here irrespective of the Outlook version-
C:\Users\user\AppData\Local\Microsoft\Outlook
Step #2 Export your OST File as PST
- In MS Outlook, click on the File tab → Open → Export → Import/Export. This will open up the Import and Export Wizard.
- Here, select the Export to a file option and hit Next.
Kernel for OST to PST - A Simple Way to Move Outlook OST File to a New Computer
Simple Way to Move Outlook OST File to a New Computer
OST is a file format used by Outlook; OST is an offline folder file that allows you to access emails even if you are not online. If you are looking to migrate OST files to a new computer, then this blog is going to help you with. There is no doubt how important an OST file is. If you want to move an OST file to a new computer, then there are indirect ways to do that. Let’s see what they are.
If you are the owner of the Exchange profile, you can configure your account in the Outlook in the new computer and simply download the mailbox data from Exchange server. But if you want to transfer OST file data to another user, you can convert OST a PST and then transfer it to the new computer. The new user can import the PST file to his mailbox.
Here we are going to try the second method, where you first convert OST to PST and the migrate PST to a new Computer. So, you need to start with OST to PST conversion. Let’s start the process:
Know the name and location of your OST file in your systepm
Before you proceed to transfer your OST file to some other computer, you first should know where to find it. So, if you are wondering where these files are located on your system, then here we are going to mention it all. If you want to know the name and location of your OST file on your system, then do as mentioned below. The process is the same for almost every version of Windows.
- Click on the Start menu or the Windows icon on your system and look for the Control Panel. Once found, open the Control Panel on your system.
or
If you are using Outlook at the moment, go to the File tab. Select Account Settings from the File menu and then select the Account Settings option again. - Now, make sure that the category customization is set to Small Icons.
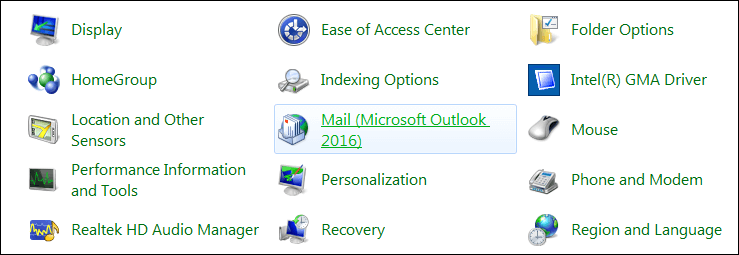
- Now, locate the Mail option in the Control Panel and make a click.
Kernel for OST to PST - A Complete Guide to Export Contacts from Outlook
Guide to Export Contacts from Outlook
Want to export contacts from MS Outlook without much effort? You have come to the right place.
Outlook contacts are very crucial for every individual or organization. They help users keep up with clients or other important persons. But, users often need to export their Outlook contacts to import them to another email client or save them as a backup. There are many versions of MS Outlook, and every version has different settings, so they require different steps to export contacts. Here, we will try to cover the simplest methods to export contacts from various Outlook versions.
In this article, you’ll learn how to export contacts from the following MS Outlook versions:
- Exporting Contacts from Outlook 2010
- Exporting Contacts from Outlook 2013/2016
- Alternate Solution – Kernel OST to PST Converter
Exporting Contacts from Outlook 2010
It’s very easy to export contacts from Outlook 2010 if you know the basic steps of exporting data file from Outlook. Here’s how you can do it:
- Open MS Outlook and go to File tab.
- Now, click Options, and then select the Advanced option.
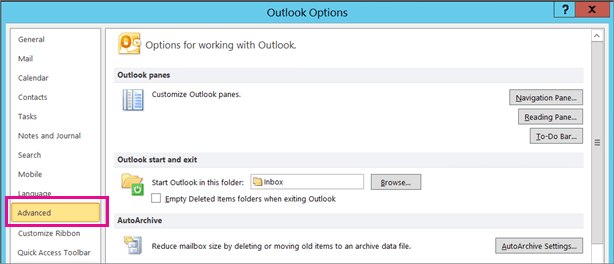
- Go to the Export section and click Export. The import/export wizard will appear on the screen.

Kernel for OST to PST - Two Free Methods to Convert OST to PST File
Two Free Methods to Convert OST to PST File
Microsoft Outlook, in the offline (Cached Exchange) mode, saves all the Exchange mailbox data in a local file named OST file. The changes made by the user in the offline mode are later updated to the server mailbox when the Exchange connection is re-established. As the OST file resides on the user’s computer, it is unaffected by Exchange Server crashes and disasters, Exchange mailbox deletions, etc. So, Exchange administrators and end-users can use OST files to restore user mailbox data in the occasions of such eventualities.
Here are some situations when converting an OST file to PST becomes very helpful:
- A few Exchange mailboxes get deleted from the server
- Want to back up a few Exchange mailboxes
- An Exchange user wants to rebuild his OST file, but the user has some unsaved data in the OST file
- EDB files are inaccessible due to Exchange corruption, Server crash, etc. and users want their emails urgently
There are multiple methods to convert any OST file into PST provided you can log in to Outlook with the same Exchange profile. Some native methods to convert OST to PST are presented here:
- Export mailbox data to PST
- Archive OST emails
- Convert OST to PST using third-party tool
Method 1: Export mailbox as a PST file
Login to Outlook with the Exchange account that was used to create the OST files. And to export the OST mailboxes to PST, follow the simple procedure:
- Go to Files → Open → Export and click Import → Export.