

Read time 10 minutes
Outlook contacts are very crucial for every individual or organization. They help users keep up with clients or other important people. But, users often need to export their Outlook contacts to import them to another email client or share them as attachments with email. There are many versions of MS Outlook, and every version has different settings, so they require different steps to export contacts. Here, we will try to cover the simplest methods to export contacts from various Outlook versions.
Step-by-Step Guide: How to Export Outlook Contacts?
In this section, we’ll learn how to export contacts from Outlook from different versions, such as 2019, 2016, and earlier editions.
- Export Contacts from Outlook 2010
- Export Contacts from Outlook 2013, 2016, 2019
- Professional OST to PST tool to export contacts
Export Contacts from Outlook 2010
Outlook 2010 is more than a decade old, and it will be a sound choice if you want to export your contacts and import them to a new Outlook version. The process to export contacts from Outlook 2010 is straightforward if you know the basic steps of exporting data file from Outlook. Here’s how you can do it:
- Open MS Outlook and go to the File tab.
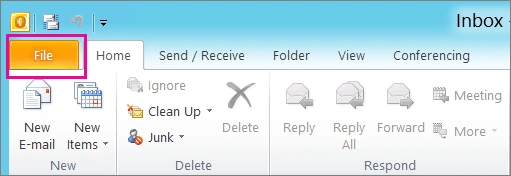
- Now, click Options, and then select the Advanced option.
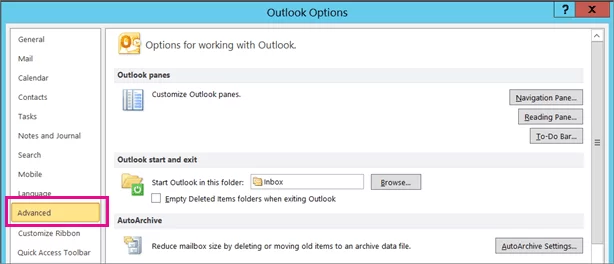
- Go to the Export section and click Export. The import/export wizard will appear on the screen.

- Select Export to a file and click Next.
- Now, choose the type of export from the Create a file type section. Usually, people choose Comma Separated Values (Windows), which is a .csv file format. After selecting the file type click Next.

Note: If you’re exporting contacts to use it with another Outlook account, then select Outlook Data file (.pst).
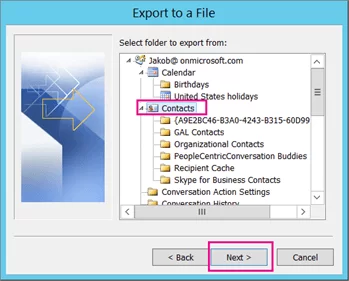
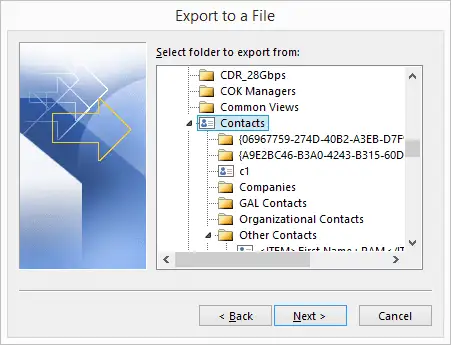
- In the next step, select the contact folder that you want to export and click Next.
Note: With the CSV option, you can only export one folder at a time.
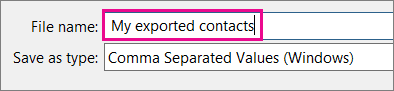
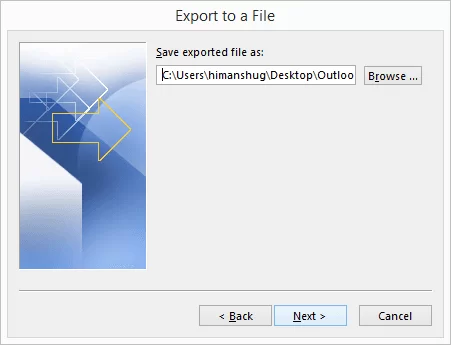
- Select a location where you want to save the contact folder(s) and give a name to it, and then click OK.
- The Export to a file wizard will appear on the screen, click Next to move ahead with the process.
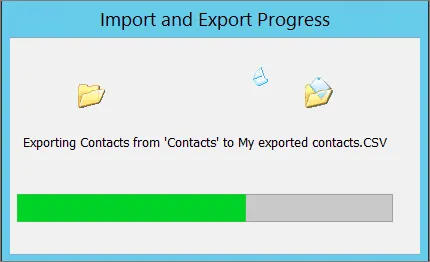
- Now, click Finish to start the export process immediately. Though Outlook doesn’t display any notification on completion of the process, the Import and Export progress will disappear.
- Once the Export process is complete, click OK to exit the process.
The Outlook 2010 contacts will be available at the location where you saved them.
Export contacts from Outlook 2013, 2016, 2019
The later versions of Outlook feature advanced functionalities and a more accessible user interface. The change in user interface welcomes a slightly different approach to export contacts in Outlook compared to the one we discussed above. To export contacts from Outlook 2013, 2016, and 2019, follow the steps:
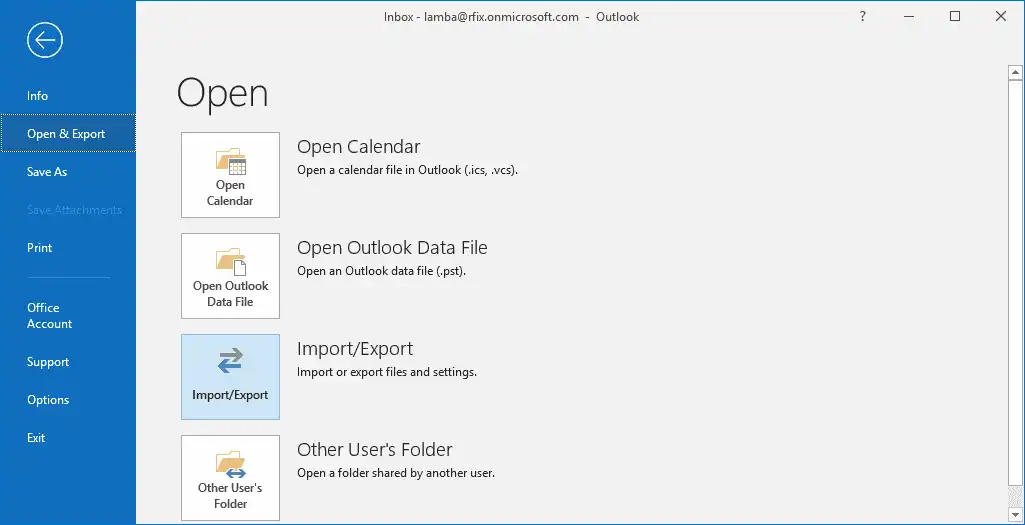
- Open MS Outlook and go to the File tab.
- Click Open & Export, and then select Import/Export option.
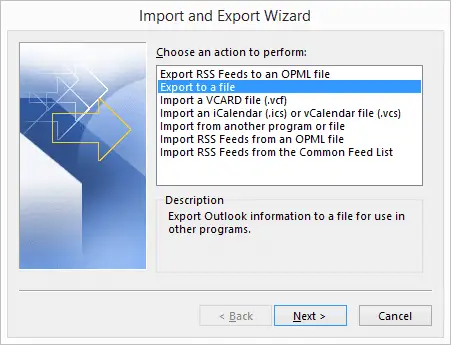
- Choose Export to a file from the Import/Export wizard.
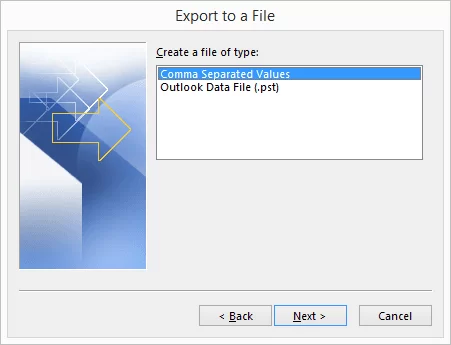
- Select Comma Separated Values option to save contacts in CSV file format, else select Outlook Data file to save contacts in PST file format and click Next.
- Now, select the Contact folder that you want to export and click Next.
- Select a location on your system to save the selected contact folder and click Next.
- In the Export to a File wizard, you can use Map custom fields option to apply any mapping to the contact attributes. Click Finish for initiating the process to export contacts from Outlook.
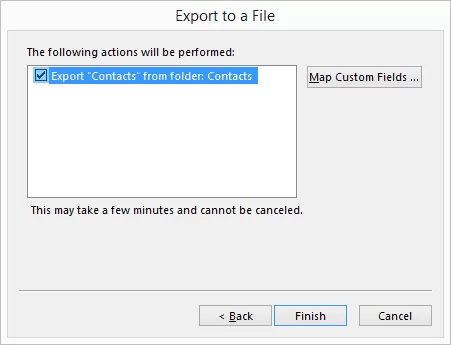
Note: You cannot cancel the export process once it is started.
- . Once the export is complete, you can check the CSV file at the specified location.
The methods mentioned above will help you export Outlook contacts to CSV format. But, as these are manual methods and depend completely on Outlook, they are not always reliable to export contacts from Outlook. Any technical glitch or bug can prevent you from creating a CSV file in Outlook. Therefore, you should always have a backup plan in mind to export contacts from Outlook, or even when you export emails from Outlook.
Common Issues When Exporting Outlook Contacts and How to Solve Them
When you use a manual solution to export Outlook contacts to CSV or other file formats, there are some issues or challenges on the way. Learn what those are and how to solve them:
Export option not working
Sometimes, when you use the Export to a file option for contacts export, clicking it results in no action, or the option becomes unavailable. To resolve it:
- Restart or update Outlook application
- Make sure you have the administrator rights to export.
- Try exporting contacts on a different Outlook version.
Exported CSV is empty
There can often be instances when you export Outlook contacts, but the resultant CSV file contains headers only and no other contact data. As a solution, always make sure that you’re not saving or changing the CSV file in Excel before the import to some other platform.
Duplicate entries in Outlook
When there are multiple duplicate entries of a contact in Outlook for the same user, there can be issues in export. To avoid this issue, regularly Manage Duplicates in the People tab and merge them.
Use a Professional Tool to Export Contacts from Outlook – Quick Solution
As a fellow Outlook user, you must be familiar with the OST file, which enables access and management of a user’s email data offline. Outlook contacts and other data items such as calendar, attachments, etc. can be easily exported from the OST file with the help of a professional tool.
The Kernel for OST To PST Converter is an advanced tool specially designed to export Outlook data to PST file format. The tools offer powerful functionalities to perform various operations on an OST file, such as converting bulk and large-size OST files, easy recovery of email attachments, exporting OST files to Office 365 mailbox directly, repairing corrupt OST files, etc.
Why choose a professional tool to export contacts from Outlook:
- The tool offers a user-friendly interface.
- Requires minimal technical expertise.
- Filtering contacts is simpler and more convenient.
- Can export multiple folders simultaneously.
- Helps with efficient OST recovery (if damaged or corrupted)
Any issue with Outlook can render you unable to export contacts from Outlook. Therefore, this tool can act as a dependable alternative to help with OST file repair, providing control over the contacts.
Quick steps to export contacts from OST file to other file formats:
- Lauch the tool and select the specific OST file and click Next.

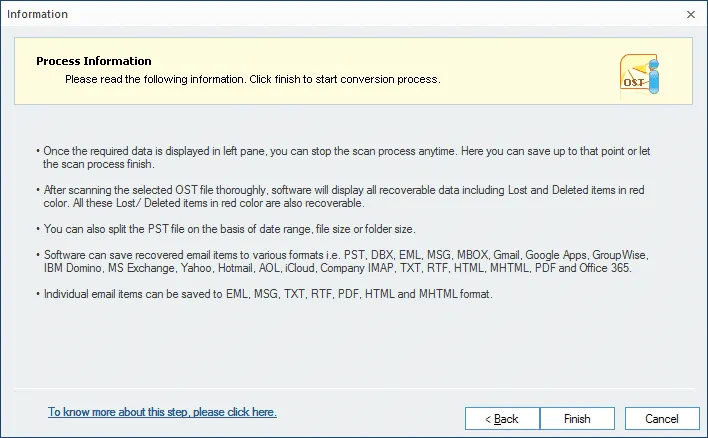
- Read the information about the tool and conversion process and click Finish.
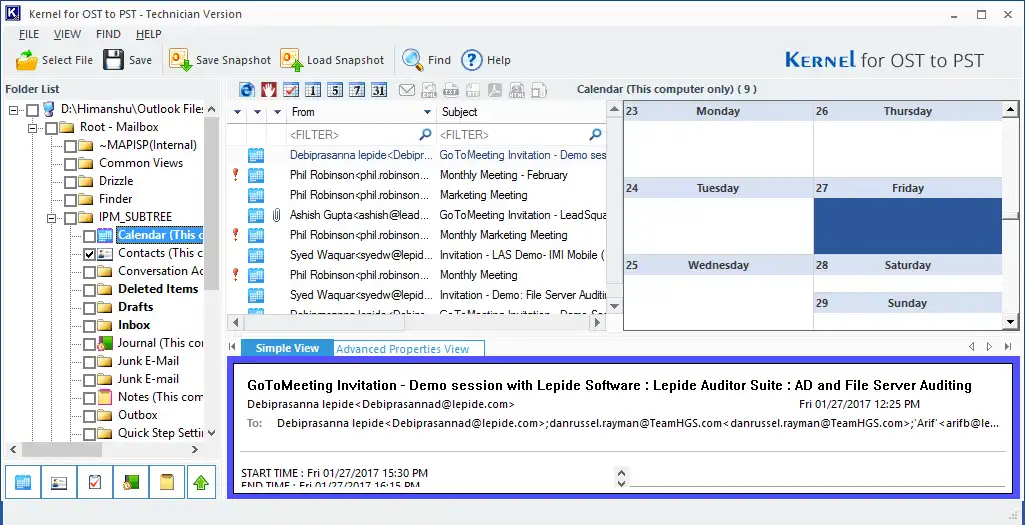
- The tool will scan the OST file and display all its folders on the left-hand side. Select the Contacts folder from the sub-tree structure and click Save.
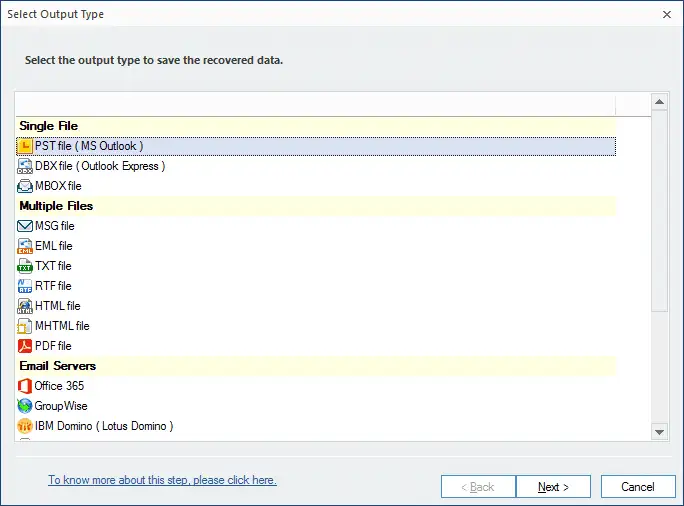
- Select the specific file format in which you want to save the Contacts. You can choose from various options like PST, DBX, MBOX, EML, etc.
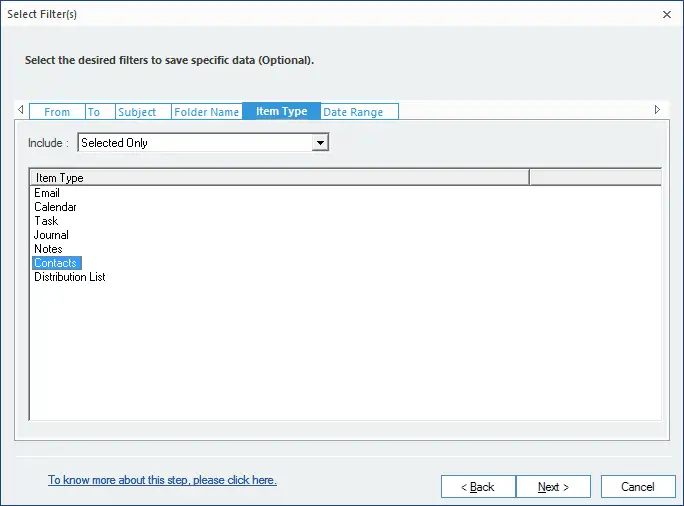
- If you’re unable to find the contacts in the previous step, then select the entire mailbox of the OST file and select Contacts from Item type in the Select Filters section, and then click Next.
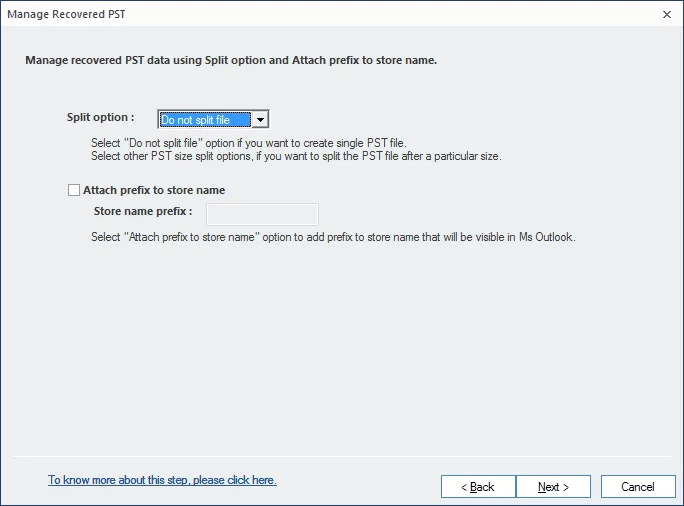
- Avoid applying any changes in the next step and click Next.
- Specify a path to save the Outlook contacts by clicking Browse and click Finish.
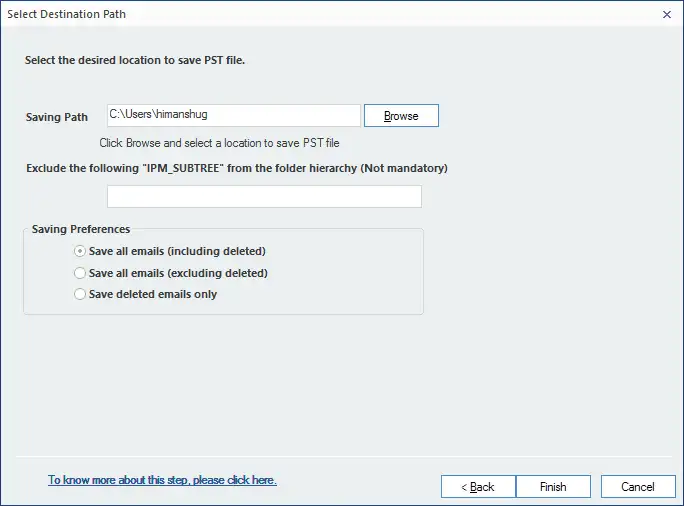
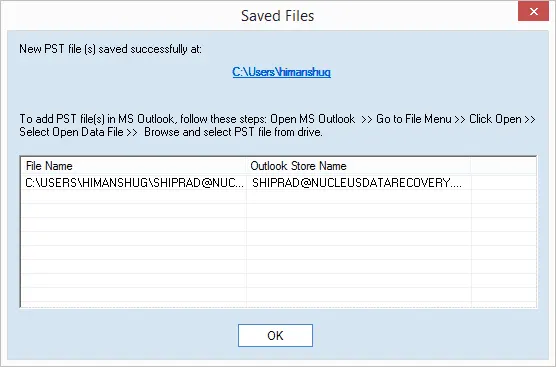
- The tool will start saving the contacts, once it is finished, a notification will appear on the screen confirming the same. Click OK to end the process.
This is the easiest way to export Outlook contacts to PST format. This tool even allows you to directly export the Outlook OST file to Live Exchange Server.
Tips for Keeping Your Outlook Contacts Updated
It is important to keep your Outlook contacts updated to avoid losing them. Here is what you can do:
- Use Exchange Server or Office 365 and enable two-way synchronization on your mobile device to update a new contact on both platforms.
- Get rid of duplicate contacts. For this, export Outlook contacts to Excel and then sort them out to remove duplicate entries.
- Regularly backup contacts to a CSV or PST file and avoid any chances of losing them.
- Use the People tab in your Outlook to edit, view, or search for the contact cards.
Conclusion
You can export contacts from Outlook manually in CSV file with Outlook’s export module. You can even export them as a PST file to import them to another Outlook account. However, if you’re unable to export contacts with the manual methods, then you can employ OST converter that allows you to export Outlook contacts to multiple file formats. Using the same utility, you can also export contacts from OST file to PST.
FAQs
A- Outlook store contacts to CSV and PST file format. Both formats allow you to export contacts from Outlook. PST files are specific to Outlook & may contain more than just contact information. CSV files, on the other hand, are a more universal file type that can be used with a variety of programs.
vCard (.vcf) is another format used to export Office 365 contacts that works with all mobile devices, desktop email clients, and cloud services.
A- Here’s what you need to do:
Open Outlook & navigate to the “File” tab.
From there, click on “Open & Export” & select “Import/Export.”
Choose “Export to a file” & then select either Excel or CSV as the file type.
After selecting a destination folder to save the file in, click “Finish.”
A- You can easily organize Outlook contacts with the following few considerations:
1. Sort out your contacts into different folders named – work, personal, business, etc.
2. You can add the important and frequent contacts to favorites to get quick access.
3. You can sort the contacts using filters like City, Company, etc.

![How to Convert OST to PST Without Outlook? [Expert Guide]](https://www.nucleustechnologies.com/blog/wp-content/uploads/2026/04/ost-to-pst-without-outlook.webp)