Large Excel files can grow with every usage, which leads to slowing down Microsoft Excel performance and making data inaccessible. Whether you have thousands of rows in an Excel file or have numerous sheets within a single workbook, dividing it into smaller files can be a game-changer.
In this blog, we will show you how to divide large Excel dataset into smaller, more manageable parts using an advanced Excel splitter tool. But first, let's know the reasons to split extensive Excel data.
Why divide large Excel dataset into smaller parts?
Dividing large Excel dataset improves performance, prevents crashes, freezes, and many other things. Here are some reasons why users should divide large Excel data into smaller files:
- Smaller files load and open faster.
- It prevents Excel from slowing down.
- Avoids exceeding Excel’s row limit.
- Keeps data in a more manageable way.
- It can be shared with others easily.
- This improves readability and productivity.
- Keeps data safe from loss.
- Distributed data based on different segments.
What is the best method to divide large Excel data file?
There are a few manual methods available to divide bulk Excel data, but they may not preserve formulas and formatting of the data. Furthermore, there are chances of data loss too. To avoid such circumstances, users should take help from our easy-to-use Excel Split tool.
Kernel Excel Splitter tool is an advanced solution to split unlimited Excel files into smaller and easily manageable files without any data loss. The software offers multiple filters based on the splitting option for precise and accurate results. Moreover, this tool uses powerful algorithm, which protects users’ data from start to end without altering or adding anything.
Benefits of using a professional Excel split tool:
- Allows users to split data based on rows, size, and sheets.
- Users can add single or multiple Excel files simultaneously.
- Supports XLS and XLSX files as sources to split them.
- Saves divided data in XLS, XLSX, XML, CSV, and ODS formats.
- Permits users to save progress summary in a CSV file.
- Keeps all the formulas and structure intact throughout the process.
- Add Excel files of any size, as there are no file size restrictions.
- Operates independently without needing additional applications.
- Compatible with Excel files of all Microsoft Excel versions.
- With the free trial version, users can split 25 items per Excel file.
How to divide large Excel file? (Step-by-step process)
Here are the detailed steps to quickly divide large Excel data using our tool that provides error-free outcomes.
Step 1. Download and launch the Kernel Excel Splitter tool.
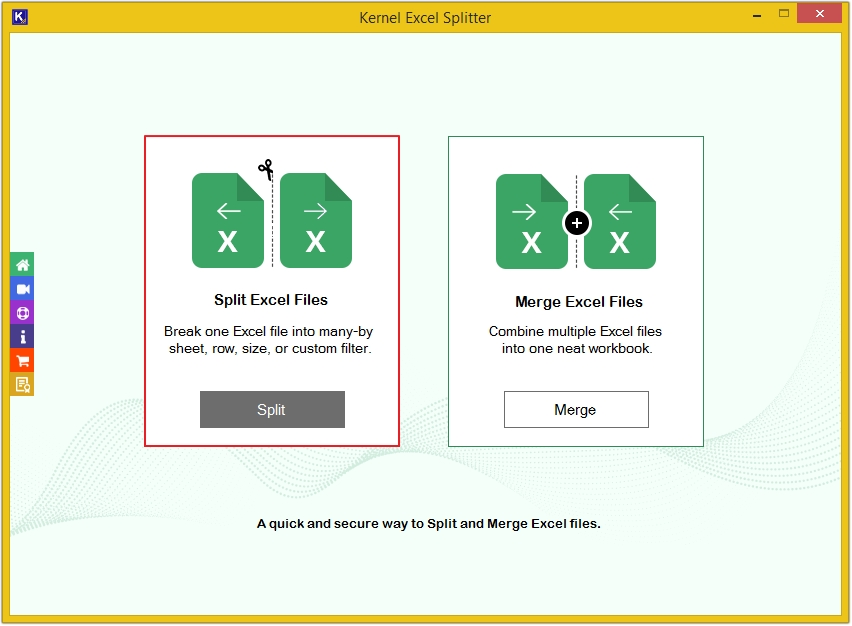
Step 2. Click on the Split option.
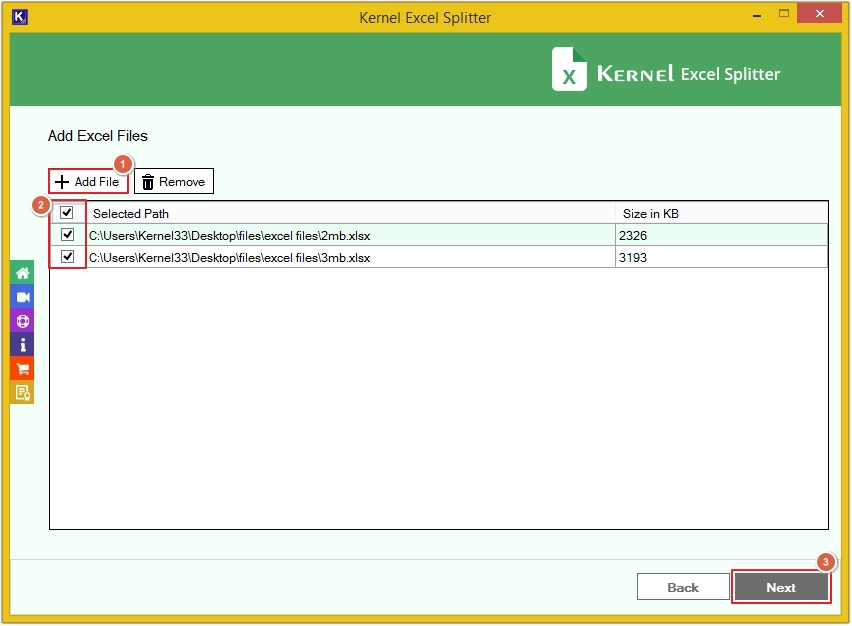
Step 3. Click the Add File to upload Excel files, then tick the checkbox adjacent to the added files and click Next.
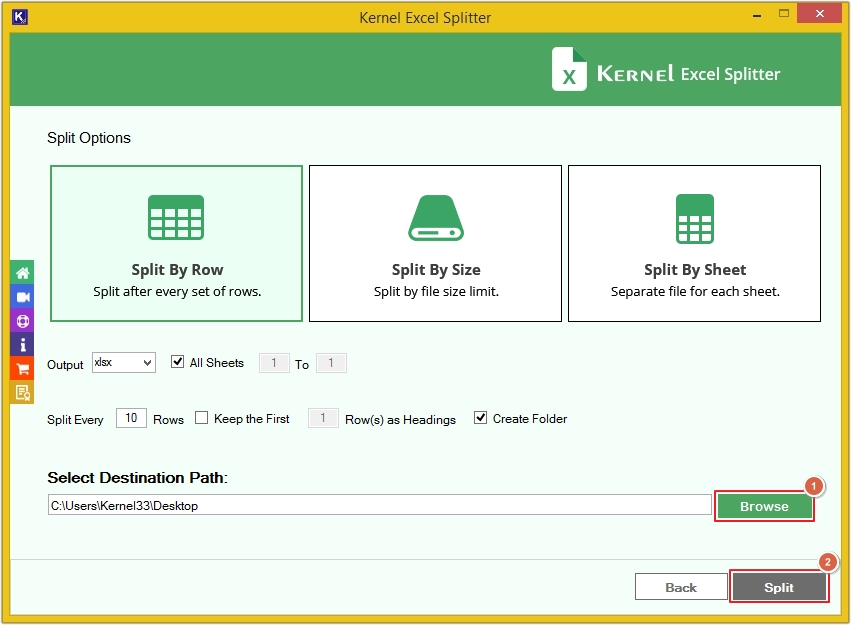
Step 4. Select the desired split option from the three available options: Split By Row, Size, and Sheets.
Note: We are splitting Excel files based on rows.

Step 5. Select the output format and apply required filtering options. Click on the Browse button to provide a saving location, then click on the Split to proceed.
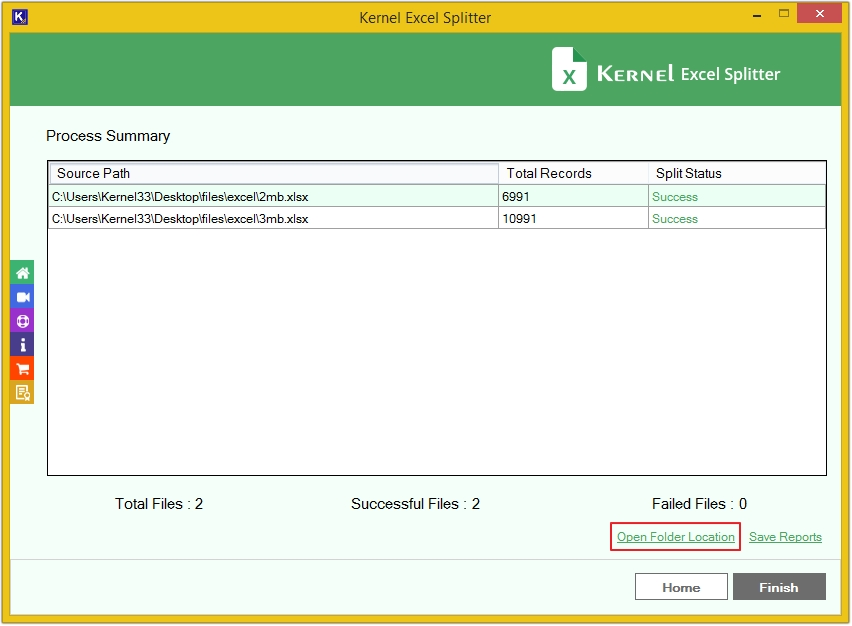
Step 6. The software will begin dividing the large Excel file.

Step 7. Once the process is completed, you will receive a success message saying, “Split process completed successfully”. Click OK to end the process.

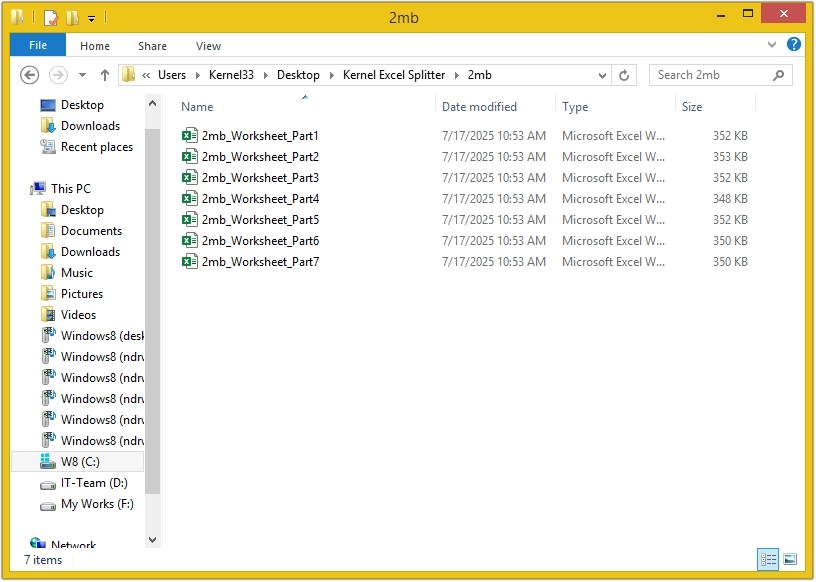
Step 8. Click on the Open Folder Location option to access the saved files directly.
Step 9. Click on any file to get a preview of the data.
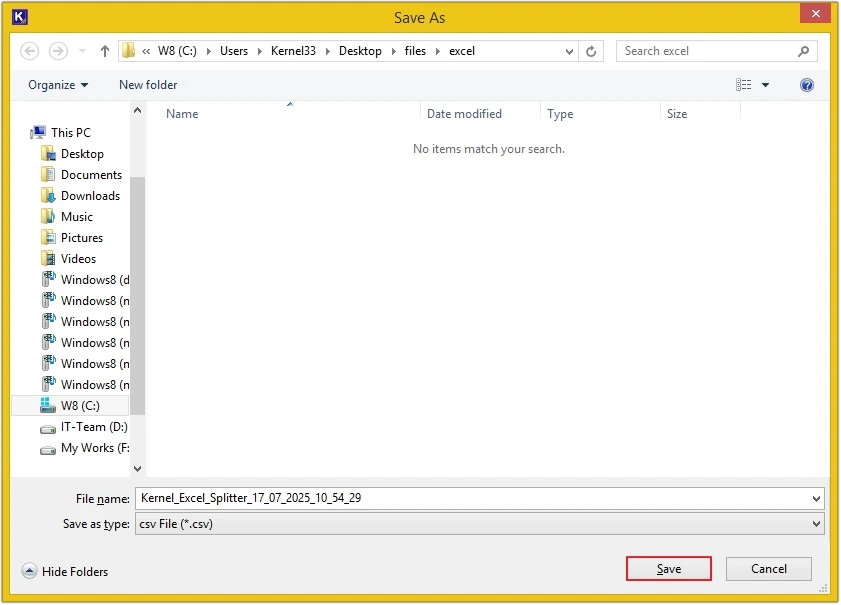
Step 10. Click on the Save Reports button to generate a log report of the split process in a CSV file.

Step 11. Provide a saving destination and click on the Save button.
Conclusion
Multiple factors encourage users to divide large Excel data into smaller files. This guide explained the best solution to split extensive dataset without losing integrity. With our Excel Splitter tool, you can convert unlimited large Excel files and save them in 5+ output formats. Download the free trial version now and start splitting your Excel files without any hassle.

Easily split bulk Excel files based on size, row, or sheet for easy management.