We dealt with many Outlook and its account related queries and helped many users providing them apt solutions with our blogs. Many users seek conversion from their POP3 email account in Outlook 2016 to the IMAP account. But what could be the reason for this? What is the easiest way to perform the conversion? Read the blog carefully to get these and more answers.
How POP3 and IMAP Email Accounts are Different?
POP3 (Post Office Protocol 3), a standard email account system for regular emailing. The messages are sent or received to the system, stored within mailboxes and then user actions depend on its fate.
IMAP (Interactive Mail Access Protocol), a transformed email account for easy email accessibility while delivering emails on the Server providing fine access on multiple devices efficiently. The server can be connected to any system easily and the emails’ modification would be displayed on Server only and not on the system.
We can easily infer that the IMAP account is more flexible with Server dependence rather than the POP3 account that delivers mails to the system. IMAP account is more secure, readily accessible anywhere, and can be configured to multiple email clients on various devices. All these differences or advantages of IMAP over POP3 account are enough for the consideration of the user to move from current POP3 account settings to IMAP account settings in Microsoft Outlook email client.
To convert the POP3 account to the IMAP account in Outlook 2016 manually, you are required to follow three sequential stages.
- Removing already added POP3 account
- Launch the Microsoft Outlook 2016 application.
- Navigate the path - File > Info > Account Settings > Account Settings.

- On the Account Settings page, select the POP3 account and click on the Remove option.
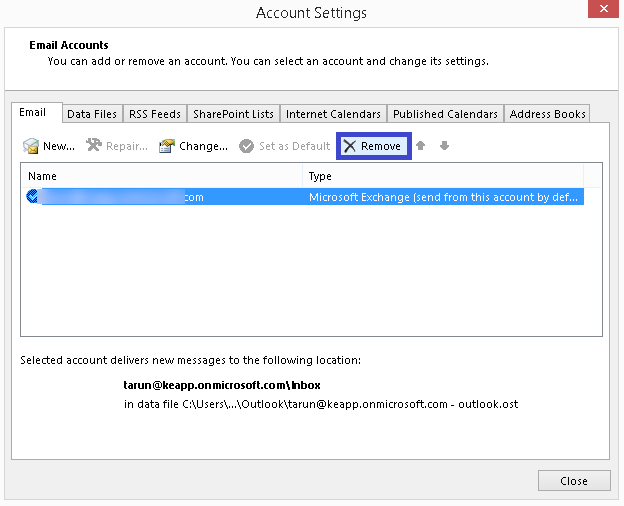
- It will remove the POP3 account from the Microsoft Outlook 2016 application.
- Adding new IMAP account in Outlook 2016 :- Now, that the POP3 account is successfully removed from the Outlook 2016 application, get ready to add the IMAP account in Outlook using the following steps.
Note: Before adding any IMAP account to the email client such as Outlook, it is required to Enable IMAP access from the same IMAP account to maintain a Server connection.
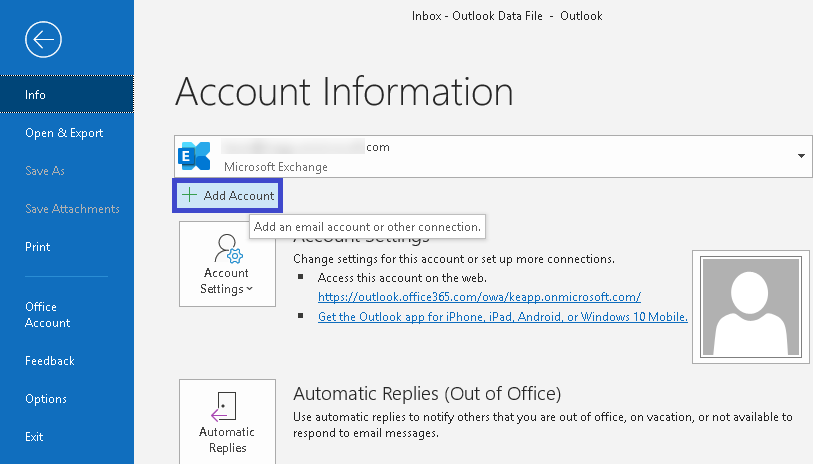
- On the Microsoft Outlook application, go to File > Info.
- From the left panel, click on the +Add Account option.
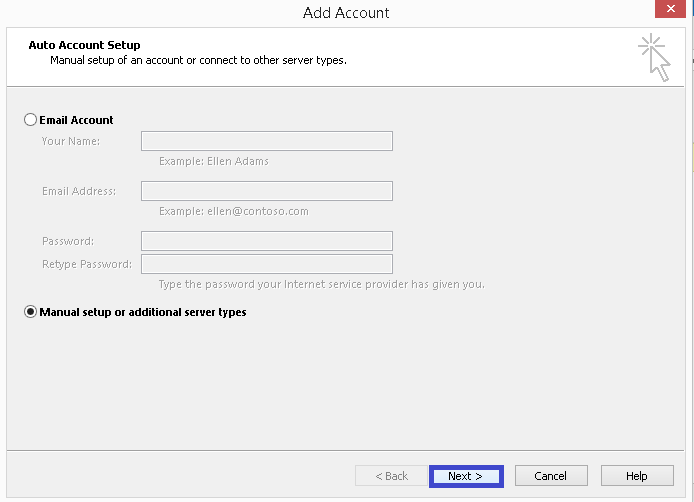
- On the Add Account page, select Manual setup or additional server types and click Next.
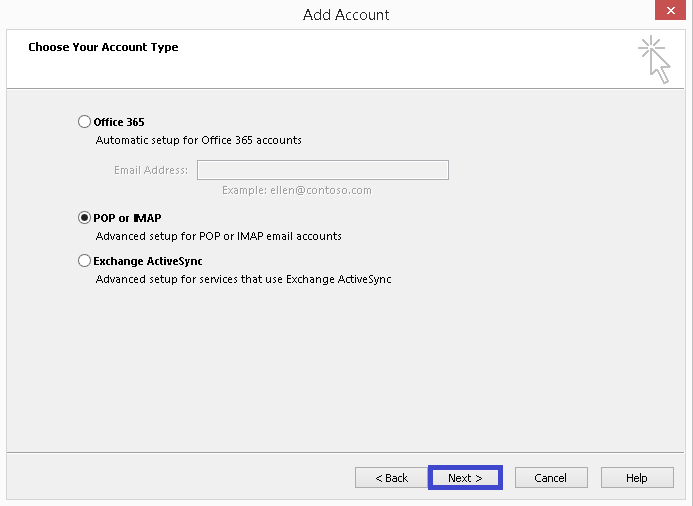
- Select the account type as POP or IMAP and click Next.
- Add the User Information details like name, email address, Server information details like Account Type as IMAP, Incoming mail server, Outgoing mail server, Logon information like User Name, Password. Click on the More Settings option then.
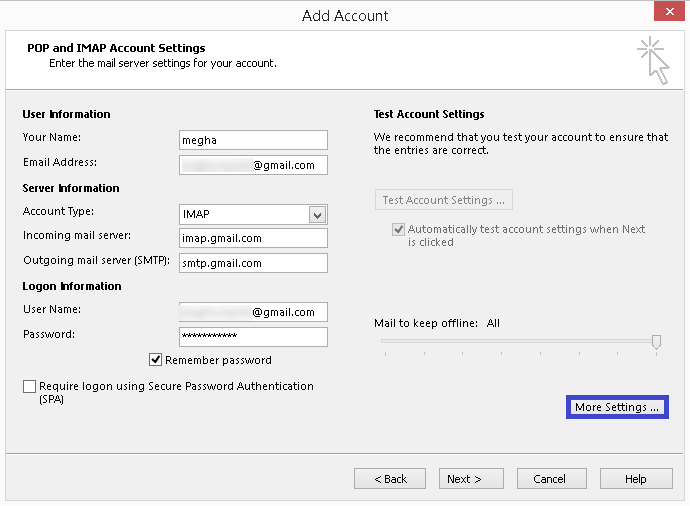
- Switch to the Advanced tab and enter values for Incoming Server (IMAP) port number as 993 and Outgoing Server port number as 587. Also, choose the encrypted connection as SSL/TSL for both. Click OK.

- Click Next or click Test Account Settings. Account testing will be progressed.
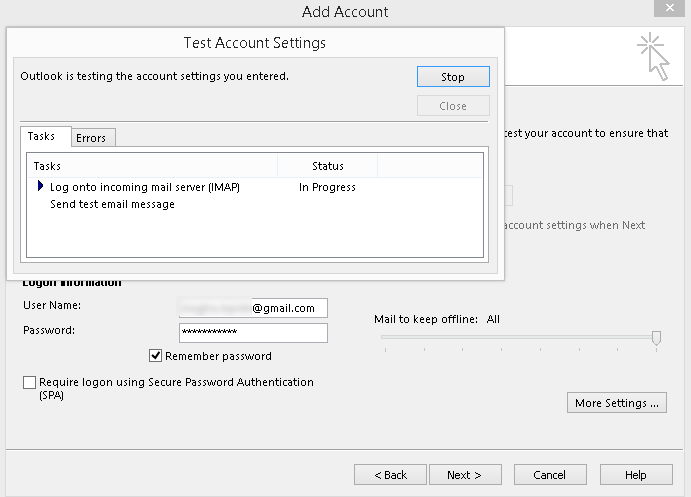
- Wait for the account connection to be established. It would display the successful connection, with the IMAP email account is successfully configured message, once set. Click the Finish option finally.
- Moving or exporting email folders :-
If you have sufficient space on your mailbox folders, you can try transferring the email folders from the folders already downloaded from the POP3 account in Outlook previously. Please note that Inbox and Sent Items folder cannot be transferred as these are primary folders of the Outlook application.
Also, the method to transfer emails from downloaded POP3 folder structure can be either Drag & Drop or Move/Copy whichever is suitable for the user. It is suggested not to move POP3 folders when the account is set to leave a copy on the server directly to the IMAP account mailbox as there would be a huge possibility of duplicate items over there. So, try moving the folders if you have ample space on your user mailboxes only.
So, this was the manual way to convert or change the POP3 account to the IMAP account in Outlook 2016. The process is not direct and involves processing with Account Settings. The account will not set even if there is a minor misspelling or mistake in the user credentials or other Advanced settings. So, great care is required to complete the procedure accurately.
Follow the steps given below to remove the already setup POP3 account in your Microsoft Outlook 2016 application.
For current IMAP account users, another attraction is the Cloud platform because of its highly advanced security, online accessibility, independence on desktop, or cost-effective approaches. They desire simple ways to optimize IMAP migration with full accuracy and integrity.
We understand all requirements of our valuable users and propose all the best suitable professional tool to move IMAP mailboxes directly to Office 365 platform with the advanced Kernel IMAP to Office 365 software.
It supports almost all IMAP Servers and migrates its single/multiple mailboxes to Office 365 regular mailboxes, archive mailboxes, and public folders selectively. The migration is automated, selective, increment to deliver the best possible results as required by the users. Visit the tool website and get complete details.
Wrapping Up
We conferred the need and procedure to convert the POP3 account to the IMAP account with complete steps and details. As an additional help to users, a smart and efficient IMAP to Office 365 software is also recommended for worry-less IMAP mailboxes migration to the Cloud platform.