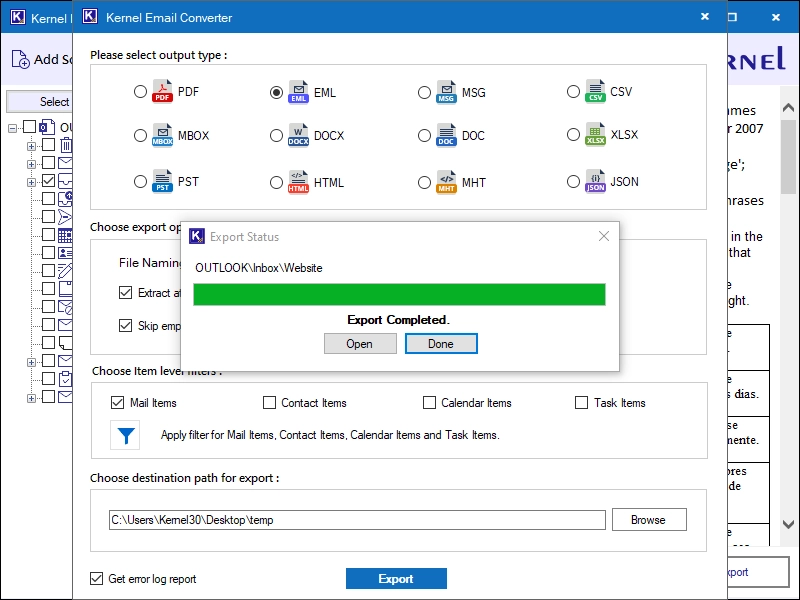
Follow this guide to learn how to use the Kernel Email Converter tool for email conversion and extraction of email addresses or attachments.
Step 1: Download, install, and open the Kernel Email Converter tool.
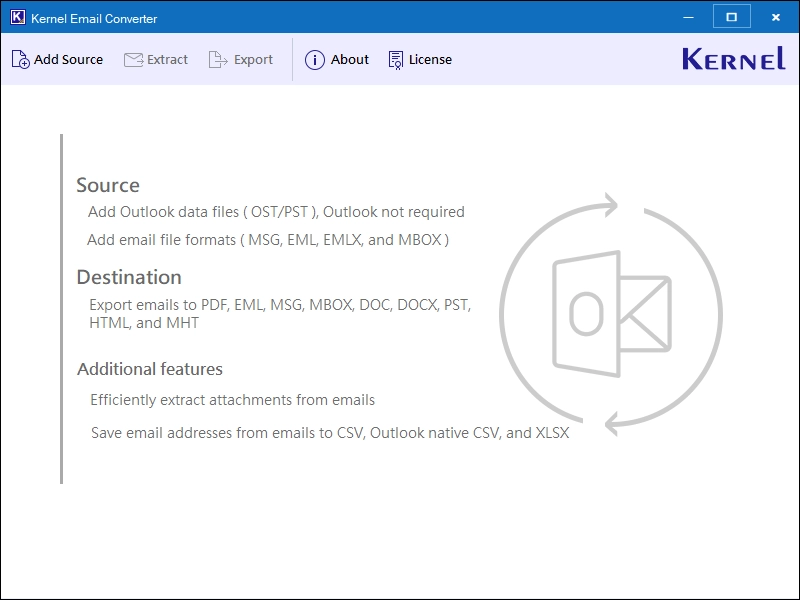
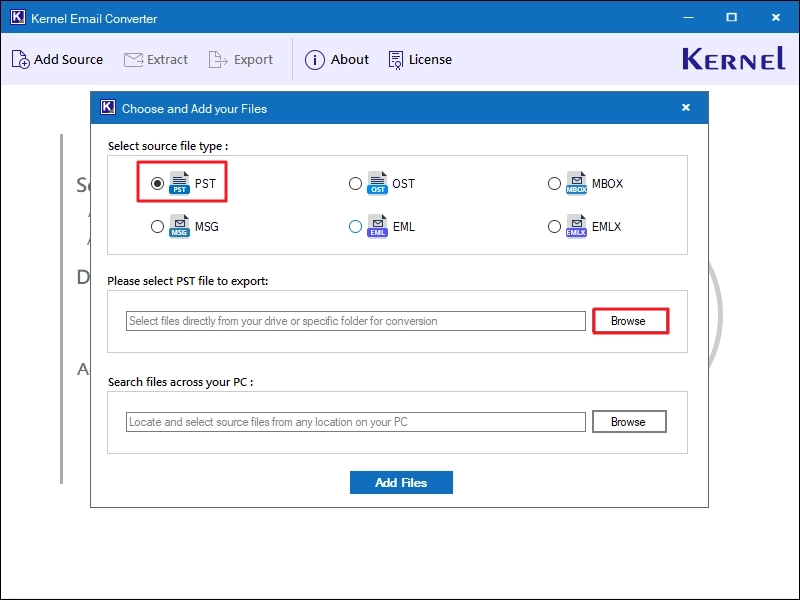
Step 2: Click on the Add Source button to add email files for conversion. Choose the source file type, then click Browse to select the email files.
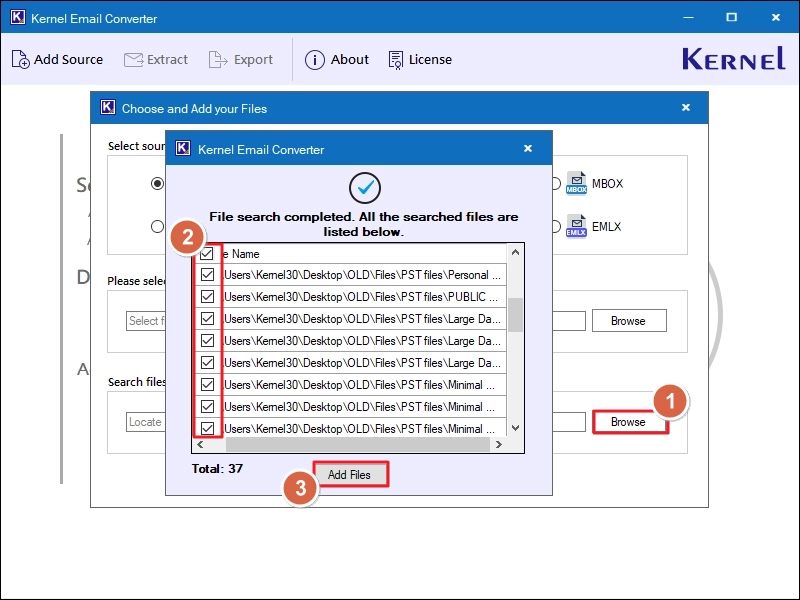
If you do not know where the emails are, you can search for the selected email type by clicking on the second Browse button under the Search file across your PC section. Here, choose a system directory and start searching for emails. Then, select the email files from the search result and click Add Files.
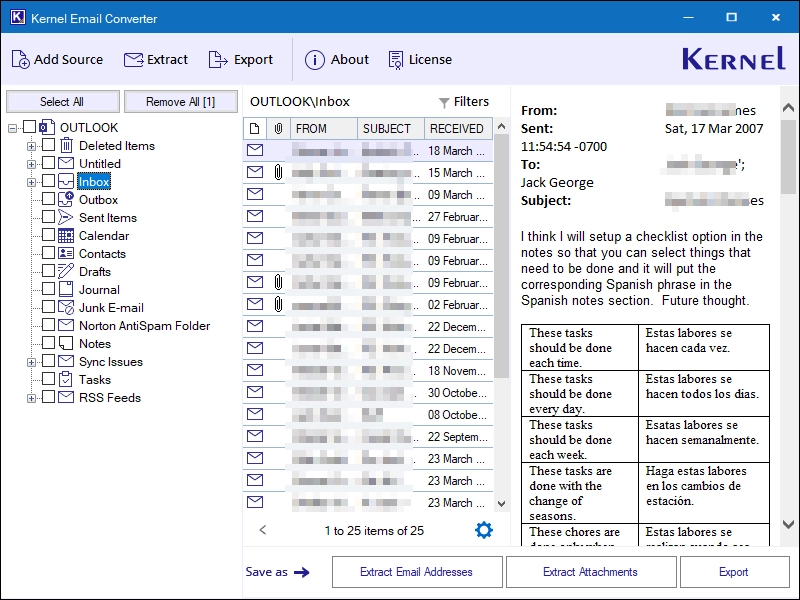
Step 3: Select any folder from the left navigation pane and select an email to preview.
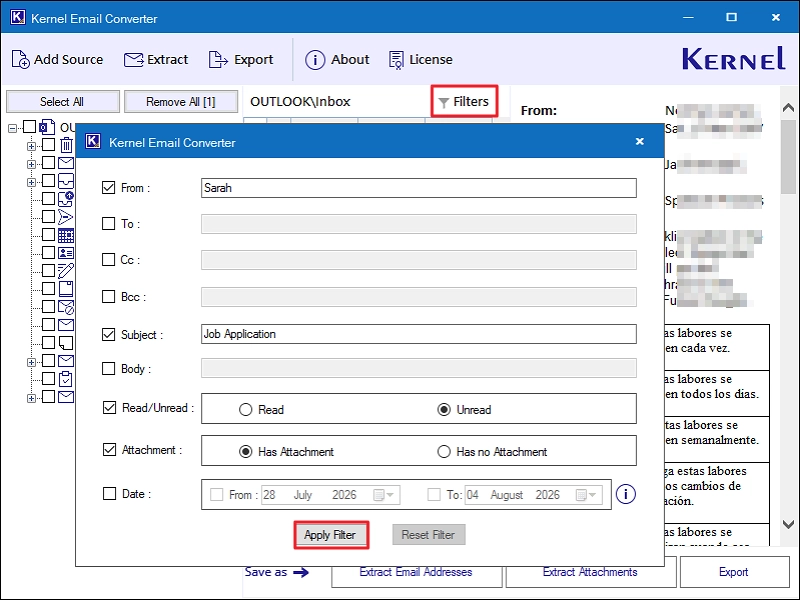
To sort emails, click the Filters button, define the filters, and click Apply Filter.
Choose Option
After previewing mail, there are three options: Extract Email Addresses, Extract Attachments, and Export.
Extract Email Addresses
To extract the email addresses from emails, follow the steps below:
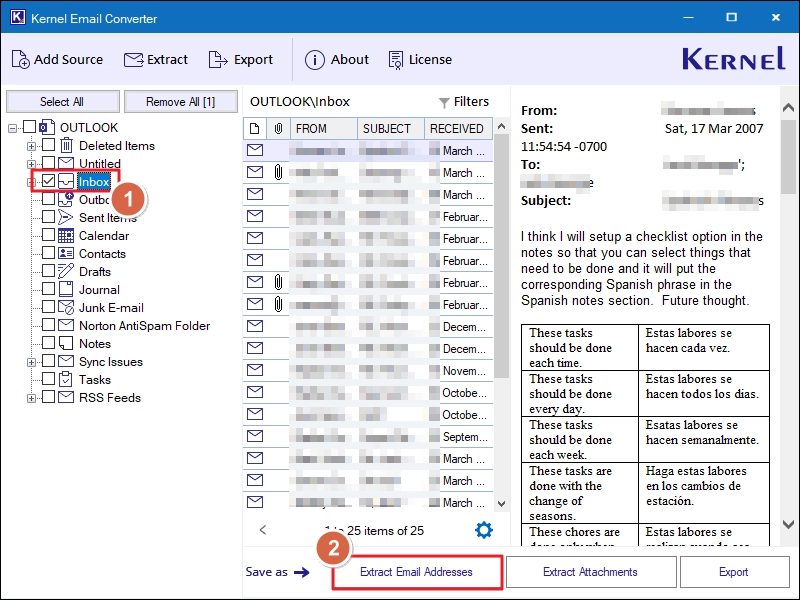
Step 1: Select the folders from the left navigation pane and click Extract Email Addresses.
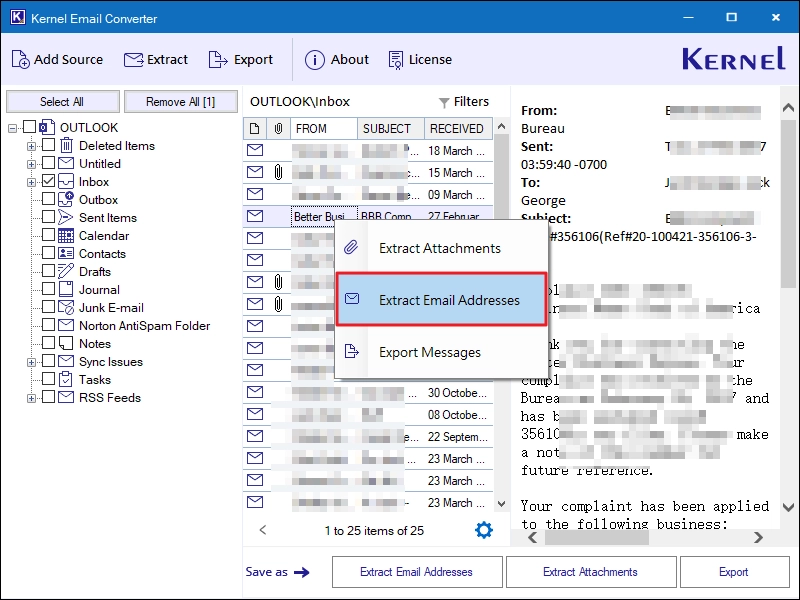
To extract email addresses from a single email, select an email, right-click on it, and choose the Extract Email Addresses option.
Step 2: Click Browse and specify where to save the email addresses after extraction. Then, select the items from which to extract addresses and click List to start scanning.
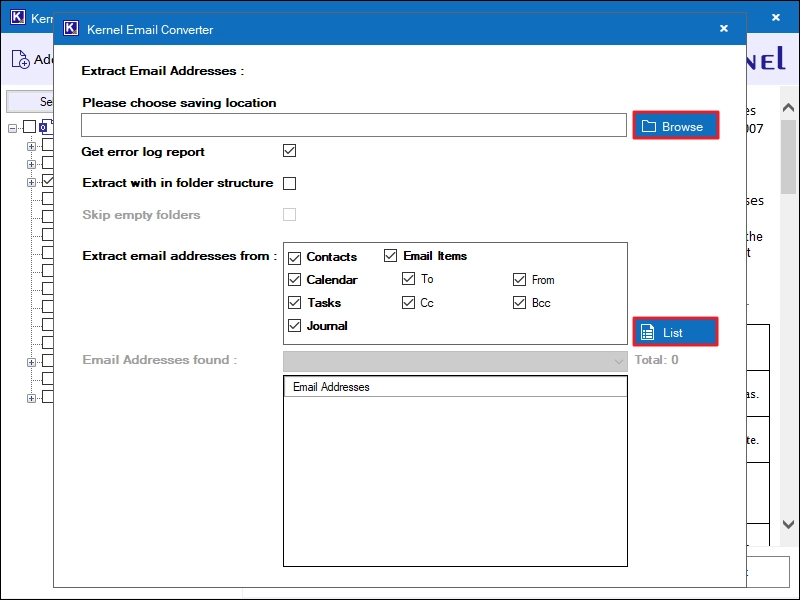
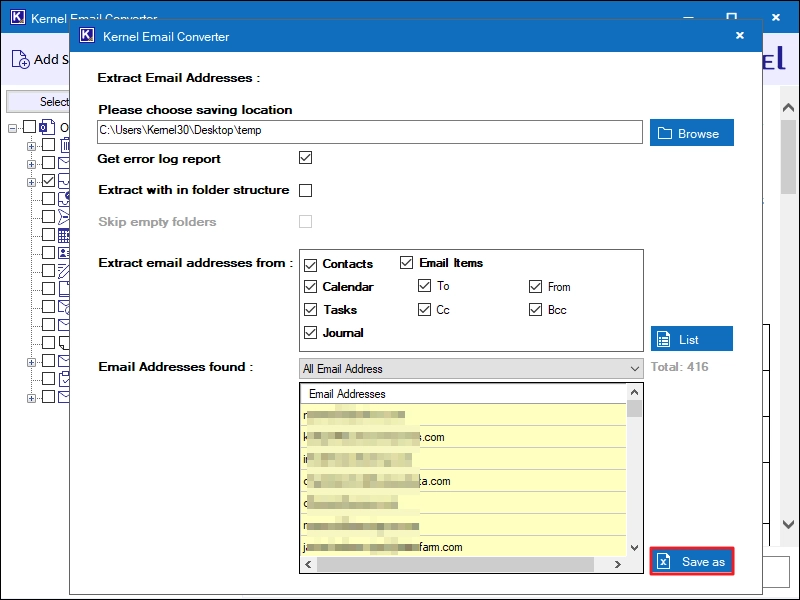
Step 3: When the tool lists all the email addresses, click the Save as button.
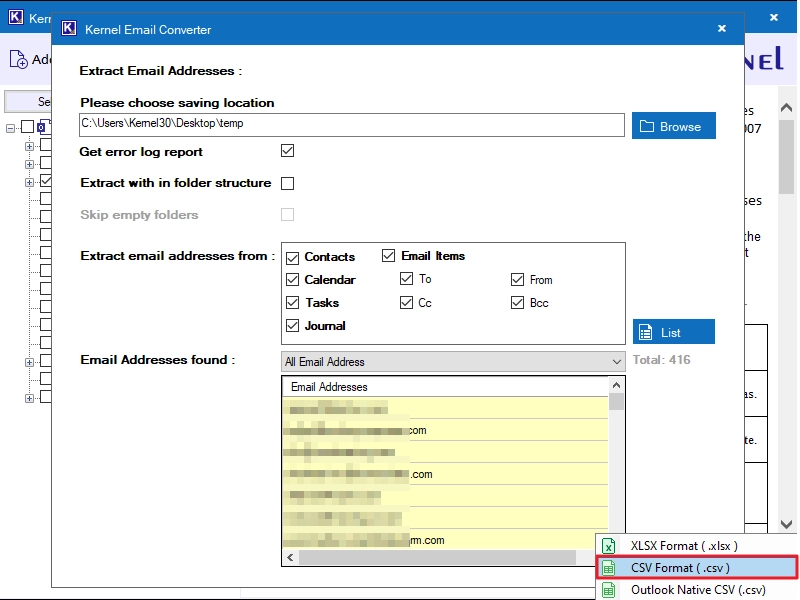
Step 4: Select the output format to save the list; the address extraction will begin.
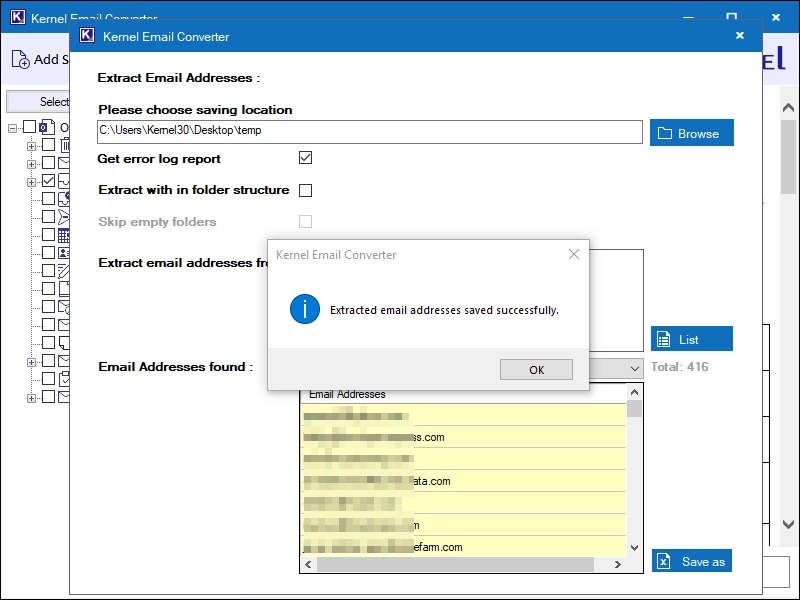
Step 5: Email address extraction is completed. Click OK, and the tool will directly open the folder where the list of email addresses is saved.
Extract Attachments
To save the attachments from emails, follow the steps below:
Step 1: Select the folders from the left navigation pane and click Extract Attachments.
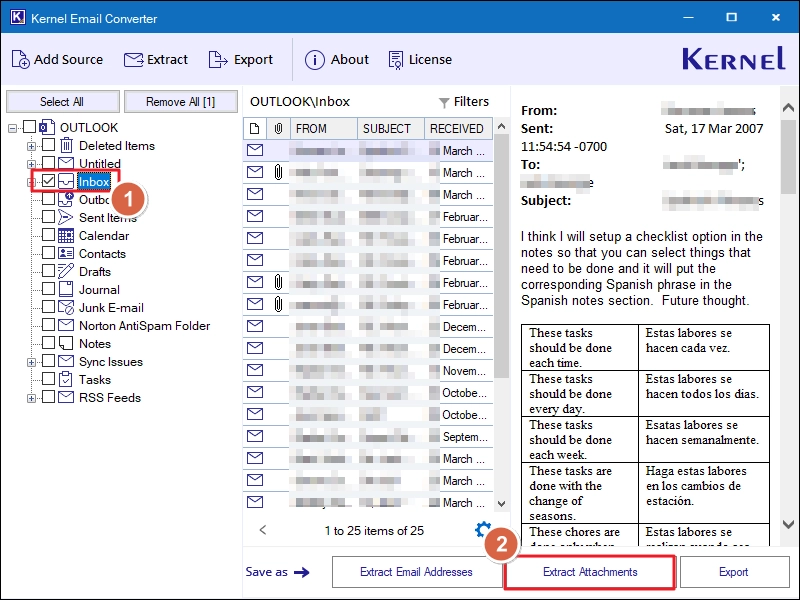
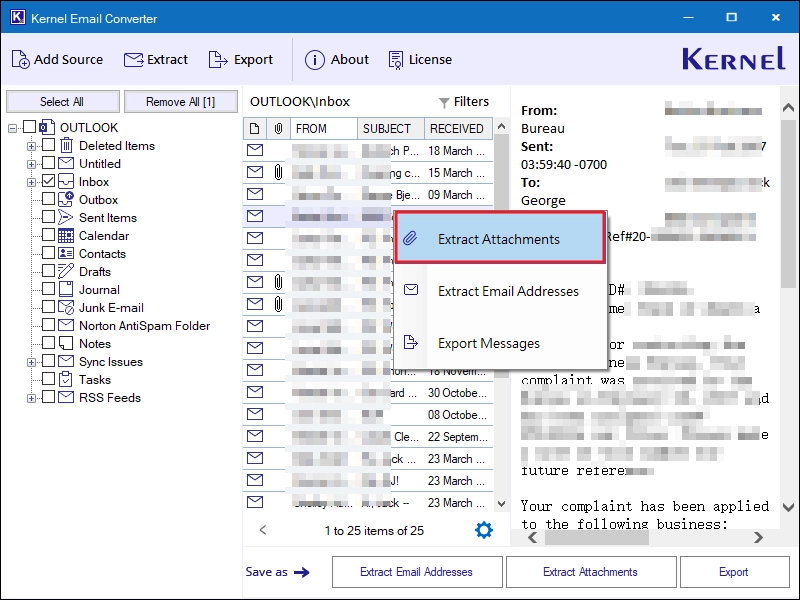
To save attachments from a single email, select the email, right-click on it, and choose the Extract Attachments option.
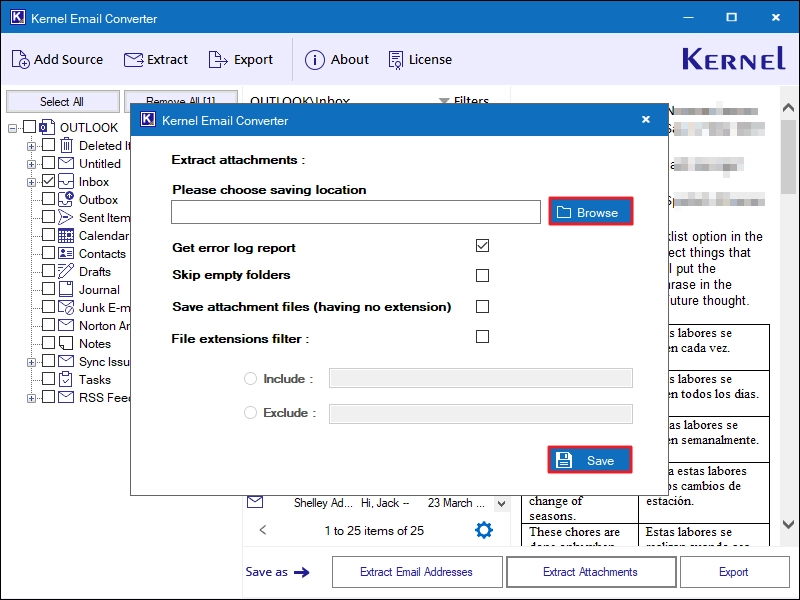
Step 2: Click Browse to specify where to save the attachments on the system. Specify the other extraction options, apply filters, and click Save to start exporting attachments.
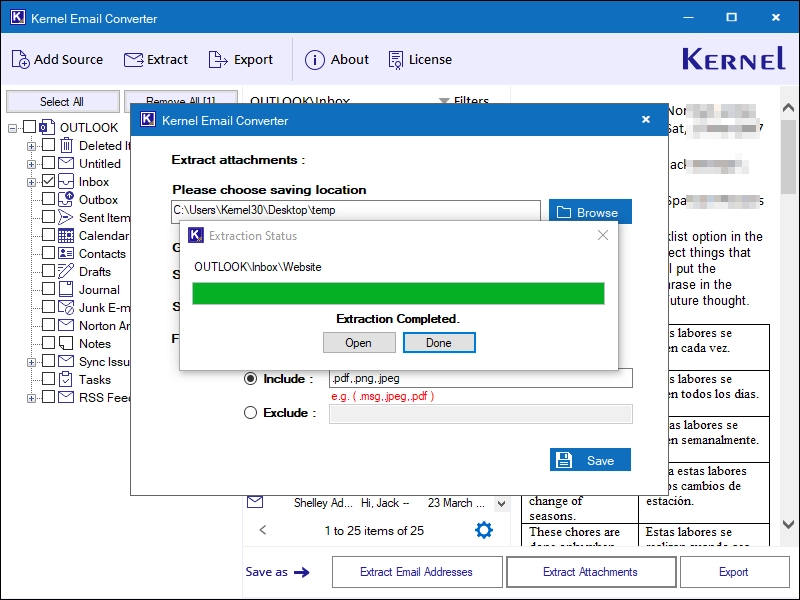
Step 3: Attachment extraction completed. Click Open , and the tool will directly open the folder where all the attachments are saved.
Export
Follow the steps given below to convert the emails:
Step 1: Select the folders and click on the Export button.
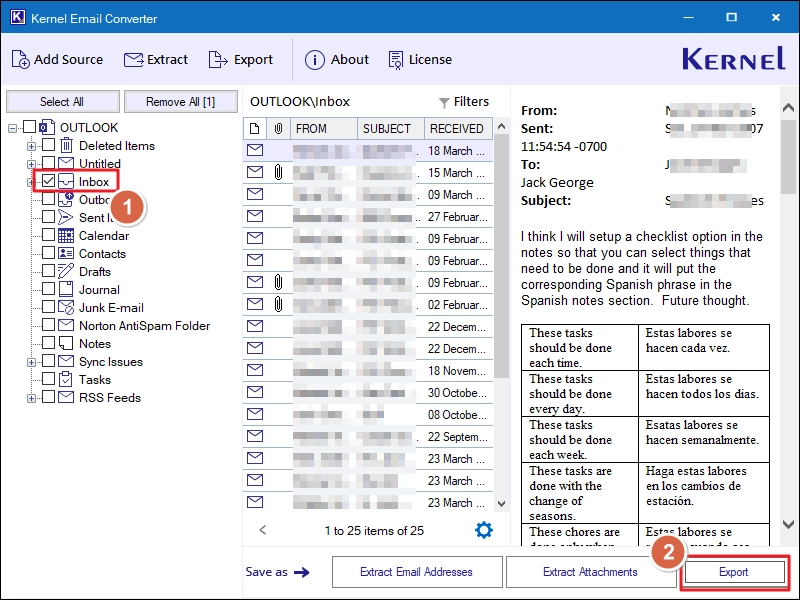
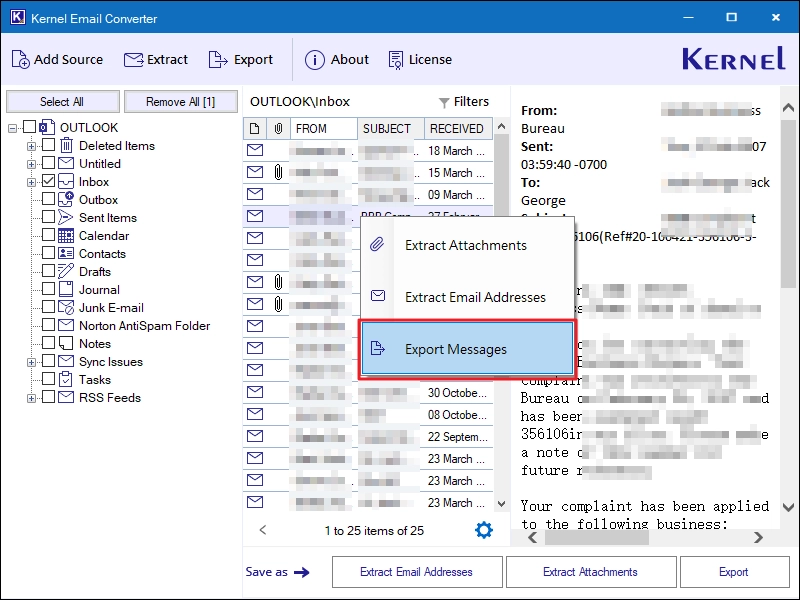
To convert a single email, select the email, right-click on it, and select the Export Messages option.
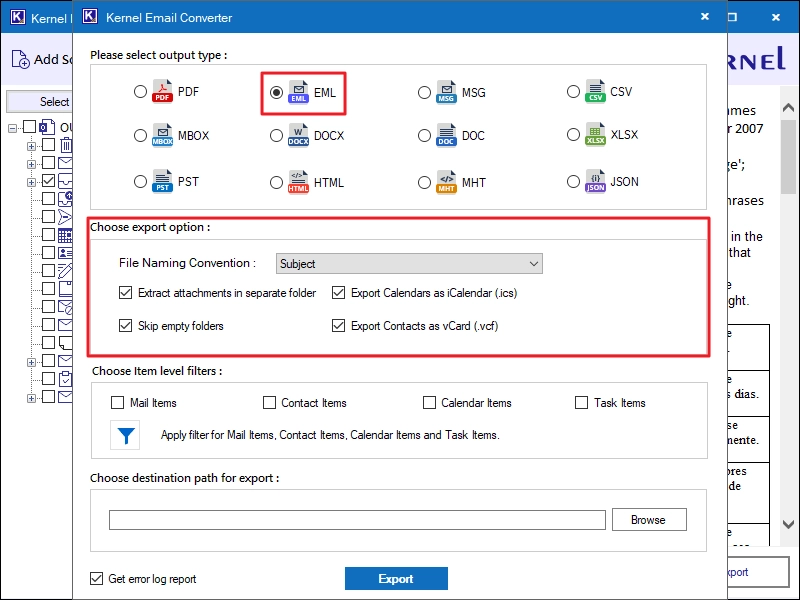
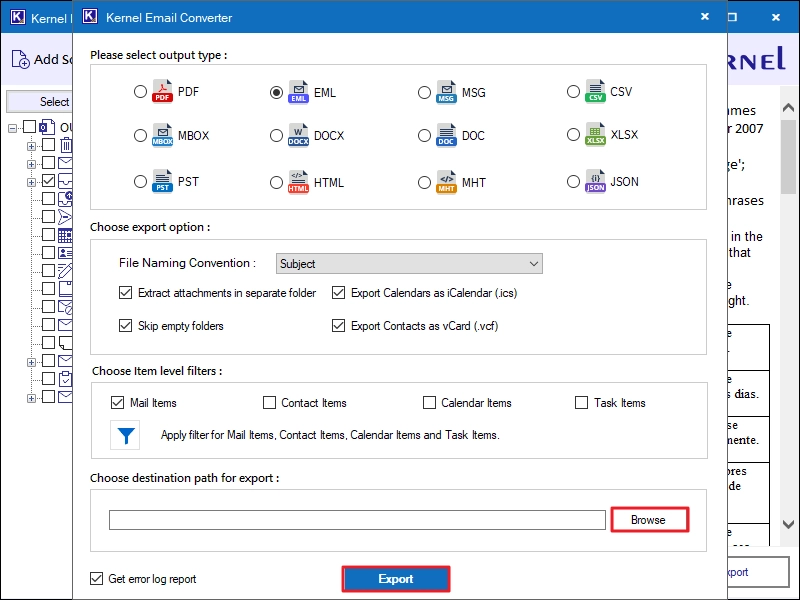
Step 2: Select the output file type and configure the other export settings
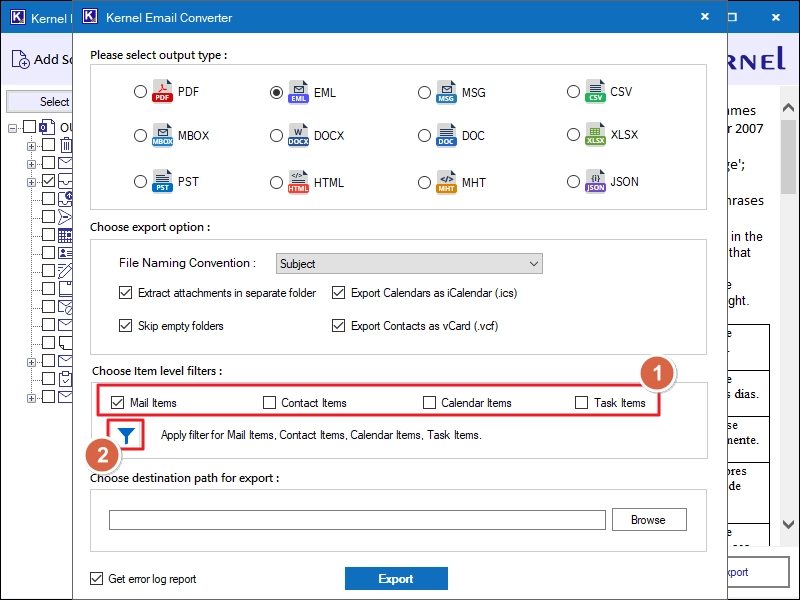
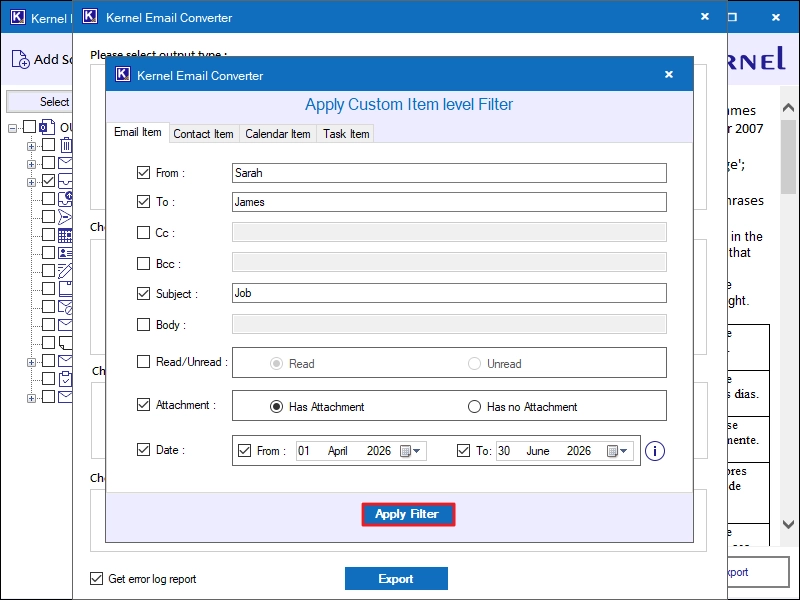
Step 3: Choose the filters as per need, then click on the filter icon to customize the filter parameters.
Step 4: Customize the filters as per requirements. Then, click on the Apply Filter button to save the filter rules.
Step 5: Click Browse and select the location where you want to save the emails after conversion. After that, click Export to start email conversion.
Step 6: Emails are converted successfully. Click the Open button to go to the folder where the emails are saved.