Read time 6 minutes
Microsoft 365 is a handy tool for emails and collaboration, but some users prefer using Outlook. The good news is you can connect your Microsoft 365 account to Outlook. This lets you access and manage your emails in the way that suits you best.
If you have Outlook 2016 or a newer version, it’s easy. They can automatically link up with your Microsoft 365 account. But for other versions of Outlook, you might need to do a little manual setup. Don’t worry; it’s not too complicated.
In this article, we’ll walk you through the steps to manually configure a Microsoft 365 account in Outlook. This way, you can handle your emails efficiently and even check them when you’re offline.
How to configure Microsoft 365 account in Outlook?
Here, we’ll guide you step by step into the process to manually configure Office 365 in Outlook. But, before moving ahead, make sure that you have the Outlook app installed on your system.
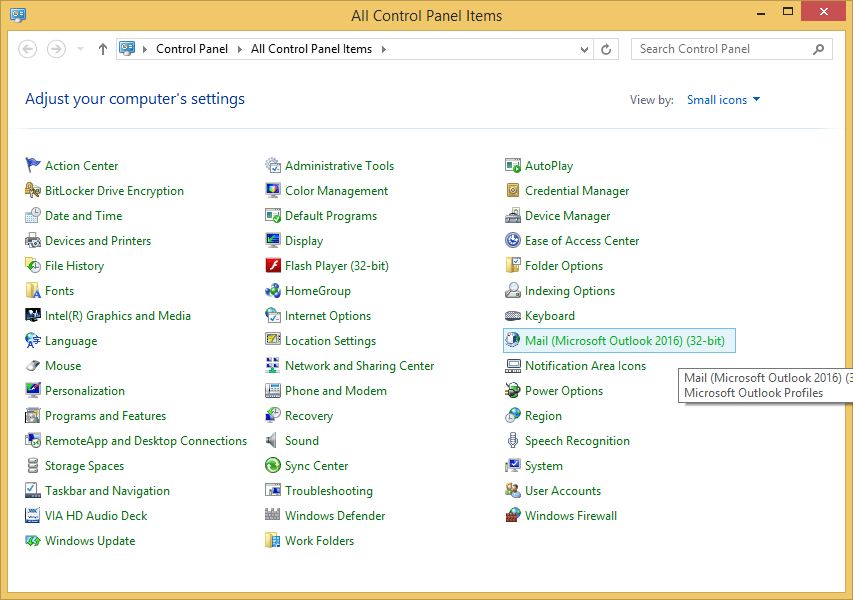
- The first thing you need to do is go to the “Control Panel” and select “Mail.”
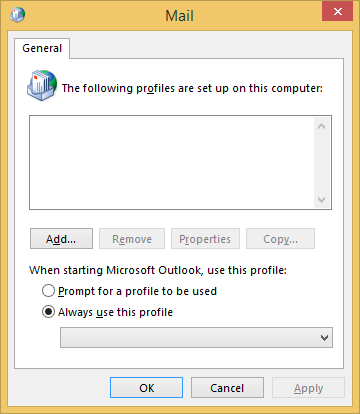
- A new window will appear on the screen; click “Add” to add a profile
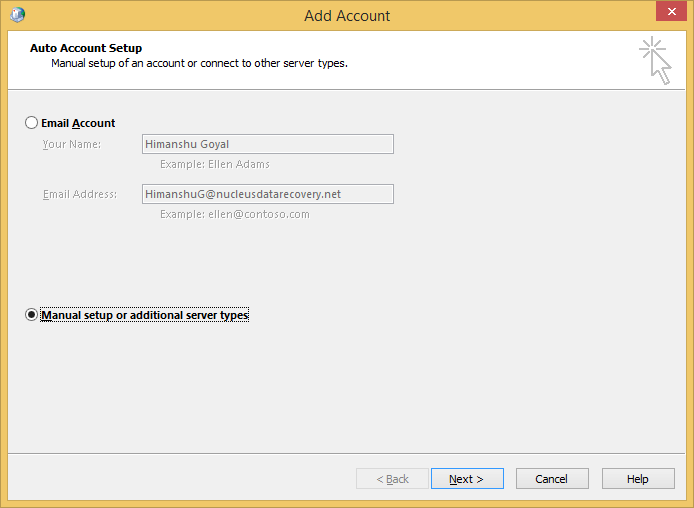
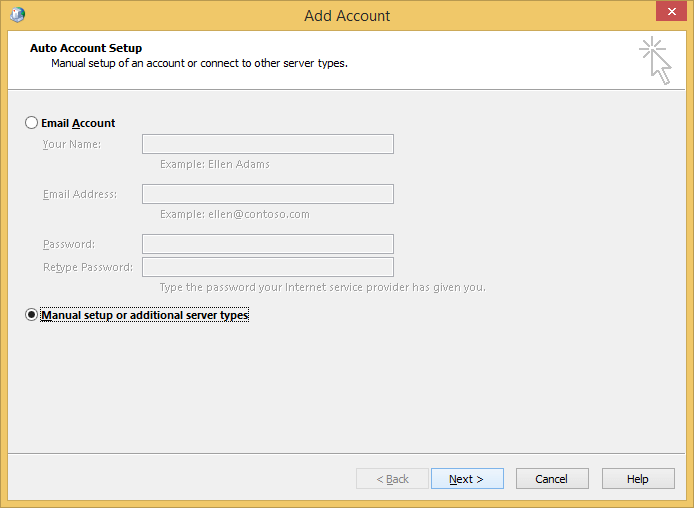
- Now, in the opened window, select “Manual setup” and click “Next.”
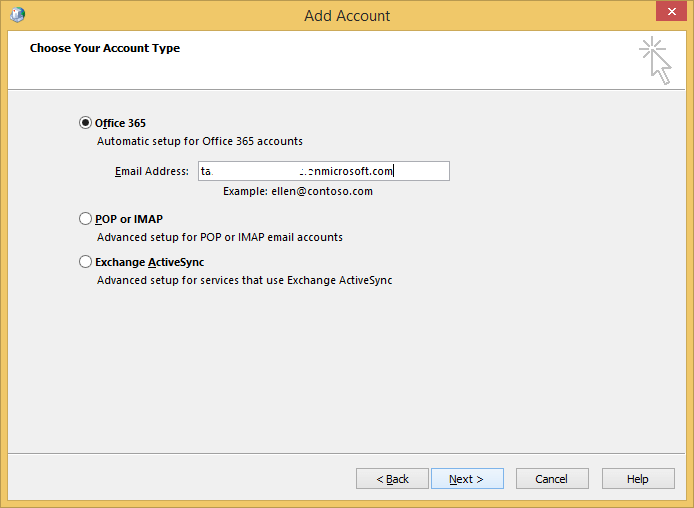
- In the next step, select “Office 365” and enter the details for your Microsoft 365 account and click “Next.”
- The process will take a few seconds to verify the Microsoft 365 account. Once it is verified, the Autodiscover.xml login window will appear on the screen. Enter the Microsoft 365 account credentials and click “Next.”

- When you’re done logging in with your Microsoft 365 account, a notification window will appear on the screen displaying:
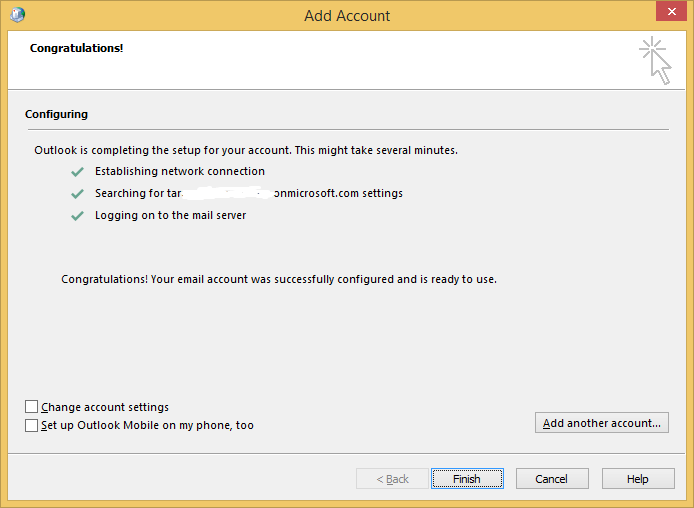
Now, open Outlook on your system. The Outlook app will take a few seconds to set up your Microsoft 365 account on it, and then you can check all your Microsoft 365 emails via Outlook.
Configure an additional account in MS Outlook
If all is done to configure Office 365 in Outlook, but you want to add another Microsoft 365 or any other POP/IMAP account to it, then follow the below steps:
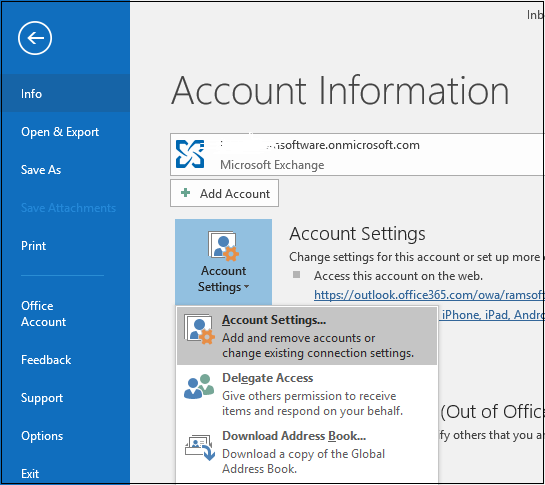
- Open Outlook and go to the “File” tab and select “Account Settings > Account Settings.”
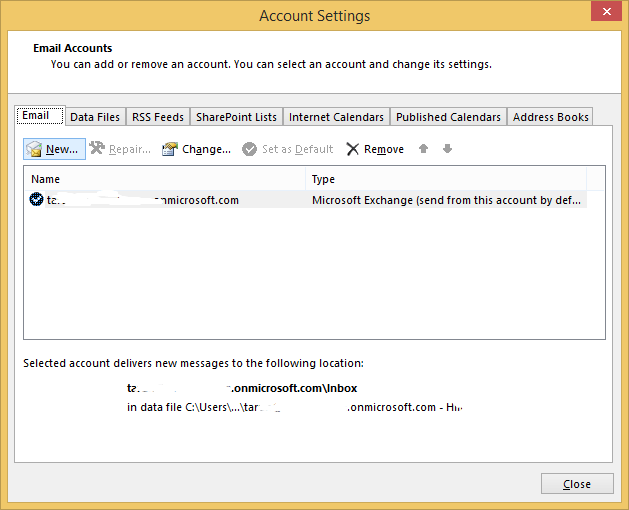
- A new wizard will appear on the screen. Click “New.”
- In the next step, select “Manual setup” and click “Next.”
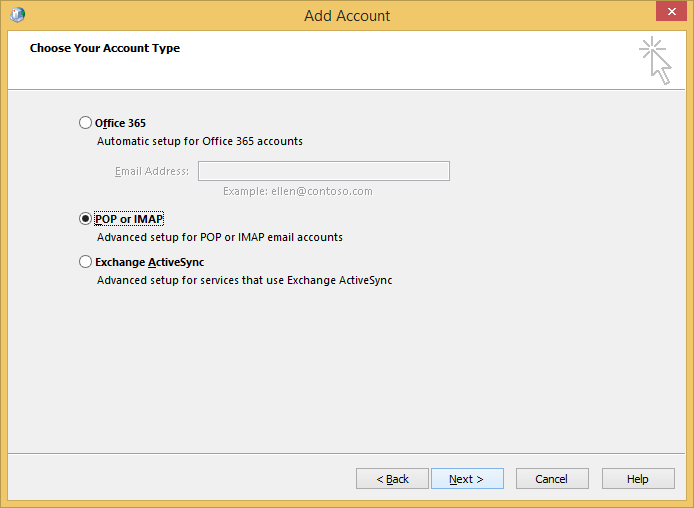
- From the opened wizard, select “POP or IMAP” and click “Next.”
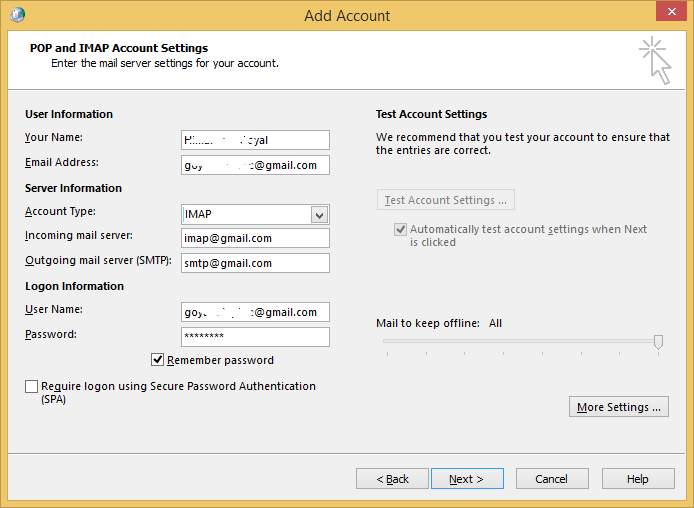
- Fill the required fields and go to “More Settings” to add the server details manually and click “Next.”
It will take a few seconds to set up the IMAP account (for example, Gmail) with Outlook. Once it is done, go to your Outlook, and you’ll find the Gmail mailbox in Outlook. All in all, this is everything you need to know about how to add Office 365 account to Outlook.
Why does Outlook not accept the password of your email account sometimes?
Occasionally, Outlook may not accept your email account’s password. This can happen when your email provider wants to ensure extra security for third-party apps like Outlook.
To resolve this, you’ll need to generate an application password separate from your usual login credentials. This special password is used exclusively for configuring your email account in Outlook.
For instance, if you have a Gmail account, follow these steps:
- Go to ‘My Account’ in Google Apps.
- Navigate to ‘Security.’
- Click on Sign-in to Google.
- Find ‘Password and Sign-in Method’ to create your application password.
With this application password, you can successfully set up your email account in Outlook and enjoy easy access.
Backup your mailboxes
Technology is not entirely immune to threats and risks. Even a tiny error can lead to a permanent situation of data loss. To avoid any situation of data loss, it is advisable to take proper backup of all your data using a reliable utility. Kernel Office 365 Backup is a well-designed software capable of taking multiple mailboxes and saving them in your desired output format. All the contents of the mailbox including emails, attachments, contacts, meetings, structure etc. are backed up accurately and safely within a few user-friendly steps. You can even export all your office 365 mailboxes to PST and other formats using a professional tool.
Conclusion
You can easily configure Office 365 in Outlook 2016 & more manually and even configure additional accounts. It helps in better management of all your work emails and a smoother communication. It is a simple process but needs to be followed with proper attention. The entire process is explained in detail in the article above. When you set up a Microsoft 365 account on your Outlook, you’ll get all the emails on your desktop. But, if you want to avoid any risks of data loss, take backup Microsoft 365 data, which can be done using Export Office 365 to PST tool.
FAQ
There are a few potential reasons why this could be happening. First, double-check that you’re using the correct login credentials. If those are correct, it’s possible that your OST files have been damaged or synchronized incorrectly.
First, Open Outlook and choose “Next” when the wizard appears.
From there, select “Next” again on the E-mail Accounts page, followed by “Add Account.”
On the Auto Account Setup page, enter your name, email address, and password before selecting “Next” once more.
The final step is to select Finish.
Your Office 365 email account is automatically set up and ready for use.
The Office 365 SMTP settings include:
- Server name: smtp.office365.com
- Port: 587
- Encryption method: SSL/TLS
- SMTP authentication
- Authentication Password