Read time: 10 minutes
Spam emails are junk messages received by users in their mailbox with or without their permission. Some users receive them frequently in huge volumes since they configure a Microsoft 365 account in Outlook and others. Sometimes, these spam messages also bring viruses, malware, and other threats along with them, creating havoc on the entire system and its applications. Overall, spam messages only create trouble for all. All users try to keep all such emails out of their mailbox and protect all their data.
Spam protection in Office 365
If you are using Microsoft 365, it can provide advanced protection to your mailbox restricting entry of all kinds of spam mails. It utilizes Exchange Online Protection (EOP) to do so. In addition, users can also enable message tracing in Exchange Online. Coming back to EOP, it is a cloud-based utility that filters email messages and further keeps all the spam, risks, threats, and malware at a far distance from your mailbox. The configuration of these filters is a lengthy and slightly complex process and therefore needs careful understanding as well as execution. This article provides all the details of Office 365 spam filters, how to identify spam, configure Office 365 spam filters, and how to remove anti-spam policies.
Techniques to identify spam on EOP
EOP functions on some proprietary spam filtering technologies, which are developed based on already known spam, threats, and user feedback. These techniques are as follows:
- Connection filtering
This filter quickly identifies good and bad incoming email messages by making use of the IP blocklist. It further allows or blocks messages from those sources. - Content filtering
The Content filter classifies messages into – High confidence spam, Bulk email, Phishing email, and High confidence phishing email. Depending on this classification, the email is deleted, rejected, or sent to the Quarantine mailbox. - Outbound spam filtering
It is equally necessary that your users are not the ones sending spam, either unintentionally or intentionally. Office 365 spam filter keeps a close tab on that aspect. - Spoof intelligence
Certain spam emails are carried out by pretending to be part of your organization. This is a classic case of spoofing. There are anti-spoofing practices that are conducted like email authentication, spoof intelligence, insight, block list, spoof detection reports, and anti-phishing policies.
How to configure anti-spam policies?
Before getting to the policies, you need to know about two elements which each policy contains:
- Spam filter policy: States the actions as well as notifications for spam filtering categories.
- Spam filter rule: States the priority and the recipient of the spam filter policy.
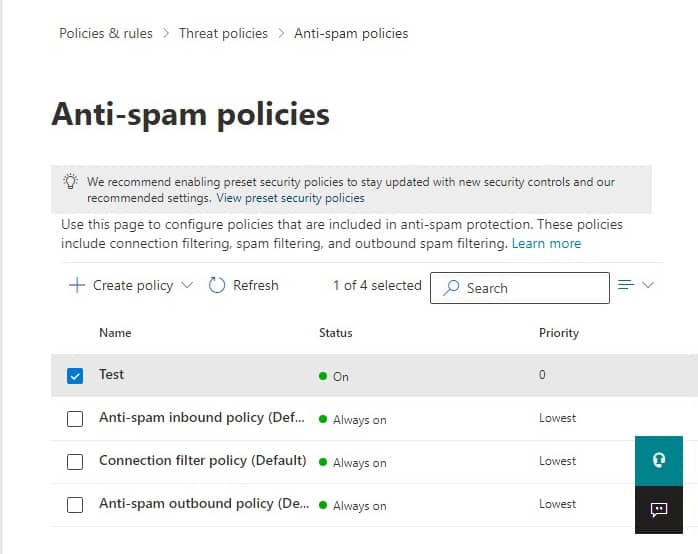
The EOP in Office 365 safeguards users against all kinds of spam messages by creating these anti-spam policies-
- Inbound anti-spam policy
- Outbound anti-spam policy
- Connection filtering
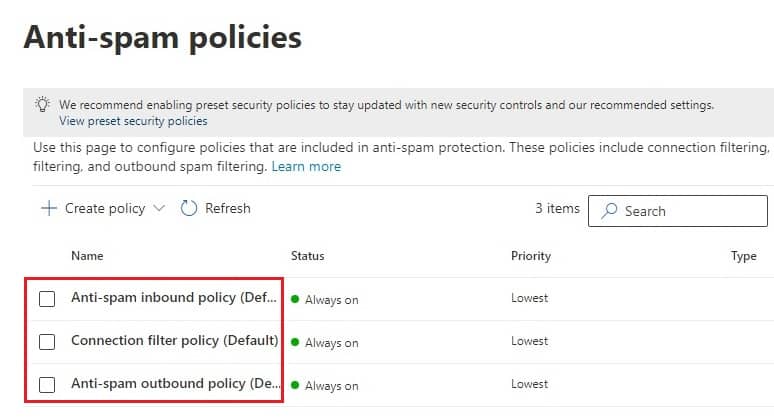
These policies are set in their Default mode but can be customized to make them stricter and more effective according to your organization’s preference and can also be made for a specific group, users, or domains. Let us understand how to configure and modify them.
Configure inbound anti-spam policy
To configure inbound anti-spam policy, follow the below-mentioned steps properly:
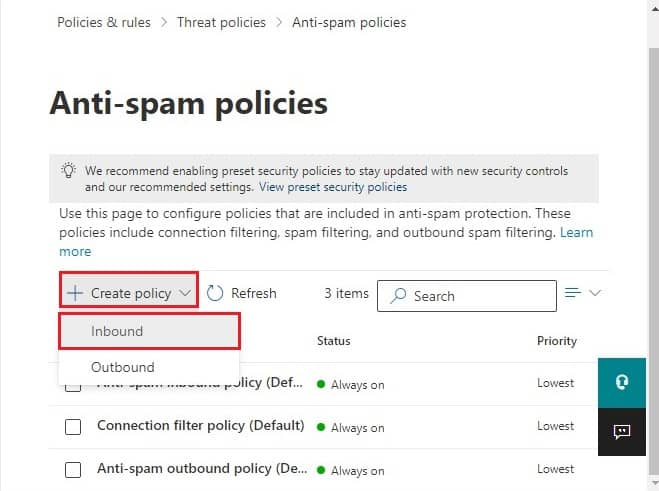
- Visit the Anti-spam policies page by clicking on his link–
https://security.microsoft.com/antispam - Click on + Create Policy. A dropdown menu will open and select Inbound. Now, this will require you to add information on various pages as you proceed ahead.
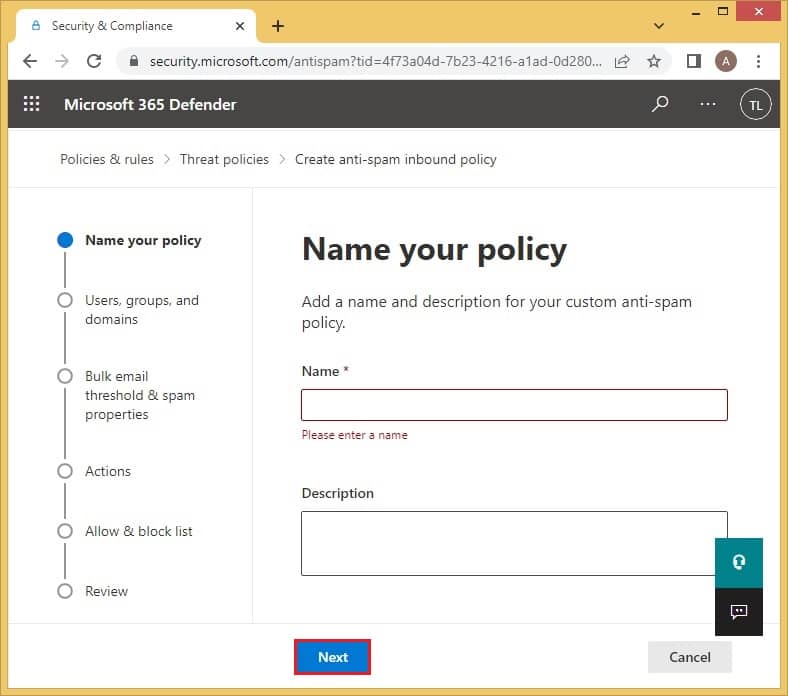
- In the Name your policy section, you need to enter a suitable title and an optional description. Click on Next.
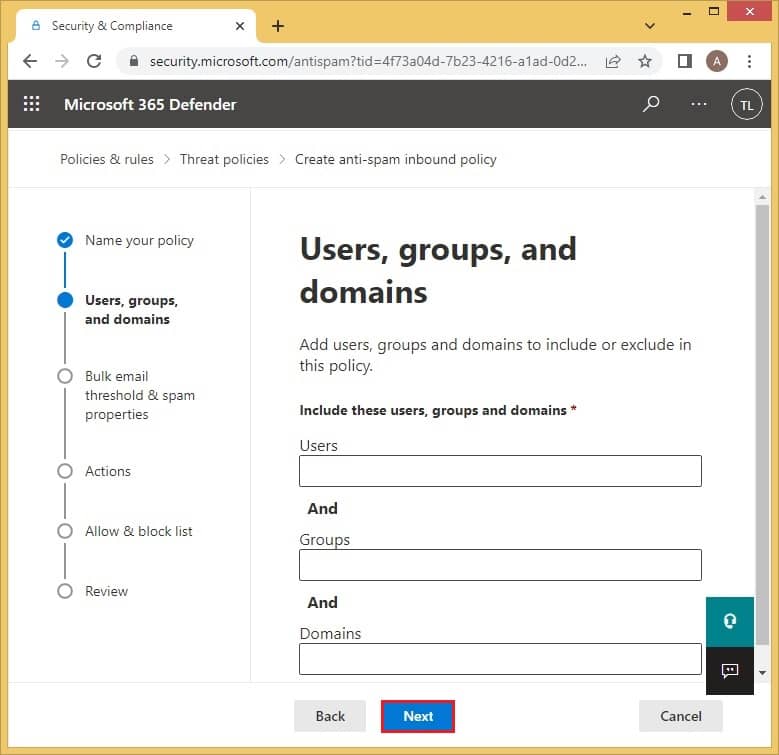
- This is the Users, groups, and domains page where you need to add which ones to include or exclude. Select Next to continue.
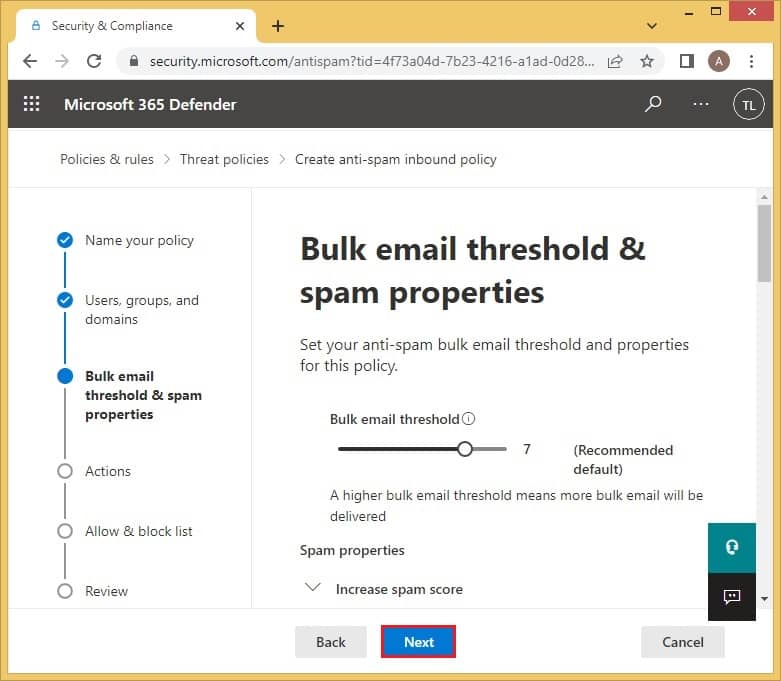
- The Bulk email threshold & spam properties will allow you to set up the amount of Bulk email threshold. In addition, you can scroll down to adjust other spam and test mode properties.
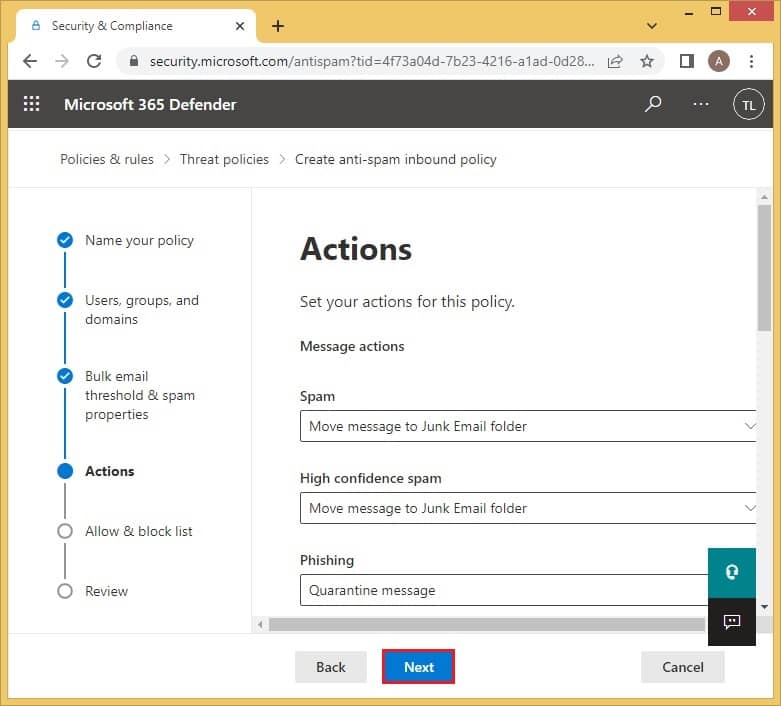
- The Actions page is where you will decide what happens with all the junk messages. The default settings send spam and bulk to the junk email folder; also, it will send high confidence spam, phishing, and high confidence phishing emails to the quarantine mailbox. The retention period for spam is 15 days. All these default settings can be adjusted as per your requirements.
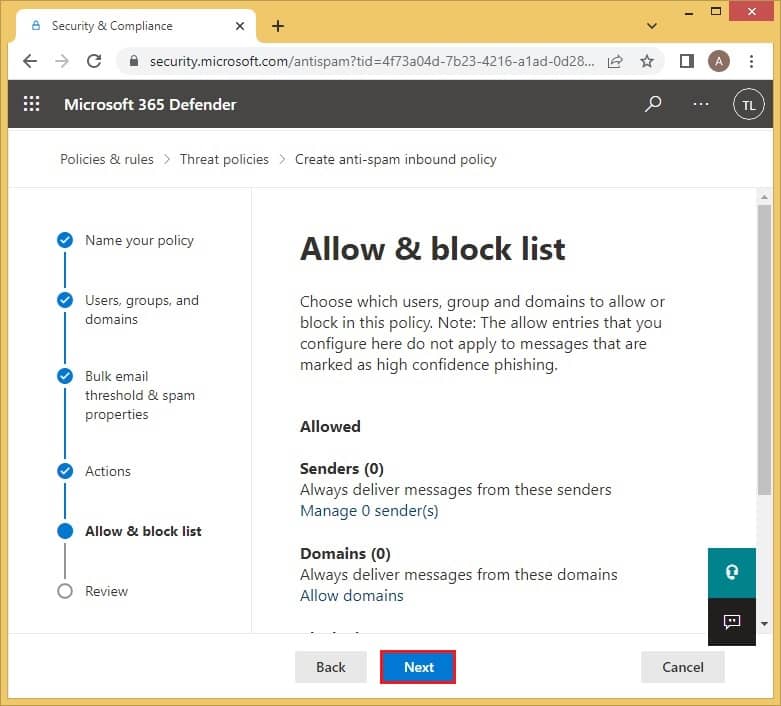
- In the Allow and Block list, you will be able to specify all the allowed and blocked senders and domains by just clicking on the given options. Click on Next to proceed.
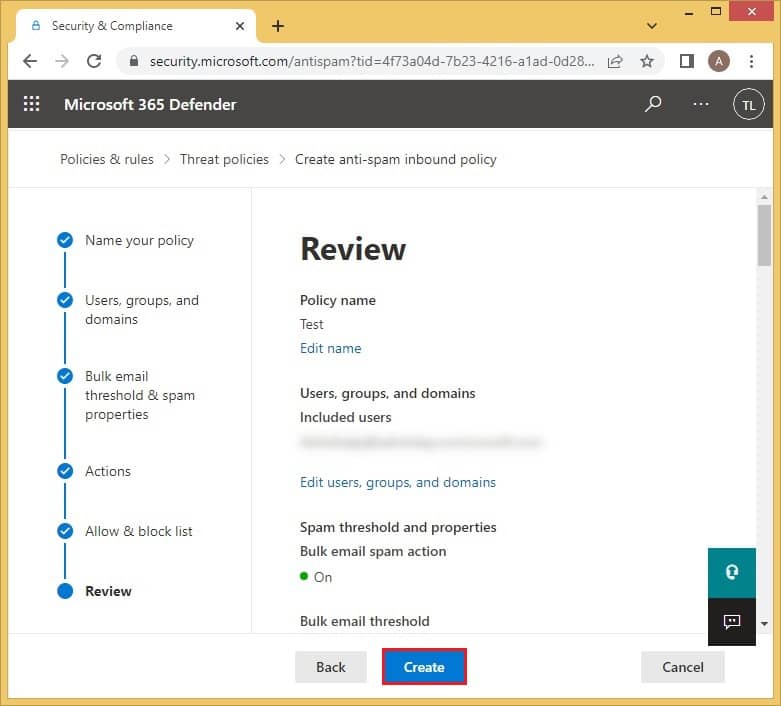
- The Review page is the summary of all the settings you have applied. You can choose to either Edit or Create them.
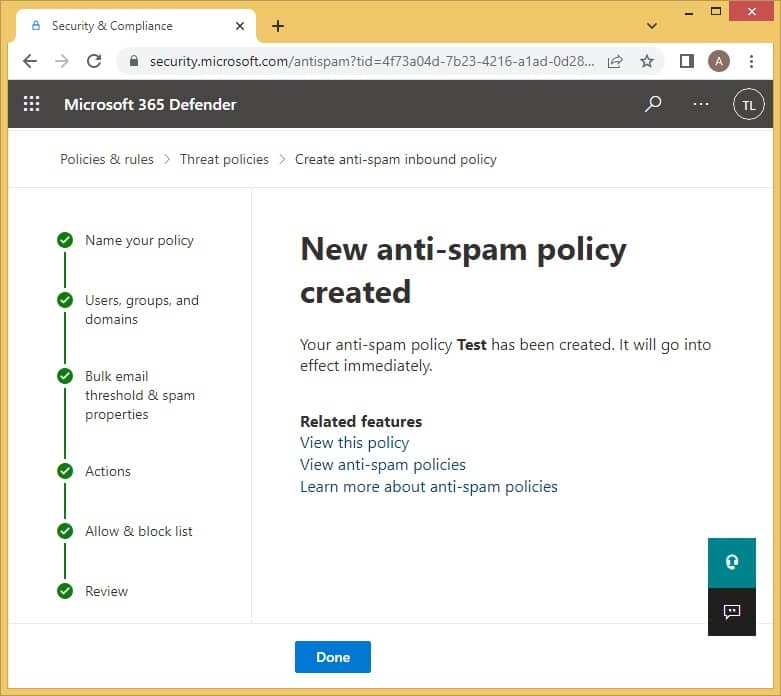
- After all the steps have been completed properly, a confirmation message will appear. Click on Done to conclude.
Configure outbound anti-spam policy
Here’s how to configure outbound anti-spam policy with proper step-by-step instructions:
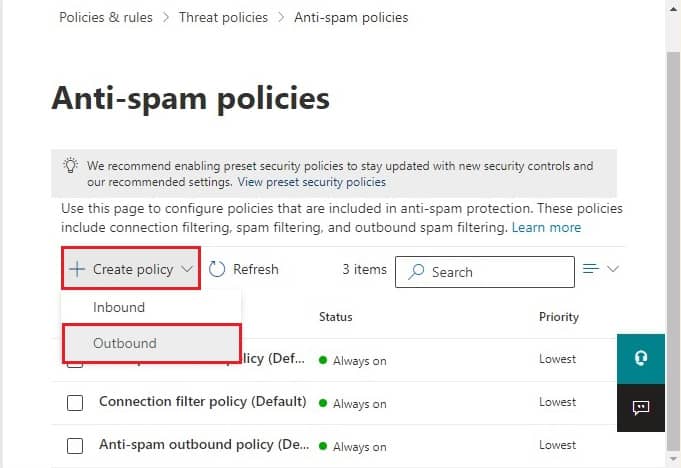
- Again, click on the given link to open the Anti-spam policies page.
https://security.microsoft.com/antispam - Click on + Create Policy. But this time, select Outbound.
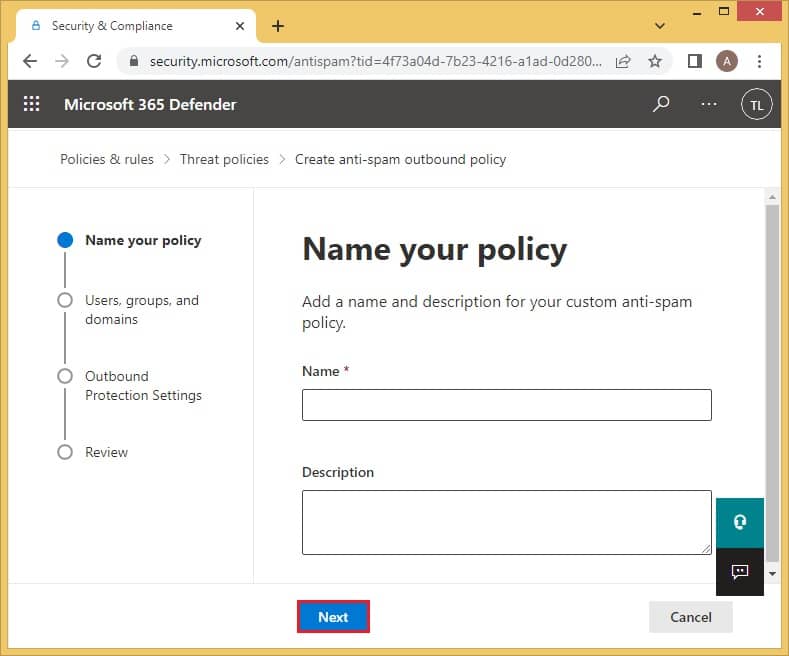
- On the Name your policy page, enter the name and description of the policy. Click on Next once done.
- On the Users, groups, and domains page, you can add all those to which this policy will be applicable.

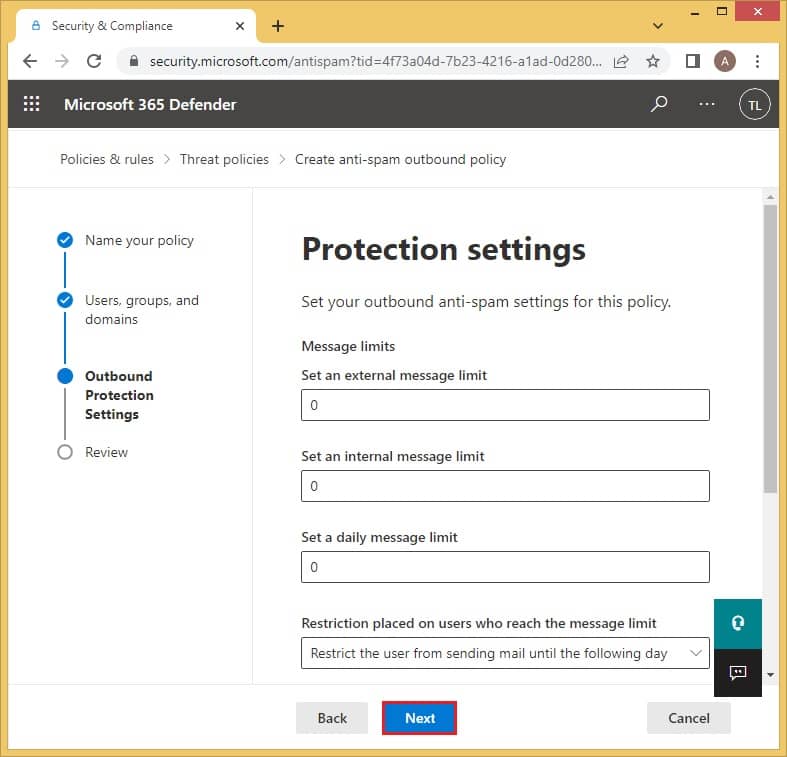
- The Protection settings page is where you can set up the limit of external, internal, and daily messages. Click on Next to proceed.
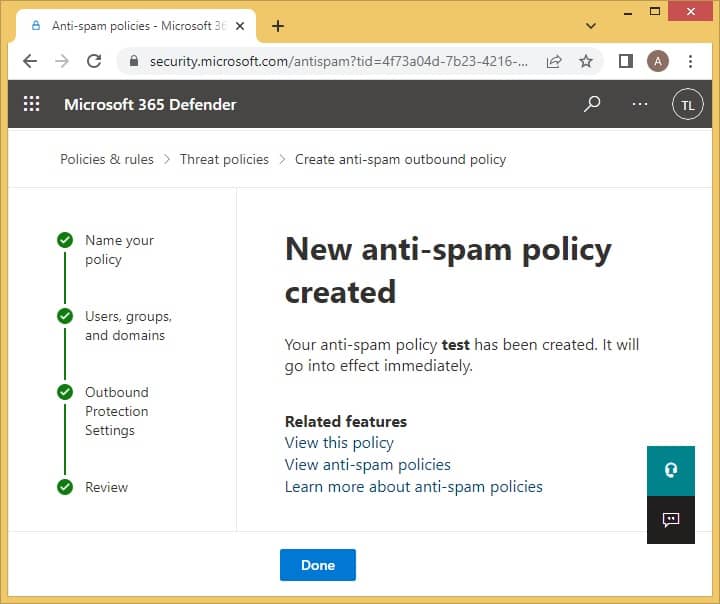
- The Review page will enable you to check all the applied policy details. You can either Edit or Create this new outbound policy.

- A message will appear to confirm the effect of the new policy immediately. Select Done.
Modify Connection filter policy
We have provided a detailed stepwise guide to modify the connection filter policy. Follow it properly to get an accurate outcome:
- Move to the Anti-spam policies page by clicking on the link. This time click on the Connection filter policy (Default).
https://security.microsoft.com/antispam - A new tab will appear. Click on Edit description to add a description for the policy.
- Mention the required description and select Save.
- Click on the Edit connection filter policy to customize the allowance and blockage of IP addresses.
- You can add a single IP or a range of IP addresses to the Allow or Block list. You can also choose to turn on the safe list. In the end, click Save, and the modifications will be saved.
Remove the applied anti-spam policies
In a situation where you want to delete a certain policy, you can easily do so by following the mentioned steps-
- Open the Anti-spam policies page with this link –
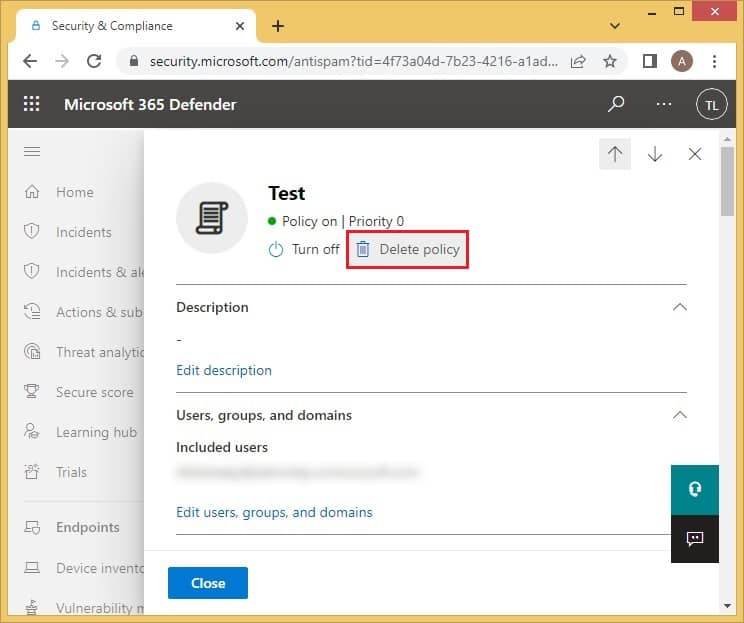
https://security.microsoft.com/antispam - Click on the applied anti-spam policy which you want to remove.
- Now, simply select Delete policy and close this window.
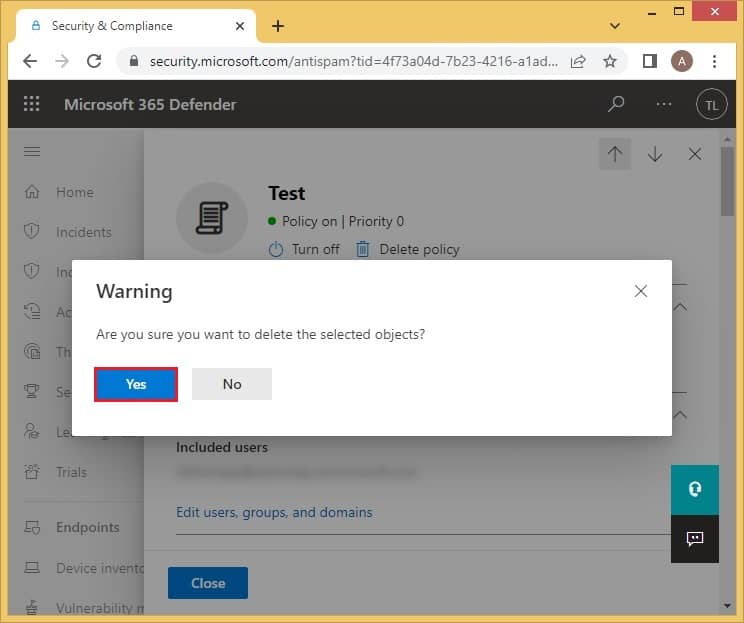
- When the warning message appears, click on Yes, and it will be deleted.
Why should we take a backup of Office 365 data?
Spam messages are the largest carriers of viruses and other risks. They can disrupt all your organization’s important data within a span of a few seconds. To protect data protected from any such loss, you need to take its backup at regular intervals. Since it must be confidential in nature, the reliability and security of the software you pick must be your top priority. Make sure you go with software that offers protection from Email spoofing Office 365 by saving important emails and leaving unwanted ones.
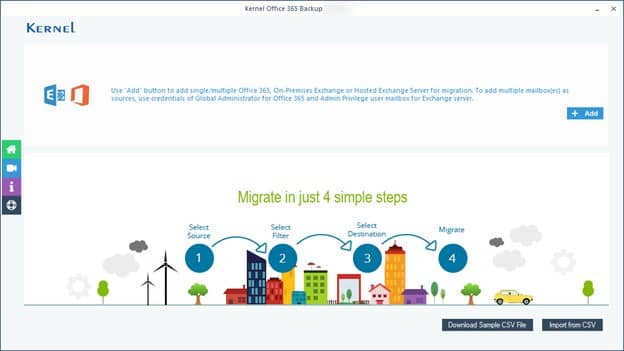
Kernel Export Office 365 to PST is a professional utility designed with advanced algorithms which takes the backup of all Office 365 mailboxes and then saves it in the desired location. It maintains the entire structure of the data. The users can also save selective data only by applying filters like Folder, Date, Item type, etc. The backing up process for Office 365 data is simple and can be handled by any user, including beginners.
Conclusion
Spam email count has recently increased due to aggressive advertising campaigns and the social media engagement of users. Microsoft 365 use Spam intelligence and Connection, Content, and Outbound spam filtering technologies to identify all such email spoofing Office 365 messages. In addition, to keep the data safe from threats that come along with spam messages, users can take backup using a professional utility, Kernel Export Office 365 to PST as discussed above.