Read time 9 minutes
Microsoft 365 is every professional’s go-to data management platform since it offers many advanced features, which allow them to enhance teamwork, collaboration, and innovation among each other. It is integrated with a suite of handy applications like SharePoint, Excel, Teams, etc. that plays a role in improving individual and organizational productivity. A Shared Mailbox is one such facility especially for a team who is working together to manage and communicate with a large customer base.
Microsoft 365 administrators can convert a regular mailbox to a shared mailbox and the other way around so that more users can access it. Here, we will be discussing all about the conversion of a user mailbox to a shared one and the reverse process as well.
Difference between a user mailbox and shared mailbox
User mailbox is a regular mailbox within an email account allotted to individual users. Users access it for conducting personal communication by sending and receiving email messages, scheduling meetings, and appointments.
A shared mailbox is used by multiple users within an organization. With shared mailbox, multiple people can access and collaborate a shared email account. It is usually created to share files, discuss, and communicate with the fellow members working in a team. Unlike user mailboxes, shared mailboxes and their contents can be accessed by many for email communication and don’t require a license in normal situations. That makes communication easier by sending them from a common email address.
Why do we convert a user mailbox to a shared mailbox?
The need for the conversion of a user mailbox to a shared mailbox arises in different situations:
- For sharing information: When the workload increases, multiple users have to work on the same task or project, previously done by another user. So, one naturally will have to share the previous data with all the relevant and authorized users. An easy way to do this is to convert their mailbox into a shared one.
- For backing up user data: After an employee exits, it may be essential to share his work and related data with multiple fellow users. This can be done by converting it to a shared mailbox that is accessible to the users concerned. Any important information about the previous employee will stay as it is in the Shared mailbox for any use in the future. Another advantage is that the user license can be removed from the mailbox after conversion.
- Better time management: Since all the team members have access to each other’s calendar entries, it becomes easier to schedule meetings and events according to everybody’s availability. No time is wasted in inquiring about available time slots and then arranging the meeting calls.
- Wrong migration: If you have mistakenly migrated shared mailbox data to a user mailbox, you can convert the user mailbox to a shared mailbox.
- Reduction in response time: Generally, a shared mailbox is preferred by a customer support team. Since many users provide support for a single client, the response time gets reduced which further makes for a satisfactory experience for them.
Conversion of a user mailbox to a shared mailbox
Converting a user mailbox to a shared mailbox does not create an empty mailbox, but the added users from existing contacts and emails will be in the shared mailbox. The members can access the contents rather than just the owner. Later, you can convert the shared mailbox to user mailbox also.
Important points to remember
- Only a licensed account user mailbox can be converted to a shared mailbox, otherwise the option for conversion will not be activated. If the user has removed the license from account, then it must be restored before creating a shared mailbox.
- A shared mailbox without a license gets a storage space up to 50 GB. To increase the storage quota to 100GB, you need to have a valid license. Otherwise, you will have to remove all the large sized attachments and messages.
- There is no need to set a new password. If you don’t reset it, the same username and password will be used in the Shared mailbox even after the conversion.
- The inbox rules which have been applied to the original mailbox remain as it is.
- Shared mailbox does not appear on mobile devices since their support is limited.
- Do not delete the old account as it is required to anchor the shared mailbox.
Note: The user mailbox you need to convert to a shared mailbox must be assigned a license (without a license, the option for conversion will not be available). After the conversion, you can remove the license as you don’t need a license for a shared mailbox if it holds data up to 50 GB only. To store more than 50 GB of data, you must have a license assigned to the mailbox.
Rules remain as they are even after the mailbox is converted to a shared mailbox.
Steps to convert regular mailbox to shared mailbox
Shared mailboxes help in conducting clear communication while working with team on the same project where communication to the external party is performed via a common email address and employees need to collaborate to carry on the work smoothly.
To convert a regular mailbox to a shared mailbox, follow the given simple steps:
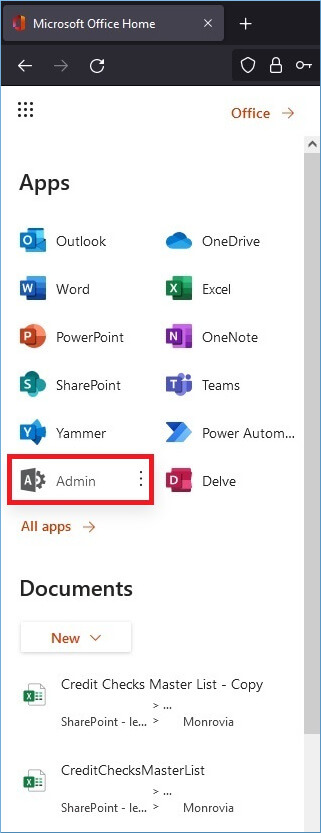
- Login to Microsoft 365 and click on Admin option.
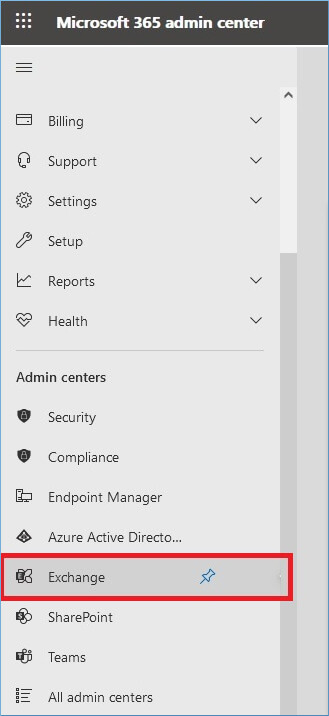
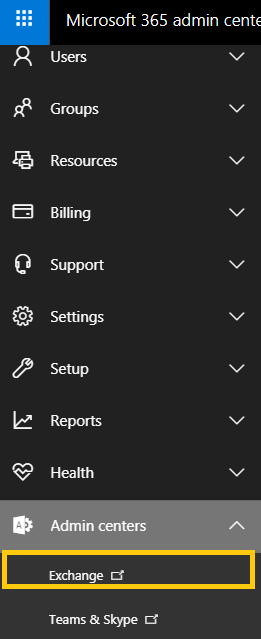
- In the Admin Centers list, choose Exchange option.
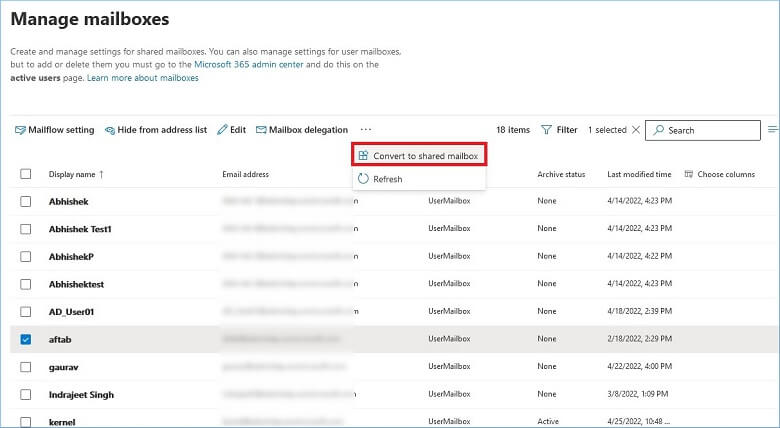
- Choose the mailbox whom you want to change to a shared mailbox. Click on more option and select ‘convert to shared mailbox.’
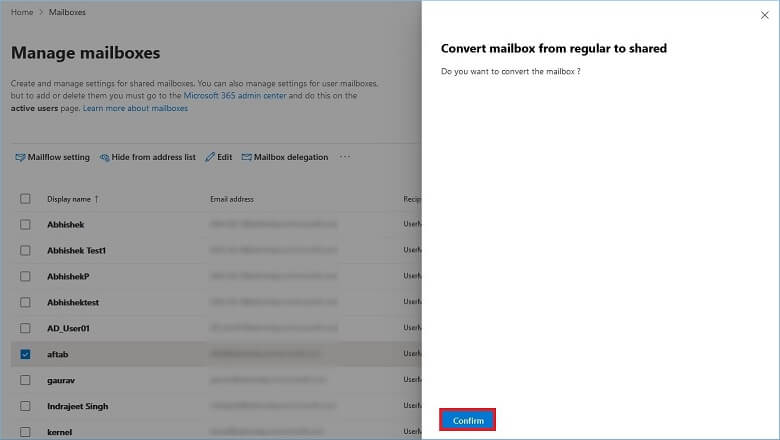
- The wizard will ask you to confirm that if you want to share regular mailbox to shared one. Click on Confirm.
How to convert a regular mailbox to a shared mailbox using PowerShell?
To convert a user mailbox to shared mailbox, users must connect to the Exchange Online PowerShell first using the following procedure.
- Run the Windows PowerShell as an administrator.
- Execute this command.
$UserCredential = Get-Credential
A dialogue box asking to enter Microsoft 365 account credentials will open. Provide the global administrator credentials and click on OK.
- Next, execute the command as follows.
$Session = New-PSSession -ConfigurationName Microsoft.Exchange -ConnectionUri https://outlook.office365.com/powershell-liveid/ -Credential $UserCredential -Authentication Basic -AllowRedirection
Wait for the connection to be established.
- Now, run the final command as follows.
Import-PSSession $Session -DisableNameChecking
- Now, you are connected to the Exchange Online PowerShell.
- Microsoft 365 users can use the below command syntax to convert a regular user mailbox to a shared one through Exchange Online PowerShell.
Set-Mailbox -Identity <user mailbox name@domainname> -Type:Shared
Note: Users must be member of the Recipient Management or Organization Management Role group to run the above command.
We will now move on to see how a shared mailbox can be converted to a regular mailbox in Microsoft 365.
Steps to convert a shared mailbox back to a regular mailbox
Once the purpose of the Shared mailbox is achieved, the admin can convert all those mailboxes to regular ones. It will ensure the privacy of work, contacts, and calendar of an individual by not sharing those details with other employees.
It takes a few minutes for the user’s account to set up properly. Once they sign into their mailbox, the previous calendar entries and emails from the shared mailbox will continue to reflect here.
One can convert a shared mailbox to a regular mailbox easily by following the steps:
- Log in to your Office 365 account as an administrator. Navigate to Microsoft 365 Admin Center and select Exchange.
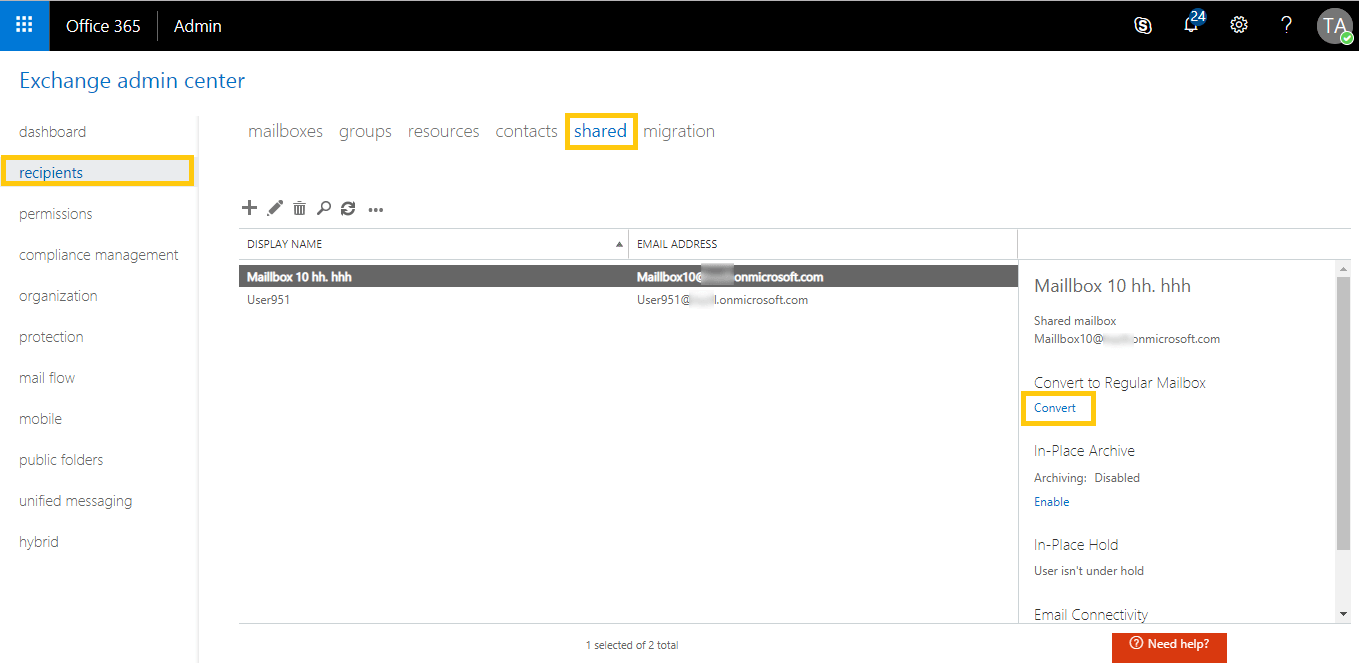
- Go to Recipients>>Shared. Select the shared mailbox and then click Convert under Convert to regular mailbox.
- A warning message will pop up, asking for confirmation. Click Yes to continue.
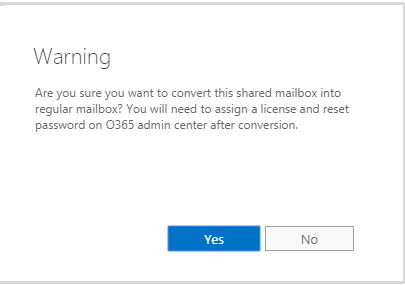
Note: You need to assign a license and reset the password for the mailbox after conversion.
- The conversion will take a little time. After that, a completion message is displayed. Once completed, click Close to exit.

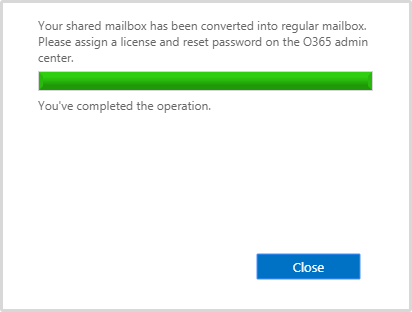
- When you sign in to Microsoft 365 again, you can find that this shared mailbox has been converted to a regular mailbox. The converted mailbox contains all the data of the shared mailbox.
Note: The Exchange Online PowerShell command syntax to convert a shared user mailbox to a regular mailbox is.
Set-Mailbox -Identity <user mailbox name@domainname> -Type:Regular
Conclusion
Shared mailboxes are useful while working on group projects where communication and collaboration among the team are essential. While regular mailboxes come in handy in an individual’s communication process. We have discussed how to convert user and shared mailboxes and conversely To tackle challenges in the conversion, we have an automatic solution to backup Office 365 mailboxes to PST. Kernel Export Office 365 to PST software allows its users to backup Microsoft 365 mailboxes (shared, archive, & regular) to Outlook PST file.