Read time: 7 minutes
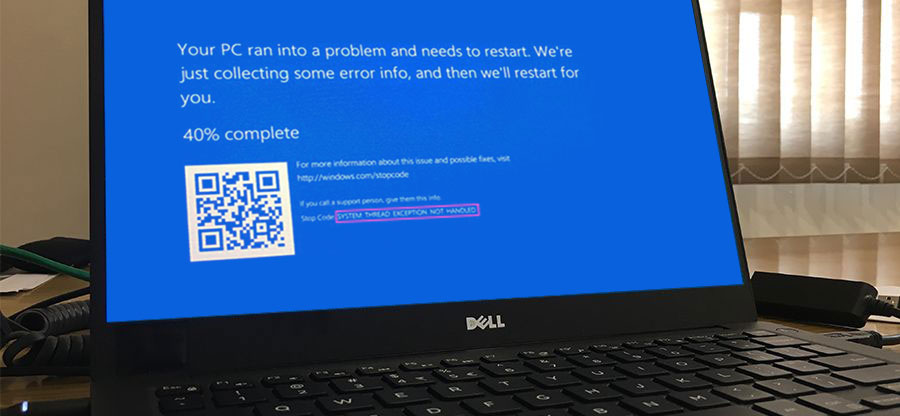
On starting your Windows10, you might come across an unwanted blue screen along with the line, “System Thread Exception Not Handled.” This is a common error that either occurs on starting the system or while rebooting.
In this blog, we shall discuss some troubleshooting methods to fix this common Windows error.
Reasons for the “system exception” error
Before starting with the solutions, let us understand some of the reasons for this error.
- The driver is not compatible with the Windows version
- Driver malware issues
- Outdated or incompatible driver
- System memory issues
Fix “system thread exception not handled”
There are different manual ways in which you can fix this error easily.
Method 1: Boot in Safe Mode
This is ideally the initial hit and trial method to fix the issue. You can boot the PC in Safe mode in different ways depending on whether you can sign in to your system or not.
- Boot into Safe Mode from Settings
- Go to Settings from the Start button.

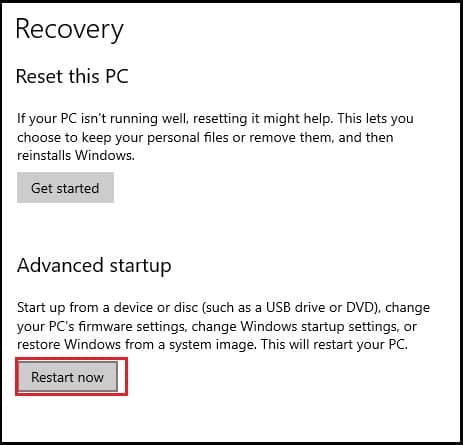
- Select Update & Security; click on Recovery.
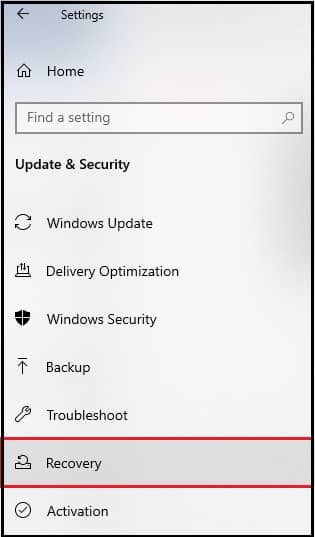
- Under Advanced startup, select Restart now.
- The Choose an option screen will appear. Select Troubleshoot>Advanced options>Startup Settings. Click on Restart.
- Once the system reboots, press F5 to boot the system in Safe Mode with Networking.
- Go to Settings from the Start button.
- Boot into Safe Mode with Restart
- Hold the shift key and power button. Then select Restart.
- Once your PC restarts, the Choose an option screen will appear.
- Select Troubleshoot>Advanced options>Startup Settings. Click on Restart.
- Once the system reboots, press F5 to boot the system in Safe Mode with Networking.
- Boot into Safe Mode without Sign-in
- Hold the power button for some time (10 seconds) to switch the PC off.
- Press the power button again.
- Once the system starts, there will be a manufacturer’s logo; press the power button again for 10 seconds.
- Start the system from the power button.
- If this is done correctly, the system will boot into Windows Recovery Entertainment.
- The Choose an option screen will appear.
- Select Troubleshoot>Advanced options>Startup Settings. Click on Restart.
- Once the system reboots, press F5 to boot the system in Safe Mode with Networking.
Method 2: Update or Roll Back Drivers
- Update Drivers
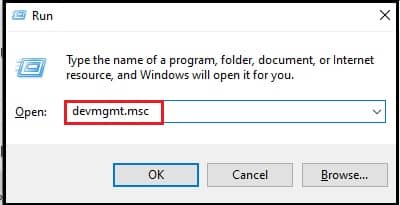
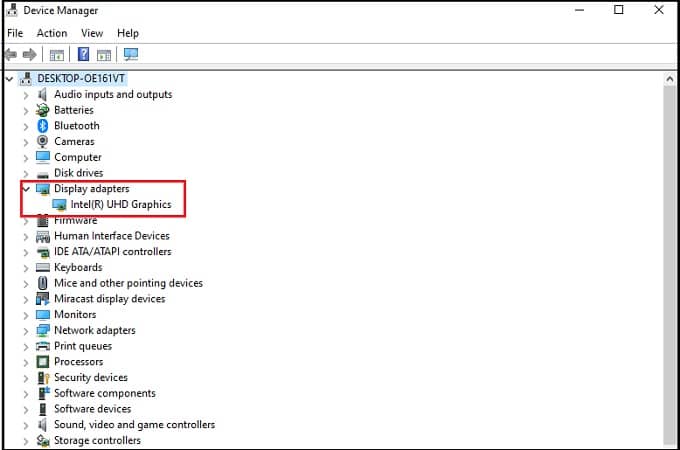
- Click Windows key + R and type devmgmt.msc. Hit Enter.
- Expand Display adapters.
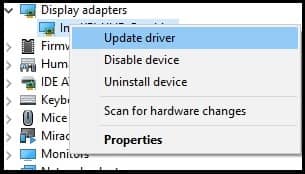
- Right-click on the installed driver and click on Update driver.
- Click on the automatic drive searching option.
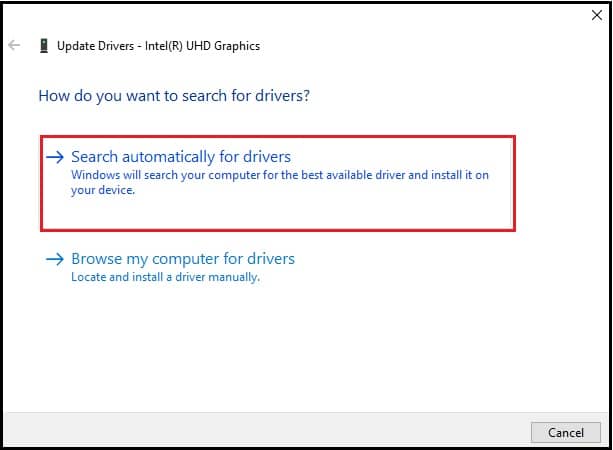
- It will search for the latest drivers to install them if not installed.
- Click Windows key + R and type devmgmt.msc. Hit Enter.
- Roll Back Drivers
- On Device Manager, right-click on the driver and select Properties.
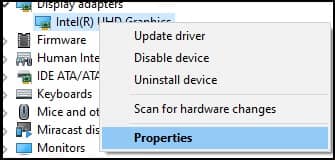
- Under the Driver tab, select Roll Back Driver.
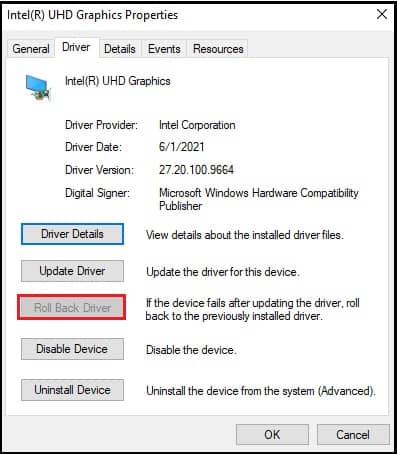
- The windows will roll back to the earlier driver version.
- On Device Manager, right-click on the driver and select Properties.
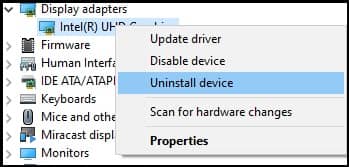
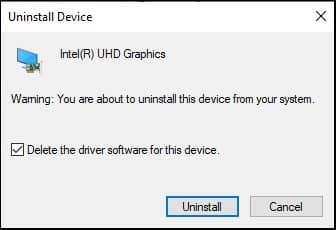
- Uninstall Drivers
- On Device Manager, expand Display Adapters.
- Select Uninstall device from the right-click menu.
- Check Delete the driver software for this device and then click on Uninstall.
Method 3: DISM and SFC to fix the Windows error
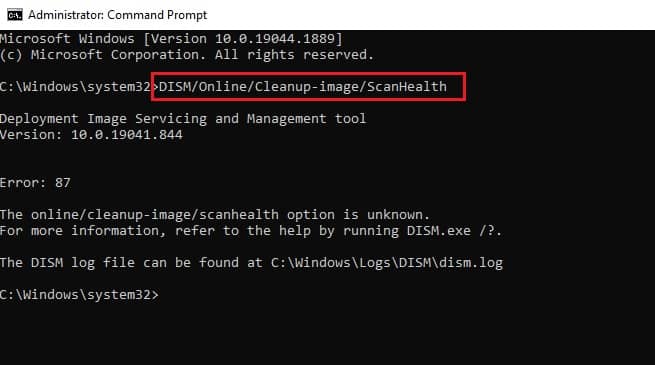
- How to run DISM
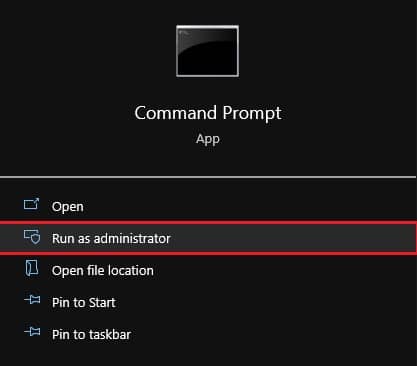
- Open Command Prompt as Administrator
- Type DISM/Online/Cleanup-image/ScanHealth; press Enter.
- Once the scanning is over by the Windows, type DISM/Online/Cleanup-image/RestoreHealth.
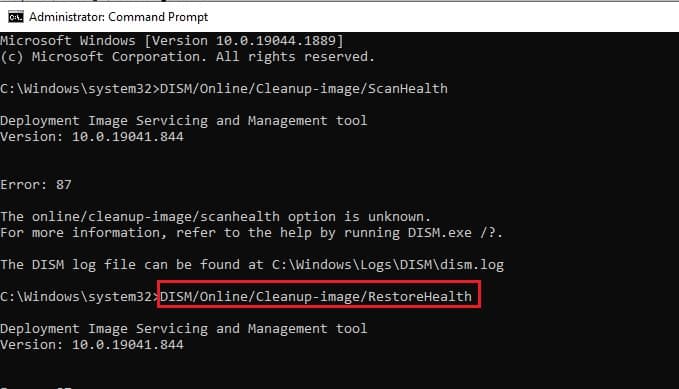
- Windows will fix all the issues while scanning.
- Open Command Prompt as Administrator
- How to run SFC
- Use Command Prompt as an administrator.
- Enter sfc/scannow.
- This will take time, while Windows will repair all the corrupt files.
Method 4: Use System Restore
The Windows System Restore feature can be helpful in fixing many issues.
- In Control Panel search for Recovery.
- Click Open System Restore.
- Select a restore point. Click on Next.
- Click on Finish.
Method 5: Find the Defective Driver
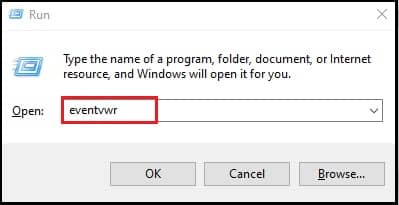
- Press Windows key + R and type eventvwr.
- Select the Windows Logs menu, expand it and select Settings.
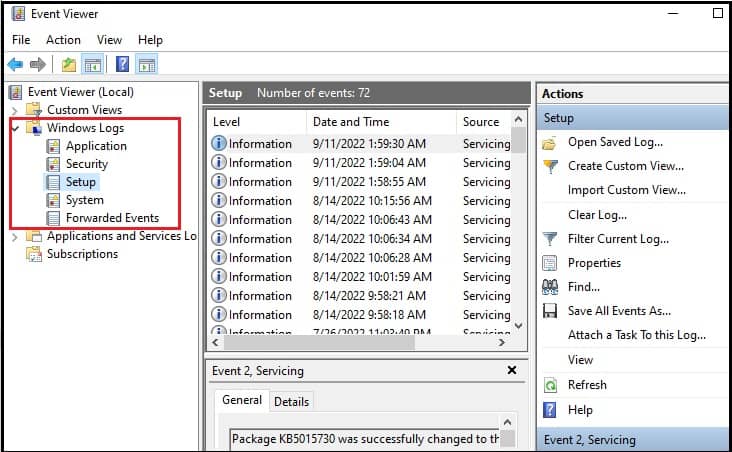
- Search for the thread, system_Thread_exception_not_handled. Click on the issue to find out the faulty driver.
Method 6: Rename the defected driver
- Open File Explorer and select C drive.
- Search for the faulty driver.
- Press F2.
- Replace the filename with .old.
- Press Enter and restart the system.
Summary
The above-mentioned methods are some of the common ways to fix the Windows 10 error, System thread exception not handled. But these tips can be used to diagnose other common blue screen errors in Windows 10. Start with the first method and restart the system. Move on to the next solution if it does not work. But if you face data loss due to this error, you can try Kernel for Windows Data Recovery. It helps you fix system file corruption and recover lost, deleted, or missing data from inaccessible Windows drives and partitions. But if you face data loss due to this error, you can try Kernel for Windows Data Recovery. It helps you recover the lost, deleted, or missing data from inaccessible Windows drives and partitions.