Read time 5 minutes
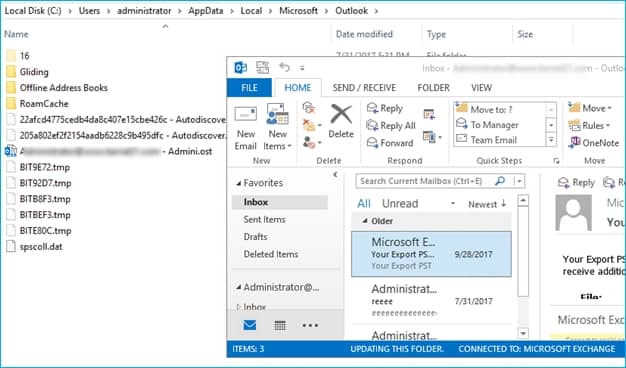
OST file, also known as Offline Storage Table, is an Outlook data file containing a copy of your mailbox items, such as emails, calendars, notes, attachments, etc. When you set up an Outlook account using Exchange, IMAP, or Office 365, your computer saves offline OST files. It allows users to access mailboxes even while being offline. Once the internet connection is restored, the changes made to this file in offline mode come in sync with the mail server.
However, due to many reasons, the OST file can become damaged or corrupt, which can lead to inaccessibility of your Outlook account. Synchronization issues are frequent when Outlook is used with an Exchange account. To fix the issue, Outlook users will have to rename their old OST file and build a new one in its place. Before recreating the OST files,it is crucial to learn about the two things you must know before diving deep into the issue:
- Check if you are working in Cached Exchange Mode
- Verify if OST to Exchange mailbox synchronization is proper
What makes an OST file inaccessible?
There can be many reasons explaining why the OST file is inaccessible and what is needed to recreate an OST file. Some common explanations are provided here:
- Virus or malware attacks
- Incompatible add-ins in Outlook.
- Sudden power cut while synchronizing mailboxes.
- Issues with server and client synchronization.
- Hardware or software breakdown.
- Oversize or large sized OST files.
- Force system shutdown
- Force termination of Outlook.
Resolving these issues will eliminate the need for rebuilding OST file facilitating smooth and uninterrupted communication.
What to do before recreating an OST file?
Rebuilding or recreating OST files can help to resolve the issue of OST file corruption, it might eventually result in missing data. Here’s what you need to remember before rebuilding OST file.
Check if you are working in Cached Exchange Mode?
If you find that the Synchronization between the OST and Exchange is not working correctly, it is possible that you have not enabled Cached Exchange Mode. Cached Exchange Mode in disabled mode tends to impact the Outlook performance especially when you’ve a large mailbox.In this case, you need to verify that you have enabled Cached Exchange Mode.
- In MS Outlook, go to File > Info > Account Settings, and then select Account Settings.
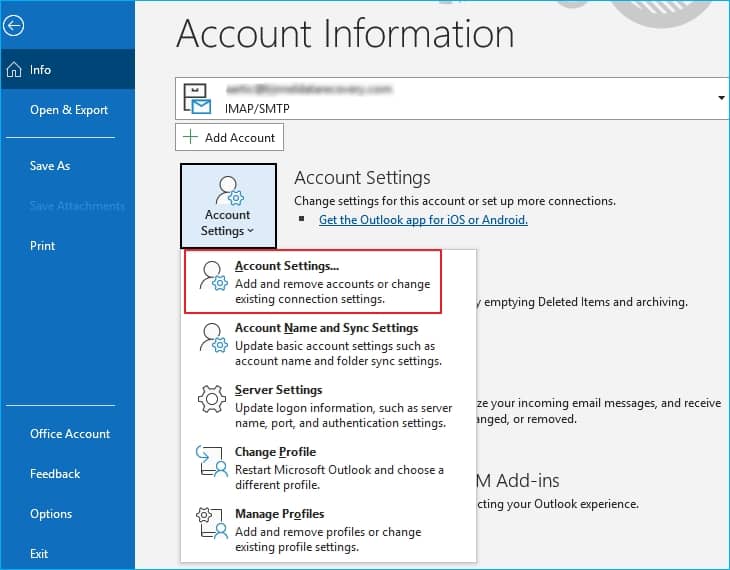
- In the Email tab, select the default OST file, and click Change.

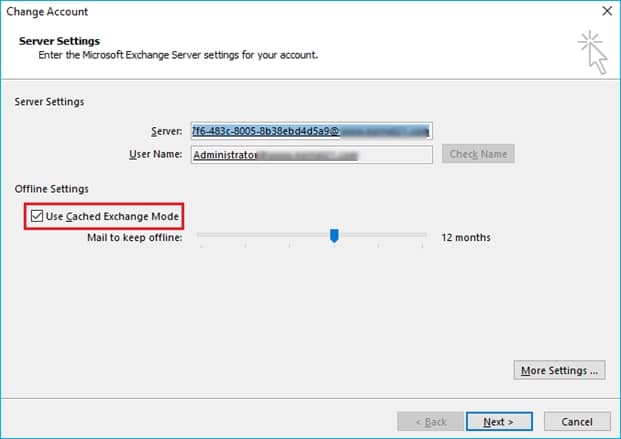
- Check if the Use Cached Exchange Mode option is checked (if not, check it and click Next).
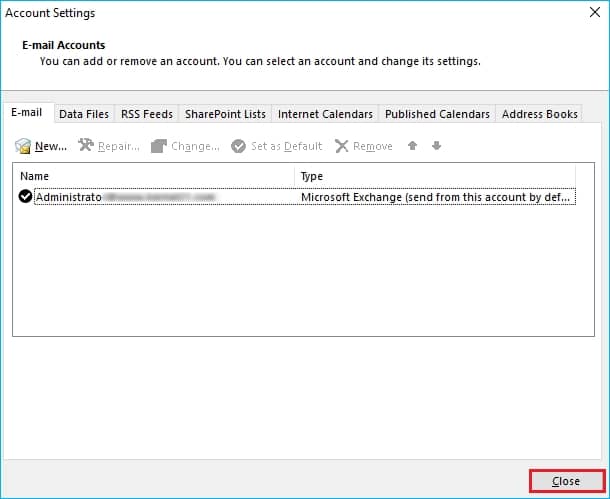
- In the end, click Close (in the Account Settings dialog box).
- Now, restart the application and check whether the needed changes have been updated.
Verify if OST to Exchange mailbox synchronization is proper?
When you doubt synchronization issues, you can check if the synchronization between the OST file and the Exchange mailbox is working correctly. It is important that you resolve synchronization issues with Exchange mailbox to save yourself from data loss. You can verify this by following the given steps: For this, try:
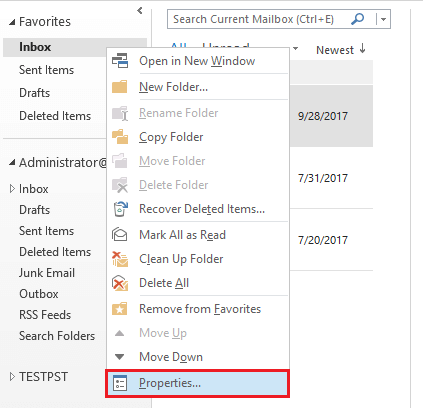
- In Outlook, select an OST folder, right-click it, and select Properties option.
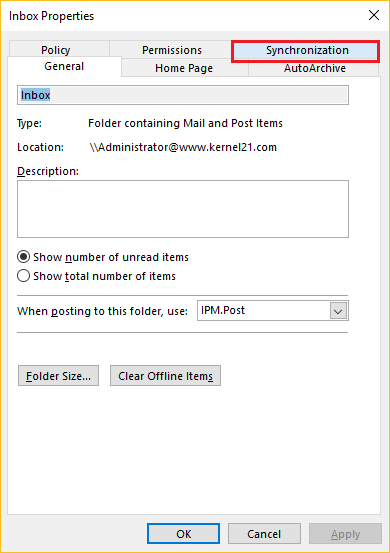
- Click the Synchronization tab in the popped-up window.
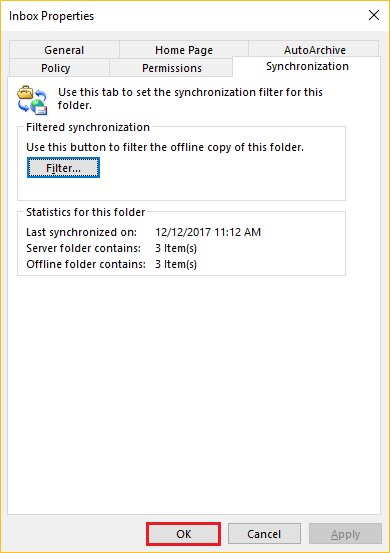
- Click OK to synchronize the current folder. You can check the information under Statistics for this folder to verify the synchronization.
Recover data with Kernel OST to PST Converter
Recreating an OST file is effortless if your Outlook application has a profile in an active state. However, there might be other problems such as internet connectivity that hinder the process. Converting inaccessible OST files to PST format helps in saving mailbox data from permanent loss.
The Kernel OST to PST converter is a spectacular application that recovers data from OST files. The software expertly converts OST file into PST without losing any single bit of data.
Conclusion
If the synchronization is not proper after rebuilding the OST file, you may have to rename the OST file and let Exchange create a new one. However, this may lead to data loss from the previous OST file. If you see some information missing in the rebuilt OST file, you can convert the renamed OST file to PST using a OST converter tool. The PST file will have all the information, including the unsaved data.