Read time 7 minutes
On a recent Sunday afternoon, I found myself engrossed in a YouTube movie when an unexpected glitch occurred. To my dismay, the entire screen transformed into a vibrant shade of green, leaving me worried that my computer had suffered a fatal malfunction. Fortunately, my tech-savvy cousin came to the rescue and assured me that all was not lost. Curiosity piqued, I embarked on a quest to uncover the mystery behind this perplexing error. The ensuing text delves into the nature of this issue, its underlying causes, and provides a comprehensive guide on resolving the notorious green screen problem that can afflict videos.
The Green Screen problem typically arises when attempting to view videos, and it can be quite vexing. Its occurrence can be attributed to a diverse range of factors, making it challenging to pinpoint a definitive cause. Nonetheless, potential culprits behind this issue may include inadequate hardware performance, outdated graphics drivers, or problems with the Flash player’s ability to handle high-quality video playback. Moreover, the installation of unreliable third-party software can also lead to system errors, contributing to the green screen video problem. Below are several manual approaches to addressing the Green Screen problem:
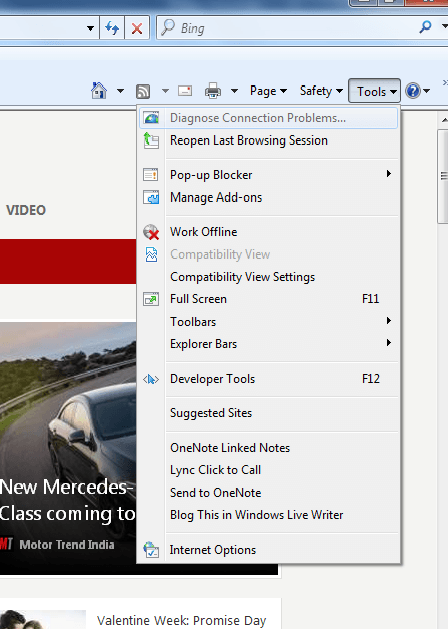
The Green Screen problem typically arises while watching a YouTube video on Internet Explorer when running Windows 11/10/8/7. One potential solution is to switch to a different web browser and attempt to view the video once more. Modifying your default web browser to options such as Google Chrome, Firefox, or Opera can be done easily. However, if you prefer to stick with Internet Explorer, you should adjust the settings to resolve the issue.
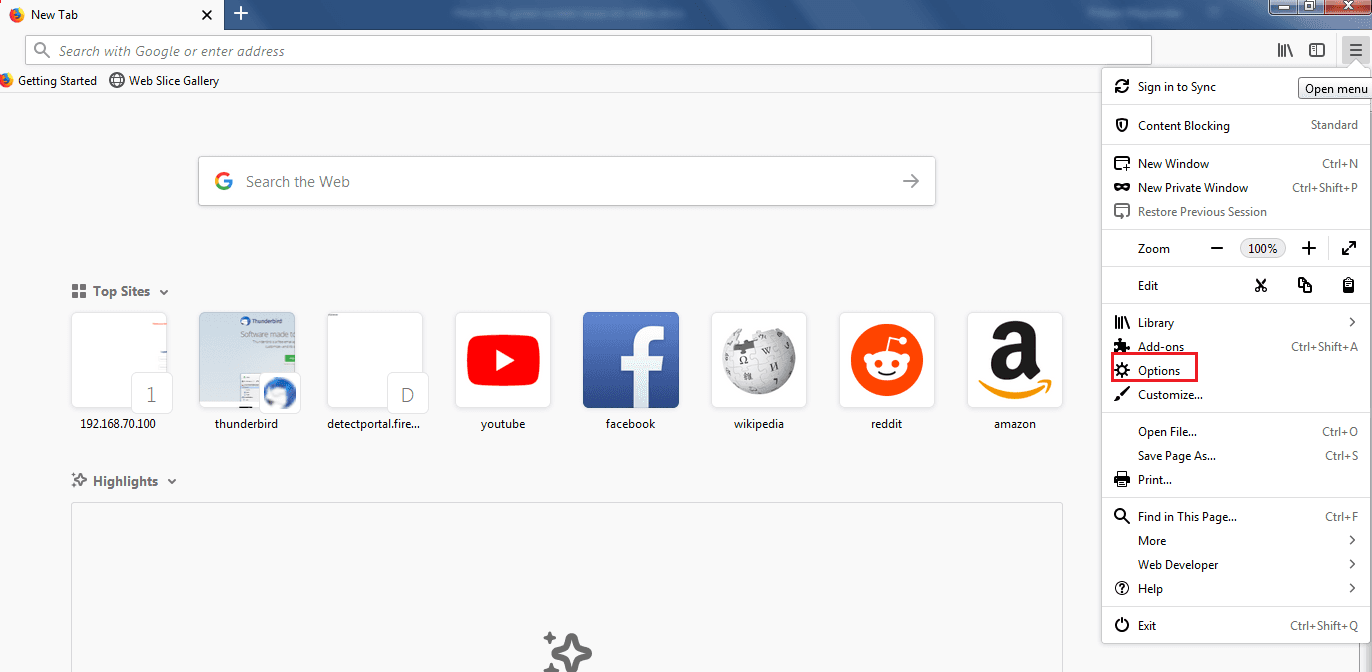
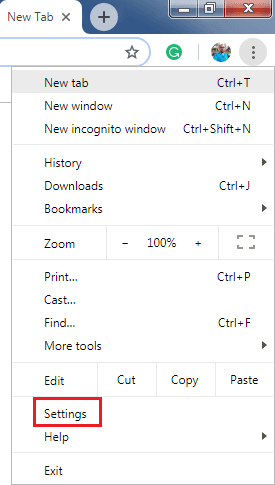
To change your web browser, follow these steps:


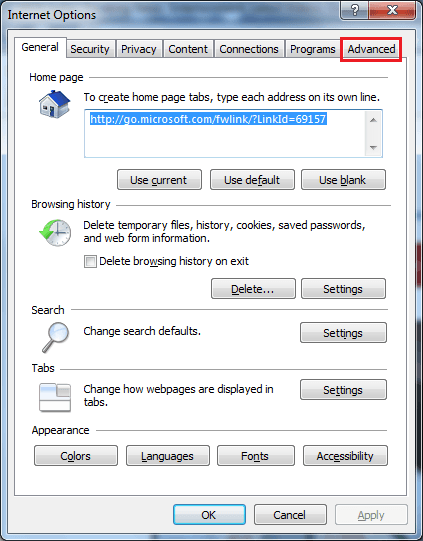
Didn’t work? It’s Okay, we’ve got you covered. Use these sets of steps:
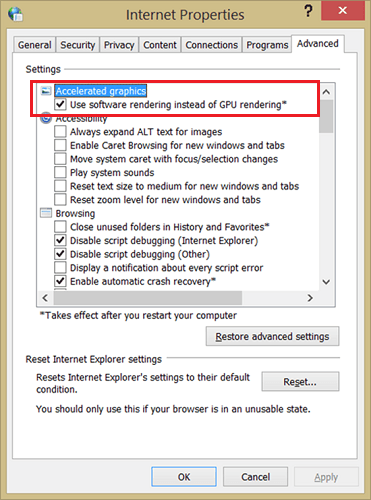
I. Consider Disabling Hardware Acceleration

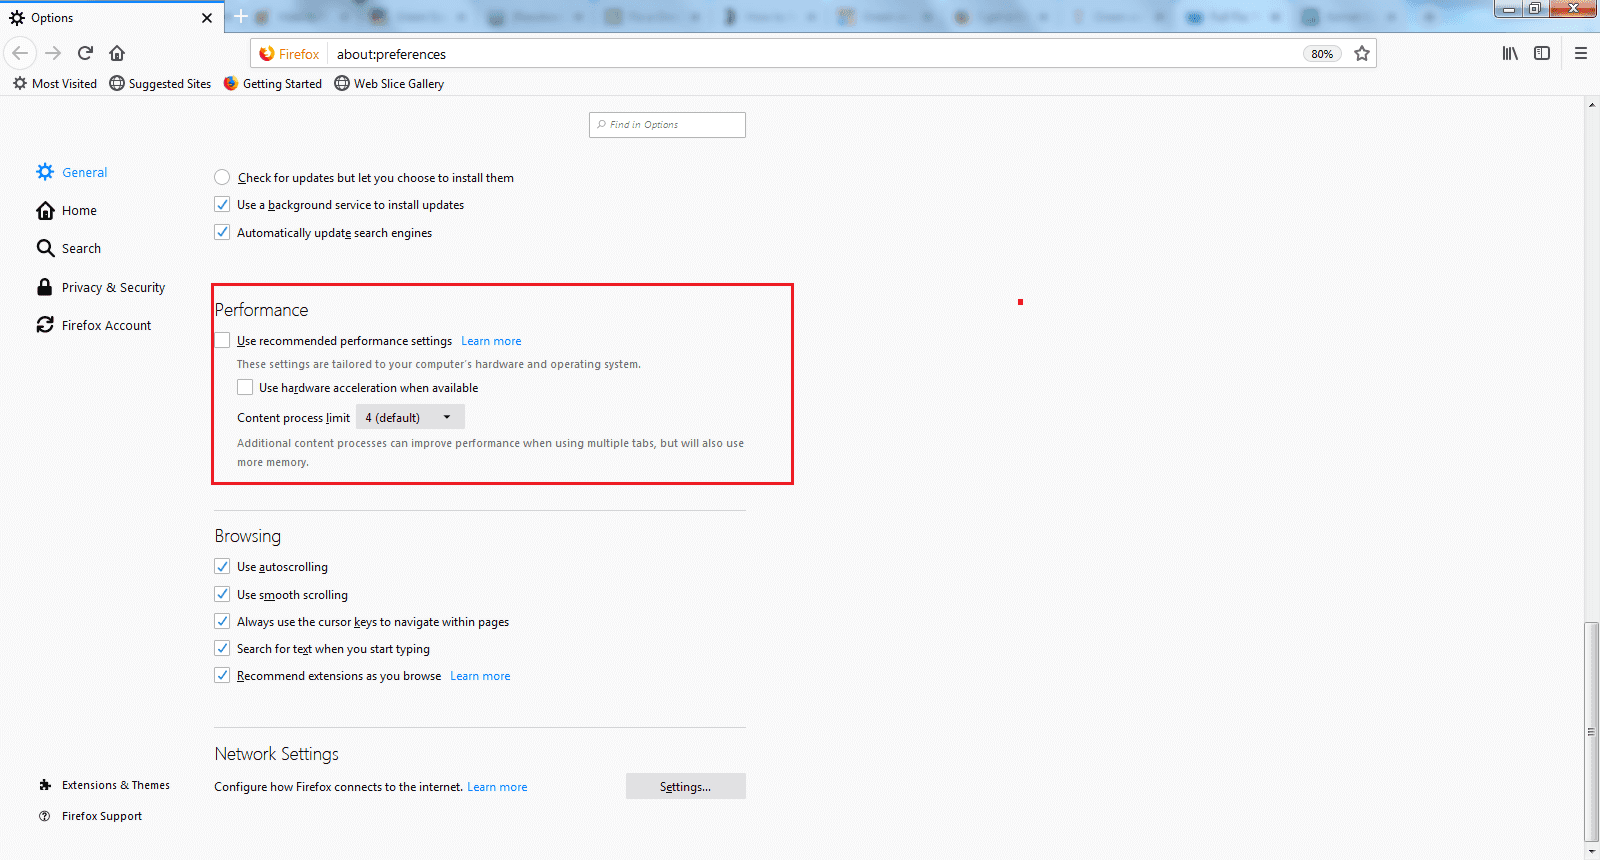
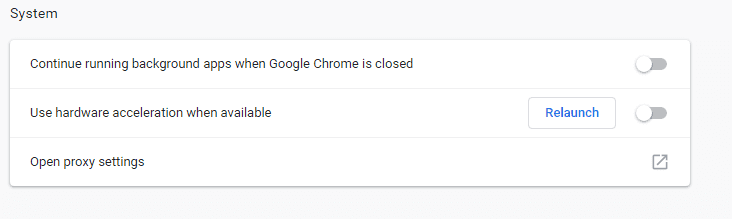
Once you’ve completed the steps, you should be able to enjoy your YouTube video without encountering the Green Screen issue. If these methods didn’t resolve the problem, don’t worry! There are alternative solutions available. So, stay relaxed! Another approach to eliminate the green screen is by adjusting your Display Settings.
II. Change The Display Settings
To change your Display Settings, use the following simple steps:
Are you still having the green Screen issue? Well, use the following means of helping you out.
III. Install an older Driver
If you have this problem continuing, you might have to uninstall and install a folder driver for the graphics card. Follow simple steps such as these:
After completing the steps mentioned above, Windows will automatically install a default graphics driver. Your next task is to install a previous version of the graphics driver specifically designed for your graphics card. If switching to an older driver doesn’t resolve the issue with the green screen, consider upgrading your graphics card to the latest version. Alternatively, you can explore the option of using a third-party tool, such as Kernel’s Video Repair Tool, to address the green screen problem.
IV. Kernel Video Repair tool
Kernel, has over the years, shown great performance in repairing important technical glitches. One of the company’s product, Kernel Video Repair is what you can use to amend the Green Screen issue. Following are a few of its benefits:
If you need more information concerning the Tool, try connecting with their support team either via chat or through email or even through call.
If you encounter a green screen problem while watching a video or streaming a movie online, there’s no need to worry. Stay composed and concentrate on the do-it-yourself solutions provided above. If these methods prove ineffective, you can always reach out to Kernel for assistance and access their Video Repair tool. The Kernel tech support team is available around the clock to assist you with any inquiries about the tool. I trust that this guide on resolving green screen issues in videos will prove helpful if you’re currently experiencing this problem with your video content.