Read time: 10 minutes
The free Google account has a total storage of 15 GB, which is shared between all the Google Workspace applications. G Suite’s Business Standard subscription provides 2 TB of space, so you can understand the huge leap in the benefits of accounts. The benefits are not limited to storage space, but there are numerous applications that are not present in the free account.
The abundance of unique features and a great number of applications are compelling factors to setup G Suite account for your business. Google Workspace has become an ideal candidate for performing real-time communication & sharing for both small and large scale enterprises.
The following article will enlighten you towards G Suite and after completing the article, you will have a clear picture regarding G Suite and how you can enable it in your business.
Why do you need a G Suite account for your business?
G Suite is not limited to one application; it is a collection of multiple tools and applications that can help in managing the entire processes of your business. For instance, the Gmail application from Google Workspace is one of the best email platforms for handling internal as well as external communications.
With G Suite, you can host your email for yourself with your domain name, which means if you have a WordPress site using the Gmail interface, and then it could work as an email hosting solution for your business. Moreover, the apps included in the G Suite are ideal for almost every task in business operations. G Suite provides you with the business versions of:
- Integration of Gemini in most Google apps
- Gmail, Google Chats, Calendar
- Google Docs, Sheets, Slides
- Google Drive and Google Keep
Besides, you get the email address with your domain name, like yourname@companyname.com, as well as you get 30 GB (in basic plan) of storage space for every user. And the benefits are not limited; they expand based on the subscription plans.
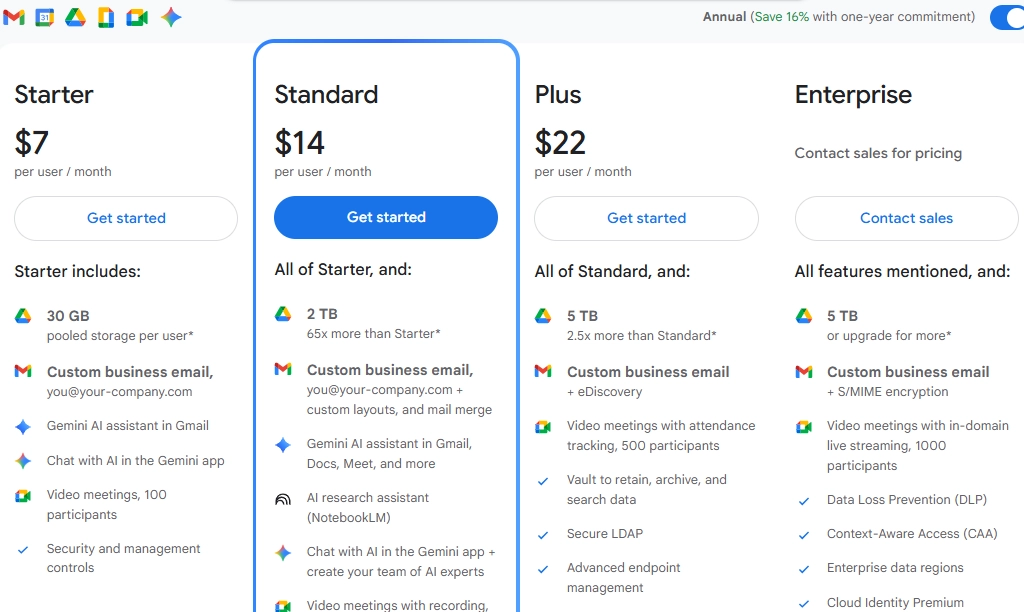
All Google Workspace Subscription Plans
Check out this table below to know which plan suits your business need.
| Feature | Business Starter | Business Standard | Business Plus | Enterprise |
| Price/Mo (Annual) | $7.00 | $14.00 | $22.00 | Custom |
| Pooled Storage | 30 GB per user | 2 TB per user | 5 TB per user | 5 TB+ per user |
| Meet Participants | 100 | 150 | 500 | 1000+ |
| Gemini AI Inclusion | Basic access | Full access | Full access | Enterprise access |
| Security | Standard | Standard | Vault (eDiscovery) | DLP & Advanced Endpoint |
Things you need before signing up for G Suite
We will move to the setup process of G Suite, but before that, there are some things you need, such as:
- A Credit Card: Though you get 14 days free trial on signing up with G Suite, you still need to provide your credit card details to keep your account active after the trial ends.
- A domain name: A domain name is necessary for the G Suite account, as it will be used as an extension of all the emails in your G Suite account.
- A Stand-in email address: The alternate email address is required for security purposes while signing up for G Suite. This email address is helpful when you are unable to access your G Suite account.
Once you have access to all these things, you can set up the G Suite account for your business.
Set up G Suite account: Step-by-step process
Generally, there are multiple steps involved in setting up a G Suite account. Here, we have concluded that process in 4 simple steps:
Let’s go through each of these steps:
Step 1: Complete your registration with G Suite
First of all, you need to register for a G Suite account, which can be done quickly by following the below steps:
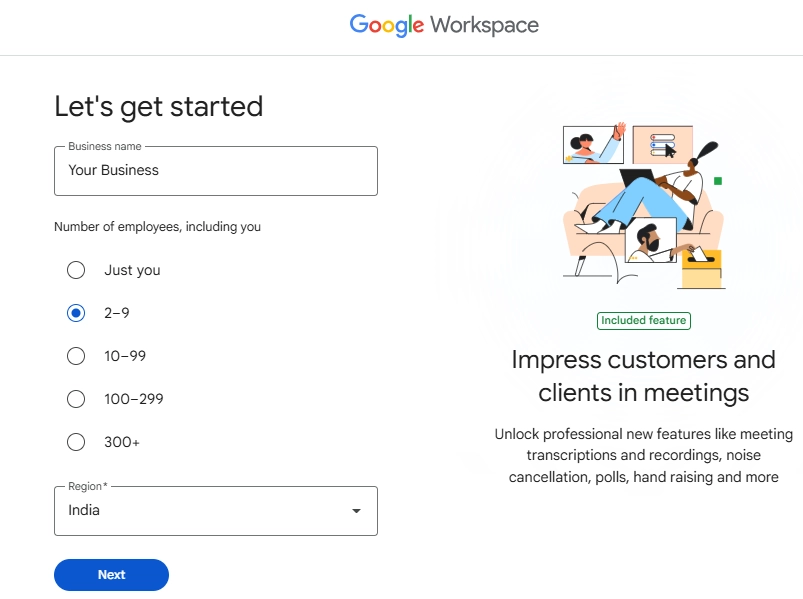
- Go to this link, select the plan you want and click the Get started button.
- It will take you to the account setup wizard, where you need to provide some personal information like your business name, number of employees, and region where company is located. Provide the info and then click Next.
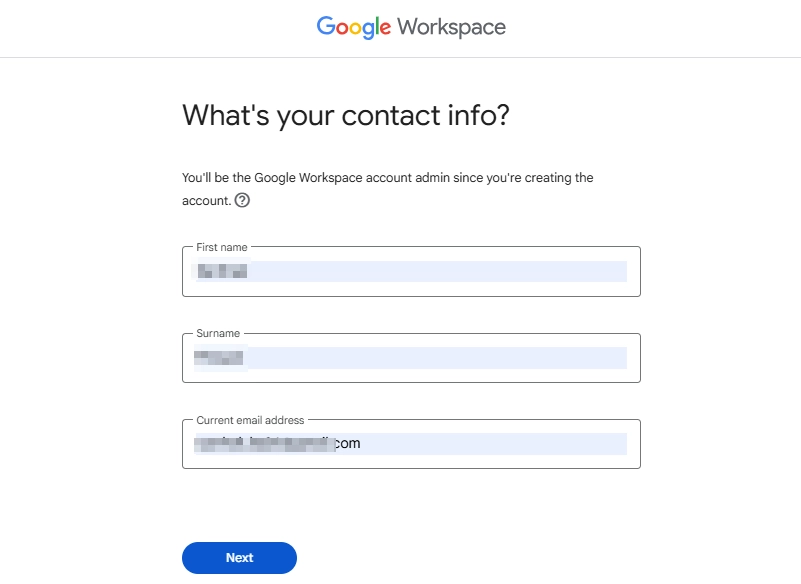
- In the next wizard, provide your contact information for the Google Workspace account. Enter your real name and an active email address (host or primary). Then, click Next.
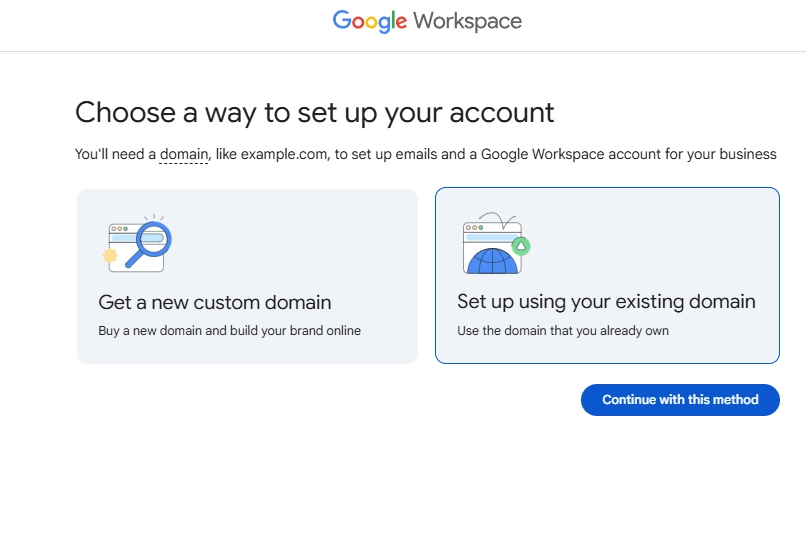
- Next, choose how to setup your account. You can either create a new domain or continue with your old domain. Choose the method as per your preference. Since I already have a domain, I’ll select the second method and click Continue with this method.
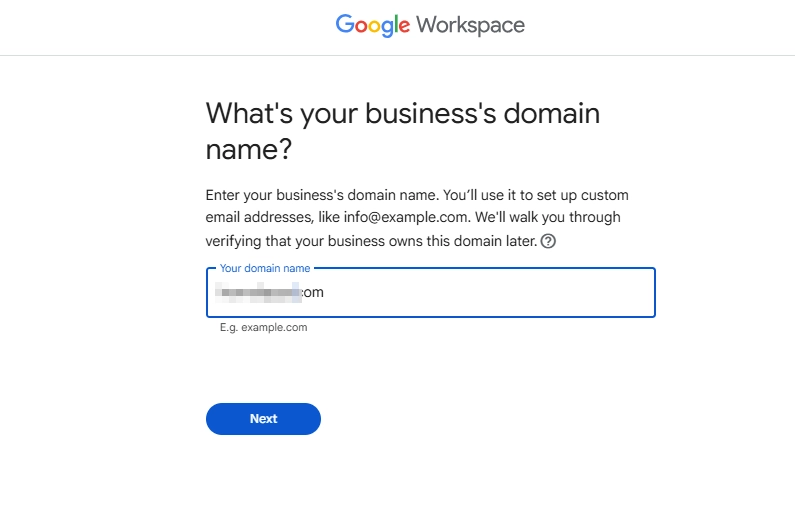
- Provide your business domain name in the box and click Next.
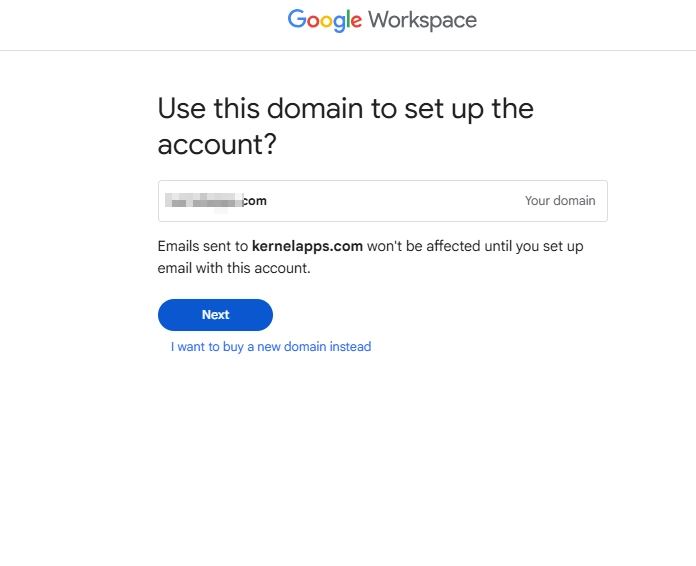
- Google will ask if you wish to use the domain to setup the account. If yes, click Next to continue.
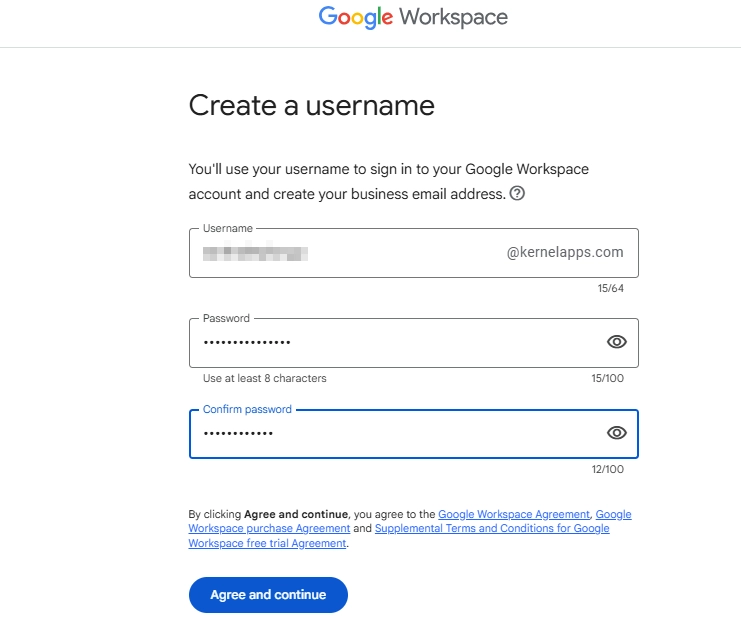
- Finally provide a username and password that you will use to sign in to the G Suite account. After that, click Agree and Continue to finish the process.
Note: After completing the account creation, make sure to enable the 2 Factor Authentication. This helps to protect your data from unauthorized access.
Step 2: Add people to G Suite (optional)
After completing the G Suite account setup, you can add other users to your account. To do so, follow the below steps:
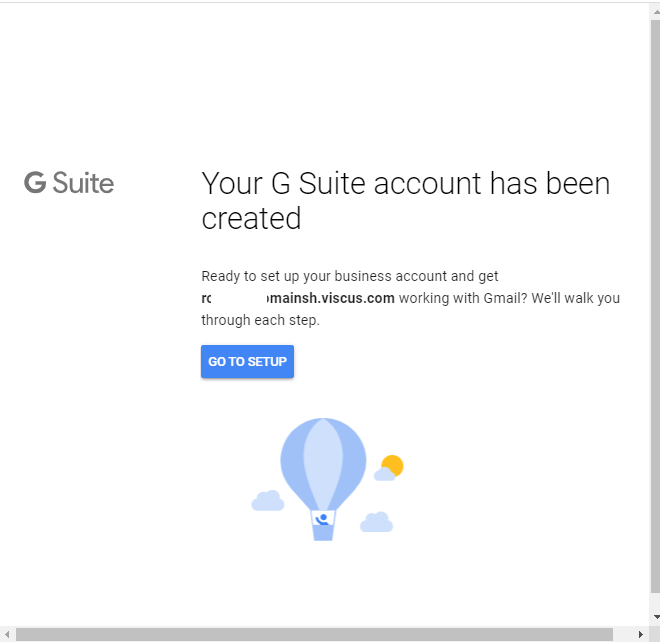
- Click the Go to Setup button, which will appear on the screen after creating the account.
- To give access to other users to your shared G Suite account, provide the name of the users and click Add, and then click Next.
- However, if you’re the only person who will use the G Suite account, then check the checkbox I added all user email and click Next.
This way, you can add users to your G Suite account.
Step 3: Verify your Domain with Google
Now, verify your domain name with Google, which could be done by adding a TXT record. Google will detect the location where your domain name is hosted with step-by-step instructions to help you verify your domain name.
The instructions are pretty helpful, and you can follow them to verify your domain name. However, you can also check the domain name with the cPanel of your site dashboard.
Step 4: Set up MX Records for Gmail
Now you have to finish the G Suite account setup. The last step involves adding MX Records, which allow a G Suite account to handle email for the domain name. You can add the MX Record from the cPanel of your hosting plan or through Google MX records.
Note: Updating the MX records is required only if you want to use Gmail. If you decide to continue using your existing email service, then do not change the MX records.
If you don’t find the above instructions helpful for setting up the MX records, then you can follow these generic steps.
- Sign in to your domain’s account at your domain host with admin credentials.
- Go to DNS Management, Mail Settings, or Advanced Settings in your host to update the MX records.
- If there are any existing MX Records, either delete them or change their priority number.
- Provide the new MX records for the Google mail servers and save the changes after updating the records.
- Now, open the Setup tool in the Google Admin Console and click Activate in the Gmail section.

- Check the email addresses that you have created and click Continue.
- In the next step, click Activate Gmail.
It will take around 6 hours to send and receive messages to your new G Suite email address; it may take about 48 hours for your G Suite email address to send and receive emails.
Now, if you want to use Gmail from G Suite account, then sign in to admin.google.com with G Suite username and password. From the top-right corner, click the App Launcher and select Mail. That’s how you can set up your G Suite account easily. Although it is a complicated process, you can smoothly perform it with the above steps.
Expert-recommended solution to Backup G Suite/Google Workspace mailboxes
The process to setup G Suite account is pretty simple if you follow the above step-by-step guide. But, if you’re already using G Suite in your organization, then you may need to backup your mailboxes and other G Suite data from time-to-time to avoid any data loss.
But there is no secure manual method to backup G Suite data. So, it becomes a little complicated for users to backup the G Suite data. However, with the help of an automated G Suite backup tool like Kernel Google Workspace Backup and Restore, you can easily backup the entire G Suite data in one go, including G Drive, Google Meet, Google Chat, Gmail, etc. The backup file will be saved locally, which can later be used to access the data in case of data loss events.
Conclusion
Google Workspace offers several enterprise-grade functionalities that are crucial for most organizations. In this guide, we discussed how to set up a Google Workspace account for your business. After that, you can begin to migrate your emails to Google Workspace. And post mailbox migration, make sure to take a complete backup of your data using the automated Google Workspace backup tool.
Frequently Asked Questions
A. No. Google limits adding up to 10 users in the 14-day free trial. To add more, you must start your paid subscription early.
A. Yes. Google offers solid data safety. But if an employee maliciously deletes files, then the data is permanently gone. Therefore, having multiple copies of your data is a must for easy data restoration.
A. Yes, but only the basic AI features. To use the advanced Gemini for Workspace (like generating full presentations or heavy data analysis), you must buy its subscription separately.