Read time: 6 minutes
Microsoft collaboration platform Teams allows users to perform various activities, including chatting, audio & video calls, video conferencing, meetings, file sharing, etc. However, online meetings are often disturbed by background noises either at your end or at one of the participants. Such unwanted noise distracts you, making you less attentive during the conference. In this detailed post, we will discuss how to correctly suppress the sound coming from outside sources so that you can have crystal clear conversations in the comfort of your own home.
Moving further, in the blog, we will discuss native methods to configure Microsoft Teams settings to reduce background noise in Microsoft Teams. Less distracting noises will help you to focus on having productive business conversations without worrying about annoying background noises. Get ready to learn every detail you need to know about reducing ambient noises during video conferences.
The basics of noise suppression in Microsoft Teams
Noise suppression is an AI-driven feature available in Microsoft Teams that helps to reduce background noise during video calls. It works by analyzing audio signals from all participants connected to the meeting and filtering out any background noises that may be present. This includes sounds like typing on keyboards, people talking in other rooms, or even loud music playing in the distance. The end result is a much cleaner sound signal with minimal unwanted noise interference.
Configuring settings to reduce background noise in Microsoft Teams
Microsoft Teams has a built-in feature that allows users to minimize Teams background noise during their video calls. To access this feature, you need to follow the steps given below.
- Open settings
The first step is to tap on the settings menu in Microsoft Teams. To do this, click on your profile picture at the top-right of the main window & then select Settings from the menu that appears.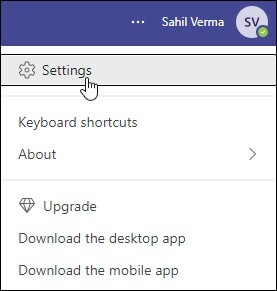
- Select devices
Once you have opened the Settings menu, select Devices from the list of options on the left. This will bring up several options related to devices, such as microphone and speaker settings. - Enable noise suppression
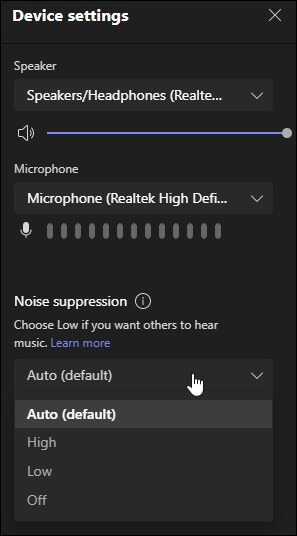
Underneath all these options is one labeled Noise suppression. This setting allows you to choose from four different levels of noise suppression. The four options are Auto (default), High, Low, and Off.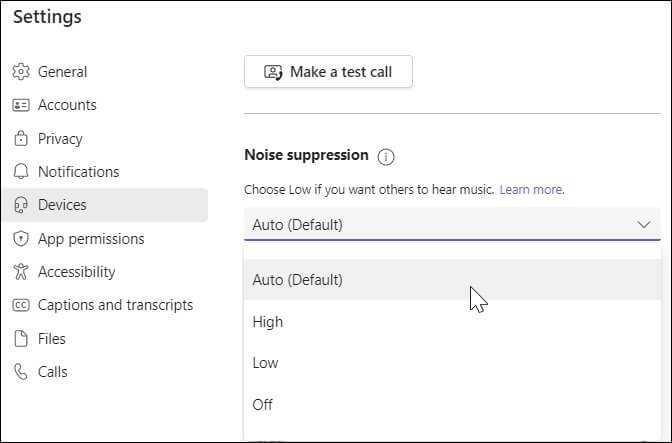
Note: For most situations where there is a lot of background noise, selecting “High” will provide enough suppression to make sure that only voices are heard on your call. However, for low-noise environments, such as when playing music or using a high-fidelity microphone, “Off” should be selected so that no noise is suppressed at all.
How to suppress background interruptions in an ongoing meeting?
Did you ever get caught in the middle of an important meeting in Microsoft Teams and have your audio interrupted by a loud background noise? It’s extremely frustrating, but luckily, there is something you can do about it. Now, we’ll discuss how to suppress background noise in your ongoing meeting and make sure that your meetings run smoothly.
- The first step is to select the More option from your meeting controls. This will present a list of options that you can choose from. Select Settings, then click the Device settings option from the list. Once you have done this, a new window will appear with several different settings that you can adjust.
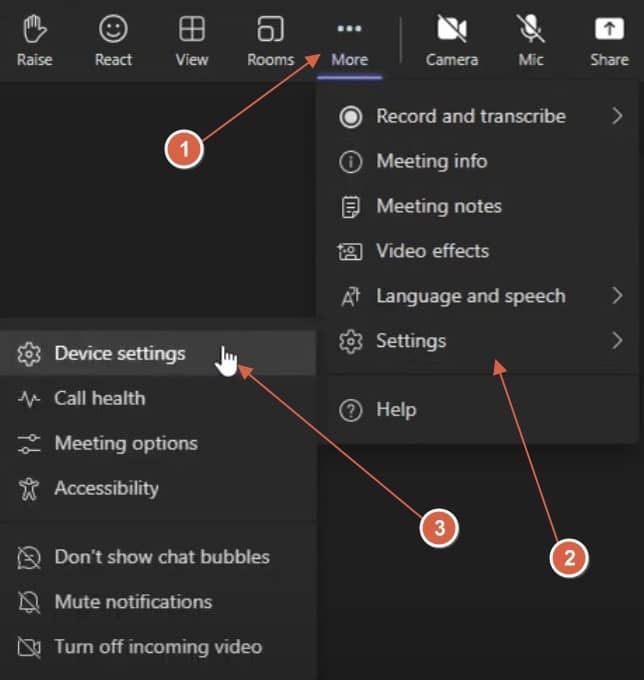
- Now scroll down to the Noise suppression section and select any of the four available options: Auto (default), High, Low, & Off.
- After selecting your desired option from the list above, your new settings will take effect immediately so you can continue with your meeting without any background interruptions.
Set up noise suppression on iOS
Here’s how to set the noise suppression level on iOS in Microsoft Teams.
- Select your profile picture
The first step is to select your profile picture. This can be found at the top right corner of the app. Once you click on it, a pop-up menu will appear, which will give you several different options. Select Settings from this menu to open up more options. - Select calling
On the next page, select Calling from the list of options that are available. You should see several different settings related to calling, such as Video, Call, & Noise Suppression Level. - Adjust noise suppression level
Under Noise Suppression Level, there are four options: Auto (default), High, Low, & Off. You can choose depending on your preferences and requirements. Select any one of these options according to your needs and then save your changes.
Microsoft Teams data migration: an added bonus
In addition to the ways to suppress unwanted noise in Microsoft Teams, we now offer a bonus: the Kernel Microsoft Teams Migration tool. This powerful and user-friendly tool enables you to easily and securely migrate all your Microsoft Team data to the desired location. Its lightning-fast transfer rate, effortless migration process, and time-saving features add to its already formidable efficiency. With this Migration tool, you can be assured of swift yet reliable migration.
Not only does it migrate important conversations and threads in the chat, but it also makes sure to keep the attachments within it intact. For those who are short on time & want to initiate multiple migrations simultaneously, this tool helps with that too.
Furthermore, you can easily schedule it for some other time using this very tool. All these features, combined with automated migration and reports shared after the successful migration of Teams data, make this a must-have tool for every Microsoft Teams user looking to migrate.
Conclusion
There are many ways to eliminate or reduce background noise in Microsoft Teams. By following the tips and suggestions outlined in this post, one will be able to find a solution that works best for you and your team. By suppressing background noise, you can create a more productive and effective working environment for yourself and your colleagues.
Moreover, if you are looking for an easy and quick way to migrate Teams data from one tenant to another, we recommend taking a trial of our Teams Migration tool. With this tool, you can easily and quickly migrate your data with minimal hassle.