Read time 5 minutes
Most businesses nowadays incur heavy traffic from incoming and outgoing email messages. But their email communication is effortlessly managed through Microsoft 365 accounts. This has led to a substantial number of Microsoft 365 users worldwide.
The entry and exit of employees in the organization make it challenging for the Exchange Administrator to maintain data integrity.They must be thorough with the platform and adopt certain practices to manage all the data well. Here, we will discuss the best practices you can apply to manage mailbox data and easily take the backup Office 365.
Things to know before you begin
Exchange mailbox management involves successfully administering and maintaining mailboxes without any issues. Considering the vastness of the topic, here we are discussing the basics only. Sometimes administrators use PowerShell or Admin Center to make changes and set additional properties for user mailboxes. But you should either be Global Admin or have permission to perform this procedure. You can check out the Mailbox Permissions to know about the authorities.
How to change Mailbox Properties using the Admin Center?
To change the mailbox properties for a SINGLE USER, you need to follow the steps given below-
- Open the Microsoft 365 admin center. Under Admin centers, select Exchange to open the Exchange Admin center.
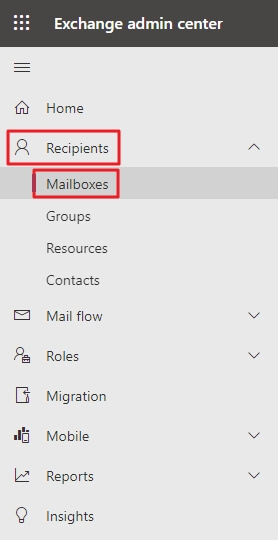
- From the left panel, expand Recipients and select Mailboxes.
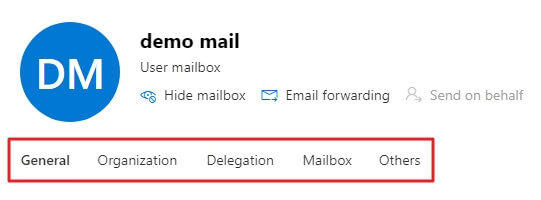
- Go to the list of user mailboxes, click on the user, and it will open the user settings window.
- You can change the user mailbox properties, including General, Organizational, Delegation, Mailbox, and Others.
To change the mailbox properties for MULTIPLE USERS, follow these steps-
- Go to Exchange Admin Center and navigate to Recipients > Mailboxes.
- Select two or more mailboxes in the list and go to the Details Pane.
- Select the mailbox properties or feature you want to edit in the Details pane.
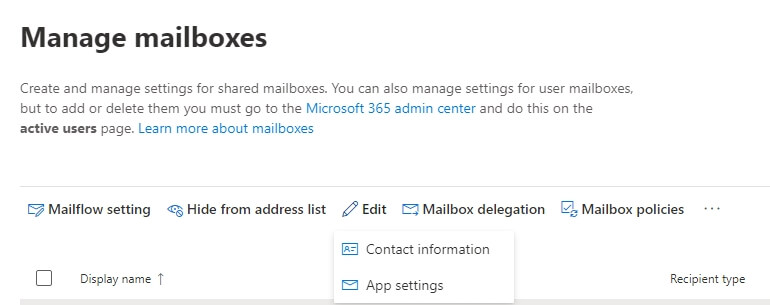
- Make the ideal changes as per requirements and then save the changes.
Below is a detailed list of all the properties and their sub-parts which can be modified. They will vary for a single user or multiple users.
| Properties | Sub-Properties |
| General |
|
| Organization |
|
| Delegation |
|
| Mailbox |
|
| Others | Custom attributes, Group membership, Automatic replies, Convert to shared mailbox, Litigation hold, Mailbox archive, Set recipient limit, and Mail tip. |
How to change user Mailbox Properties with Exchange Online PowerShell?
If you want to manage user mailboxes via Exchange Online PowerShell, you can do that easily with the help of Get-Mailbox and Set-Mailbox cmdlets. The most significant advantage of using Exchange PowerShell is that you can modify the properties of multiple mailboxes at once.
Verify the applied mailbox properties for users
Now, to verify that the changes are applied to the mailboxes, do the following things:
- Go to the Exchange Admin Center, select each mailbox you bulk edited, then click Edit to check the modified properties.
- You can check the same in Exchange Online PowerShell using the Get-Mailbox cmdlet. The advantage of using Exchange Online PowerShell is that it allows you to view multiple properties of multiple mailboxes. The below cmdlet can be used to verify whether the retention policy is applied to a mailbox-
Similarly, you can verify the modified settings of other Office 365 mailboxes.
Managing Office 365 mailboxes using EAC or Exchange Online PowerShell is a bit complicated, as you have to verify every time the changes are applied or not. Similarly, taking backup of Microsoft 365 mailboxes is more complex than managing them, as the manual methods to backup Office 365 mailboxes are too challenging to understand. So, we recommend you use Kernel Export Office 365 to PST utility to ease the Office 365 mailbox backup process.
Wrap Up
Efficiently managing Office 365 mailboxes crucial, as things keep changing in organizations. So, modification in your Office 365 mailboxes is required sometimes. You can easily modify your Microsoft 365 mailbox properties from EAC or Exchange Online PowerShell. Also, the Kernel Office 365 Backup tool is a simple solution to back up Office 365 mailboxes. You can also export multiple Office 365 mailboxes to PST and other formats to keep your data safe and intact.