Related Posts
Detailed Information on Sensitivity Labels in Microsoft 365

Written By
Abhishek Pandey
Updated On
December 13, 2022
Read time 10 minutes
To complete their tasks, employees in your organization collaborate with others both inside as well as outside the organization. It means that all sorts of content flow everywhere, across different departments and teams in the organizations, and it no longer stays behind a firewall.Therefore, it becomes important to understand how to do it in a secure and protected way that meets your organization’s compliance policies.
To do that effectively without compromising the user productivity and their ability to collaborate, Microsoft Purview Information Protection introduced Sensitivity Labels which allow you to classify and protect all the data shared within the organization. In this blog, we will discuss sensitivity labels, how to set them up, and how it works.
Sensitivity labels are like a digital stamp added to your business document or email to secure it. They allow you to protect sensitive data within the file. Applying them enables you to state how sensitive certain data is. A sensitivity label appears to users like a tag applied to a document or email, and it is:
Customizable – Based on your organization or business needs, you can create different level categories of sensitive content such as Personal, Public, General, Confidential, and Highly Confidential.
Clear Text – Labels are stored in the clear text format in the metadata for emails and files. So that third-party applications and services can read them and, if required, apply their protective actions.
Persistent – No matter where the label is saved or stored, it stays with the content because it is stored in the metadata for emails and files. Unique label identification becomes the way to apply and enforce your configured policies.
As we already discussed, sensitivity labels appear like a tag on documents and emails that can be easily integrated into users’ workflows. Moreover, documents and emails can have both sensitivity labels as well as retention labels applied to them.
We can use sensitivity labels to:
You must have access to one of the admin centers (Microsoft 365 Security Center, Microsoft 365 Compliance Center, Security & Compliance Center) to create and manage sensitivity labels. The Global Administrator has access to admin centers and can grant non-admin access to compliance officers and other non-users.
To grant this limited admin access, it’s important to go to one of these admin center’s permission page and add new members to the Compliance Administrator, Compliance Data Administrator, or Security Administrator group.
If you prefer granting permissions to groups, you must create a new role group and add either Organization Configuration or Sensitive Administration role to this group. Use the sensitivity Label Reader, which initially supported just the Office 365 PowerShell labeling cmdlets for read-only access.
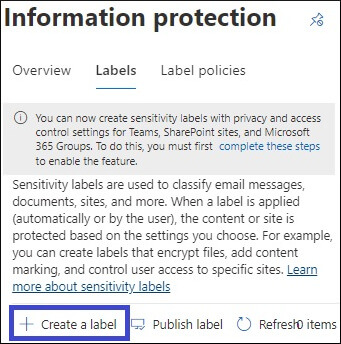
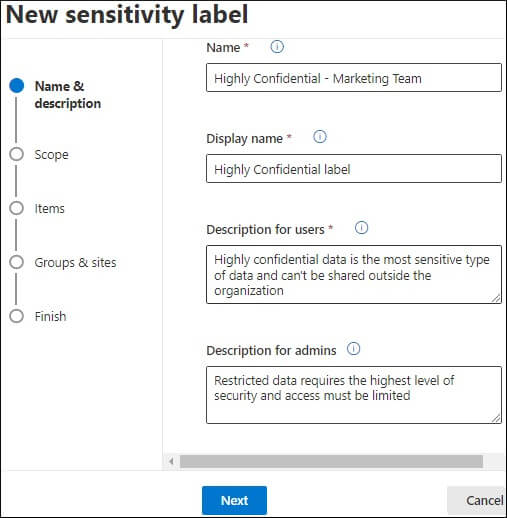
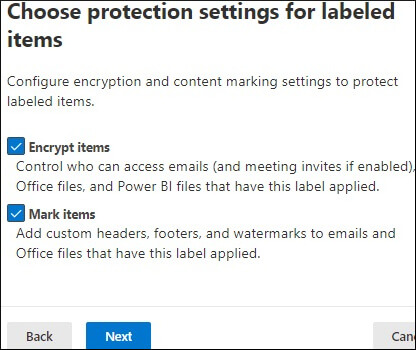
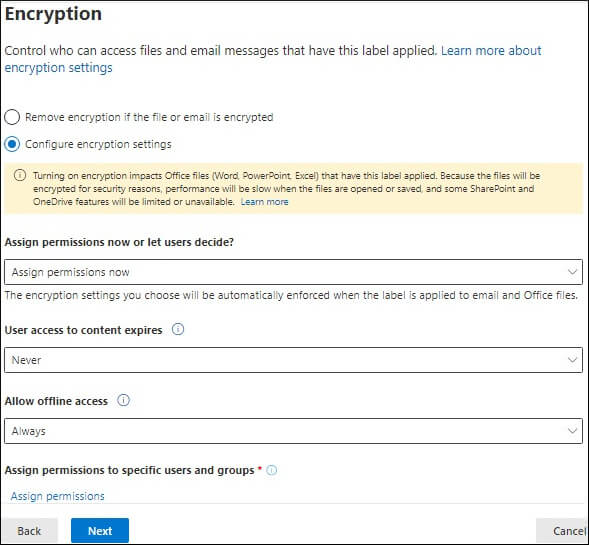
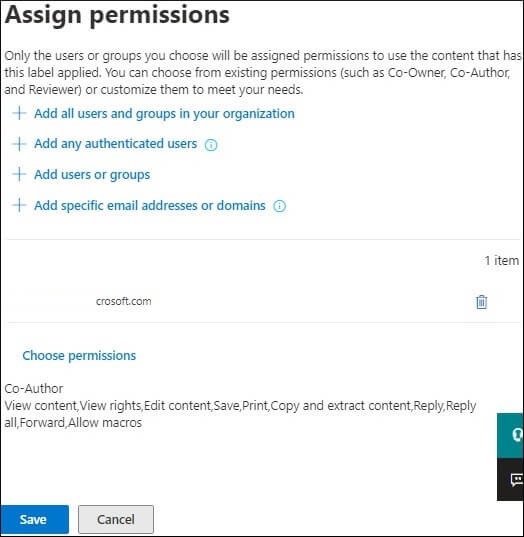
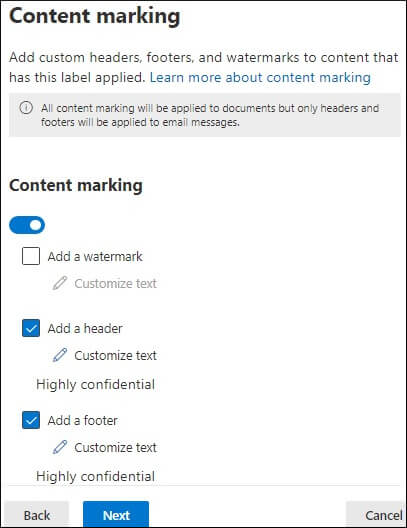
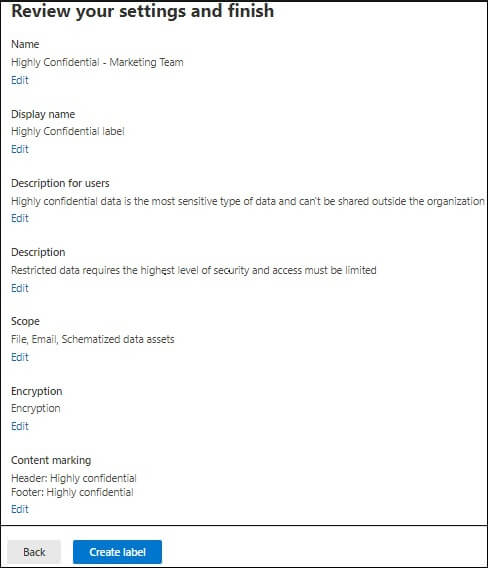
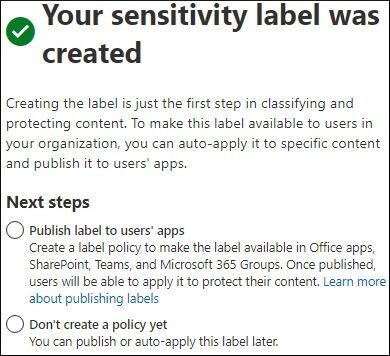
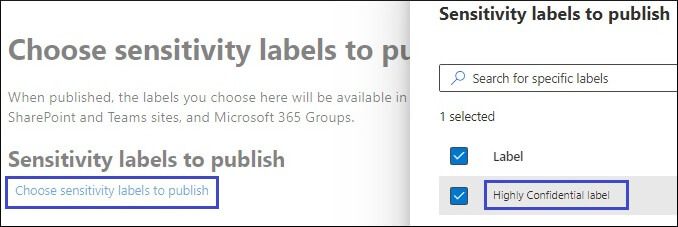
Once we have enabled unified sensitivity labels and assigned the required roles and permissions, it’s time to create and publish a few sensitivity labels and see them in action. The steps to create a sensitivity level are as follows:
To remove a sensitivity label or lower its classification, users must provide a justification. They need to specify why they are changing or removing a label. Follow these steps to remove a label:
All the created labels will appear in a list on the Sensitivity tab of the Labels page. The order of the label in this list is important because it indicates their priority. You want your least restrictive sensitivity label, such as Public or Personal, to come at the top of the list and the most restrictive label, highly confidential,to appear at the bottom.
Using sub-labels, you can also group multiple labels below a parent label (users see it in an Office app). But sub-labels don’ inherit any features or settings from their parent label. While publishing a sub-label, users can apply the sub label, but they can’t just apply the parent label to the content. If you select a parent label as the default label or configure it to apply automatically or recommended, it won’t apply to the content.
Undoubtedly, sensitivity label isa powerful Office 365 feature that can help boost Microsoft 365 data security and force your employees to be careful while sharing or accessing the data. Using sensitivity label tags, you can easily protect content in other applications, track content’s activity, encrypt emails, automatically label content, and much more.
Even after all this, there might be a possibility of data loss in Office 365 due to several reasons. In this case, we suggest you use an automated tool named Kernel Export Office 365 to Restore, which allows you to back up the mailbox data of Microsoft 365, hosted Exchange, and on-premises Exchange. To learn more about this automated tool, download its free demo version.


![How to Migrate Hostinger to Outlook? [Step-by-Step]](https://www.nucleustechnologies.com/blog/wp-content/uploads/2026/07/hostinger-to-outlook-featured.webp)